swiftでObjective-Cのライブラリを使ってみた
今作ってるアプリでグラフ表示をするのに最初に見つけたライブラリがObjective-Cのライブラリだったので、以前1度途中で挫折したBridgeに挑戦してみた
前提
グラフライブラリの導入はCocoa Podsで実施しましたが、そこの詳細は割愛。
使ったライブラリはBEMSimpleLineGraph
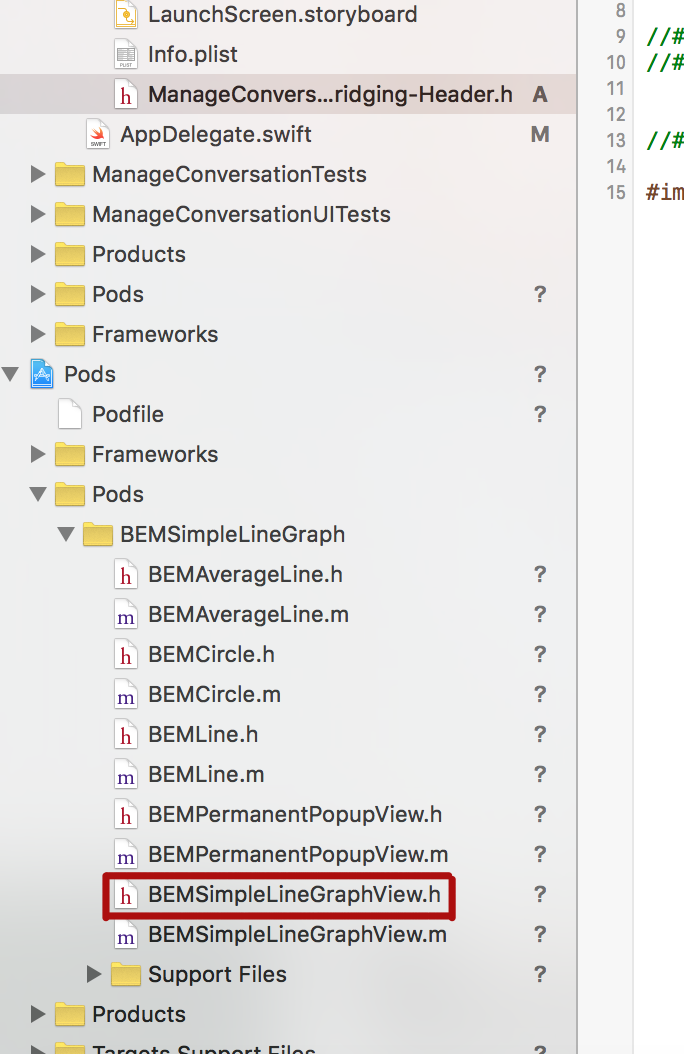
今回読み込みファイルはBEMSimpleLineGraphView.h
早速ヘッダーファイルを追加
New Fileでブリッジヘッダーファイルを追加。ファイル名はいろんな記事にならって<プロジェクト名>-Bridging-Header.h
中身は下記の通りで読み込みファイルのインポート1行のみ
ManageConversation-Bridging-Header.h
#import "BEMSimpleLineGraphView.h"
プロジェクトファイルに設定追加
Targets->Build Settings->Swift Compiler->Code Generation->Objective-C Bridging Headerで下記を入力。
\$(SRCROOT)/\$(PROJECT_NAME)/\$(SWIFT_MODULE_NAME)-Bridging-Header.h
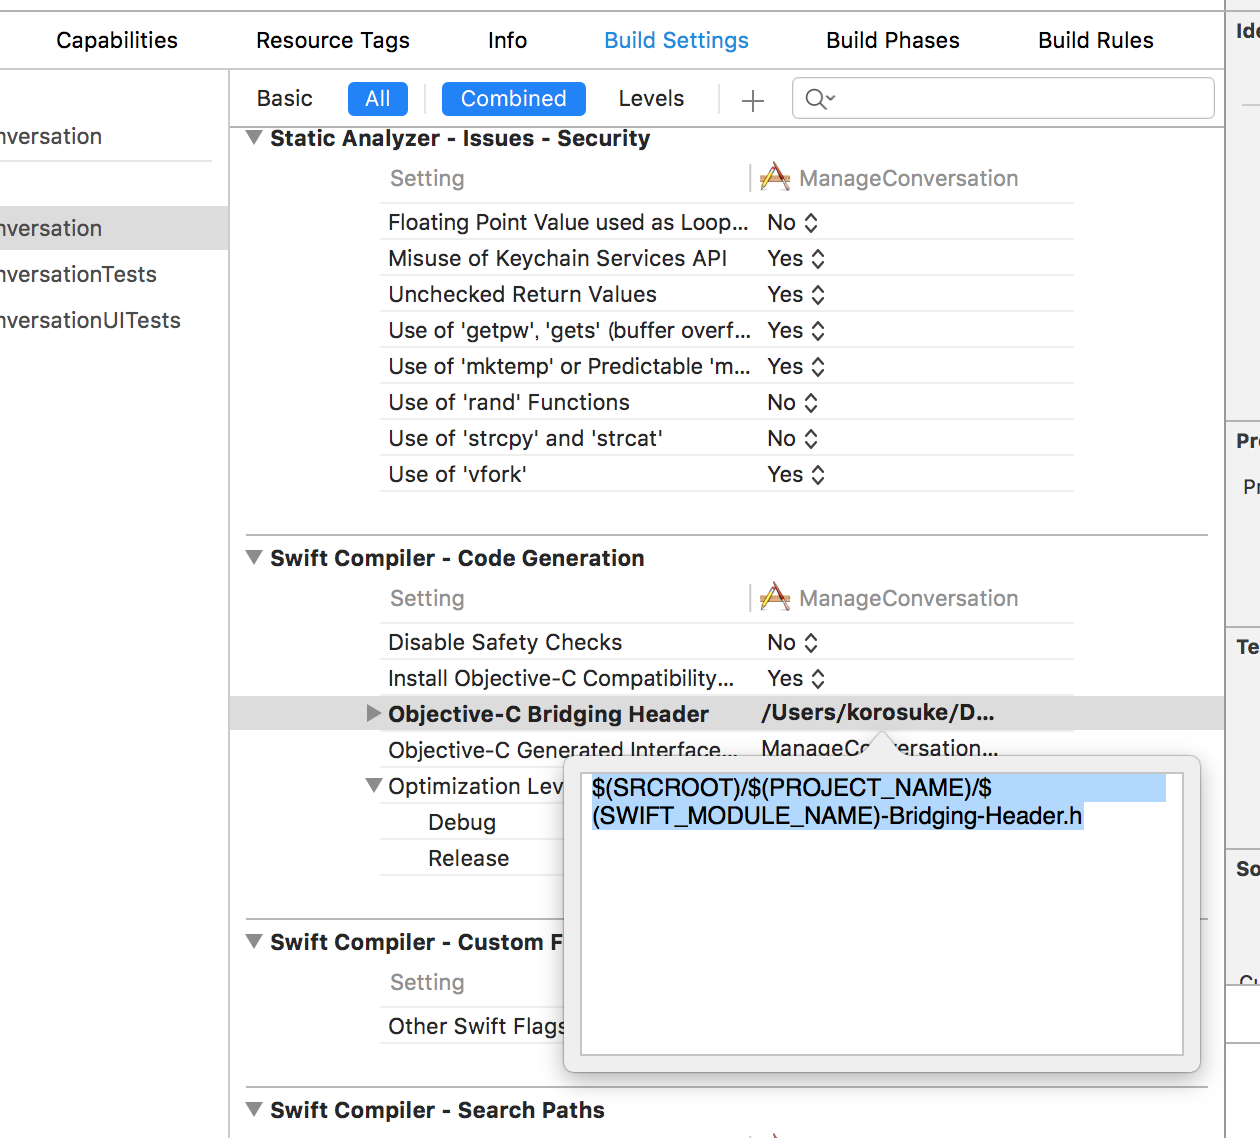
ちなみに間違ってたのはココだった気がします。ここを単純にファイル名だけ入力していた気がします。
これで設定は完了。
以降はおまけです。実際にBEMSimpleLineGraphを使ってみたソース
swift側で実装
特に実装する際は気をつけることはなかったです。
GraphViewController.swift
//
//  GraphViewController.swift
//  ManageConversation
//

import UIKit

class GraphViewController: UIViewController {

    // サンプルラベル
    var SampleLabel: Array<String> = ["ラベルA", "ラベルB", "ラベルD", "ラベルE", "ラベルF"]
    // サンプルデータ
    var SampleData:  Array<Float> = [10.5, 20.8, 5.3, 12.1, 25.9]

    override func viewDidLoad() {
        super.viewDidLoad()

        // Do any additional setup after loading the view.
        // グラフのViewを作成(今回はメインビューと同じ大きさのビューを作ります)
        var GraphView: BEMSimpleLineGraphView = BEMSimpleLineGraphView(frame: CGRectMake(10, -100, self.view.bounds.width - 30, self.view.bounds.height - 60))
        // データソースを設定 (今回はこのクラスの中にメソッドを書くので、selfを設定)
        GraphView.dataSource = self
        // delegateを設定 (今回はこのクラスの中にメソッドを書くので、selfを設定)
        GraphView.delegate = self

        // GraphView.delegate = self の次の行から以下を追加した例
        GraphView.enableYAxisLabel = true
        GraphView.enableXAxisLabel = true
        GraphView.enableReferenceAxisFrame = true
        GraphView.enableReferenceXAxisLines = true
        GraphView.enableReferenceYAxisLines = true
        GraphView.enableBezierCurve = false
        GraphView.widthLine = 2
        GraphView.colorLine = UIColor.orangeColor()
        GraphView.colorTop = UIColor.whiteColor()
        GraphView.colorBottom = UIColor.whiteColor()

        // メインビューにグラフのViewを追加
        self.view.addSubview(GraphView)
    }

    override func didReceiveMemoryWarning() {
        super.didReceiveMemoryWarning()
        // Dispose of any resources that can be recreated.
    }

    /*
    // MARK: - Navigation

    // In a storyboard-based application, you will often want to do a little preparation before navigation
    override func prepareForSegue(segue: UIStoryboardSegue, sender: AnyObject?) {
        // Get the new view controller using segue.destinationViewController.
        // Pass the selected object to the new view controller.
    }
    */

}
// MARK: - GraphViewController: BEMSimpleLineGraphDelegate, BEMSimpleLineGraphDataSource
extension GraphViewController: BEMSimpleLineGraphDelegate, BEMSimpleLineGraphDataSource {
    // グラフのX軸の最大個数を返すメソッドを作成
    func numberOfPointsInLineGraph(graph: BEMSimpleLineGraphView) -> NSInteger {
        // 今回はSampleData配列の数を返します
        return SampleData.count
    }

    // Y軸の値を返すメソッドを作成
    func lineGraph(graph: BEMSimpleLineGraphView, valueForPointAtIndex index: NSInteger) -> CGFloat {
        //何個目のX軸のポイントかはindexで取得できるので、今回はSampleData配列の中にあるindexの要素をそのまま返します
        return CGFloat(SampleData[index])
    }

    func lineGraph(graph: BEMSimpleLineGraphView, labelOnXAxisForIndex index: Int) -> String {
        return "test"
    }
}
ちなみにswift対応しているグラフライブラリがあったのでこれを使うのはやめました。。。
また、それについては別途まとめようと思います。