概要
Androidアプリで、Google MapのアプリのようなBottomSheetを作ってみました。
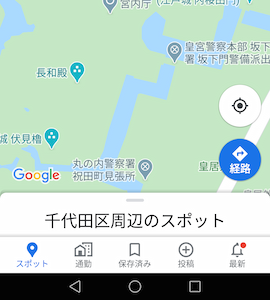
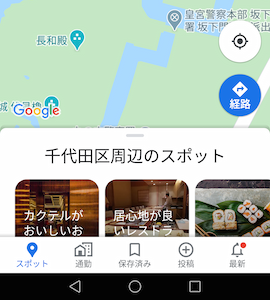
Googleの「マップ」アプリのBottomSheet
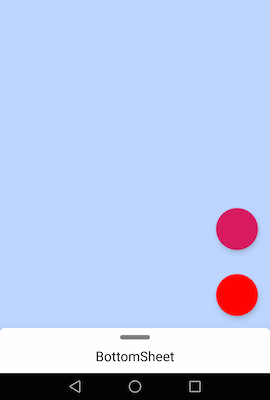
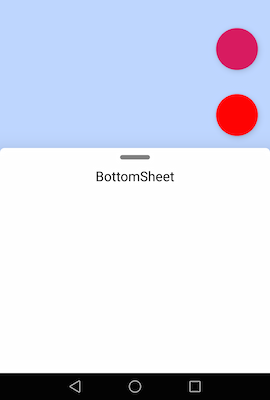
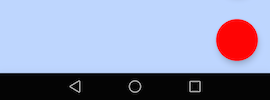
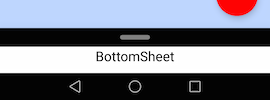
作成したBottomSheet
主に以下のような特徴を実現しました。
- BottomSheet領域をスワイプ、またはBottomSheet上部のバー領域をタップすることで展開・収納できる
- FAB(Floating Action Button)がBottomSheetに追従して移動する
Google MapのBottomSheetは、収納時下にスワイプすると隠れる・展開時上にスワイプすると全画面になる、などの挙動もありますが今回はやっていません。
BottomSheetとは
マテリアルデザインのガイドラインでは、BottomSheetについて以下のような説明がされています。
Bottom sheets are surfaces containing supplementary content that are anchored to the bottom of the screen.
BottomSheetを作成する
BottomSheetを作成します。
画面レイアウト
<?xml version="1.0" encoding="utf-8"?>
<androidx.coordinatorlayout.widget.CoordinatorLayout
    xmlns:android="http://schemas.android.com/apk/res/android"
    xmlns:tools="http://schemas.android.com/tools"
    xmlns:app="http://schemas.android.com/apk/res-auto"
    android:layout_width="match_parent"
    android:layout_height="match_parent"
    android:background="#BED6FF"
    tools:context=".HomeFragment">

    <include
        layout="@layout/bottom_sheet"
        android:id="@+id/bottomSheet" />

</androidx.coordinatorlayout.widget.CoordinatorLayout>
CoordinatorLayoutを使ってBottomSheetの挙動を実現します。
BottomSheet
<?xml version="1.0" encoding="utf-8"?>
<LinearLayout xmlns:android="http://schemas.android.com/apk/res/android"
    xmlns:app="http://schemas.android.com/apk/res-auto"
    xmlns:tools="http://schemas.android.com/tools"
    android:layout_width="match_parent"
    android:layout_height="300dp"
    android:orientation="vertical"
    android:background="@drawable/bottom_sheet_background"
    android:elevation="30dp"
    app:layout_behavior="com.google.android.material.bottomsheet.BottomSheetBehavior"
    app:behavior_peekHeight="60dp">

    <LinearLayout
        android:id="@+id/bottomSheetBarArea"
        android:layout_width="match_parent"
        android:layout_height="wrap_content"
        android:orientation="vertical">

       <LinearLayout
            android:layout_width="match_parent"
            android:layout_height="25dp"
            android:gravity="center"
            android:background="#00000000">

            <View
                android:id="@+id/bottomSheetBar"
                android:layout_width="40dp"
                android:layout_height="6dp"
                android:background="@drawable/bottom_sheet_bar" />

       </LinearLayout>

    </LinearLayout>

    <TextView
        android:id="@+id/text"
        android:layout_width="match_parent"
        android:layout_height="wrap_content"
        android:gravity="center"
        android:text="BottomSheet"
        android:textColor="@android:color/black"
        android:textSize="18sp" />

</LinearLayout>
drawable
<?xml version="1.0" encoding="utf-8"?>
<shape xmlns:android="http://schemas.android.com/apk/res/android"
    android:shape="rectangle">
    <corners
        android:bottomLeftRadius="0dp"
        android:bottomRightRadius="0dp"
        android:topLeftRadius="6dp"
        android:topRightRadius="6dp" />
    <solid android:color="@android:color/white"/>
</shape>
<?xml version="1.0" encoding="utf-8"?>
<shape xmlns:android="http://schemas.android.com/apk/res/android">
    <solid android:color="#808080"/>
    <corners android:radius="5dp"/>
</shape>
BottomSheetのレイアウトはLinearLayoutで作成しています。中身は好きなように要素を配置してください。
-
layout_height
今回は展開時のBottomSheetの高さを指定しています。 -
background
上部のみ角丸の背景(bottom_sheet_background)を設定しています。 -
layout_behavior
CoordinatorLayoutの子要素にBottomSheetBehaviorを適用することで、その要素をBottomSheetのように動かせます。これだけで、スワイプで展開・収納できます。 -
behavior_peekHeight
収納時の高さを指定できます。setPeekHeight(peekHeight)でスクリプトでも設定できます。
今回は設定していませんが、app:behavior_hideable="true"でBottomSheetを隠せるようにできます。
上部のバー領域
タップすると展開・収納できる領域を作成します。バー部分だけではタップできる領域が狭すぎるため、バー以外の上部をタップした時にもイベントが発生するように、透明なバー領域を作成しています。
黒い領域がタップ領域です。
スクリプト
今回は、バー領域をタップした時にもBottomSheetを展開・収納できるようにClickListenerを追加しました。
class HomeFragment : Fragment() {
  private lateinit var bottomSheet: View
  private lateinit var bottomSheetBarArea: View
  private lateinit var bottomSheetBehavior: BottomSheetBehavior<View>
  override fun onCreateView(inflater: LayoutInflater,
                          container: ViewGroup?,
                          savedInstanceState: Bundle?): View? {
    super.onCreateView(inflater, container, savedInstanceState)

    val view = inflater.inflate(R.layout.fragment_home, container, false)
    bottomSheet = view.findViewById(R.id.bottomSheet)
    bottomSheetBarArea = view.findViewById(R.id.bottomSheetBarArea)
    bottomSheetBehavior = BottomSheetBehavior.from(bottomSheet)
    setup()
    return view
  }

  private fun setup() {
    bottomSheetBarArea.setOnClickListener {
      if (bottomSheetBehavior.state == BottomSheetBehavior.STATE_COLLAPSED) {
        bottomSheetBehavior.setState(BottomSheetBehavior.STATE_EXPANDED)
      } else if (bottomSheetBehavior.state == BottomSheetBehavior.STATE_EXPANDED) {
        bottomSheetBehavior.setState(BottomSheetBehavior.STATE_COLLAPSED)
      }
    }
  }
}
BottomSheetBehavior.from(view: V)でBottomSheetBehaviorを取得します。
そして、bottomSheetBarAreaをタップした時の処理を、BottomSheetBehaviorの状態によって分岐しています。
- 収納されている時(
STATE_COLLAPSED)には展開(STATE_EXPANDED)する - 展開されている時には収納する
これで、スワイプだけでなくタップでも展開・収納できます。
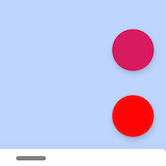
別の要素を追従させる
BottomSheetの動きに合わせてFAB(Floating Action Button)を上下させます。今回は2つのFABをLinearLayoutで囲って一緒に動かしています。
<?xml version="1.0" encoding="utf-8"?>
<androidx.coordinatorlayout.widget.CoordinatorLayout
    xmlns:android="http://schemas.android.com/apk/res/android"
    xmlns:tools="http://schemas.android.com/tools"
    xmlns:app="http://schemas.android.com/apk/res-auto"
    android:layout_width="match_parent"
    android:layout_height="match_parent"
    android:background="#BED6FF"
    tools:context=".HomeFragment">

    <include
        layout="@layout/bottom_sheet"
        android:id="@+id/bottomSheet" />

    <LinearLayout
        android:id="@+id/fabContainer"
        android:layout_width="wrap_content"
        android:layout_height="wrap_content"
        android:orientation="vertical"
        android:layout_gravity="top"
        app:layout_anchor="@id/bottomSheet"
        app:layout_anchorGravity="top|end">

        <com.google.android.material.floatingactionbutton.FloatingActionButton
            android:id="@+id/fab1"
            android:layout_width="wrap_content"
            android:layout_height="wrap_content"
            android:layout_margin="@dimen/fab_margin" />

        <com.google.android.material.floatingactionbutton.FloatingActionButton
            android:id="@+id/fab2"
            android:layout_width="wrap_content"
            android:layout_height="wrap_content"
            android:layout_margin="@dimen/fab_margin"
            app:backgroundTint="#FF0000" />

    </LinearLayout>

</androidx.coordinatorlayout.widget.CoordinatorLayout>
-
layout_gravity
topを指定してBottomSheetと被らないようにしています。 -
layout_anchor
アンカーを指定します。今回はBottomSheetに追従させたいのでBottomSheet要素を指定しています。 -
layout_anchorGravity
アンカーに対するgravityを設定します。今回はBottomSheetの右上に配置したいのでtop|endを指定しています。
まとめ
-
CoordinatorLayoutとBottomSheetBehaviorでBottomSheetを作成しました。 - アンカーを指定して別の要素をBottomSheetに追従するようにしました。
参考