主旨
以前、公式ページに v9 は npm でしか使えないよって書いてあった気がしてましたが、最近ページを見直したら使う方法が書いてあることに気が付いたのでメモです。
結論
下記に方法が書いてありました。
ESM を使用していて、ブラウザ モジュールを使用する場合は・・・と書かれているところです。
import {
    initializeApp
} from 'https://www.gstatic.com/firebasejs/9.8.4/firebase-app.js';
こんな感じで、firebase v9 のモジュールを import できます。
コード
下記ファイルに apiKey などを入力した上で、Firebase Authentication の Sign-in Method のプロバイダの「匿名ログイン」を有効にすれば、ローカルファイルをブラウザで開くだけで動きます(多分)。
<!DOCTYPE html>
<head>
    <meta charset="UTF-8" />
    <meta name="viewport" content="width=device-width, initial-scale=1.0" />
    <title>Firebase v9 CDN test</title>
</head>
<body>
    <div id="main">
        <span id="status-text">サインインしていません</span><br/>
        <input id="sign-in"  class="buttons" type="button" value="Sign-In"><br/>
    </div>
</body>
<script type="module">

//  --------- START FIREBASE INITIALIZATION ------------
import {
    initializeApp
} from 'https://www.gstatic.com/firebasejs/9.14.0/firebase-app.js';
import {
    getAuth,
    onAuthStateChanged,
    signInAnonymously,
    signOut,
    connectAuthEmulator
} from 'https://www.gstatic.com/firebasejs/9.14.0/firebase-auth.js';


const firebaseConfig = {
    apiKey: "",
    authDomain: "",
    databaseURL: "",
    projectId: "",
    storageBucket: "",
    messagingSenderId: "",
    appId: "",
};

const firebase = initializeApp(firebaseConfig);
// ------------ END OF FIREBASE INITIALIZATION

let currentUser = null;
const signInButton = document.getElementById('sign-in');
const statusText = document.getElementById('status-text');

function signIn() {
    const auth = getAuth();
    signInButton.disabled = true;
    signInAnonymously(auth)
    .then(() => {
        console.log("login");
    })
    .catch((error) => {
        const errorCode = error.code;
        const errorMessage = error.message;
        console.log("faild to login", errorCode, errorMessage );
        signInButton.disabled = false;
    });
}

function signOutUser() {
    signOut(getAuth());
    signInButton.value = "Sign-Out";
}

function initFirebaseAuth() {
   onAuthStateChanged(getAuth(), authStateObserver);
}

function authStateObserver(user) {
    if (user) { // User is signed in!
        console.log("signed-in");
        signInButton.value = "Sign-Out";
        statusText.innerText = "サインインしました";

    }else{
        console.log("signed-out");
        signInButton.value = "Sign-In";
        statusText.innerText = "サインインしていません";
    }

    signInButton.disabled = false;
}

function init()
{
    initFirebaseAuth();
    signInButton.addEventListener('click',() => {
        if ( signInButton.value == "Sign-In"){
            signIn();
        }else{
            signOutUser();
        }
    })
}

init();
</script>
<style>
span {
    font-size: 400%;
}
input.buttons {
    font-size: 400%;
    width: 5em;
    height:2em;
}
</style>
</html>
動作
ファイルを開くと、下記の画面になるはずです。
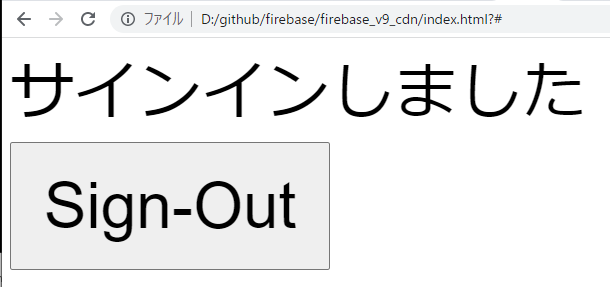
Sign-In のボタンを押して、認証に成功すると下記画面になります。
Sign-Out を押すと、サインアウトして最初の画面にもどります。
エラーが出たり、サインインできない場合は、下記のどれかが原因です(多分)
- firebase authentication で匿名ログインが有効になっていない
- firebase の apiKey が正しくない。
匿名認証については、下記を参考にしてください。
注意点
signInWithPopup のような、ローカルで動かすとオリジン回りのエラーが出るコードを動かす場合は、fireabse serve で動かすか、エミュレータを使う必要があります。
具体的な手順は下記です。まず、下記で firebase プロジェクトを初期化します。
$ firebase init hosting
次に/public/index.html にファイルを置きます。それから、下記コマンドで、ローカル起動します。
$ firebase serve --only hosting
この状態で、http://localhost:5000 をブラウザを開くことで動かすことができます。
エミュレータを使うのでも OK です。
もちろん、firebase deploy しても動きます。
Google 認証を使うコードの例
上の匿名ログインを Google 認証に書き換えたコードです。これは index.html をブラウザで開く方法では動きません。
apiKey は正しいものに置き換える必要があります。
<!DOCTYPE html>
<head>
    <meta charset="UTF-8" />
    <meta name="viewport" content="width=device-width, initial-scale=1.0" />
    <title>Firebase v9 CDN test</title>
</head>
<body>
    <div id="main">
        <span id="status-text">サインインしていません</span><br/>
        <input id="sign-in"  class="buttons" type="button" value="Sign-In"><br/>
    </div>
</body>
<script type="module">

//  --------- START FIREBASE INITIALIZATION ------------
import {
    initializeApp
} from 'https://www.gstatic.com/firebasejs/9.14.0/firebase-app.js';
import {
    getAuth,
    onAuthStateChanged,
    signInWithPopup,
    GoogleAuthProvider,
    signOut,
    connectAuthEmulator
} from 'https://www.gstatic.com/firebasejs/9.14.0/firebase-auth.js';


const firebaseConfig = {
    apiKey: "",
    authDomain: "",
    databaseURL: "",
    projectId: "",
    storageBucket: "",
    messagingSenderId: "",
    appId: ""
};

const firebase = initializeApp(firebaseConfig);
// ------------ END OF FIREBASE INITIALIZATION

let currentUser = null;
const signInButton = document.getElementById('sign-in');
const statusText = document.getElementById('status-text');

function signIn() {
    var provider = new GoogleAuthProvider();
    signInWithPopup(getAuth(), provider)
    .then((auth) => {
        console.log("login");
    })
    .catch((error) => {
        const errorCode = error.code;
        const errorMessage = error.message;
        console.log("faild to login", errorCode, errorMessage );
        signInButton.disabled = false;
    });
}

function signOutUser() {
    signOut(getAuth());
    signInButton.value = "Sign-Out";
}

function initFirebaseAuth() {
   onAuthStateChanged(getAuth(), authStateObserver);
}

function authStateObserver(user) {
    if (user) { // User is signed in!
        console.log("signed-in", user);
        signInButton.value = "Sign-Out";
        statusText.innerText = "サインインしました";

    }else{
        console.log("signed-out");
        signInButton.value = "Sign-In";
        statusText.innerText = "サインインしていません";
    }

    signInButton.disabled = false;
}

function init()
{
    initFirebaseAuth();
    signInButton.addEventListener('click',() => {
        if ( signInButton.value == "Sign-In"){
            signIn();
        }else{
            signOutUser();
        }
    })
}

init();
</script>
<style>
span {
    font-size: 400%;
}
input.buttons {
    font-size: 400%;
    width: 5em;
    height:2em;
}
</style>
</html>
Google 認証を使ってなおかつエミュレータも使うコードの例
コード
前記のコードの下記部分に、
// ------------ END OF FIREBASE INITIALIZATION
下記のコードを付け加えます。
const isEmulating = window.location.hostname === "localhost";
if (isEmulating) {

    const auth = getAuth();
    connectAuthEmulator(auth, "http://localhost:9099");
}
動作テスト
emulator は最低限、authentication と hosting を有効にしておく必要があります。
$ firebase init emulators
下記で起動します。
$ firebase emulators:start
エミュレータが起動したら、http://localhost:5000 を開きます。
Sign-in して下のようなログイン用のポップアップ画面が出たら成功です。エミュレータの場合は、下記のようにダミーの google アカウントを好きに作成できます。
全部のエミュレータを使う場合のサンプル
コードだけ置いておきます。
import { initializeApp } from 'https://www.gstatic.com/firebasejs/9.14.0/firebase-app.js';
import { getFunctions, connectFunctionsEmulator } from 'https://www.gstatic.com/firebasejs/9.14.0/firebase-functions.js';
import { getFirestore, connectFirestoreEmulator } from 'https://www.gstatic.com/firebasejs/9.14.0/firebase-firestore.js';
import { getStorage, connectStorageEmulator } from 'https://www.gstatic.com/firebasejs/9.14.0/firebase-storage.js';
import { getAuth, connectAuthEmulator } from 'https://www.gstatic.com/firebasejs/9.14.0/firebase-auth.js';;

var firebaseConfig = {
    // apiKey 関連のコードをここに張り付ける。
    apiKey: "xxxxxxxxxxxxxxxxxxxxxxxxxxxxxxxxxxxxxxxxx",
    authDomain: "xxxxxxxxxx.firebaseapp.com",
    projectId: "xxxxxxxxxx",
    storageBucket: "xxxxxxxxxx.appspot.com",
    messagingSenderId: "xxxxxxxxxx",
    appId: "xxxxxxxxxx"
};

export const firebase = initializeApp(firebaseConfig);
const isEmulating = window.location.hostname === "localhost";
if (isEmulating) {

    const auth = getAuth();
    connectAuthEmulator(auth, "http://localhost:9099");

    const storage = getStorage();
    connectStorageEmulator(storage, "localhost", 9199);

    const db = getFirestore();
    connectFirestoreEmulator(db, 'localhost', 8080);

    const functions = getFunctions();
    connectFunctionsEmulator(functions, "localhost", 5001);
}


