RailsでGmailを利用した問い合わせフォームを実装しました。
ルーティングの設定
まず、ルーティングを設定します。
問い合わせフォームのページで問合せ内容を入力→送信したら送信完了ページに遷移するという想定です。
config/routes.rb
Rails.application.routes.draw do
  resource :contacts, only: [:new, :create] do
    get "/thanks" => "contacts#thanks"
  end
end
モデルの作成
問合せフォームで入力する内容は、お名前、メールアドレス、問合せ内容の3点としました。
$ rails g model contact name:string email:string content:text
$ rails db:migrate
コントローラの作成
$ rails g controller contacts
app/controller/contacts_controller.rb
class ContactsController < ApplicationController
  def new
    @contact = Contact.new
  end

  def create
    @contact = Contact.new(contact_params)
    if @contact.save
      ContactMailer.contact_mail(@contact).deliver
      redirect_to thanks_contacts_path
    else
      render :new
    end
  end

  def thanks
  end

  private
  def contact_params
    params.require(:contact).permit(:name, :email, :content)
  end
end
ビュー(お問い合わせフォーム)の作成
私が作成したサイトのテイストに合わせて一部ひらがなにしている箇所がございますが気にしないでください。
app/view/contacts/new.html.erb
<h3>おといあわせ</h3>
<%= form_with(model: @contact, local: true) do |f| %>
  <%= f.label :name, "おなまえ" %>
  <%= f.text_field :name %>
  <%= f.label :email, "メールアドレス" %>
  <%= f.email_field :email, autocomplete: "email" %>
  <%= f.label :content, "ないよう" %>
  <%= f.text_field :content %>
  <%= f.submit "おくる" %>
<% end %>
ビュー(送信完了画面)の作成
app/view/contacts/thanks.html.erb
<h3>おといあわせ、ありがとうございました。</h3>
メーラーの作成
$ rails g mailer ContactMailer
メール送信処理を記載
app/model/contact_mailer.rb
class ContactMailer < ApplicationMailer
  def contact_mail(contact)
    @contact = contact
    mail to:"自分のメールアドレス", subject: "お問い合わせ"
  end
end
メール文の作成
app/view/contact_mailer/contact_mail.html.erb
<p>ユーザーネーム:<%= @contact.name %></p>
<p>メールアドレス:<%= @contact.email %></p>
<p>お問い合わせ内容:<%= @contact.content %></p>
Gmailサーバーの設定
config/environments/development.rb
Rails.application.configure do
  config.action_mailer.perform_deliveries = true
  config.action_mailer.raise_delivery_errors = true
  config.action_mailer.delivery_method = :smtp
  config.action_mailer.smtp_settings = {
    address: 'smtp.gmail.com',
    domain: 'gmail.com',
    port: 587,
    user_name: '自分のメールアドレス',
    password: ENV["GMAIL_KEY"],
    authentication: 'plain',
    enable_starttls_auto: true
  }
end
パスワードはGitHubに上がってしまわないように、.envファイルに記載することにします。
Gmailキーの設定
アプリケーションディレクトリ直下の.envファイル(ない場合は作成)に以下を記載します。
GMAIL_KEY=パスワード
ここに入力するパスワードはGoogleアカウントにアクセスし生成したアプリパスワードを入力します。
セキュリティ→Googleへのログインの欄
2段階認証を設定していない方は、まず設定をした上で、アプリパスワードを生成します。
ここで生成したパスワードを入力します。
こちらで実装は完了です。
これで問合せフォームからメールを送信すると
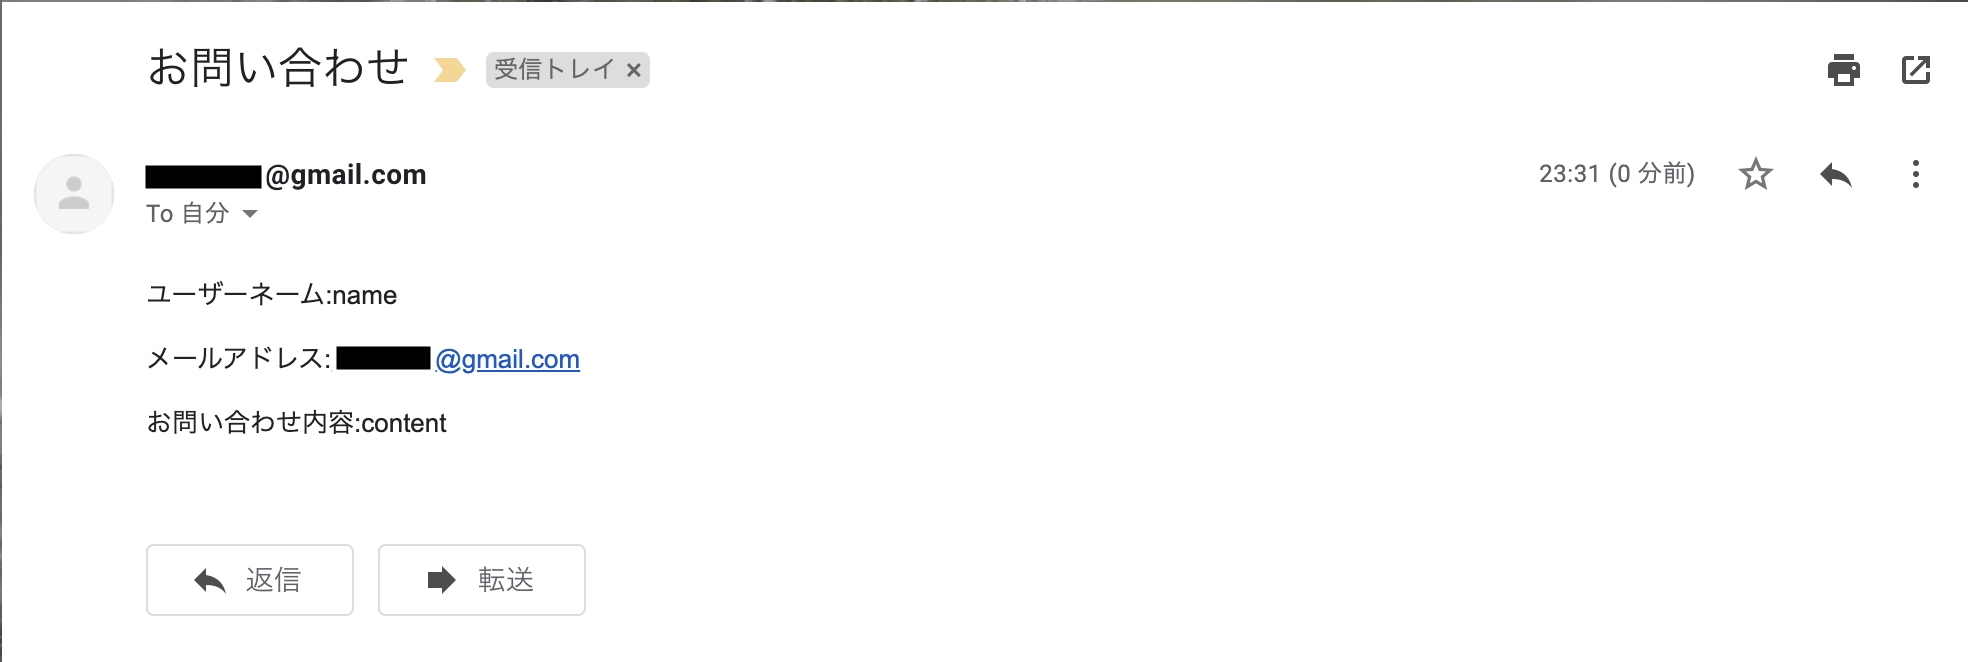
無事、送受信ができました。