やりたいこと
- Javascriptでバーコードリーダーを実装。
- 出来るだけ多くのプラットフォームで動作させたい。
- WebCodeCamJSというライブラリをベースにバーコードリーダーを実装する。
- クライアントサイドで動作するため、サーバに余計な負荷をかけない。
- WebCodeCamJSをカスタマイズさせて、より使いやすくする。
- チェックデジットを自前で実装して、より誤検出をへらす。
そのうち記事を追記したりするかもしれません。
前提
前回の記事
https://qiita.com/mm_sys/items/a0dcc2c02f27751cd80d
WebRTCでwebカメラを使ってバーコードリーダーを実装するため、前回はそのテスト環境を作成しました。
しかし、そのテスト環境でなくてもHTTPSで接続出来る環境であれば今回の内容を実装できます。
webサイトの保存ディレクトリをhtdocsと表記しておりますので、各人の環境に読み替えてください。
WebCodeCamJSを展開
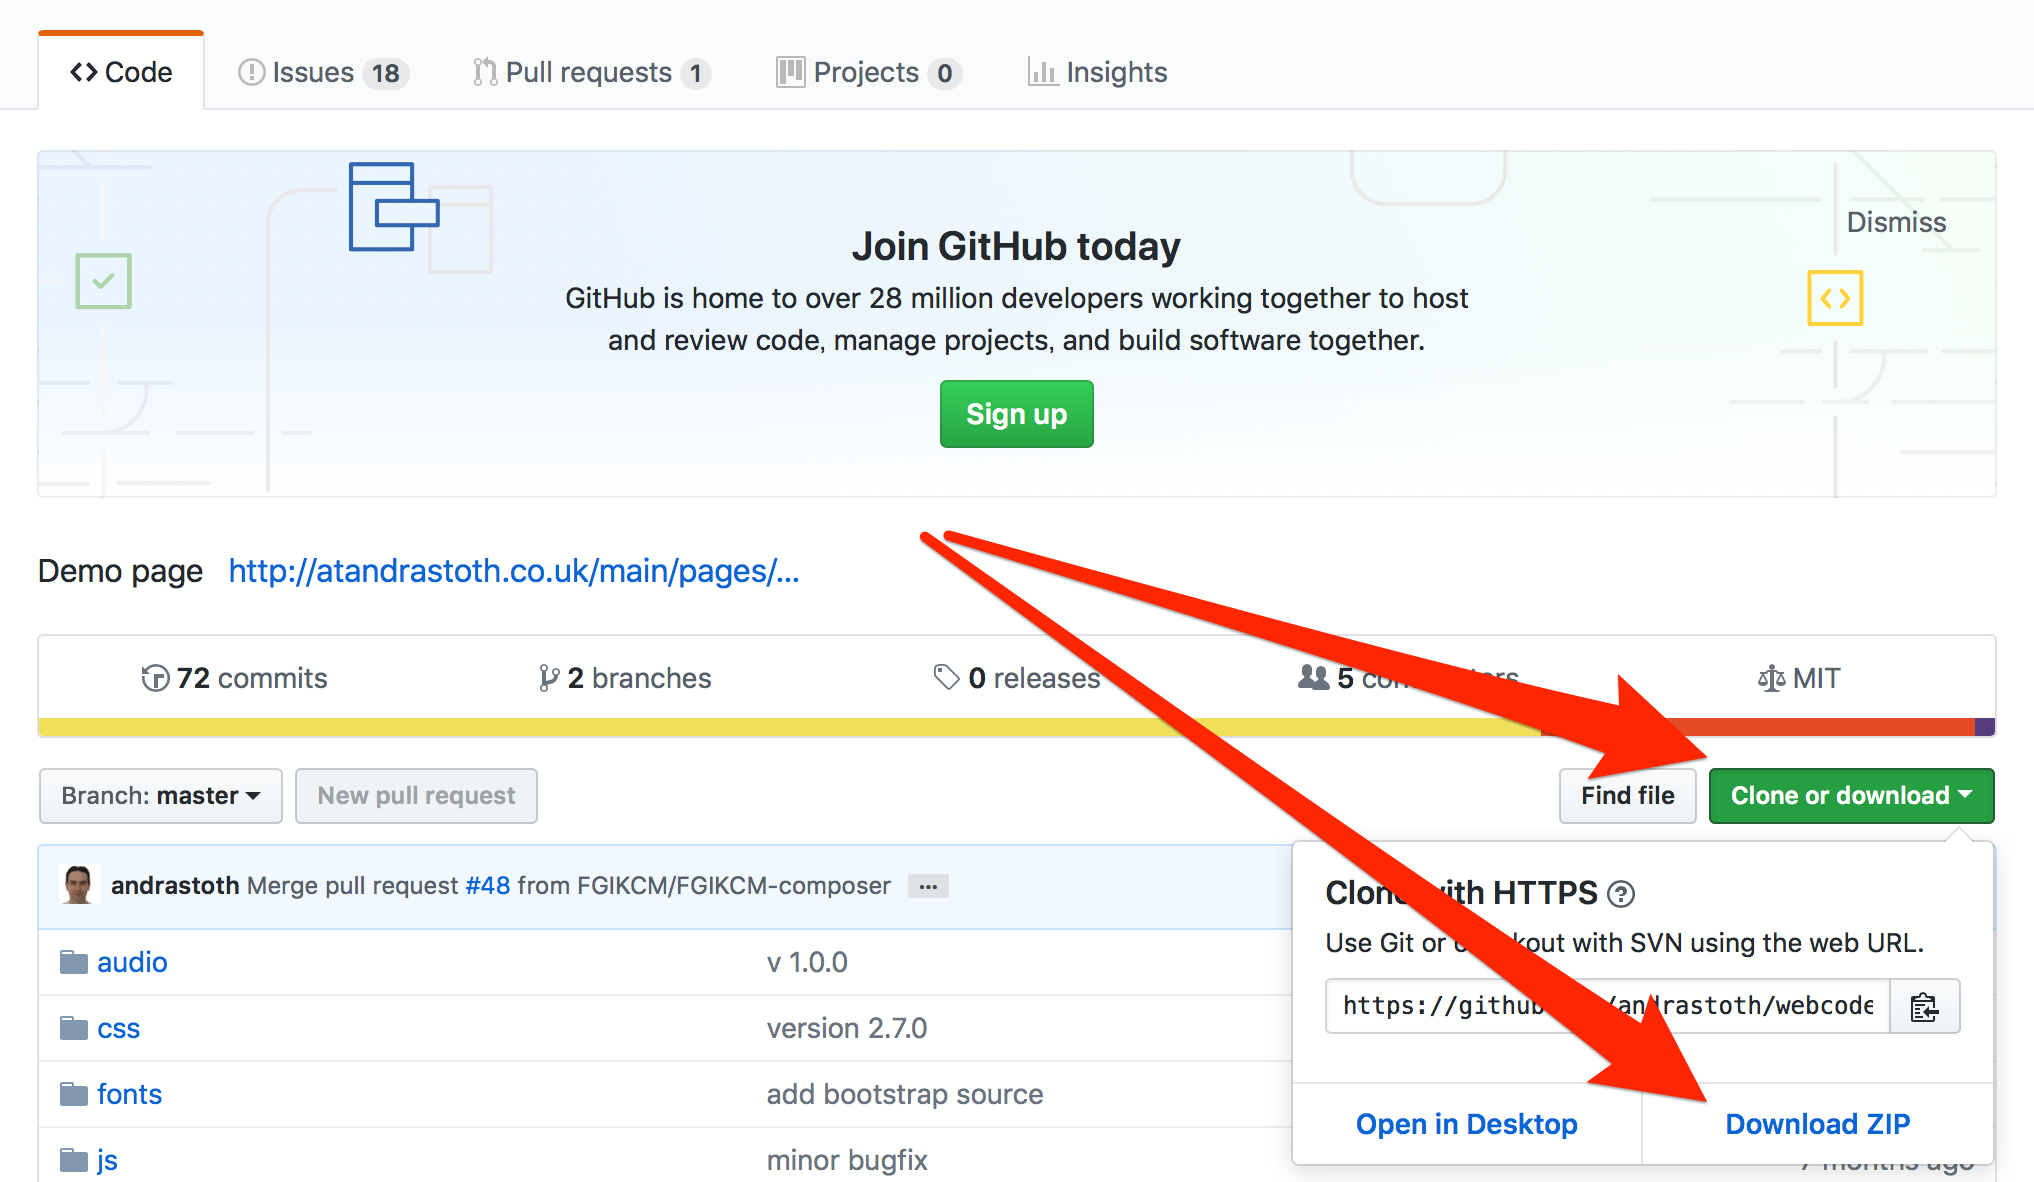
WebCodeCamJS 2.7.0 を利用してます。
GitHub - andrastoth/webcodecamjs: Demo page
上記URLにアクセスして、ダウンロード等して、htdocs内に展開してください。

jsファイルの構成
今回主に使うjavascriptファイル(jsフォルダ内のファイル)は以下のような構成になっています。
- DecoderWorker.js::必須ファイルで変更不可
- jquery.js
- main.js::index.htmlから直接読み込まれるファイル。index.htmlのレイアウトのIDとかと直接関係がある記述がされている。レイアウト変更したらこのファイルの中身を変更する。
- qrcodelib.js::名前の通り、QRコードを読み解くのに必要。変更不可
- webcodecamjs.js::デコードや画像処理のメインファイル。バーコードリーダーの処理関係はとりあえずここを修正。
必要なファイルのみにする
前回の記事の最後のように、WebCodeCamJSを使ってバーコードリーダーの動作が確認できたとして、今回はシンプルな構成から色々カスタマイズしていきます。
jsディレクトリとaudio以外排除
htdocs内のjsと、audioおよびその中身のbeep.mp3という名前のファイルとディレクトリ以外、htdocsフォルダの中身を削除もしくは別フォルダに移動させてください。
シンプルなファイルを作る
カスタマイズしやすいようにシンプルなHTMLを実装します。
今回作成する仕様は、リアルタイム検出のみを行います。
HTMLを記述
jsと同じフォルダに以下の内容でindex.htmlという名前で保存。
ちなみに、bootstrapのCDNを使っているのでインターネットに接続されている状態でないと、レイアウトが崩れます。オフラインで使いたいときは、bootstrapが動作するように書き換えてください。
<!DOCTYPE html>
<html>

<head>
    <meta charset="utf-8">
    <meta name="viewport" content="width=device-width, initial-scale=1.0">
    <title>simple</title>
    <link rel="stylesheet" href="https://cdnjs.cloudflare.com/ajax/libs/twitter-bootstrap/3.3.7/css/bootstrap.min.css">
    <link rel="stylesheet"
          href="https://cdnjs.cloudflare.com/ajax/libs/twitter-bootstrap/3.3.7/css/bootstrap-theme.min.css">
</head>

<body>
<div class="container">
    <div class="row">
        <div class="col-md-12">
            <span id="scanned-TYPE">CODE TYPE</span>
            <textarea rows="3" id="scanned-QR"></textarea>
        </div>
        <div class="col-md-12">
            <div class="thumbnail" id="result" style="width:320px;height:240px;max-width:320px;">
                <img id="scanned-img" style="width:100%;height:100%;min-height:150px;max-height:320px;">
            </div>
            <div>
                <canvas width="640" height="480" id="webcodecam-canvas"></canvas>
                <div class="scanner-laser laser-rightBottom" style="opacity:0.5;"></div>
                <div class="scanner-laser laser-rightTop" style="opacity:0.5;"></div>
                <div class="scanner-laser laser-leftBottom" style="opacity:0.5;"></div>
                <div class="scanner-laser laser-leftTop" style="opacity:0.5;"></div>
                <select id="camera-select" class="form-control"></select>
                <div class="btn-group" role="group">
                    <button class="btn btn-default" type="button" id="play">play</button>
                    <button class="btn btn-default" type="button" id="pause"><strong>pause</strong></button>
                    <button class="btn btn-default" type="button" id="stop"><strong>stop</strong><br></button>
                </div>
            </div>
        </div>
        <div class="col-md-12">
            <span class="label label-default" id="zoom-value">倍率 : 2</span>
            <input type="range" min="10" max="50" value="0" id="zoom" onchange="Page.changeZoom();"/>
            <span class="label label-default" id="brightness-value">明るさ : 20</span>
            <input type="range" value="20" min="0" max="128" id="brightness" onchange="Page.changeBrightness();"/>
            <span class="label label-default" id="contrast-value">コントラスト : 0</span>
            <input type="range" value="0" min="0" max="64" id="contrast" onchange="Page.changeContrast();"/>
            <span class="label label-default" id="threshold-value">2値化 : 0</span>
            <input type="range" value="0" min="0" max="512" id="threshold" onchange="Page.changeThreshold();"/>
            <span class="label label-default" id="sharpness-value">鋭化 : off</span>
            <input type="checkbox" id="sharpness" onchange="Page.changeSharpness();"/>
            <span class="label label-default" id="grayscale-value">白黒 : off</span>
            <input type="checkbox" id="grayscale" onchange="Page.changeGrayscale();"/>
            <span class="label label-default" id="flipVertical-value">垂直反転 : off</span>
            <input type="checkbox" id="flipVertical" onchange="Page.changeVertical();"/>
            <span class="label label-default" id="flipHorizontal-value">水平反転: off</span>
            <input type="checkbox" id="flipHorizontal" onchange="Page.changeHorizontal();"/>
        </div>
    </div>
</div>
<div>
使わないけど設置しておかないとエラーが表示されるボタン
<button id="decode-img"></button>
<button id="grab-img"></button>
</div>
<script type="text/javascript" src="js/qrcodelib.js"></script>
<script type="text/javascript" src="js/webcodecamjs.js"></script>
<script type="text/javascript" src="js/main.js"></script>
<script src="https://cdnjs.cloudflare.com/ajax/libs/jquery/3.2.1/jquery.min.js"></script>
<script src="https://cdnjs.cloudflare.com/ajax/libs/twitter-bootstrap/3.3.7/js/bootstrap.min.js"></script>
</body>

</html>
htdocsがこんな状態になったかと思います。

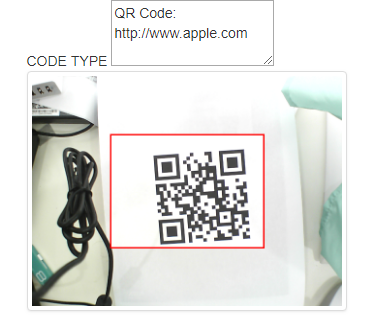
試しにアクセス
バーコードのほうは、このままではかなり認識率が悪いです。
QRコードは割と認識しやすいです。
カスタマイズ
ここから認識率の向上とつかやすくするためカスタマイズします。
os別に動作を変える
こちらのサイトを参照。
http://www9.plala.or.jp/oyoyon/html/script/platform.html
iOSの場合はリアカメラに設定する
iOSのカメラはフロントカメラが標準のようで、リアカメラは別に設定しないといけません。
webcodecamjs.jsのvar WebCodeCamJS = function(element) {のinit()メソッド(93行目くらい)の直前くらいに以下を追記します。
// 略
            cameraError: function(error) {
                console.log(error);
            }
        };

    // ----ここから追記----
    function switchOS() {
        var os, ua = navigator.userAgent;
        if (ua.match(/iPhone|iPad/)) {
            // todo iOSのリアカメラ使うかどうかはここで設定
            options.constraints.video.facingMode = {exact: "environment"}; // リアカメラにアクセス};
        }
    }
    switchOS();
    // ----ここまで追記----

    function init() {
        var constraints = changeConstraints();
        try {
            mediaDevices.getUserMedia(constraints).then(cameraSuccess).catch(function(error) {
                options.cameraError(error);
                return false;
// 略
チェックデジットを追加して精度を上げる
JANコードなんかのバーコードの末尾は整合性を確認するための番号になっており、これの整合性を確認して精度を上げます。
webcodecamjs.jsのvar WebCodeCamJS = function(element) {の適当なところに追記します。
// todo チェックデジット
    function checkDigit(barcodeStr, barCodeType) {
        // バーコードの種類ごとに処理を変える
        if (barCodeType === "EAN-13") {
            // 短縮用処理
            barcodeStr = ('00000' + barcodeStr).slice(-13);
            let evenNum = 0, oddNum = 0;
            for (var i = 0; i < barcodeStr.length - 1; i++) {
                if (i % 2 === 0) { // 「奇数」かどうか(0から始まるため、iの偶数と奇数が逆)
                    oddNum += parseInt(barcodeStr[i]);
                } else {
                    evenNum += parseInt(barcodeStr[i]);
                }
            }
            // 結果
            return 10 - parseInt((evenNum * 3 + oddNum).toString().slice(-1)) === parseInt(barcodeStr.slice(-1));
        }
        // 対象とならないバーコードの場合はtrue(確認せずに処理通過)で終了
        return true;
    }
webcodecamjs.jsの228行目くらいにあるsetCallBack内に1行追記
function setCallBack() {
        DecodeWorker.onmessage = function(e) {
            if (localImage || (!delayBool && !video.paused)) {
                if (e.data.success === true && e.data.success != 'localization') {
                    sucessLocalDecode = true;
                    delayBool = true;
                    delay();
                    setTimeout(function() {
                        if (options.codeRepetition || lastCode != e.data.result[0].Value) {
                            beep();
                            lastCode = e.data.result[0].Value;
                            if (!checkDigit(lastCode, e.data.result[0].Format)) return; // <- これを追記
                            options.resultFunction({
                                format: e.data.result[0].Format,
                                code: e.data.result[0].Value,
                                imgData: lastImageSrc
                            });
                        }
以下略
スキャンするサイズを変更する
webcodecamjs.jsの48行目くらいにあるwidthとheightの値を変更します。
略
        options = {
            decodeQRCodeRate: 5,
            decodeBarCodeRate: 3,
            successTimeout: 500,
            codeRepetition: true,
            tryVertical: true,
            frameRate: 15,
            width: 640,<-変更
            height: 480,<-変更
            constraints: {
                video: {
略
スキャンする種類を限定して処理を軽く
手っ取り早いのはwebcodecamjs.jsのdelay(144行目くらい)内の該当箇所をコメントアウト
    function delay() {
        delayBool = true;
        if (!localImage) {
            setTimeout(function() {
                delayBool = false;
                if (options.decodeBarCodeRate) {
                    tryParseBarCode();// <- バーコードをスキャンしたくないときはコメントアウト
                }
                if (options.decodeQRCodeRate) {
                    tryParseQRCode();// <- QRをスキャンしたくないときはコメントアウト
                }
            }, options.successTimeout);
        }
    }
また、279行目くらいにあるdecodeFormatsの使わないバーコードの種類を削除
略
        DecodeWorker.postMessage({
            scan: con.getImageData(0, 0, w, h).data,
            scanWidth: w,
            scanHeight: h,
            multiple: false,
            decodeFormats: ["Code128", "Code93", "Code39", "EAN-13", "2Of5", "Inter2Of5", "Codabar"],//<-ここを編集する
            rotation: flipMode[0]
        });
略
枠を描いて、その中だけスキャンする
これはちょっと手間がかかります。
まず、枠の座標を保存する変数を追加します。
41行目くらいに追記しました。
略
        delayBool = false,
        initialized = false,
        localStream = null,
        // ----ここから追記----
          // 640x480くらいのサイズの場合
        scanSize = {
            x: 80,
            y: 60,
            width: 320,
            height: 240,
        },
        // ----ここまで追記----
        options = {
            decodeQRCodeRate: 5,
            decodeBarCodeRate: 3,
略
次に、以下の関数を追記します。
私はconvolute関数の次くらいに記入しました。
// 枠の描画と2つの画像を合成する
    function drawRectangleAndMerge(screenPixels, pixels, x, y, w, h) {
        // 内側のピクセル
        var src = pixels.data,
            // 全体のピクセル
            screen = screenPixels.data,
            // 空のキャンバスを作成し、この中に結果を入れる
            tmpCanvas = document.createElement('canvas'),
            tmpCtx = tmpCanvas.getContext('2d'),
            output = tmpCtx.createImageData(screenPixels.width, screenPixels.height),
            dst = output.data;
        for (var tmp_y = 0; tmp_y < screenPixels.height; tmp_y++) {
            for (var tmp_x = 0; tmp_x < screenPixels.width; tmp_x++) {
                // 色をぬる座標設定
                var dstOff = (tmp_y * screenPixels.width + tmp_x) * 4;
                // 矩形の塗り範囲(この場合3pixel内側に赤く塗る)
                if (x < tmp_x && x + w > tmp_x && y < tmp_y && y + h > tmp_y// 外周の中であるか
                ) {
                    if (x + 3 < tmp_x && x + w - 3 > tmp_x && y + 3 < tmp_y && y + h - 3 > tmp_y)// 内周から3pixel内側か
                    {
                        // 枠の内側用の座標生成
                        var dstSrcOff = ((tmp_y - y) * pixels.width + (tmp_x - x)) * 4;
                        // 枠の内側の描画
                        dst[dstOff] = src[dstSrcOff]; // R
                        dst[dstOff + 1] = src[dstSrcOff + 1]; // G
                        dst[dstOff + 2] = src[dstSrcOff + 2]; // B
                        dst[dstOff + 3] = 255; // alpha
                    } else {
                        // 色の枠を描画
                        dst[dstOff] = 255; // R
                        dst[dstOff + 1] = 0; // G
                        dst[dstOff + 2] = 0; // B
                        dst[dstOff + 3] = 255; // alpha
                    }
                } else {
                    // 枠の外を描画
                    dst[dstOff] = screen[dstOff]; // R
                    dst[dstOff + 1] = screen[dstOff + 1]; // G
                    dst[dstOff + 2] = screen[dstOff + 2]; // B
                    dst[dstOff + 3] = 255; // alpha
                }
            }
        }
        return output;
    }
そして、setEventListenersを以下のように書き換えます。
function setEventListeners() {
        video.addEventListener('canplay', function(e) {
            if (!isStreaming) {
                if (video.videoWidth > 0) {
                    h = video.videoHeight / (video.videoWidth / w);
                }
                display.setAttribute('width', w);
                display.setAttribute('height', h);
                isStreaming = true;
                if (options.decodeQRCodeRate || options.decodeBarCodeRate) {
                    delay();
                }
            }
        }, false);
        video.addEventListener('play', function() {
            setInterval(function() {
                if (!video.paused && !video.ended) {
                    var z = options.zoom;
                    if (z === 0) {
                        z = optimalZoom();
                    }
                    con.drawImage(video, (w * z - w) / -2, (h * z - h) / -2, w * z, h * z);
                    // ↓これをコメントアウト
                    // var imageData = con.getImageData(0, 0, w, h);
                    // ↓かわりにこれを追記
                    var imageData = con.getImageData(scanSize.x, scanSize.y, scanSize.width, scanSize.height);
                    if (options.grayScale) {
                        imageData = grayScale(imageData);
                    }
                    if (options.brightness !== 0 || options.autoBrightnessValue) {
                        imageData = brightness(imageData, options.brightness);
                    }
                    if (options.contrast !== 0) {
                        imageData = contrast(imageData, options.contrast);
                    }
                    if (options.threshold !== 0) {
                        imageData = threshold(imageData, options.threshold);
                    }
                    if (options.sharpness.length !== 0) {
                        imageData = convolute(imageData, options.sharpness);
                    }
                    // todo ↓これを追記
                    imageData = drawRectangleAndMerge(con.getImageData(0, 0, w, h), imageData, scanSize.x, scanSize.y, scanSize.width, scanSize.height);

                    con.putImageData(imageData, 0, 0);
                }
            }, 1E3 / options.frameRate);
        }, false);
    }
それと、tryParseBarCode関数を下記のように修正
    function tryParseBarCode() {
        display.style.transform = 'scale(' + (options.flipHorizontal ? '-1' : '1') + ', ' + (options.flipVertical ? '-1' : '1') + ')';
        if (options.tryVertical && !localImage) {
            flipMode.push(flipMode[0]);
            flipMode.splice(0, 1);
        } else {
            flipMode = [1, 3, 6, 8];
        }
        lastImageSrc = display.toDataURL();
        DecodeWorker.postMessage({
            // ↓この3行をコメントアウト
            // scan: con.getImageData(0, 0, w, h).data,
            // scanWidth: w,
            // scanHeight: h,
            // ↓かわりにこれを追記
            scan: con.getImageData(
                scanSize.x,
                scanSize.y,
                scanSize.width,
                scanSize.height).data,
            scanWidth: scanSize.width,
            scanHeight: scanSize.height,
            // ここまで追記
            multiple: false,
            decodeFormats: ["Code128","EAN-13"],
            rotation: flipMode[0]
        });
    }
他にも色々変更できます。
自分に必要な機能を色々追加しましょう
