はじめに
PFでジャニーズの私物を特定して、すぐに購入できるサービスを作成したのでまとめます。
あまりにも長くなりそうなので、まずTwitter APIを使用した部分についてまとめます。
サービスの概要
ジャニーズファンは推しと同じものを日常生活やライブで身につけたいという心理があります。
twitte上にファンの人が私物を特定してツイートをするので、そのツイートをキャッチして、LINEで通知・購入できるサービスになっています。
なぜこのサービスを作成したか
私物の特定のツイートがされるとすぐファンが購入し、売り切れてしまうことがよくあります。
私自身、私物特定のツイートを発見し、サイトを検索してももう売り切れてしまっていたということが何回もあります。
他のファンよりも早く購入できるサービスがあればいいなと思い、このサービスを作成しました。
完成したサービス
Webサイトは以下になります↓
LINEのQRコードになります。
ぜひ動かしてみてください!!

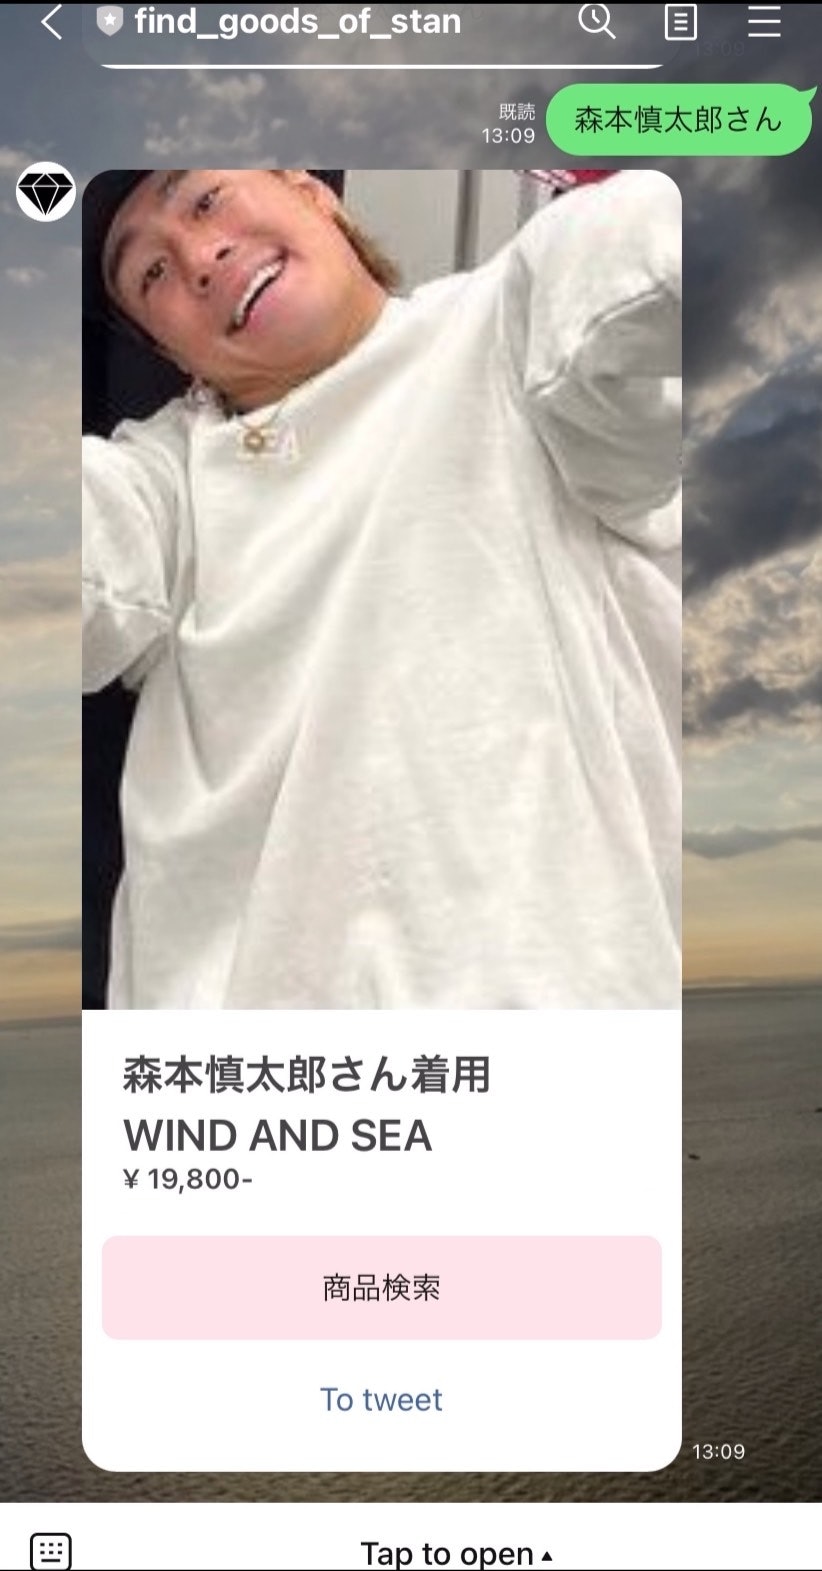
サービスのイメージがしづらいと思いますがこんな流れになります
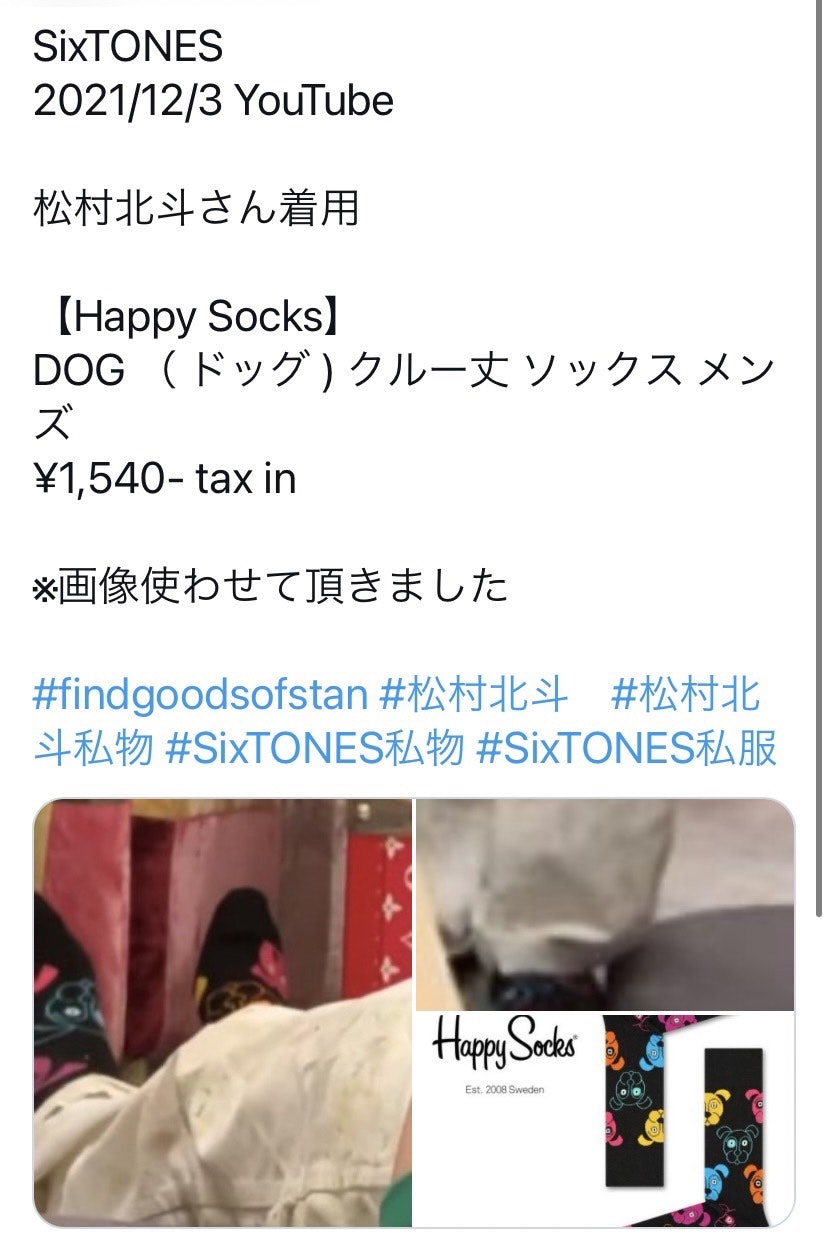
1.Twitterで私服特定ツイートがされます。
2.すぐLINEにこのような通知が届きます。
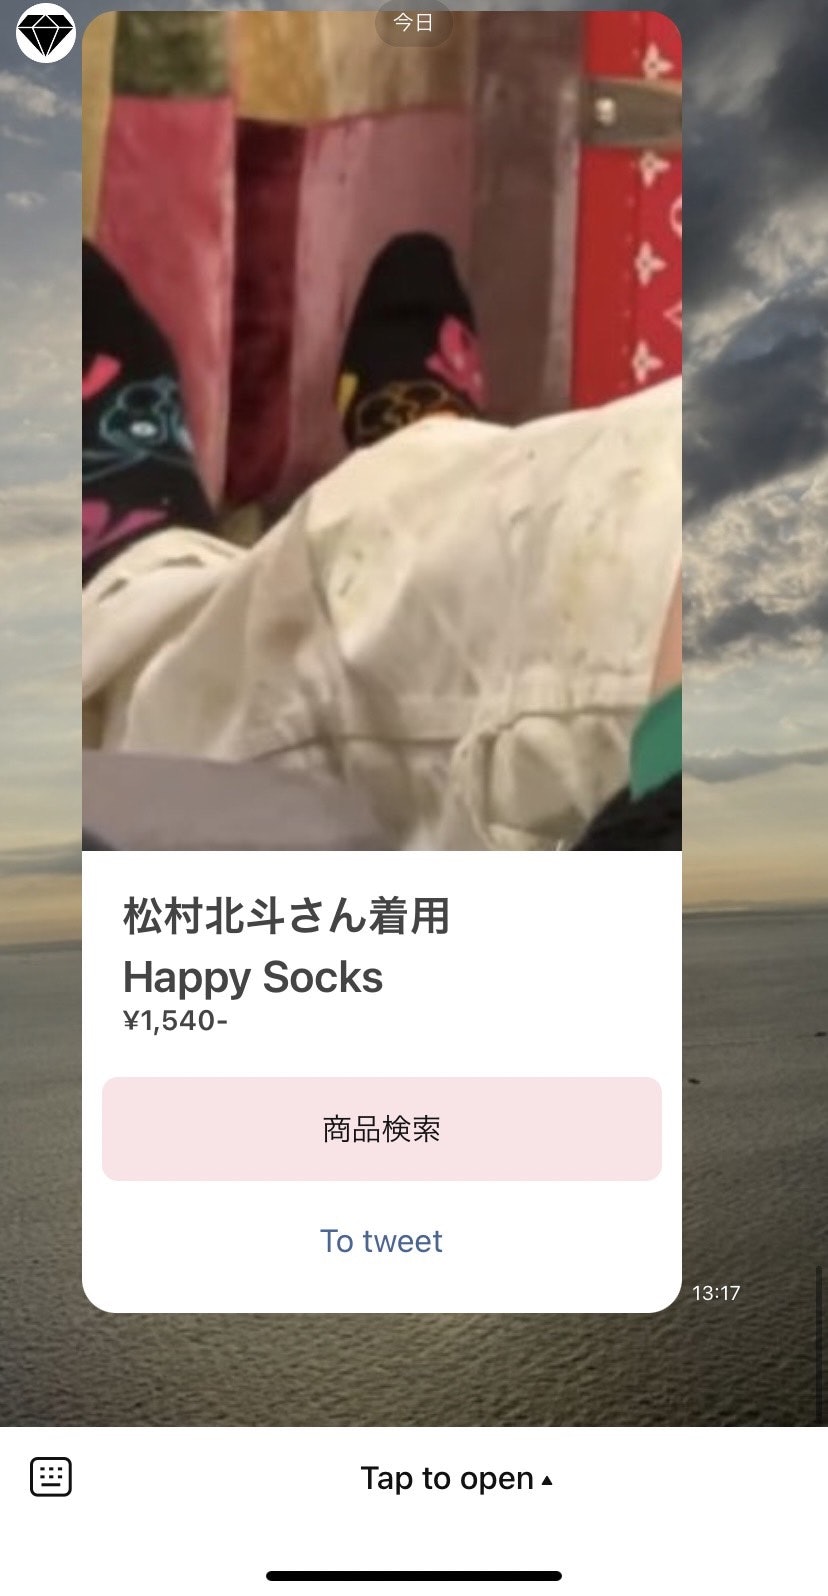
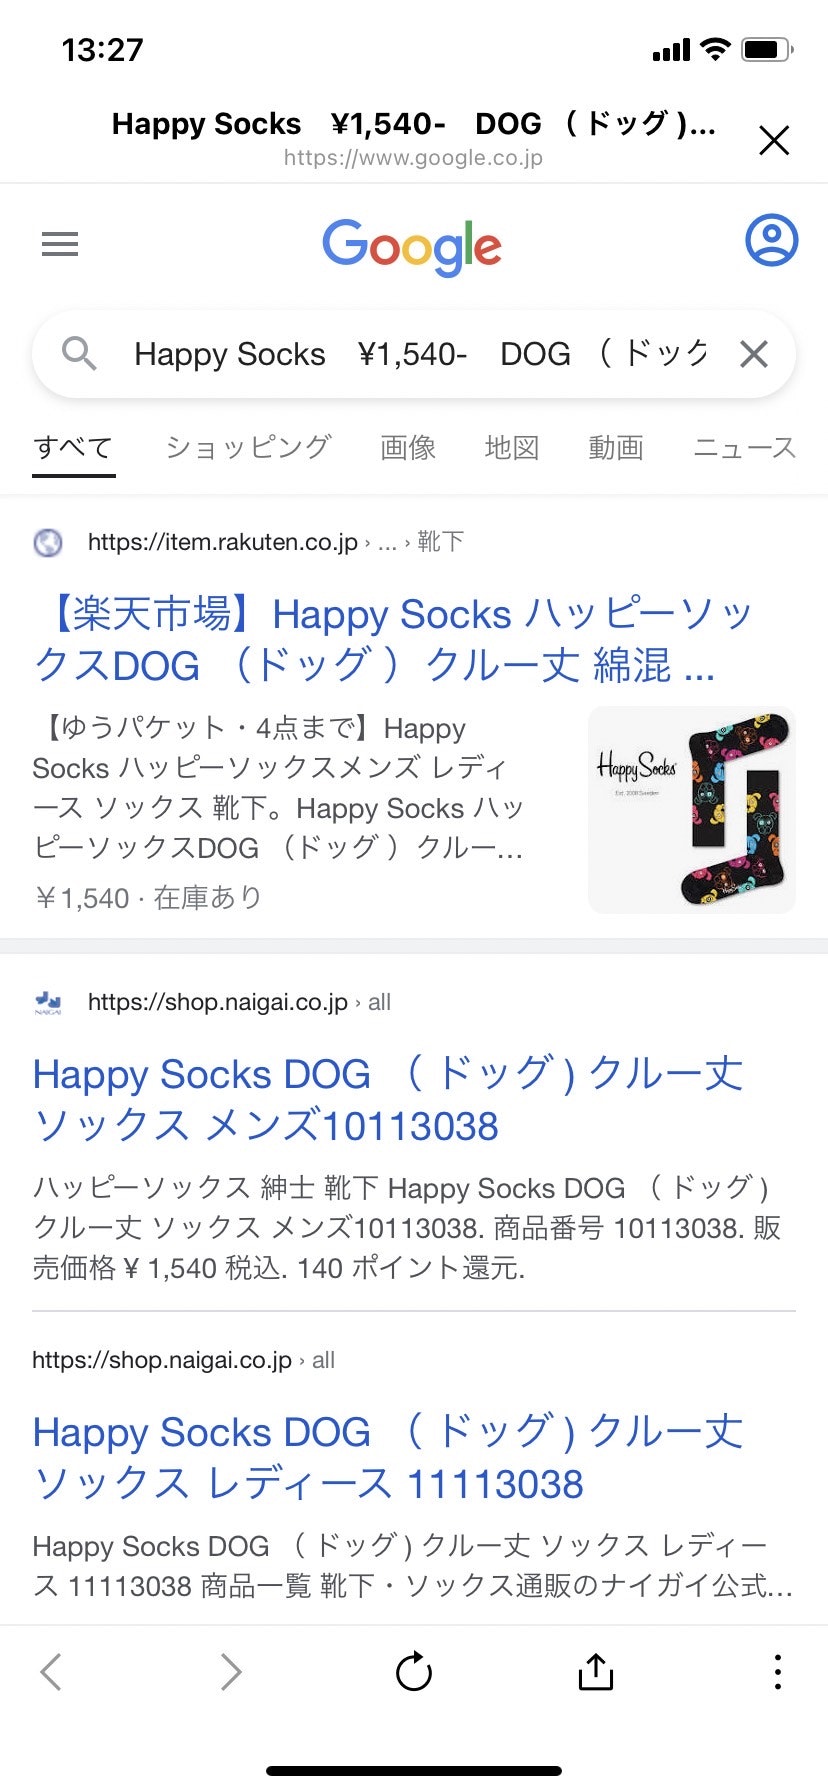
3.商品検索ボタンから検索可能です。
4.To tweetボタンからソース元に遷移可能です。

LINE友達登録後できること
1.最新の情報を確認できます。
リッチメニュー右上の最新の情報ボタンを押す→情報を確認したいメンバーを選択する→最新の情報が表示される
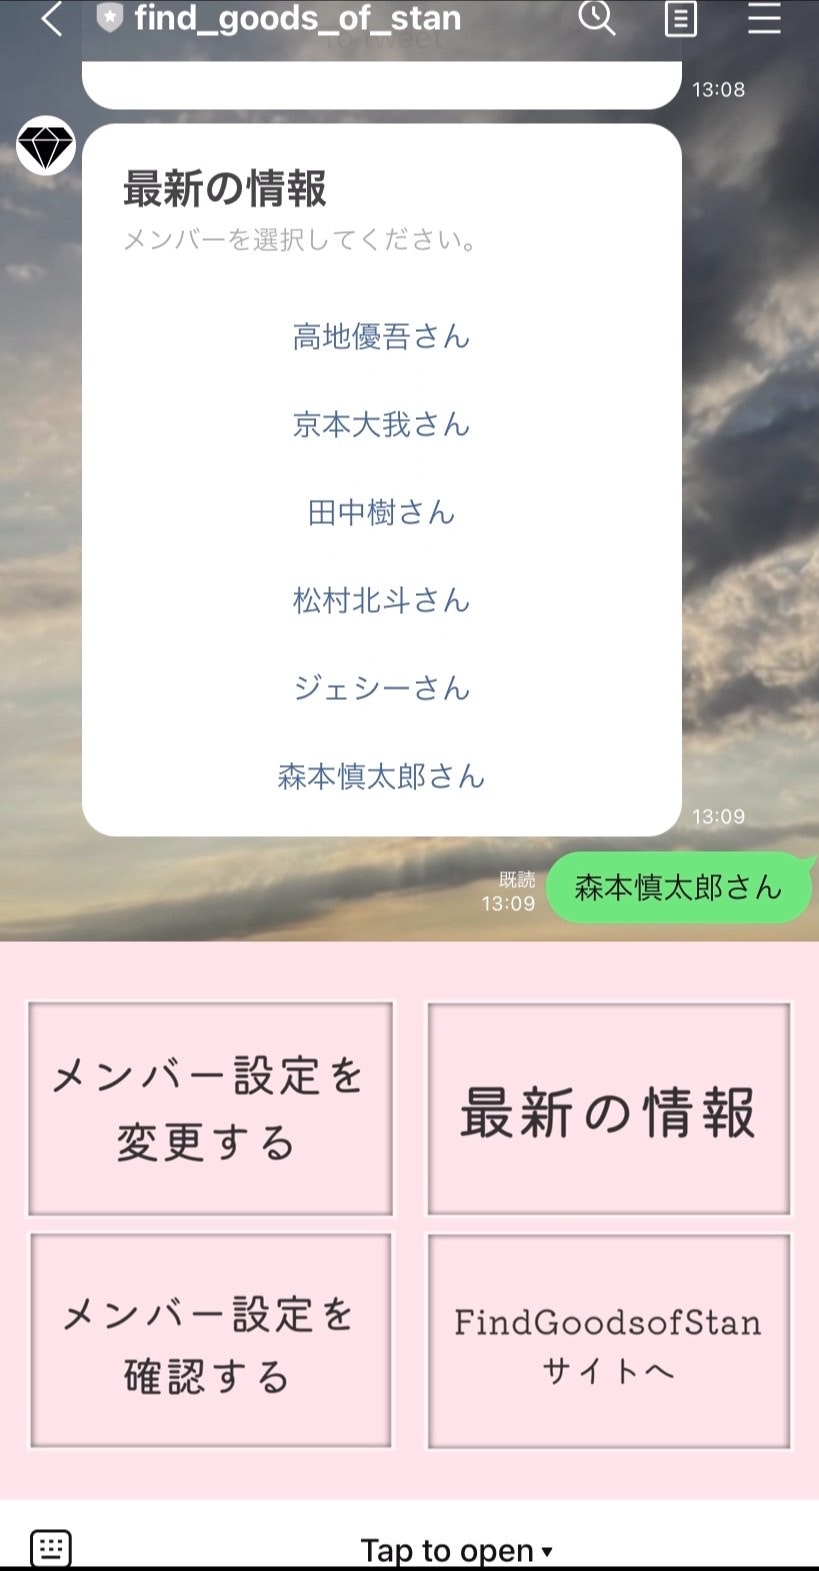
2.情報を受け取るメンバーを選択できます。
リッチメニュー左上のメンバー設定を変更するを選択する→設定したいメンバーを選択する→通知を受け取るか、受け取らないかを選択する
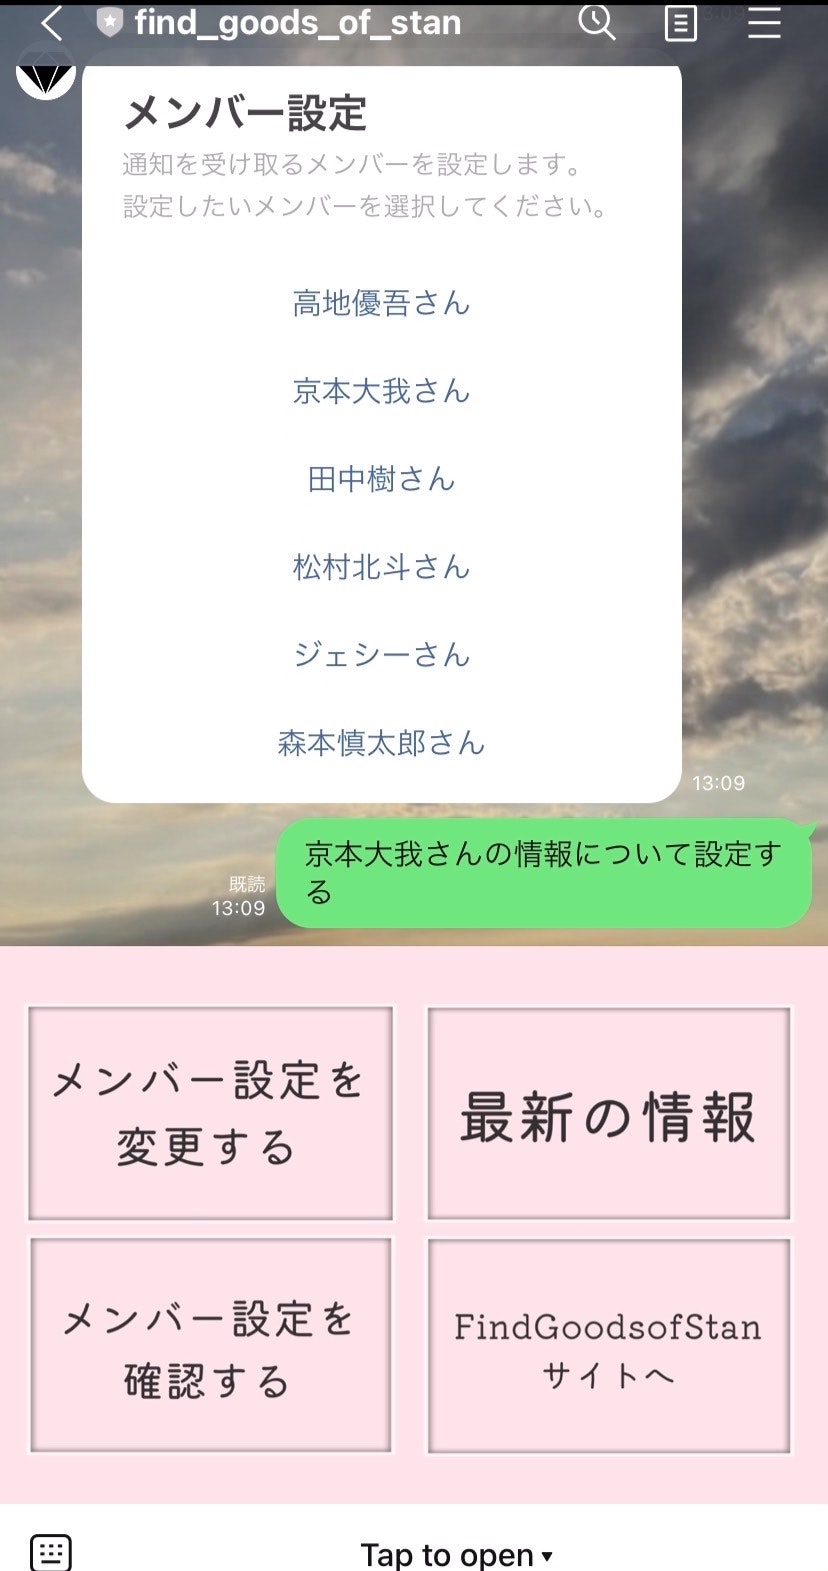

もちろん、現在の通知設定についてもリッチメニュー左下のメンバー設定を確認する から確認可能です。

使用した機能
Twitter API
LINE Messaging API
dotenv-rails'
config gem
ransack gem
sorcery gem
kaminari gem
enum_help gem
rails-i18n gem
AWS
heroku
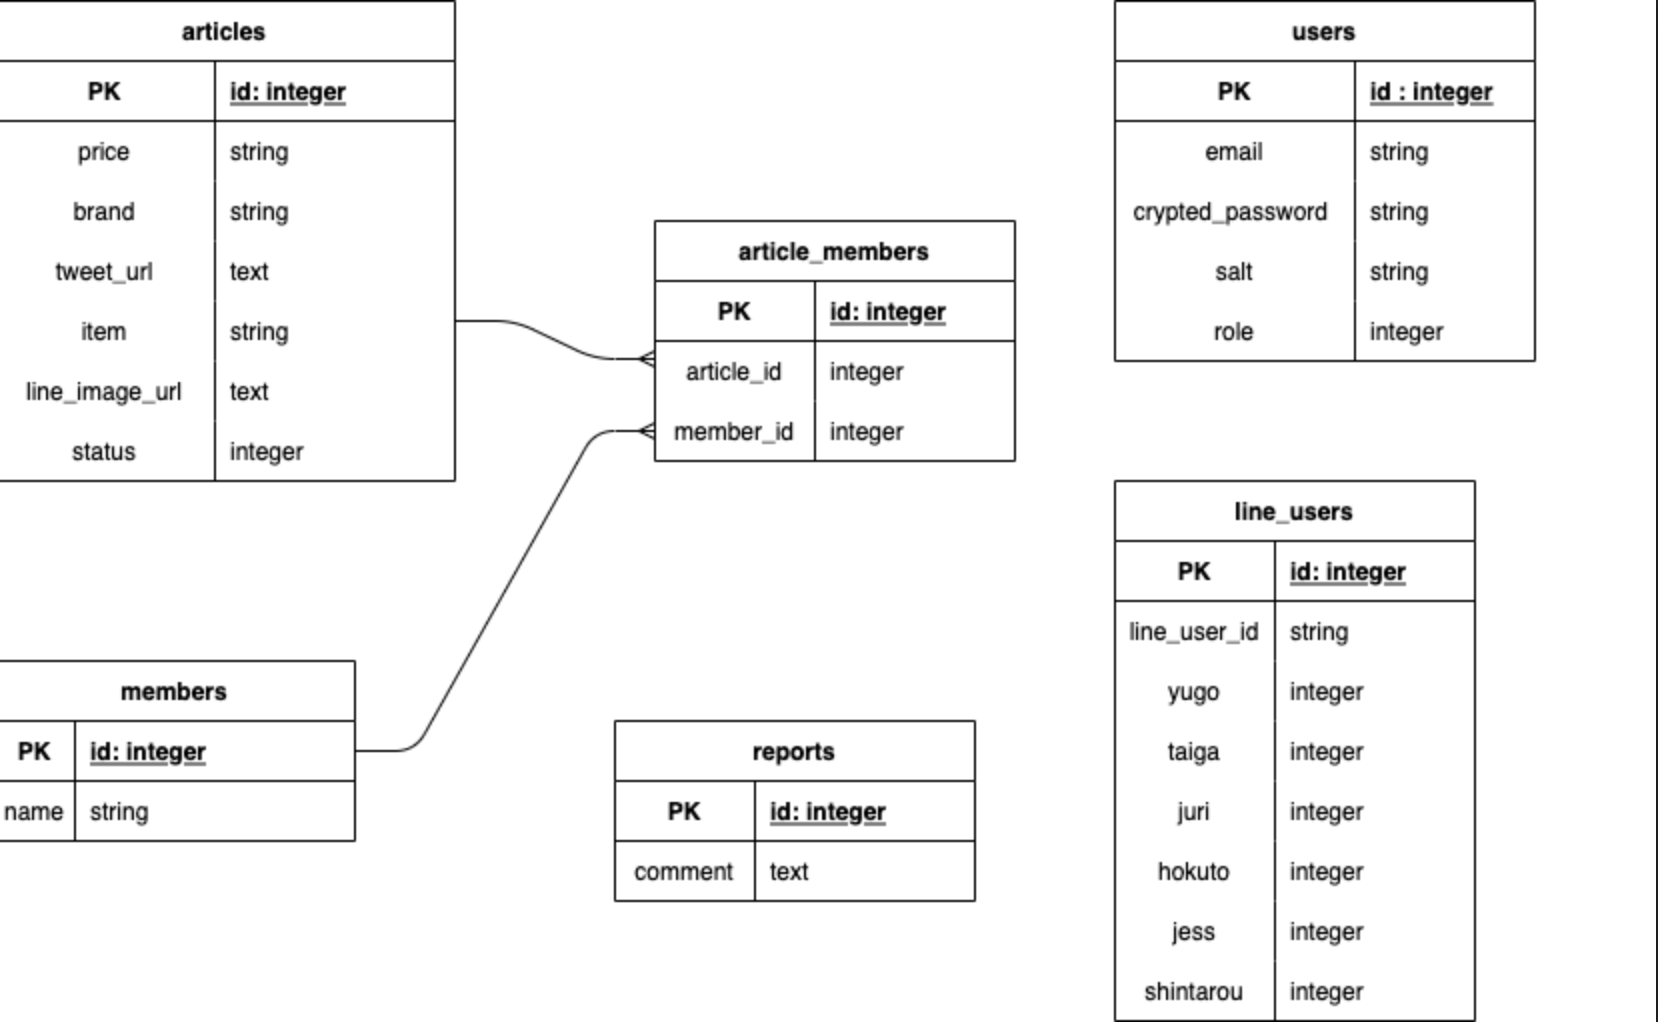
ER図
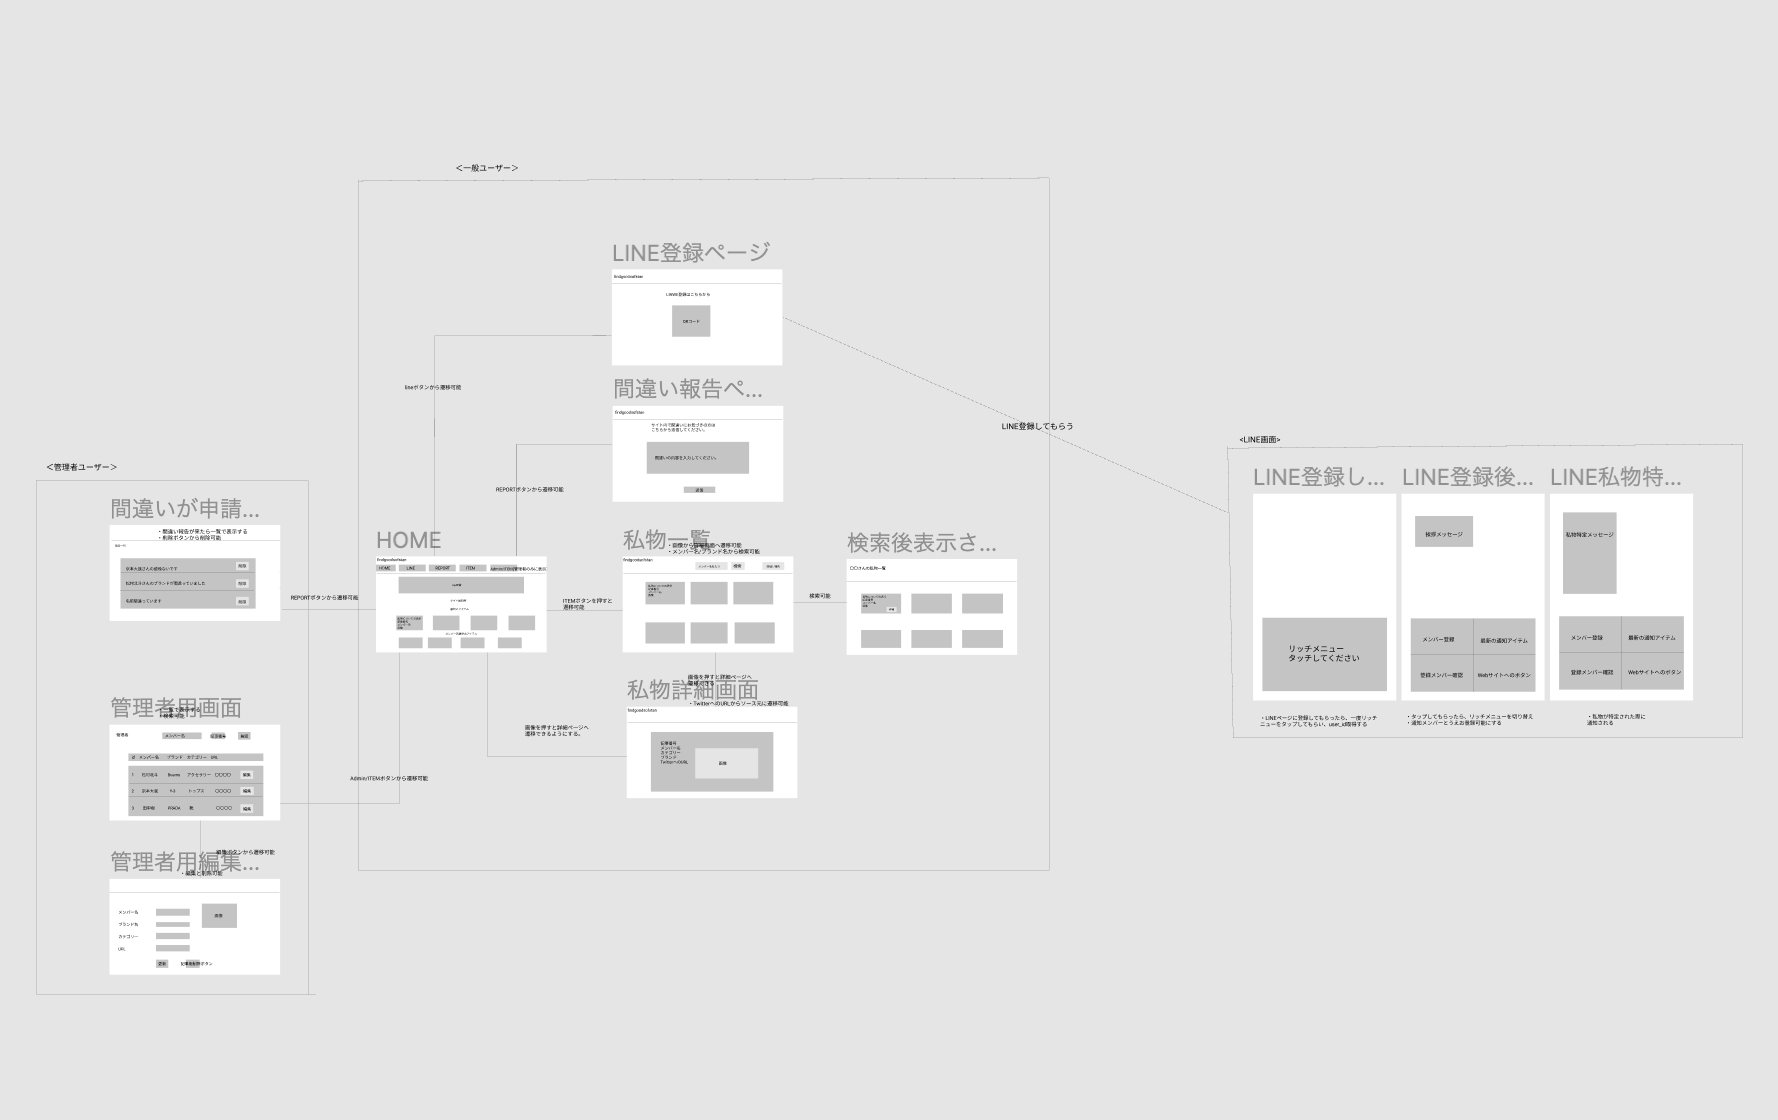
画面遷移図
Twiiter API 部分について
Twiiter APIを使用して、特定のアカウントが私物に関するツイートをした際にツイート内容や画像等を取得します。
1.gemを取得します。
# Twitter API用
gem 'twitter'
# .env 管理用
gem 'dotenv-rails'
❶twitter gemを取得
gem 'twitter'
Twitter APIを使用するので取得します。
❷dotenv-rails gemを取得します。
gem 'dotenv-rails'
環境変数(公開させたくない情報)を管理することができるgemです。
自身のアプリケーションの直下に.envファイルを作成することで、パスワードなどネット上に公開させたくない情報を扱い、自動で読み込むことが可能です。
これを使用しない場合は、自分でシェルを使用して設定しなければならないです。
設定したアクセストークン等を.envファイルに設定しておく。
# Twitter
CONSUMER_KEY=""
CONSUMER_SECRET=""
ACCESS_TOKEN=""
ACCESS_SECRET=""
git管理しているので、.gitignoreに.envを追加しておく。
gitignoreはGitで使われる特殊なファイル名で、このファイルに書かれたファイルは上から順に処理されて、Gitのトラッキングの対象外になります。
.env
2.メソッドを定義
controllerのfat化を防ぐためにメソッドはarticle.rbに作成しました。
まずは、全体を載せます。
# Twitterclient認証
  def twitter_client
    Twitter::REST::Client.new do |config|
      config.consumer_key        = ENV["CONSUMER_KEY"]
      config.consumer_secret     = ENV["CONSUMER_SECRET"]
      config.access_token        = ENV["ACCESS_TOKEN"]
      config.access_token_secret = ENV["ACCESS_SECRET"]
    end
  end

  # 指定したidのアカウントのツイート検索
  def search(id)
    @tweets = twitter_client.user_timeline(user_id: id, count: 1, exclude_replies: false, include_rts: false, contributor_details: false, result_type: "recent", locale: "ja", tweet_mode: "extended")
  end

  # 検索したツイートが私物関連のものであるか判断
  def set_article(tag)
    @for_article_tweets = []
    @tweets.each do |tweet|
      @for_article_tweets << tweet if tag.any?{|t| tweet.text.include?(t)}
    end
  end

  # 関係するメンバーを判断
  def check_member(tweet_content)
    member_ids = []
      a = ["#高地優吾"]
      b = ["#京本大我"]
      c = ["#田中樹"]

      member_ids << 1 if a.any?{ |a| tweet_content.include?(a) }
      member_ids << 2 if b.any?{ |b| tweet_content.include?(b) }
      member_ids << 3 if c.any?{ |c| tweet_content.include?(c) }
      members << Member.find(member_ids)
  end


  # ツイートに含まれる画像を保存
  def set_images(medias)
    image_urls = medias.map{ |h| h.media_url_https }
    # LINE送信用の画像url作成
    imgae_url_for_line = image_urls.first
    # imgae_url_for_line = image_urls.last
    @imgae_url_for_line_small = "#{imgae_url_for_line}:small"
    # 画像をActiveStorageに保存
    image_urls.each_with_index do |image_url, i|
      image_url_small = "#{image_url}:small"
      io = open(image_url_small)
      self.images.attach(io: io, filename: "image_#{i}")
    end
  end

    #  GoodsFindというアカウントのツイート検索
    def make_GoodsFind_article
      search("100000000000")
      tag = ["#findgoodsofstan"]
      set_article(tag)
      @for_article_tweets.each do |tweet|
        tweet_content = tweet.text.gsub(/[\r\n]/,"")
        self.tweet_url = tweet.url
        self.price = tweet_content.scan(/¥.+?-/).join(',')
        self.brand = tweet_content.scan(/(?<=\【).+?(?=\】)/).join(',')
        self.item = tweet_content.scan(/(?<=\】).+?(?=\¥)/).join(',')
        check_member(tweet_content)
        set_images(tweet.media)
        if save
          send_line(member_ids, tweet_url, @imgae_url_for_line_small)
        end
      end
    end
分解してみていきます。
❶Twitter APIの認証をします。
# Twitterclient認証
  def twitter_client
    Twitter::REST::Client.new do |config|
      config.consumer_key        = ENV["CONSUMER_KEY"]
      config.consumer_secret     = ENV["CONSUMER_SECRET"]
      config.access_token        = ENV["ACCESS_TOKEN"]
      config.access_token_secret = ENV["ACCESS_SECRET"]
    end
  end
ここの部分で、認証(gemのgithubを参考)させます。
あらかじめ1-❷で.envに設定したアクセストークン等を
consumer key (API key) consumer secret (API secret) access token access secretに定義します。
❷user_timelineメソッドを使用して、指定したidのアカウントのツイートを取得するインスタンスメソッドを作成します。
# 指定したidのアカウントのツイート検索
  def search(id)
    @tweets = twitter_client.user_timeline(user_id: id, count: 1, exclude_replies: false, include_rts: false, contributor_details: false, locale: "ja", tweet_mode: "extended")
  end
twitter_client → 2-❶で認証した際に設定しました。
user_timeline screen_nameパラメータや user_idパラメータで指定したユーザーが投稿した 最新のツイート集を取得します。
user_id: id → 検索結果を取得するユーザーのID
count: 1 → 取得するツイート数を設定します。
exclude_replies: false→ リプライを含まないように設定します。
include_rts: false → falseを設定すると、タイムラインはリツイートを表示しません。
contributor_details: false → ライター機能(複数人による投稿)を利用したツイートの場合、contributorsプロパティにユーザー情報の詳細を含めた内容にします。
locale: "ja" → 日本語のツイートを取得します。
tweet_mode: "extended" → 140文字以上のツイートを取得します。(ツイートの前内容を取得したかったので!)
❸ ❷で取得したツイートが私物関連のものであるのか判断するメソッドを作成します。tagにはツイートに必ず含まれている#から始まるタグを配列にして引数に渡します。
# 検索したツイートが私物関連のものであるか判断
  def set_article(tag)
    @for_article_tweets = []
    @tweets.each do |tweet|
      @for_article_tweets << tweet if tag.any?{|t| tweet.text.include?(t)}
    end
  end
ここからまた分解してみていきます
(1)私物関連のツイートであった場合、配列の形で次のメソッドで使用したいので空の配列を用意しておく。
@for_article_tweets = []
(2)any?メソッドとeachメソッドと三項演算子を使用して判断していきます。
2-❷で@tweetsの中に取得したツイートを代入しているので使用していきます。
@tweets.each do |tweet|
  @for_article_tweets << tweet if tag.any?{|t| tweet.text.include?(t)}
end
any?メソッド →
すべての要素が偽である場合に false を返します。真である要素があれば、ただちに true を返します。
このような形で、1つでも真である要素があればtrueを返します。
irb(main):095:0>  [100, 200, 300].any? { |v| v > 200 }
=> true
irb(main):096:0> ["aaa","bbb","ccc"].any? {|v| v.include?("a")}
=> true
これに三項演算子を使用すると...
まず上のターミナルで試したものに三項演算子を加えてみます。
このような形で、trueであればifの前の処理を行ってくれます。
irb(main):107:0> puts "ok" if [100, 200, 300].any? { |v| v > 200 }
ok
=> nil
irb(main):108:0> puts "YES!" if ["aaa","bbb","ccc"].any? {|v| v.include?("a")}
YES!
=> nil
配列部分をインスタンスに代入して使用してみます。
tweet_contentsにtagが含まれているかどうか...
# インスタンスに入れてみる
irb(main):125:0> tweet_contents = ["aaa","bbb","ccc"]
=> ["aaa", "bbb", "ccc"]
irb(main):126:0> tag = ["ccc"]
=> ["ccc"]
# any?メソッドが正しく使用できるか試してみる
irb(main):127:0> tag.any?{ |t| tweet_contents.include?(t)}
=> true
# 次は三項演算子も使用してみる
irb(main):128:0> puts "ok" if tag.any?{ |t| tweet_contents.include?(t)}
ok
=> nil
こんな感じで使用できました。
ですがこれだと、「取得したツイートの配列の中に指定したtagが含まれている。」と言うことしかわからず、「取得したツイートの配列の中のどれに含まれているのかわからないです。
なので、eachメソッドを使用して@tweetsの要素を一つずつ渡し、判断していきます。
tweets = ["aaa","bbb","ccc"]
tag = ["ccc"]
results = []

# tweetsに入っている要素を順番に取得し、変数tweetに格納しブロック内の処理を実行する。変数tweetにtag内の文字が含まれていれば、resultsの中に追加している。
tweets.each do |tweet|
 results << tweet if tag.any?{ |t| tweet.include?(t)}
end

puts results
=>ccc
最終的に私が作成したメソッドだと...
[1]2-❷で定義した@tweets(取得したツイート)をeachメソッドを使用し、@tweetsに入っている要素を順番に取得し、変数(tweet)に格納しブロック内の処理を実行する。
[2]ブロック内では、要素を格納した変数(tweet)に対し引数(tag)が含まれているかどうかをany?メソッドを使用して判断する。
[3]true(含まれている)であれば、@for_article_tweetsに追加していく。
def set_article(tag)
    @for_article_tweets = []
    @tweets.each do |tweet|
      @for_article_tweets << tweet if tag.any?{|t| tweet.text.include?(t)}
    end
  end
このような形になってます。
❸ツイートに関係しているメンバーを判断していきます。名前は変えてます。
# 関係するメンバーを判断
  def check_member(tweet_content)
  #引数に、取得したツイートの内容を渡します。
    member_ids = []
      a = ["#高地優吾"]
      b = ["#京本大我"]
      c = ["#田中樹"]

      member_ids << 1 if a.any?{ |a| tweet_content.include?(a) }
      member_ids << 2 if b.any?{ |b| tweet_content.include?(b) }
      member_ids << 3 if c.any?{ |c| tweet_content.include?(c) }
      #取得したツイートの内容に、メンバーの名前のタグが含まれていれば、seedファイルで初期に登録したメンバーのid(1,2,3)がそれぞれ追加されるようになっている。
      (self.は略)members << Member.find(member_ids)
      #メンバーのidを格納したmember_idsを使用してMemberを取得し、membersに追加する。
  end
any?メソッド → 2❸(2)でまとめてあります。
<<メソッド →
関連付けをしたので、追加されたメソッド
collection<<メソッドは、1つ以上のオブジェクトをコレクションに追加します。このとき、追加されるオブジェクトの外部キーは、呼び出し側モデルの主キーに設定されます。
❹ ツイートに含まれる画像を保存します
# ツイートに含まれる画像を保存
  def set_images(medias)
    image_urls = medias.map{ |h| h.media_url_https }
    # LINE送信用の画像url作成
    imgae_url_for_line = image_urls.first
    @imgae_url_for_line_small = "#{imgae_url_for_line}:small"
    # 画像をActiveStorageに保存
    image_urls.each_with_index do |image_url, i|
      image_url_small = "#{image_url}:small"
      io = open(image_url_small)
      self.images.attach(io: io, filename: "image_#{i}")
    end
  end
ここが割と詰んだ部分です。
また分解してみていきます。
(0)前提として...
例えば2-❶のように認証した後、
@tweets = twitter_client.user_timeline(user_id: "(ユーザーID)", count: 1, 〜2-❷と同様)
=> [#<Twitter::Tweet id=1461747303736242176>]

# @tweetは配列(array)なので、`first`で一つ抜き出して試してみます。
irb(main):019:0> @tweet = @tweets.first
=> #<Twitter::Tweet id=1461747303736242176>

# .textを使用すると、ツイートの内容を取得できます。
irb(main):021:0> puts @tweet.text
2021/11/20 YouTube等
【adidas】
ジャージジャケット ポルトガル代表
¥不明
※画像使わせて頂きました
 https://t.co/xvYNvE45sX
=> nil
ここからが本題です。mediaを使用すると何ができるかをまとめます。@tweetに関しては↑のターミナルと続いているものとします。
取得したツイート@tweetに対して@tweet.mediaと使用するとTwitter::Media::Photoオブジェクトが取得できます。(@tweetに含まれている画像についての情報が取得できます。)
Twitter::Media::Photoオブジェクト↓のようにこれも配列(array)です。
irb(main):023:0> @tweet.media
=> [#<Twitter::Media::Photo id=1461747300020420608>, #<Twitter::Media::Photo id=1461747300016222208>]
Twitter::Media::Photoオブジェクトのメソッドはattrs, id, media_url, media_url_https, sizesなどがあります。
attrsメソッド → Twitter::Media::Photoの中身を見れます。ハッシュとして扱えます。
# 配列なのでわかりやすくするためにfirstで最初の画像を取得します。
irb(main):024:0> @tweet.media.first
=> #<Twitter::Media::Photo id=1461747300020420608>

irb(main):025:0> @tweet.media.first.attrs
=> {:id=>1461747300020420608,
:id_str=>"1461747300020420608",
:indices=>[141, 164],
:media_url=>"http://pbs.twimg.com/media/FEkrbLkagAAFXVH.jpg",
:media_url_https=>"https://pbs.twimg.com/media/FEkrbLkagAAFXVH.jpg",
:url=>"https://t.co/xvYNvE45sX",
:display_url=>"pic.twitter.com/xvYNvE45sX",
:expanded_url=>"https://twitter.com/GoodsFind/status/1461747303736242176/photo/1",
:type=>"photo",
:sizes=>{
  :thumb=>{:w=>150, :h=>150, :resize=>"crop"},
  :medium=>{:w=>784, :h=>732, :resize=>"fit"},
  :large=>{:w=>784, :h=>732, :resize=>"fit"},
  :small=>{:w=>680, :h=>635, :resize=>"fit"}
 }
}
id, media_url, media_url_https, sizesを使用してみます。
# idを取得できる
irb(main):026:0> @tweet.media.first.id
=> 1461747300020420608

# 画像のurlを取得できる(httpから連なる)
irb(main):027:0> @tweet.media.first.media_url
=> #<Addressable::URI:0x3fce24c8e664 URI:http://pbs.twimg.com/media/FEkrbLkagAAFXVH.jpg>

# 画像のurlを取得できる(httpsから連なる)
irb(main):028:0> @tweet.media.first.media_url_https
=> #<Addressable::URI:0x3fce1ffa571c URI:https://pbs.twimg.com/media/FEkrbLkagAAFXVH.jpg>

# 画像のサイズを取得できる
irb(main):030:0> @tweet.media.first.sizes
=> {:thumb=>#<Twitter::Size h=150 w=150>, :medium=>#<Twitter::Size h=732 w=784>, :large=>#<Twitter::Size h=732 w=784>, :small=>#<Twitter::Size h=635 w=680>}
media_urlの返値であるAddressable::URIオブジェクトはURIオブジェクトみたいなもので、to_sでURL文字列になります。
前提が長くなりましたが
このインスタンスメソッドの引数の(medias)には、
def set_images(medias)
使用するときに、このように取得したツイートに対して.mediaを使用してTwitter::Media::Photoオブジェクトを渡します。
set_images(tweet.media)
次に行きます。
(1)media_url_httpsメソッド(画像のurlを取得できる(httpsから連なる))
(2)の最後に書いたように、引数のmediasここにはTwitter::Media::Photoオブジェクトが渡されています。
[medias = Twitter::Media::Photoオブジェクト]に対してmapメソッドを使用し各要素に対してブロック{}内の処理を実行させ、結果を全て含む配列を返します。
もっと砕いた言葉にすると
→mapメソッドを使用し、mediasに含まれているTwitter::Media::Photoオブジェクト一つ一つに対して、ブロック内のmedia_url_httpsメソッドを使用し、httpsから連なる画像のURLの配列を返し、image_urlsに代入します。
image_urls = medias.map{ |h| h.media_url_https }
mapメソッド
各要素に対してブロックを評価した結果を全て含む配列を返します。
(2)LINE Messaging APIで使用する画像を準備
LINE Messaging APIで使用する画像をimgae_url_for_lineに代入します。
今回は最初の画像を使用します。
imgae_url_for_line = image_urls.first
(3)LINE Messaging APIで使用する画像のサイズを指定します。
今回は一番小さいサイズを指定したいので、:smallを使用します。
ここは単純で、media_url_httpsメソッドを使用し、httpsから連なる画像のURLの最後に:smallをつければサイズ調整ができます。
ここでは、(2)で定義したimgae_url_for_lineの最後に:smallを結合させています。
@imgae_url_for_line_small = "#{imgae_url_for_line}:small"
2-❹(0)の再記載になりますが、ここに:smallが含まれています。
irb(main):025:0> @tweet.media.first.attrs
=> {:id=>1461747300020420608,
:id_str=>"1461747300020420608",
:indices=>[141, 164],
:media_url=>"http://pbs.twimg.com/media/FEkrbLkagAAFXVH.jpg",
:media_url_https=>"https://pbs.twimg.com/media/FEkrbLkagAAFXVH.jpg",
:url=>"https://t.co/xvYNvE45sX",
:display_url=>"pic.twitter.com/xvYNvE45sX",
:expanded_url=>"https://twitter.com/GoodsFind/status/1461747303736242176/photo/1",
:type=>"photo",
# ここの
:sizes=>{
  :thumb=>{:w=>150, :h=>150, :resize=>"crop"},
  :medium=>{:w=>784, :h=>732, :resize=>"fit"},
  :large=>{:w=>784, :h=>732, :resize=>"fit"},
# ここです!!!
  :small=>{:w=>680, :h=>635, :resize=>"fit"}
 }
}
(4)画像をActiveStorageに保存
まず説明を書いて、その後に詳しくまとめます。
image_urls.each_with_index do |image_url, i|
# image_urls → httpsから連なる画像のURLの配列(2-❹(1)(2)で設定済み)
  image_url_small = "#{image_url}:small"
  #サイズをsmallに指定
  io = open(image_url_small)
  #openメソッドを使用し、取得しているURLをファイルオブジェクトとして返す。
  self.images.attach(io: io, filename: "image_#{i}")
  #attachメソッドを使用してimagesに取得した画像を追加する
end
(4)-1
image_urls.each_with_index do |image_url, i|
# image_urls → httpsから連なる画像のURLの配列(2-❹(1)(2)で設定済み)
  image_url_small = "#{image_url}:small"
  #サイズをsmallに指定
each_with_indexメソッド → eachループで回しつつ、それぞれのデータに番号を振りたいのでこのメソッドを使用しました。(ファイル名が同じ名前だと保存されない。)
["いちご", "なし" , "ブドウ"].each_with_index do |item, i|
  puts "#{i}番目のフルーツは、#{item}です"
end

=>0番目のフルーツは、いちごです
=>1番目のフルーツは、なしです
=>2番目のフルーツは、ブドウです
(4)-2
問題はこの部分ですね...ここは2行をまとめて書いた方がわかりやすいと思うのでまとめます。
io = open(image_url_small)
# openメソッドを使用し、取得しているURLをファイルオブジェクトとして返す。
self.images.attach(io: io, filename: "image_#{i}")
# attachメソッドを使用してimagesに取得した画像を追加する
まず、self.images.attach(io: io, filename: "image_#{i}")は以下を参照に作成しています。
HTTPリクエスト経由では配信されないファイルをアタッチする必要が生じる場合があります。たとえば、ディスク上で生成したファイルやユーザーが送信したURLからダウンロードしたファイルをアタッチしたい場合や、モデルのテストでfixtureファイルをアタッチしたい場合などが考えられます。これを行うには、オープンIOオブジェクトとファイル名を1つ以上含むハッシュを渡します。
@message.image.attach(io: File.open('/path/to/file'), filename: 'file.pdf')
以上から、io = open(image_url_small)では、self.images.attach(io: io, filename: "image_#{i}")のio: ioの部分に渡すものを作成します。
open-uriライブラリを使用します。
http/ftp上のURLを普通のファイルのように開き、開いたファイルオブジェクトは StringIO もしくは Tempfile になります。
io = open(image_url_small)
image_url_smallに入ったAddressable::URIオブジェクトに対してopenメソッドを実行します。
openメソッド →
name が http:// や https://、ftp:// で始まっている文字列なら URI のリソースを取得した上で StringIO オブジェクトまたは Tempfile オブジェクトとして返します。返されるオブジェクトは OpenURI::Meta モジュールで extend されています。
ターミナルで中身を確認してみると(サイズはsmallにしてない状態です)
irb> image_url
=> #<Addressable::URI:0x3fce24c8e664 URI:http://pbs.twimg.com/media/FEkrbLkagAAFXVH.jpg>

irb> io = open(image_url)
=> #<Tempfile:/var/folders/gp/jc5cbzvd0v77std1f228cw080000gn/T/open-uri20211130-72880-1f2t1e>

irb> p io
# <Tempfile:/var/folders/gp/jc5cbzvd0v77std1f228cw080000gn/T/open-uri20211130-72880-1f2t1e>
# Tempfileについて(テンポラリファイル(一時的なファイル)を操作するクラスです。画像などのダウンロードやアップロード処理の中で、一時的にファイルとして扱いたい場合などに利用できます。)
参照
❺ ❶❷❸❹で作成したメソッドとツイートIDを使用してツイートと画像を取得します。
#  GoodsFindというアカウントのツイート検索
    def make_GoodsFind_article
      search("100000000000")
      #searchメソッドにアカウントの idを渡して最新のツイートを取得させる。
      tag = ["#findgoodsofstan"]
      set_article(tag)
      #tagにそのアカウントが私物特定の時に使用するタグを渡し、set_articleメソッドを使用して私物特定のツイートかどうかを確認する。

# 以下↓はアカウントごとに仕様が異なるのでメソッドにはしなかった。
# それぞれ正規表現を使用してツイート内容から必要な文字を抜き取る。
      @for_article_tweets.each do |tweet|
        tweet_content = tweet.text.gsub(/[\r\n]/,"")
        self.tweet_url = tweet.url
        self.price = tweet_content.scan(/¥.+?-/).join(',')
        self.brand = tweet_content.scan(/(?<=\【).+?(?=\】)/).join(',')
        self.item = tweet_content.scan(/(?<=\】).+?(?=\¥)/).join(',')
        check_member(tweet_content)
        #どのメンバーの私物か判断させる。
        set_images(tweet.media)
        #tweet.mediaを引数にし、set_imageメソッドでがそうを登録させる。
        if save  #saveできれば、lineで送信する。
          send_line(member_ids, tweet_url, @imgae_url_for_line_small)
        end
      end
    end
❻ saveできたらLINEを送信する
Twitter APIで取得した情報をLINE APIで送信する。
ここの部分です。
if save  #saveできれば、lineで送信する。
  send_line(member_ids, tweet_url, @imgae_url_for_line_small)
end
LineUserモデルにline_user_idカラムを作成し、そこでLineのuser_idを管理しているので、そのデータを使用し、送信先を判断します。(LINE API部分については、次の記事についてまとめます。)
def send_line(member_ids, tweet_url, @imgae_url_for_line_small)
   #Line認証
    client = Line::Bot::Client.new { |config|
      config.channel_secret = ENV["LINE_CHANNEL_SECRET"]
      config.channel_token = ENV["LINE_CHANNEL_TOKEN"]
    }
    #記事に該当するメンバー判断
    unless member_ids.empty?
      ids = member_ids.map(&:to_s)
    end

    #通知onにしているユーザーのline_user_idをにまとめる
    names = []
    user_ids = []

    if ids.include?("1")
      names << "高地優吾さん"
      LineUser.yugo_on.each {|lineuser| user_ids << lineuser.line_user_id unless user_ids.include?(lineuser.line_user_id)}
    end
    if ids.include?("2")
      names << "京本大我さん"
      LineUser.taiga_on.each {|lineuser| user_ids << lineuser.line_user_id unless user_ids.include?(lineuser.line_user_id)}
    end

    if ids.include?("3")
      names << "田中樹さん"
      LineUser.juri_on.each {|lineuser| user_ids << lineuser.line_user_id unless user_ids.include?(lineuser.line_user_id)}
    end

    if ids.include?("4")
      names << "松村北斗さん"
      LineUser.hokuto_on.each {|lineuser| user_ids << lineuser.line_user_id unless user_ids.include?(lineuser.line_user_id)}
    end

    if ids.include?("5")
      names << "ジェシーさん"
      LineUser.jess_on.each {|lineuser| user_ids << lineuser.line_user_id unless user_ids.include?(lineuser.line_user_id)}
    end

    if ids.include?("6")
      names << "森本慎太郎さん"
      LineUser.shintarou_on.each {|lineuser| user_ids << lineuser.line_user_id unless user_ids.include?(lineuser.line_user_id)}
    end


    word = "#{self.brand} #{self.price} #{self.item}"
    enc = URI.encode_www_form_component(word)
    url = "https://www.google.co.jp/search?q="
    search_url = url+enc

    self.brand.present? ? brand = self.brand : brand = ""
    self.price.present? ? price = self.price : price = "  "

    message =
      {
      "type": "flex",
      "altText": "#{names.join('と')}の私物が特定されました!(Twitter)",
      "contents": {
        "type": "bubble",
        "hero": {
          "type": "image",
          "url": tweet_image_url,
          "size": "full",
          "aspectRatio": "20:28",
          "aspectMode": "cover"
        },
        "body": {
          "type": "box",
          "layout": "vertical",
          "spacing": "sm",
          "contents": [
            {
              "type": "text",
              "wrap": true,
              "weight": "bold",
              "size": "xl",
              "text": "#{names.join('と')}着用"
            },
            {
              "type": "box",
              "layout": "vertical",
              "contents": [
                {
                  "type": "text",
                  "text": "#{brand}",
                  "wrap": true,
                  "weight": "bold",
                  "size": "xl",
                  "flex": 0
                },
                {
                  "type": "text",
                  "text": "#{price}",
                  "wrap": true,
                  "weight": "bold",
                  "size": "sm",
                  "flex": 0
                }
              ]
            }
          ]
        },
        "footer": {
          "type": "box",
          "layout": "vertical",
          "spacing": "sm",
          "contents": [
            {
              "type": "button",
              "style": "secondary",
              "action": {
                "type": "uri",
                "label": "商品検索",
                "uri": "#{search_url}"
              },
              "color": "#FCE3E7",
              "height": "md"
            },
            {
              "type": "button",
              "action": {
                "type": "uri",
                "label": "To tweet",
                "uri": "#{tweet_url}"
              }
            }
          ]
        }
      }
    }
    client.multicast(user_ids, message)
  end
user_idsには、情報が必要なユーザーのLINE user_idが入るので、multicastメソッドを使用して送信します。
LINE API部分は次の記事でまとめています。