Node-RED Starterは非常に便利ですが、Watsonに関しては最新のAPIに追随しているとは言いがたい状況です。たとえば、現時点ではNatural Language Classifier (NLC)のノード定義がありません。そこで、NLCのノードを自作して追加してみました。
前提
- Bluemixアカウント(IBM-ID)の取得
- Cloud Foundry CLI (cf)のインストール
- Curlのインストール
- jqのインストール
サンプル分類器の作成
あとで使うためのサンプル分類器を作ります。
ここでは、IBM Watsonチームが提供している、天気に関するサンプル(weather_data_train.csv)を借用して、天気に関する質問文の分類器を作成します。
#
# 分類器に学習させるサンプルCSVを取得
#

# IBM Watsonチームのサンプルプロジェクトをクローン
$ git clone https://github.com/watson-developer-cloud/natural-language-classifier-nodejs.git

# ファイルの中身を確認
$ cat natural-language-classifier-nodejs/training/weather_data_train.csv

#
# NLCサービスを作成
#

# サービス、およびサービスにアクセスするためのcredential情報を作成
$ cf create-service natural_language_classifier standard weather-classifier
$ cf create-service-key weather-classifier credentials

# Credential情報の中身を確認し、コマンドの結果の"username"と"password"を以下で使用
$ cf service-key weather-classifier credentials

#
# 天気に関する質問文の分類器を作成
#

# 分類器を作成(curlが出力する"classifier_id"はあとで分類器を特定するために使用)
$ curl -s -u "{usernamne}:{password}" -X POST -F training_data=@natural-language-classifier-nodejs/training/weather_data_train.csv -F training_metadata="{\"language\":\"en\",\"name\":\"weather\"}" https://gateway.watsonplatform.net/natural-language-classifier/api/v1/classifiers

# 学習状況を確認
# このコマンドが出力するjsonにある"status"が"Training"から"Available"に変わった時点で学習が終了
$ curl -s -u "{usernamne}:{password}" https://gateway.watsonplatform.net/natural-language-classifier/api/v1/classifiers/{classifier_id}

# 分類器を使ってみる("class_name"と"confidence"を含むjsonが出力されればOK)
$ curl -s -u "{usernamne}:{password}" -X POST -H "Content-Type:application/json" -d "{\"text\":\"Is it cloudy today?\"}" https://gateway.watsonplatform.net/natural-language-classifier/api/v1/classifiers/{classifier_id}/classify | jq '.classes[0]'
Node-REDアプリケーションの作成
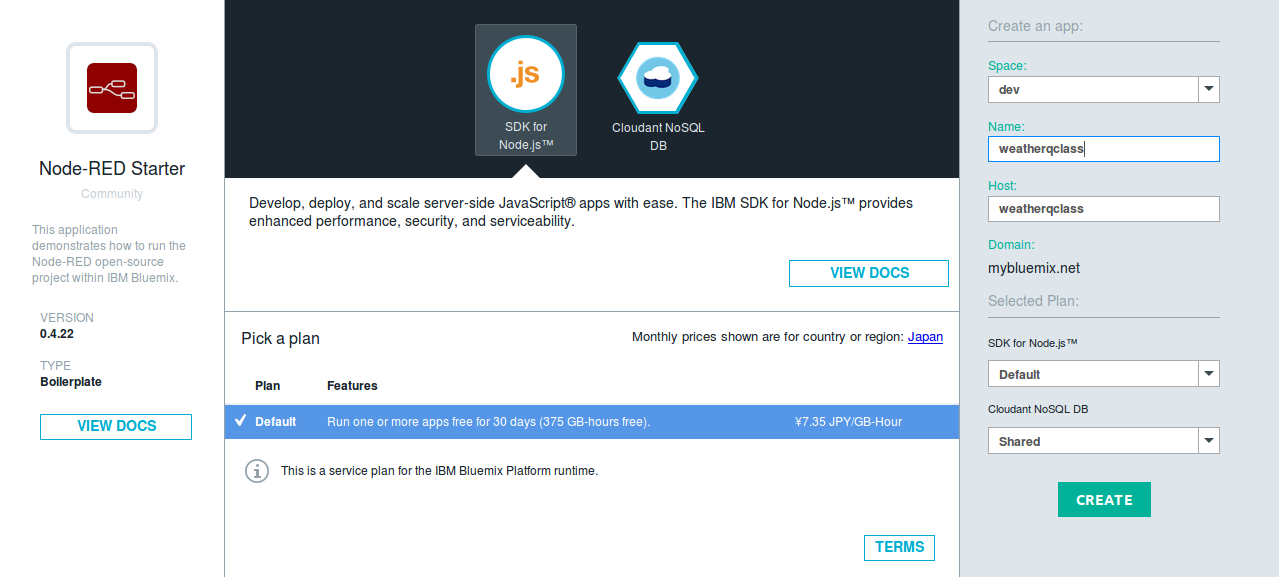
BluemixコンソールのCATALOGからNode-RED Starterアプリケーションを作成します。
CATALOGでは次のアイコン(Node-RED Starter / Community BETA)です。
このアイコンを選択するとアプリケーション設定画面に移りますので、プロジェクトの名前(この例では"weatherqclass")のみ入力してアプリケーションを作成します。
Node-RED Starterでは自動的にアプリケーションのステージングが開始されます。画面には「Your application is staging ...」と出ますので、暫く待っていると、「Your app is running」に変わります。
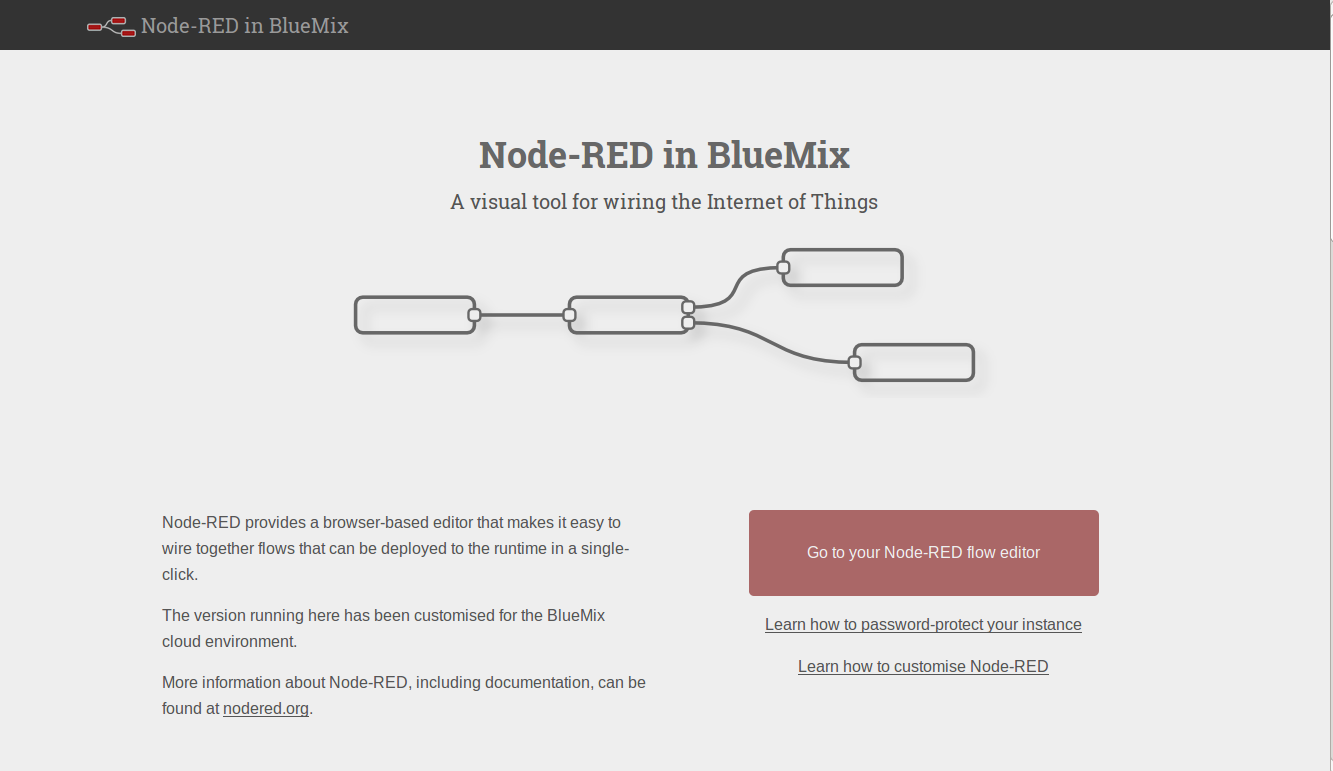
それでは、ブラウザでhttp://weatherqclass.mybluemix.net/に接続してみましょう。
右の方にある「Goto your Node-RED flow editor」をクリックすると、フローエディタが開きます。
フローエディタの左側にノード一覧があり、この最下部にWatsonサービス群のノードがあります。
NLCはありません。今回のゴールはここにNLCノードを作成し、フローで使ってみることです。
Node-REDフローエディタへのノードの追加
Node-REDアプリケーションのソースファイルのダウンロード
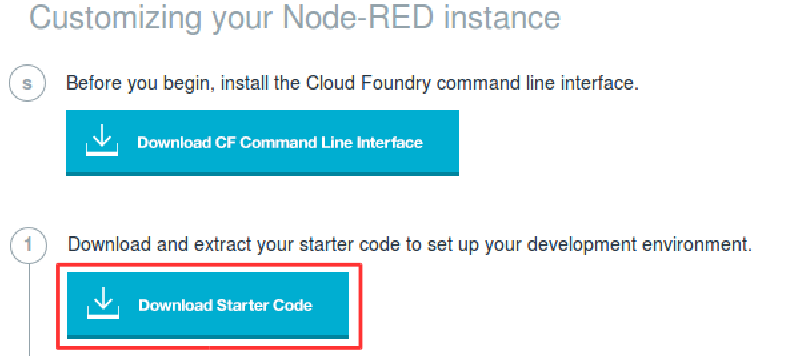
まず、フローエディタのソースをローカル開発環境にダウンロードします。具体的には、さきほど「Your app is running」と表示された画面(左側のメニューでは「Start Coding」)に戻り、「Download Starter Code」と記されたボタンをクリックします。
すると、ブラウザのダウンロードフォルダにzipがダウンロードされますので、これを適当なディレクトリに展開します。
$ mkdir weatherqclass
$ cd weatherqclass
$ unzip ~/Downloads/weatherqclass.zip
ノードを追加する手順
ノードを追加する手順は以下の通りです。
- ノードの外形的表現(nodes/nlc.html)
- ノードの振る舞い表現(nodes/nlc.js)
- ノードのアイコン(nodes/icons/nlc.png)
- パッケージへの追加(package.json)
なお、すべてを変更したソースのサンプルがgithub上に置いてあります。
1. ノードの外形的表現(nodes/nlc.html)
ノードの外形的表現は、nodesディレクトリ以下にhtmlで作成します。このhtmlは大きく3つのscriptから構成します。
(1) 設定項目と設定ダイアログの名称、アイコン、プレイスホルダ等
<script type="text/x-red" data-template-name="natural-language-classifier">
  <div class="form-row">
    <label for="node-input-name"><i class="fa fa-tag"></i>Name</label>
    <input type="text" id="node-input-name" placeholder="Name">
  </div>
  <div class="form-row">
    <label for="node-input-username"><i class="fa fa-user"></i>Username</label>
    <input type="text" id="node-input-username" placeholder="NLC Username">
  </div>
  <div class="form-row">
    <label for="node-input-password"><i class="fa fa-key"></i>Password</label>
    <input type="password" id="node-input-password" placeholder="NLC Password">
  </div>
  <div class="form-row">
    <label for="node-input-classifierid"><i class="fa fa-tag"></i>Classifier ID</label>
    <input type="text" id="node-input-classifierid" placeholder="NLC Classifier ID">
  </div>
</script>
(2) ヘルプの記述
<script type="text/x-red" data-help-name="natural-language-classifier">
  <p>The natural language indentifier service.</p>
</script>
(3) エディタ上のノードの基本的な設定
<script type="text/javascript">
  (function() {
    RED.nodes.registerType('natural-language-classifier', {
      category: 'IBM_Watson',
      defaults: {
        name: { value: "" },
        username: { value: "" },
        password: { value: "" },
        classifierid: { value: "", required: true }
      },
      color: "#FFAAAA",
      inputs: 1,
      outputs: 1,
      icon: "nlc.png",
      paletteLabel: function() {
        return this.name || "Natural Language Classifier";
      },
      label: function() {
        return this.name || "Natural Language Classifier";
      },
      labelStyle: function() {
        return this.name ? "node_label_italic" : "";
      }
    });
  })();
</script>
2. ノードの振る舞い表現(nodes/nlc.js)
ノードの振る舞いは同じくnodesディレクトリにjavascriptファイルで配置します。基本的には、ノードオブジェクトを作成し、on('input', function(msg){})で前のノードから受け取ったpayloadの処理を記述します。後ろのノードにpayloadを送り出す処理はsend(msg)です。
module.exports = function(RED) {

  function NLCNode(config) {
    RED.nodes.createNode(this, config);
    this.username = config.username;
    this.password = config.password;
    this.classifierid = config.classifierid;
    var node = this;

    this.status({fill:"red",shape:"ring",text:"--------"});

    this.on('input', function(msg) {

      if (!msg.payload) {
        node.error('Missing property: msg.payload');
        return;
      }

      var username = this.username;
      var password = this.password;
      if (!username || !password) {
        node.error('Missing service credentials.');
        this.status({fill:"red",shape:"ring",text:"--------"});
        return;
      }

      this.status({fill:"blue",shape:"ring",text:"--------"});

      var watson = require('watson-developer-cloud');
      var nlc = watson.natural_language_classifier({
        url: 'https://gateway.watsonplatform.net/natural-language-classifier/api',
        username: username,
        password: password,
        version: 'v1'
      });

      nlc.classify({
        text: msg.payload,
        classifier_id: this.classifierid },
        function(err, response) {
          if (err) {
            node.error(err);
          } else {
            msg.text = response.text;
            msg.payload = response.top_class;
            msg.classified = response.classes[0].class_name;
            msg.confidence = response.classes[0].confidence;
          }
          node.send(msg);
        });

      this.status({fill:"green",shape:"ring",text:"--------"});

    });
  }

  RED.nodes.registerType("natural-language-classifier", NLCNode, {
    username: { type: "text" },
    password: { type: "password" },
    classifierid: { type: "text" }
  });
}
3. ノードのアイコン(nodes/icons/nlc.png)
上述したnodes/nlc.htmlの(3)の中に以下のような行があります。
icon: "nlc.png",
これはエディタ上に表現されるアイコンを示します。このアイコンファイルは、nodes/iconsディレクトリに配置します。
4. パッケージへの追加(package.json)
最後に、これまで作成したnodes以下のファイルをパッケージそしてNode-REDに認識させるために、package.jsonに以下のような記述を追加します。
    "keywords":[ "node-red" ],
    "node-red": {
        "nodes": {
            "natural-language-classifier": "nodes/nlc.js"
        }
    },
なお、この例では、NLCを使うためにwatson-developer-cloudパッケージを使っていますので、dependenciesにも以下の行を追加しています。
    "dependencies": {
        "when": "~3.x",
        "mongodb": "~1.4.x",
        "nano": "~5.11.0",
        "cfenv":"~1.0.0",
        "feedparser":"~0.19.2",
        "redis":"~0.10.1",
        "node-red": "0.x",
        "node-red-bluemix-nodes":"0.x",
        "node-red-node-cf-cloudant":"0.x",
        "node-red-contrib-scx-ibmiotapp":"0.x",
        "node-red-contrib-ibmpush":"0.x",
        "node-red-contrib-bluemix-hdfs":"0.x",
        "node-red-nodes-cf-sqldb-dashdb":"0.x",
        "watson-developer-cloud": "*" # これを追加した(前の行のカンマに注意)
    },
NLC追加版Node-REDを動かす
さて、それでは修正したNode-REDをcf pushします。
$ cf push weatherqclass
いつものように最後にrunningというログが出ればOKです。
     state     since                    cpu    memory           disk           details
# 0   running   2015-12-13 08:25:48 PM   0.0%   207.7M of 512M   317.6M of 1G
ブラウザで確認します。
無事に「Natural Language Classifier」というノードが追加されました。
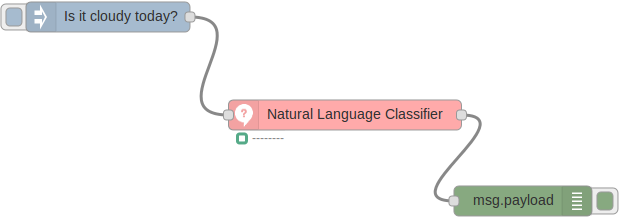
早速使ってみます。Injectで文字列を投げ込み、NLCで分類した結果をdebugに吐く、というだけの例です。
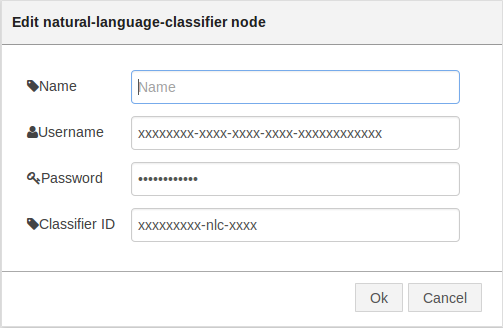
NLCの設定は以下のようになります。入力されている内容は、サンプル分類器のcredential情報(username, password)と分類器ID (classifier ID)です。
このフローを実行する(Injectノードの左側にある四隅の丸い四角のアイコンをクリックする)と、debugログに以下のようにNLCの分類結果が表示されます。
このフローの詳細は以下のjsonの通りです。これをインポートすればサンプルフローを再現することができます。
[{"id":"7f2f030e.ba7c14","type":"inject","z":"69f50d6e.27d11c","name":"","topic":"","payload":"Is it cloudy today?","payloadType":"string","repeat":"","crontab":"","once":true,"x":127,"y":154,"wires":[["db86397f.5a46f"]]},{"id":"22108696.9cfe6a","type":"debug","z":"69f50d6e.27d11c","name":"","active":true,"console":"false","complete":"false","x":542,"y":338,"wires":[]},{"id":"db86397f.5a46f","type":"natural-language-classifier","z":"69f50d6e.27d11c","name":"","username":"9b9e911b-538d-4d4a-8f11-5e185e69cca0","password":"qMicYuKpxs6s","classifierid":"3B015Fx14-nlc-2340","x":364,"y":252,"wires":[["22108696.9cfe6a"]]}]
まとめ
- Node-RED StarterにはNatural Language Classifier (NLC)が含まれていませんが、自作のノードを作成することで、Node-REDエディタのフローを簡単に作ることができました。
- 自作のノードを作成するにはある程度javascriptやhtmlの知識をもち、またcfコマンドに慣れている必要があります。
- 実際には学習の工程が存在するため、curlやjqにも慣れておくほうがよさそうです。

