TL;DR:
require 'sinatra'
require 'icalendar'

get '/hogehoge' do
  calendar = Icalendar::Calendar.new
  calendar.append_custom_property("X-WR-CALNAME;VALUE=TEXT", "カレンダーのタイトル")
  calendar.timezone do |t|
    t.tzid = 'Asia/Tokyo'
    t.standard do |s|
      s.tzoffsetfrom = '+0900'
      s.tzoffsetto   = '+0900'
      s.tzname       = 'JST'
      s.dtstart      = '19700101T000000'
    end
  end

  # eventsという変数はイベントのhashの配列とする
  events.each do |event|
    calendar.event do |e|
      e.dtstart = Icalendar::Values::Date.new(Date.parse(entry['date']))
      e.summary = entry['title']
      e.description = "#{entry['title']}\n#{entry['url']}"
    end
  end
  calendar.publish

  content_type 'text/calendar'
  calendar.to_ical
end
はじめに
iCalendarファイルをカレンダー.appやGoogleカレンダーなど普段使っているカレンダーアプリに取り込むと、そのカレンダーアプリに予定を表示することができる。また、iCalendarファイルをWeb上で配信し、配信者側で適宜予定を更新してやると、新しく追加された予定についても更新が手元のカレンダーアプリに反映される。
connpassのカレンダー連携機能が良い例だろう。
今回は、Ruby製Webアプリケーション開発用DSLであるSinatraと、RubyからiCalendarを扱うことのできるicalendarというgemを利用して、予定をWebで配信するサンプルアプリケーションを作ってみたいと思う。
サンプルアプリケーション
今回作成したサンプルアプリケーションの全ソースコードは、以下のGitHubリポジトリに置いてある。
動かし方は以下の通り。
$ git clone https://github.com/mktakuya/sinatra-icalendar-sample
$ cd sinatra-icalendar-sample
$ bundle install
$ ruby app.rb
# ブラウザで http://localhost:4567/tnct-adv を開くと、icsファイルがダウンロードされる
動作確認環境
- macOS 10.13.2 High Sierra
- Ruby 2.4.2
- Gem
- Sinatra 2.0.0
- icalendar 2.4.1
準備
プロジェクトのディレクトリを作成し、bundle initコマンドを実行する。
$ mkdir sinatra-icalendar-sample
$ cd sinatra-icalendar-sample
$ bundle init
Gemfileを以下のように編集して、bundle installコマンドを実行する。
# frozen_string_literal: true

source "https://rubygems.org"

git_source(:github) {|repo_name| "https://github.com/#{repo_name}" }

# Sinatra
gem 'sinatra'
gem 'sinatra-contrib'

# iCalendar
gem 'icalendar'
適当な予定の準備
サンプルアプリケーションなので扱う予定はなんでもいいのだが、とりあえず苫小牧高専アドベントカレンダー2017の投稿一覧をJSON形式でAdventarから取得、それをローカルに置いてファイル読み込みすることにする。
苫小牧高専アドベントカレンダー 2017の投稿一覧のJSONファイルは、以下のURLで取得できる。
https://adventar.org/calendars/2126.json
require 'json'

json = JSON.parse(File.read('./tomakomai-kosen-adv-2017.json'))

# json['entries']に記事の情報が格納されている
json['entries'][0]
# => { "date"=>"2017-12-01",
#     "url"=>"https://blog.mktakuya.net/f5740f92e3ed",
#     "title"=>"苫小牧高専のニュースをFAXで確実に受取る – #えむけーろぐ",
#     "image"=>"https://cdn-images-1.medium.com/max/1200/1*KaOW786EEtH0GZsZlh4-lA.jpeg"}
Icalendar::Calendarインスタンスの生成と初期設定
だいたいはGitHubのicalendar/icalendarのREADMEに書いてあるのだけど、Icalendar::Calendarクラスのインスタンスの生成とタイトルの設定、タイムゾーン関連の設定をする。
特筆すべきは、 X-WR-CALNAME だろう。この拡張属性を追加することにより、カレンダー.appやGoogleカレンダーに追加したときにタイトルが設定される。
# Icalendar::Calendarクラスのインスタンスを生成
calendar = Icalendar::Calendar.new

# カレンダーのタイトルを設定(カレンダー.appやGoogleカレンダーに表示される時のタイトルになる)
calendar.append_custom_property("X-WR-CALNAME;VALUE=TEXT", "苫小牧高専アドベントカレンダー2017カレンダー")

# タイムゾーン関連の設定
calendar.timezone do |t|
  t.tzid = 'Asia/Tokyo'
  t.standard do |s|
    s.tzoffsetfrom = '+0900'
    s.tzoffsetto   = '+0900'
    s.tzname       = 'JST'
    s.dtstart      = '19700101T000000'
  end
end
Icalendar::Calendarインスタンスにイベントを追加していく
イベントを追加するには、以下のようにすれば良い。上述した json['entries']変数の一つ一つの要素に対してeachメソッドを回していく。実際の現場で使う時は、DBからイベントの情報を引っ張ってくるなりすれば良い。
json['entries'].each do |entry|
  calendar.event do |e|
    e.dtstart = Icalendar::Values::Date.new(Date.parse(entry['date']))
    e.summary = entry['title']
    e.description = "#{entry['title']}\n#{entry['url']}"
  end
end
iCalandarファイルを配信する
適切に設定が終わったIcalendar::Calendarインスタンスの to_ical メソッドを呼び出せば、iCalendar形式の文字列を返すので、それをそのままレスポンスとして返してやれば良い。
注意が必要なのが、Content-Typeヘッダを適切に設定してやらないと、単なるテキストとして解釈されてしまうので、 content_type 'text/calendar' を追加してやる必要がある。
content_type 'text/calendar'
calendar.to_ical
iCalendarファイルのダウンロードと確認
以上で、2017/12/20時点での苫小牧高専アドベントカレンダー2017の投稿記事の一覧をiCalendar形式で配信することが出来た。試しにサーバを起動して、カレンダー.appなどオフラインで動作するカレンダーアプリで新規照会カレンダーとして http://localhost:4567 を指定すると、以下のように記事一覧を表示することができる。
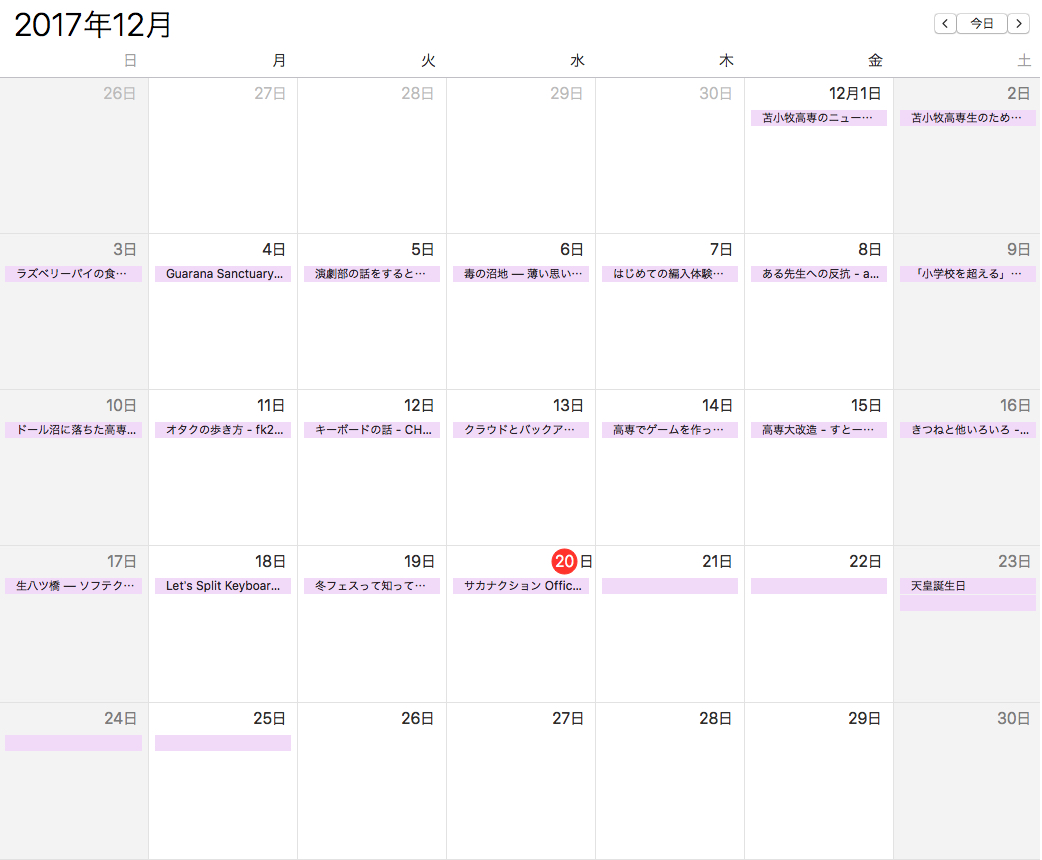
これをHerokuやVPSなどインターネットからアクセスできるサーバで動かせば、GoogleカレンダーやOffice 365のカレンダーからも予定を確認することができる。