目的
- CloudFormation のテンプレートがある程度読めるようになりたい。ハンズオン等で「このテンプレートをデプロイして下さい」と言われることがあるが、中身がよく分からないテンプレートを実行して、想定外のリソースができてしまったりするのが嫌なので。
やったこと
- 以下を実現するシンプルな CloudFormation テンプレートを作成する。
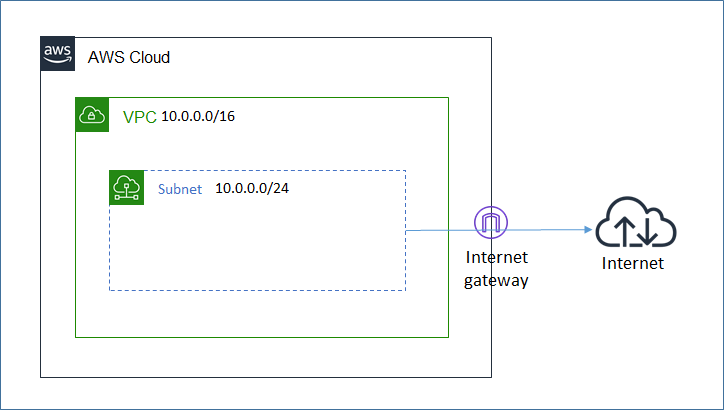
- VPC, IGW, Subnetを作成する。
- SubnetにIGW向けのルーティングを入れる。
構成図
作業手順
- AWS公式のテンプレート「DNS およびパブリック IP アドレスを持つ Amazon VPC」 を見て、必要な設定のみ残す。
- 「Resources」で設定している内容は以下の通り。
- VPC: VPCを作成する。IPレンジ(10.0.0.0/16)は固定。
- Subnet: Subnetを作成する。IPレンジ(10.0.0.0/24)は固定。
- InternetGateway: IGWを作成する。
- AttachGateway: VPCにIGWをアタッチする。
- PublicRouteTable: RouteTableを作成する。
- Route: RouteTableにRoute(0.0.0.0/0をIGWへ)を追加する。
- PublicSubnetRouteTableAssociation: RouteTableとSubnetを紐づける。
sampletemplate.json
{
    "AWSTemplateFormatVersion" : "2010-09-09",
    "Description" : "Test template",

    "Parameters" : {
      "StackName": {
        "Description" : "Please input StackName.",
        "Type": "String",
        "Default" : "SampleStack",
        "AllowedPattern" : "[-a-zA-Z0-9]*",
        "ConstraintDescription" : ""
      },
    },

    "Resources" : {
      "VPC" : {
        "Type" : "AWS::EC2::VPC",
        "Properties" : {
          "CidrBlock" : "10.0.0.0/16",
          "Tags" : [{"Key" : "Name", "Value" : { "Ref" : "AWS::StackName" }}]
        }
      },
      "Subnet" : {
        "Type" : "AWS::EC2::Subnet",
        "Properties" : {
          "VpcId" : { "Ref" : "VPC" },
          "CidrBlock" : "10.0.0.0/24",
          "Tags" : [ {"Key" : "Name", "Value" : { "Ref" : "AWS::StackName" }} ]
        }
      },
      "InternetGateway" : {
        "Type" : "AWS::EC2::InternetGateway",
        "Properties" : {
          "Tags" : [ {"Key" : "Name", "Value" : { "Ref" : "AWS::StackName" } } ]
        }
      },
      "AttachGateway" : {
         "Type" : "AWS::EC2::VPCGatewayAttachment",
         "Properties" : {
           "VpcId" : { "Ref" : "VPC" },
           "InternetGatewayId" : { "Ref" : "InternetGateway" }
         }
      },
      "PublicRouteTable" : {
        "Type" : "AWS::EC2::RouteTable",
        "Properties" : {
          "VpcId" : {"Ref" : "VPC"},
          "Tags" : [ {"Key" : "Name", "Value" : { "Ref" : "AWS::StackName" } } ]
        }
      },
      "Route" : {
        "Type" : "AWS::EC2::Route",
        "DependsOn" : "AttachGateway",
        "Properties" : {
          "RouteTableId" : { "Ref" : "PublicRouteTable" },
          "DestinationCidrBlock" : "0.0.0.0/0",
          "GatewayId" : { "Ref" : "InternetGateway" }
        }
      },
      "PublicSubnetRouteTableAssociation" : {
        "Type" : "AWS::EC2::SubnetRouteTableAssociation",
        "Properties" : {
          "SubnetId" : { "Ref" : "Subnet" },
          "RouteTableId" : { "Ref" : "PublicRouteTable" }
        }
      },
    }
}
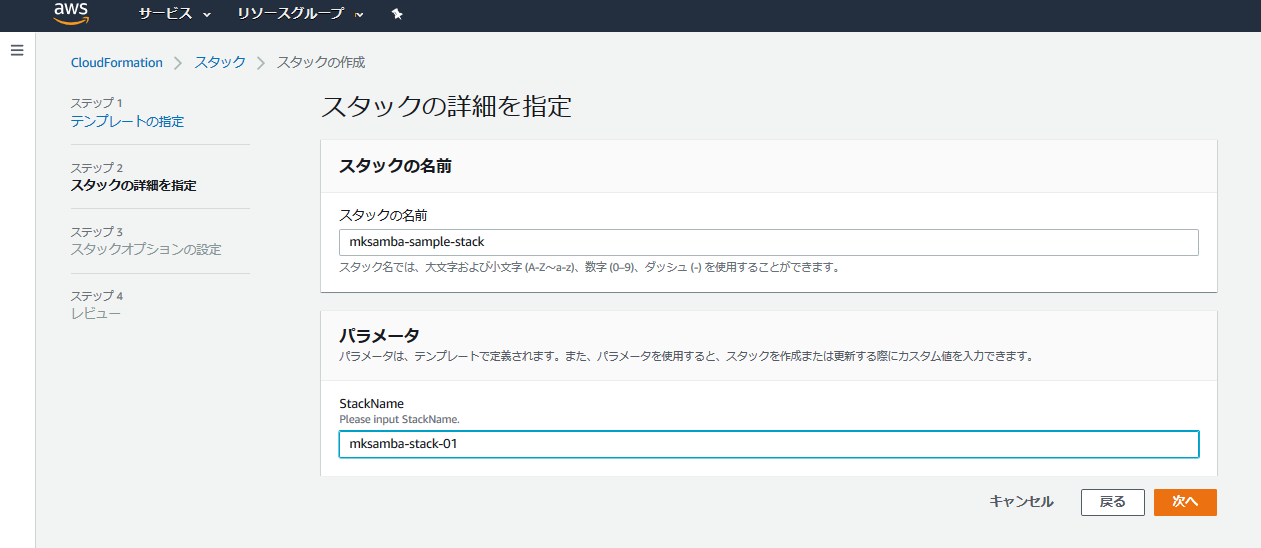
- マネージメントコンソールからjsonファイルを読み込んでstackを作成する。Parametersで「StackName」を入力させるようにしており、ここで入力した値がVPC等のリソースのNameに反映される。
所感
- 変なリソースが作られないように、他人のテンプレートの実行前にはきちんと内容をチェックするようにし、あわせて読解力を高めていきたい。