1. はじめに
- 業務で扱うシステムで、監視にPrometheusを使っている。これまでPrometheus周りを触ったことがなく、仕組みを理解するために一から簡単な検証を行う。
- こちらの記事「Prometheus/Loki/Grafanaを使ってメトリクス、ログを監視してみる」 が非常に分かりやすく、またやりたかったことが網羅されており、ほぼそのまま実施した。(私の記事では資材のバージョンの最新化や、監視設定変更などを行っており、元記事と合わせてご参照頂ければ)
- 長くなったので、実施内容を分割投稿する。
- 【初心者】Prometheus/Loki/Grafanaを使ってみる (メトリクス/ログの収集と表示)
- 本記事。メトリクスとログを収集しGrafanaで表示させる。
-
【初心者】Prometheus/Loki/Grafanaを使ってみる #2 (AlertManagerによるアラーム通知)
- AlertManagerを追加し、CPU高負荷時にslackへの通知を行う。
-
【初心者】Prometheus/Loki/Grafanaを使ってみる #3 (Amazon Managed Service for Promethus連携)
- 自分のPrometheusで収集したメトリクスをAmazon Managed Service for Prometheusに連携する。
- 【初心者】Prometheus/Loki/Grafanaを使ってみる (メトリクス/ログの収集と表示)
2. やったこと
-
以下のコンポーネントをインストール/設定することにより、監視対象サーバのCPU/MEM、プロセス、ログの監視を行う。
- 監視サーバ: Prometheus、Loki、Grafana
- 監視対象サーバ: Node Exporter、Process Exporter、Promtail
-
処理の大まかな流れは以下の通り。
- 監視対象サーバのNode Exporterで、CPU/MEMなどの情報を取得する。監視サーバのPrometheusにてメトリクスを収集する。
- 監視対象サーバのProcess Exporterで、Process(Nginxなど)の情報を取得する。監視サーバのPrometheusにてメトリクスを収集する。
- 監視対象サーバのPromtailで、ログを取得する。Promtailから、監視サーバのLokiへログを送付する。
- 監視サーバのGrafanaで、データソースとしてPrometheusを登録し、Prometheus上に収集されたCPU/MEM、プロセス情報を表示する。
- 監視サーバのGrafanaで、データソースとしてLokiを登録し、Loki上に収集されたログを表示する。
3. 構成図
4. 手順
4.1 事前準備
- パブリックサブネット(10.0.0.0/24)を持つVPCを作成する。
- 監視サーバ、監視対象サーバとして、Amazon Linux 2023 のインスタンスを2台作成する。
- 監視対象サーバにはNginx(プロセス監視・ログ収集検証用)をインストールする。
4.2 監視対象サーバの設定
4.2.1 Node Exporter
インストール
- 資材をダウンロード、インストールする。
# 2023/9時点の最新版 v1.6.1(2023/6/17リリース) を使用
[ec2-user@ip-10-0-0-124 nodexporter]$ wget https://github.com/prometheus/node_exporter/releases/download/v1.6.1/node_exporter-1.6.1.linux-amd64.tar.gz
# 解凍して、バイナリを /usr/local/binに展開する
[ec2-user@ip-10-0-0-124 nodexporter]$ tar xvf node_exporter-1.6.1.linux-amd64.tar.gz
[ec2-user@ip-10-0-0-124 nodexporter]$ cd node_exporter-1.6.1.linux-amd64/
[ec2-user@ip-10-0-0-124 node_exporter-1.6.1.linux-amd64]$ sudo cp -p node_exporter /usr/local/bin
サービス化
- systemdユニットファイルを作成する。
/usr/lib/systemd/system/nodeexporter.service
[Unit]
Description=NodeExporter
[Service]
Type=simple
ExecStart=/usr/local/bin/node_exporter
Restart=always
[Install]
WantedBy=multi-user.target
- Node Exporterをサービスとして登録、起動する。
[ec2-user@ip-10-0-0-124 ~]$ sudo systemctl daemon-reload
[ec2-user@ip-10-0-0-124 ~]$ sudo systemctl enable nodeexporter.service
[ec2-user@ip-10-0-0-124 ~]$ sudo systemctl start nodeexporter.service
[ec2-user@ip-10-0-0-124 ~]$ sudo systemctl status nodeexporter.service
動作確認
- 9100/tcp で待ち受けできていることを確認する。
[ec2-user@ip-10-0-0-124 bin]$ curl localhost:9100
<html lang="en">
  <head>
    <meta charset="UTF-8">
    <meta name="viewport" content="width=device-width, initial-scale=1.0">
    <title>Node Exporter</title>
    <style>body {
  font-family: -apple-system,BlinkMacSystemFont,Segoe UI,Roboto,Helvetica Neue,Arial,Noto Sans,Liberation Sans,sans-serif,Apple Color Emoji,Segoe UI Emoji,Segoe UI Symbol,Noto Color Emoji;
  margin: 0;
}
…省略…
4.2.2 Process Exporter
インストール
- 資材をダウンロード、インストールする。
# 2023/9時点の最新版 v0.7.10(2021/11/17リリース) を使用
[ec2-user@ip-10-0-0-124 processexporter]$ wget https://github.com/ncabatoff/process-exporter/releases/download/v0.7.10/process-exporter-0.7.10.linux-amd64.tar.gz
# 解凍して、バイナリを /usr/local/binに展開する
[ec2-user@ip-10-0-0-124 processexporter]$ tar xvf process-exporter-0.7.10.linux-amd64.tar.gz
[ec2-user@ip-10-0-0-124 processexporter]$ cd process-exporter-0.7.10.linux-amd64/
[ec2-user@ip-10-0-0-124 process-exporter-0.7.10.linux-amd64]$ sudo cp -p process-exporter /usr/local/bin/
- 設定ファイルを作成する。(全てのプロセスを取得)
/etc/processexporter/config.yml
process_names:
  - name: "{{.Comm}}"
    cmdline:
    - '.+'
サービス化
- systemdユニットファイルを作成する。
/usr/lib/systemd/system/processexporter.service
[Unit]
Description=ProcessExporter
[Service]
Type=simple
ExecStart=/usr/local/bin/process-exporter -config.path /etc/processexporter/config.yml
Restart=always
[Install]
WantedBy=multi-user.target
- Process Exporterをサービスとして登録、起動する。
[ec2-user@ip-10-0-0-124 ~]$ sudo systemctl daemon-reload
[ec2-user@ip-10-0-0-124 ~]$ sudo systemctl enable processexporter.service
[ec2-user@ip-10-0-0-124 ~]$ sudo systemctl start processexporter.service
[ec2-user@ip-10-0-0-124 ~]$ sudo systemctl status processexporter.service
動作確認
- 9256/tcp で待ち受けできていることを確認する。
[ec2-user@ip-10-0-0-124 ~]$ curl localhost:9256
<html>
<head><title>Named Process Exporter</title></head>
<body>
<h1>Named Process Exporter</h1>
<p><a href="/metrics">Metrics</a></p>
</body>
</html>[ec2-user@ip-10-0-0-124 ~]$
4.2.3 Promtail
インストール
- 資材をダウンロード、インストールする。
# 2023/9時点の最新版 v2.9.0(2023/9/6リリース) を使用
[ec2-user@ip-10-0-0-124 promtail]$ wget https://github.com/grafana/loki/releases/download/v2.9.0/promtail-linux-amd64.zip
[ec2-user@ip-10-0-0-124 promtail]$ unzip promtail-linux-amd64.zip
[ec2-user@ip-10-0-0-124 promtail]$ sudo cp -p promtail-linux-amd64 /usr/local/bin
- 設定ファイルを作成する。
/etc/promtail/promtail-local-config.yaml
server:
  http_listen_port: 9080
  grpc_listen_port: 0

positions:
  filename: /tmp/positions.yaml

# 監視サーバのlokiのエンドポイントを指定
clients:
  - url: http://10.0.0.249:3100/loki/api/v1/push

scrape_configs:
- job_name: system
  static_configs:
  - targets:
      - localhost
    labels:
      job: varlogs
      __path__: /var/log/*log

# nginxのaccesslogを収集対象にする
- job_name: nginx
  static_configs:
  - targets:
      - localhost
    labels:
      job: nginx
      __path__: /var/log/nginx/access.log
サービス化
- systemdユニットファイルを作成する。
/usr/lib/systemd/system/promtail.service
[Unit]
Description=Promtail
[Service]
Type=simple
ExecStart=/usr/local/bin/promtail-linux-amd64 --config.file=/etc/promtail/promtail-local-config.yaml
Restart=always
[Install]
WantedBy=multi-user.target
- Promtailをサービスとして登録、起動する。
[ec2-user@ip-10-0-0-124 ~]$ sudo systemctl daemon-reload
[ec2-user@ip-10-0-0-124 ~]$ sudo systemctl enable promtail.service
[ec2-user@ip-10-0-0-124 ~]$ sudo systemctl start promtail.service
[ec2-user@ip-10-0-0-124 ~]$ sudo systemctl status promtail.service
動作確認
- 9080/tcp で待ち受けできていることを確認する。
[ec2-user@ip-10-0-0-124 ~]$ curl localhost:9080/targets
<!DOCTYPE html>
<html lang="en">
    <head>
        <meta http-equiv="Content-Type" content="text/html; charset=utf-8">
        <meta name="robots" content="noindex,nofollow">
        <title>Targets</title>
        <link rel="shortcut icon" href="/static/img/favicon.ico?v=%28version%3d2.9.0%2c%20branch%3dHEAD%2c%20revision%3d2feb64f69%29">
        <script src="/static/vendor/js/jquery-3.5.1.min.js?v=%28version%3d2.9.0%2c%20branch%3dHEAD%2c%20revision%3d2feb64f69%29"></script>
        <script src="/static/vendor/js/popper.min.js?v=%28version%3d2.9.0%2c%20branch%3dHEAD%2c%20revision%3d2feb64f69%29"></script>
        <script src="/static/vendor/bootstrap-4.1.3/js/bootstrap.min.js?v=%28version%3d2.9.0%2c%20branch%3dHEAD%2c%20revision%3d2feb64f69%29"></script>
…略…
4.3 監視サーバの設定
4.3.1 Prometheus
インストール
- 資材をダウンロード、インストールする。
# 2023/9時点の最新版 v2.47.0(2023/9/6リリース) を使用
[ec2-user@ip-10-0-0-249 prometheus]$ wget https://github.com/prometheus/prometheus/releases/download/v2.47.0/prometheus-2.47.0.linux-amd64.tar.gz
[ec2-user@ip-10-0-0-249 prometheus]$ tar xvf prometheus-2.47.0.linux-amd64.tar.gz
[ec2-user@ip-10-0-0-249 prometheus]$ cd prometheus-2.47.0.linux-amd64/
[ec2-user@ip-10-0-0-249 prometheus-2.47.0.linux-amd64]$ sudo cp -p prometheus /usr/local/bin
- 設定ファイルを作成する。
- デフォルトの設定ファイルに対し、Node ExporterとProcess Exporterを監視対象(JOB)として追加する。
/etc/prometheus/prometheus.yml
# my global config
global:
  scrape_interval: 15s # Set the scrape interval to every 15 seconds. Default is every 1 minute.
  evaluation_interval: 15s # Evaluate rules every 15 seconds. The default is every 1 minute.
  # scrape_timeout is set to the global default (10s).

# Alertmanager configuration
alerting:
  alertmanagers:
    - static_configs:
        - targets:
          # - alertmanager:9093

# Load rules once and periodically evaluate them according to the global 'evaluation_interval'.
rule_files:
  # - "first_rules.yml"
  # - "second_rules.yml"

# A scrape configuration containing exactly one endpoint to scrape:
# Here it's Prometheus itself.
scrape_configs:
  # The job name is added as a label `job=<job_name>` to any timeseries scraped from this config.
  - job_name: "prometheus"

    # metrics_path defaults to '/metrics'
    # scheme defaults to 'http'.

    static_configs:
      - targets: ["localhost:9090"]

  - job_name: "node-exporter"
    static_configs:
      - targets: ["10.0.0.124:9100"]
  - job_name: "process-exporter"
    static_configs:
      - targets: ["10.0.0.124:9256"]
サービス化
- systemdユニットファイルを作成する。
/usr/lib/systemd/system/prometheus.service
[Unit]
Description=Prometheus
[Service]
Type=simple
ExecStart=/usr/local/bin/prometheus --config.file=/etc/prometheus/prometheus.yml
Restart=always
[Install]
WantedBy=multi-user.target
- Prometheusをサービスとして登録、起動する。
[ec2-user@ip-10-0-0-124 ~]# sudo systemctl daemon-reload
[ec2-user@ip-10-0-0-124 ~]# sudo systemctl enable prometheus.service
[ec2-user@ip-10-0-0-124 ~]# sudo systemctl start prometheus.service
[ec2-user@ip-10-0-0-124 ~]# sudo systemctl status prometheus.service
動作確認
- 9090/tcp で待ち受けできていることを確認する。
[ec2-user@ip-10-0-0-249 ~]$ curl localhost:9090/graph
<!doctype html><html lang="en"><head><meta charset="utf-8"/><link rel="shortcut icon" href="./favicon.ico"/>
<meta name="viewport" content="width=device-width,initial-scale=1,shrink-to-fit=no"/><meta name="theme-color" content="#000000"/><script>const GLOBAL_CONSOLES_LINK="",GLOBAL_AGENT_MODE="false",GLOBAL_READY="true"</script>
<link rel="manifest" href="./manifest.json" crossorigin="use-credentials"/><title>Prometheus Time Series Collection and Processing Server</title><script defer="defer" src="./static/js/main.78875f45.js"></script><link href="./static/css/main.4858e794.css" rel="stylesheet"></head>
<body class="bootstrap"><noscript>You need to enable JavaScript to run this app.</noscript><div id="root"></div></body></html>
4.3.2 Loki
インストール
- 資材をダウンロード、インストールする。
# 2023/9時点の最新版 v2.9.0(2023/9リリース) を使用
[ec2-user@ip-10-0-0-249 loki]$ wget "https://github.com/grafana/loki/releases/download/v2.9.0/loki-linux-amd64.zip"
[ec2-user@ip-10-0-0-249 loki]$ unzip loki-linux-amd64.zip
[ec2-user@ip-10-0-0-249 loki]$ sudo cp -p loki-linux-amd64 /usr/local/bin
# 設定ファイルのひな形取得
[ec2-user@ip-10-0-0-249 loki]$ wget https://raw.githubusercontent.com/grafana/loki/main/cmd/loki/loki-local-config.yaml
- 設定ファイルを作成する。
- 今回はダウンロードしたひな形(loki-local-config.yaml)をそのまま使用する。
/etc/loki/loki-local-config.yaml
auth_enabled: false

server:
  http_listen_port: 3100
  grpc_listen_port: 9096

common:
  instance_addr: 127.0.0.1
  path_prefix: /tmp/loki
  storage:
    filesystem:
      chunks_directory: /tmp/loki/chunks
      rules_directory: /tmp/loki/rules
  replication_factor: 1
  ring:
    kvstore:
      store: inmemory

query_range:
  results_cache:
    cache:
      embedded_cache:
        enabled: true
        max_size_mb: 100

schema_config:
  configs:
    - from: 2020-10-24
      store: boltdb-shipper
      object_store: filesystem
      schema: v11
      index:
        prefix: index_
        period: 24h

ruler:
  alertmanager_url: http://localhost:9093

# By default, Loki will send anonymous, but uniquely-identifiable usage and configuration
# analytics to Grafana Labs. These statistics are sent to https://stats.grafana.org/
#
# Statistics help us better understand how Loki is used, and they show us performance
# levels for most users. This helps us prioritize features and documentation.
# For more information on what's sent, look at
# https://github.com/grafana/loki/blob/main/pkg/analytics/stats.go
# Refer to the buildReport method to see what goes into a report.
#
# If you would like to disable reporting, uncomment the following lines:
#analytics:
#  reporting_enabled: false
サービス化
- systemdユニットファイルを作成する。
/usr/lib/systemd/system/loki.service
[Unit]
Description=Loki
[Service]
Type=simple
ExecStart=/usr/local/bin/loki-linux-amd64 -config.file=/etc/loki/loki-local-config.yaml
Restart=always
[Install]
WantedBy=multi-user.target
- Lokiをサービスとして登録、起動する。
[ec2-user@ip-10-0-0-124 ~]# sudo systemctl daemon-reload
[ec2-user@ip-10-0-0-124 ~]# sudo systemctl enable loki.service
[ec2-user@ip-10-0-0-124 ~]# sudo systemctl start loki.service
[ec2-user@ip-10-0-0-124 ~]# sudo systemctl status loki.service
動作確認
- 3100/tcp で待ち受けできていることを確認する。
[ec2-user@ip-10-0-0-249 ~]$ curl localhost:3100/metrics
# HELP cortex_distributor_ingester_clients The current number of ingester clients.
# TYPE cortex_distributor_ingester_clients gauge
cortex_distributor_ingester_clients 0
# HELP cortex_dns_failures_total The number of DNS lookup failures
# TYPE cortex_dns_failures_total counter
cortex_dns_failures_total{name="memberlist"} 0
…以下略…
4.3.3 Grafana
インストール
- 資材をダウンロード、インストールする。手順は「Install Grafana on RHEL or Fedora」を参照する。
- GPGキーをインポートする。
[ec2-user@ip-10-0-0-249 grafana]$ wget -q -O gpg.key https://rpm.grafana.com/gpg.key
[ec2-user@ip-10-0-0-249 grafana]$ sudo rpm --import gpg.key
- /etc/yum.repos.d/grafana.repo としてレポジトリファイルを作成する。
/etc/yum.repos.d/grafana.repo
[grafana]
name=grafana
baseurl=https://rpm.grafana.com
repo_gpgcheck=1
enabled=1
gpgcheck=1
gpgkey=https://rpm.grafana.com/gpg.key
sslverify=1
sslcacert=/etc/pki/tls/certs/ca-bundle.crt
- grafanaをインストールする。(2023/9時点では10.1.1がインストールされる)
[ec2-user@ip-10-0-0-249 bin]$ sudo dnf install grafana
[ec2-user@ip-10-0-0-249 ~]$ grafana-server -v
Version 10.1.1 (commit: 0cfa76b22d, branch: HEAD)
サービス化
- Grafanaをサービスとして常時起動設定する。
[ec2-user@ip-10-0-0-124 ~]$ sudo systemctl enable grafana-server
[ec2-user@ip-10-0-0-124 ~]$ sudo systemctl start grafana-server
[ec2-user@ip-10-0-0-124 ~]$ sudo systemctl status grafana-server
動作確認
4.4 Grafanaダッシュボードの登録
4.4.1 Prometheusの登録
- Prometheusをデータソースとして登録する。
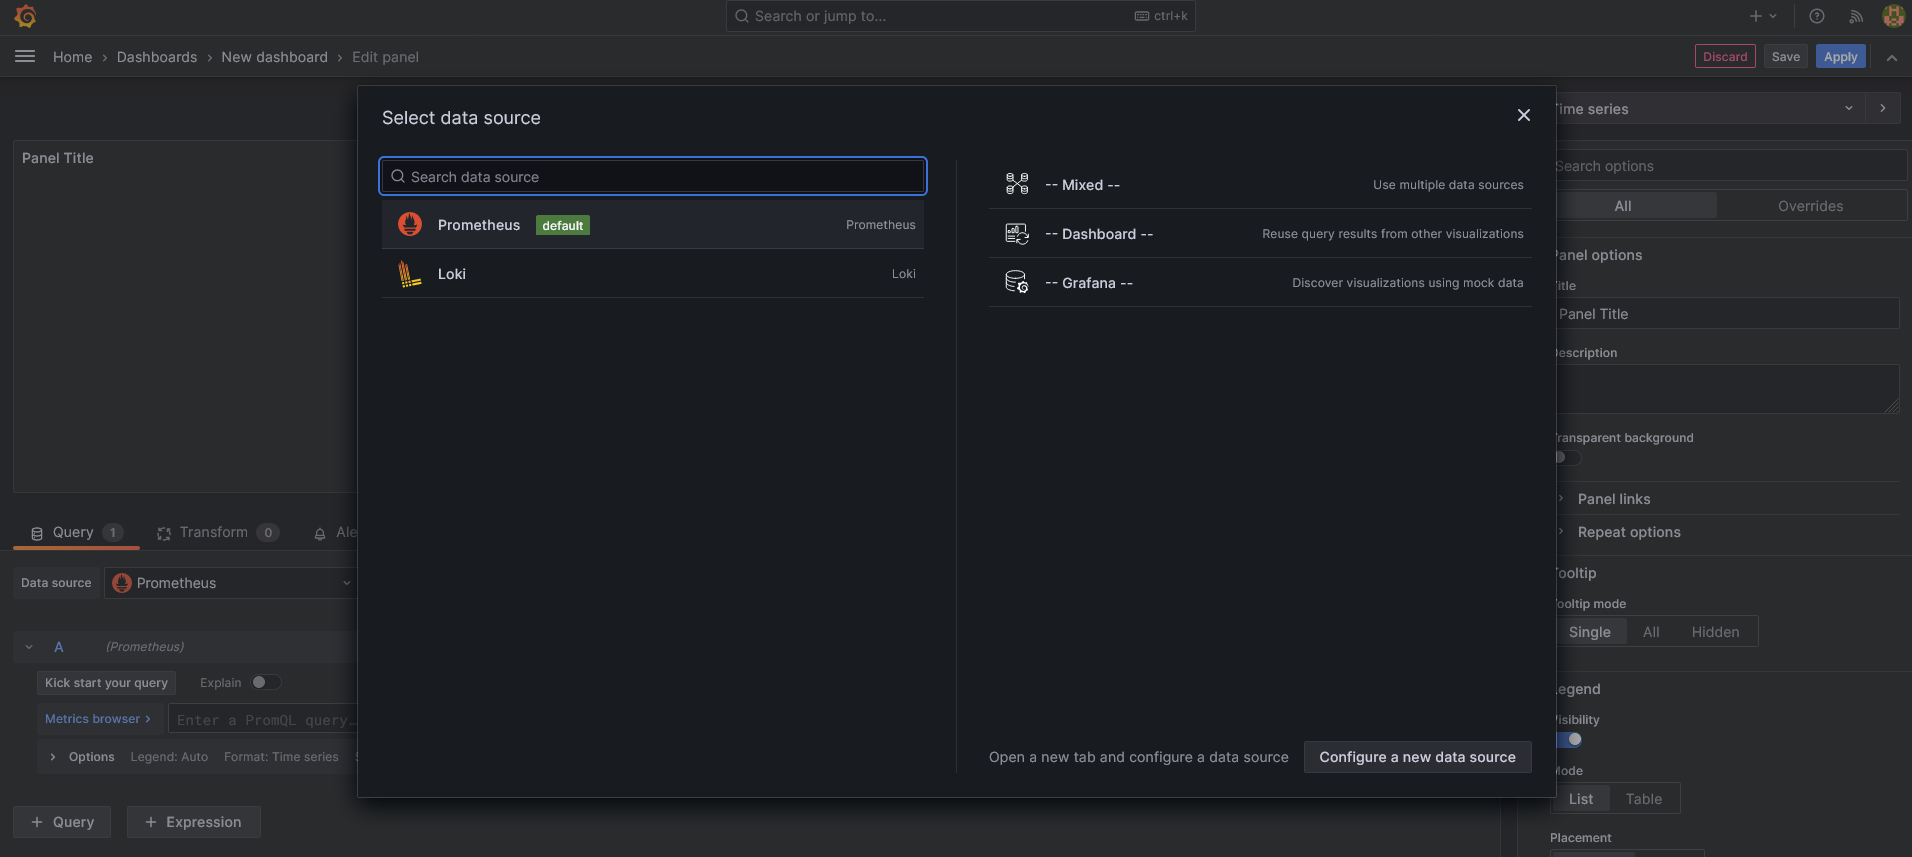
- Home > Connections > Data Sources -> Add data source から、Prometheusを選択する。
- Prometheusの登録画面にて、「Prometheus server URL」に、自ホスト「http://localhost:9090」を入力し、「Save & Test」を押して登録する。
4.4.2 Lokiの登録
- Lokiをデータソースとして登録する。
- Home > Connections > Data Sources -> Add data source から、Lokiを選択する。
- Lokiの登録画面にて、「URL」に、自ホスト「http://localhost:3100」を入力し、「Save & Test」を押して登録する。
4.4.3 Node Exporter からの情報(CPM/MEM)の登録、表示
- データを表示するためのDashboardを新規作成する。
- Home > Dashboards > New dashboard > + Add visualization で新しいDashboardを作成し、data source としてPrometheusを選択する。
- パネルの作成画面にて、以下を設定し、Dashboardの名前を付けてSaveする。
- Metrics browser(code): 100 - (rate(node_cpu_seconds_total{mode="idle"}[1m])) * 100
- Standard options - Unit: Percent(0-100) ※MiscからPercentを選択可能
node_cpu_seconds_total はNode Exporter経由で取得できるCPUの使用率に関する値。100からidleの値を引いて使用率を算出し、パネルには%で表示させる。
- CPU使用率のパネルが登録できたら、次にMEM使用率のパネルを作成する。作成したDashboardsの画面から、「Add Visualization」を選択し、新しいパネルを作成する。
- パネルの作成画面にて、以下を設定し、Applyする。
- Data source: Prometheus
- Metrics browser(code): (node_memory_MemTotal_bytes - node_memory_MemAvailable_bytes) / node_memory_MemTotal_bytes * 100
- Standard options - Unit: Percent(0-100) ※MiscからPercentを選択可能
node_memory_MemTotal_bytes、node_memory_MemAvailable_bytes はNode Exporter経由で取得できるメモリの使用率に関する値。
4.4.4 Process Exporter からの情報(nginx)の登録、表示
- 作成したDashboardsの画面から、「Add Visualization」を選択し、新しいパネルを作成する。
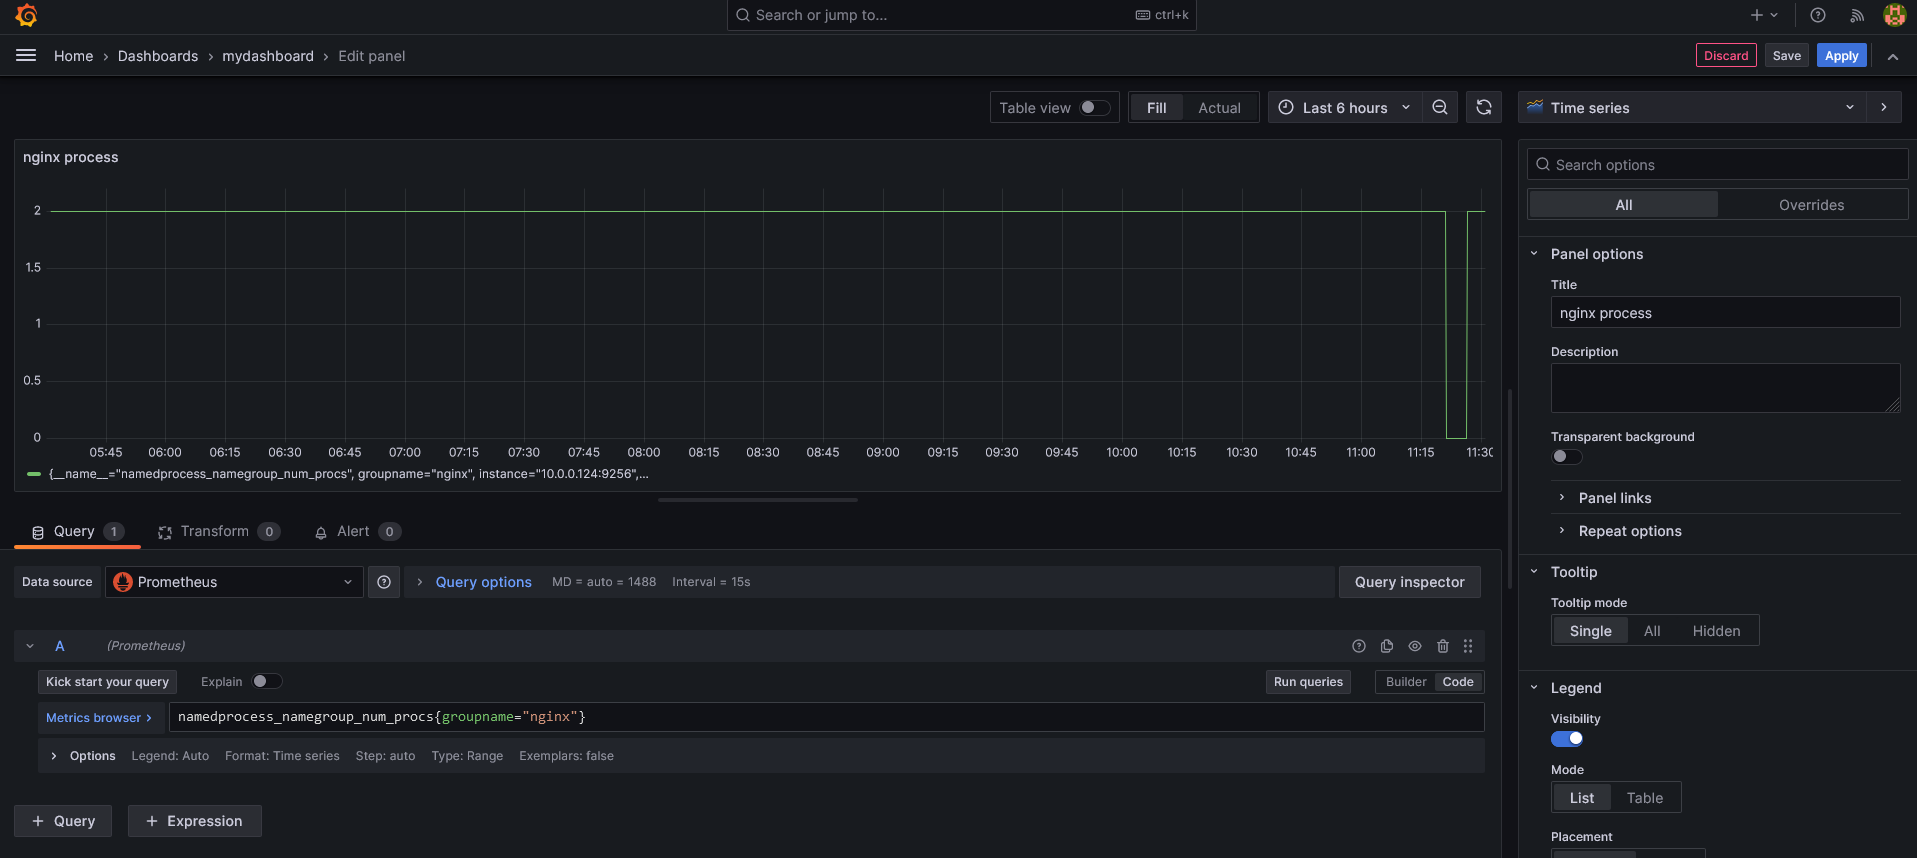
- パネルの作成画面にて、以下を設定し、Applyする。
- Metrics browser(code): namedprocess_namegroup_num_procs{groupname="nginx"}
namedprocess_namegroup_num_procs はProcess Exporter経由で取得できるプロセス数に関する値。nginxは通常時2つのプロセスが起動している。
4.4.5 promtailからの情報(nginxのアクセスログ)の登録、表示
- 作成したDashboardsの画面から、「Add Visualization」を選択し、新しいパネルを作成する。
- パネルの作成画面にて、以下を設定し、Applyする。
- Data source: Loki
- Query: {filename="/var/log/nginx/access.log"}
- パネル種別: Logs
nginxのaccesslogをpromtailからLokiに出力している。GrafanaでデータソースをLokiにして、表示させたいファイルパスを指定することでファイルの内容を表示させることができる。
- Dashboardにて、作成した4つのパネルを並べ替え、CPU、MEM、nginxのprocess数、nginxのaccess.logが表示されるようにした。
5. 参考サイト
6. 所感
- Prometheus/Loki/Grafanaがどういう風に連携するのかの基本を確認することができた。AlertManagerなどの追加機能についても続けて確認していきたい。


