Ansibleとは?
Ansibleを3行で表してみます。
- Ansibleはサーバーの設定を管理してくれる
- inventory(どのサーバーに対して)とplaybook(何をするか)を設定する
- SSHやWinRMを利用してサーバーに接続し、エージェントレスで動作する
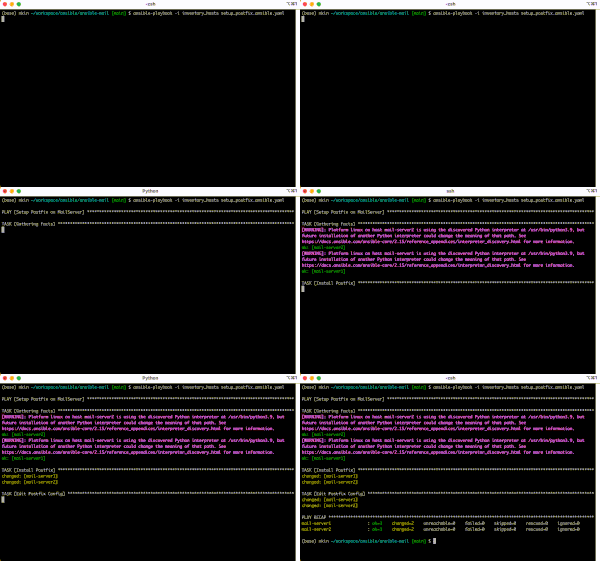
まずはAnsibleの実行の雰囲気をお伝えします。
Ansibleのコマンドを実行すると、サーバーにアクセスして指定したタスクを実行してくれます。
最後には、変更結果をサマリーで表現してくれます。
今回の設定の概要図
この記事で紹介するAnsibleの概要図です。ローカルPCに配置したAnsibleのinventoryとplaybookのファイルをもとに、メールサーバーの設定をしたいと思います。
ちょっとしたハンズオンにも使えるかも。GitHubリポジトリはこちらです。
準備
Ansibleインストール
私の環境がMacbookなのでMacOSのインストールを記載します。
公式ドキュメントではpipを使ってインストールする方法が推奨されていましたが、brewでもインストールできたので、そちらからインストールしました。
brew install ansible

# バージョンを確認
ansible --version
>> ansible [core 2.15.3]
VSCode拡張機能
- Ansibleのyamlファイルをハイライトやサジェスト機能を提供してくれます
- 対象ファイルは
-
/playbooksディレクトリ配下のyamlファイル - 拡張子が
.ansible.ymlや.ansible.yaml - etc...
-
EC2の起動
今回はAWSコンソールから作成しました。
- name:
MailServer1、MailServer2 - プラットフォーム: Amazon Linux 2023
- pemフィアル名:
ansible_mail.pem - セキュリティグループ: インバウンドルールに22番ポート(SSH)を許可
設定
それでは、さっそくAnsibleの設定していきます。
接続先サーバの設定(inventory)
- デフォルトは
/etc/ansible/hostsを参照する - コマンド実行オプション
-i <inventoryファイルのpath>でも指定可能なので、今回はinventory_hostsファイルを新規作成して設定していきます。
[mailservers]
mail-server1 ansible_host=ec2-54-249-100-242.ap-northeast-1.compute.amazonaws.com ansible_connection=ssh ansible_user=ec2-user ansible_ssh_private_key_file=~/.ssh/ansible_mail.pem
mail-server2 ansible_host=ec2-52-192-45-175.ap-northeast-1.compute.amazonaws.com ansible_connection=ssh ansible_user=ec2-user ansible_ssh_private_key_file=~/.ssh/ansible_mail.pem
inventoryファイルの設定値
-
[グループ名]: グループ名は任意の値です。後でこの設定値を使って対象サーバを特定します - ansible_host: AWSコンソールからパブリックDNSを確認してください
- ansible_connection: SSH
- ansible_user: 接続ユーザー名
- ansible_ssh_private_key_file: pemファイルのパスを指定
※接続方法は上記以外にも可能です(もっと知りたい方は下記の公式ドキュメントを参照してください)
Postfixのインストール
AnsibleではplaybookというYAMLファイルをもとに、上から順番に処理していきます。
playbook
- name: Setup Postfix on MailServer
  hosts:
    - mailservers
  tasks:
    - name: Install Postfix
      yum:
        name: postfix
        state: present
      become: yes
- name: 任意の分かりやすい説明です
- hosts: inventoryファイルで設定したグループ名を指定しています(これで
MailServer1とMailServer2に対してインストールが実行されます) - tasks: 複数のタスクを設定できます。いったん一つだけ設定します
- yumを使ってインストールしています
- stateの値によってインストールやアンインストールを設定します
- present:インストール
- absent:アンインストール
- become: yesを指定するとroot権限で実行します
- 未指定だとec2-userでPostfixのインストールを実行することになり、権限が無くてエラーになります
実行(ansible-playbookコマンド)
$ ansible-playbook -i inventory_hosts setup_postfix.ansible.yaml

PLAY [Setup Postfix on MailServer] **********************************************************************************

TASK [Gathering Facts] **********************************************************************************************
[WARNING]: Platform linux on host mail-server2 is using the discovered Python interpreter at /usr/bin/python3.9, but
future installation of another Python interpreter could change the meaning of that path. See
https://docs.ansible.com/ansible-core/2.15/reference_appendices/interpreter_discovery.html for more information.
ok: [mail-server2]
[WARNING]: Platform linux on host mail-server1 is using the discovered Python interpreter at /usr/bin/python3.9, but
future installation of another Python interpreter could change the meaning of that path. See
https://docs.ansible.com/ansible-core/2.15/reference_appendices/interpreter_discovery.html for more information.
ok: [mail-server1]

TASK [Install Postfix] **********************************************************************************************
changed: [mail-server2]
changed: [mail-server1]

PLAY RECAP **********************************************************************************************************
mail-server1               : ok=2    changed=1    unreachable=0    failed=0    skipped=0    rescued=0    ignored=0
mail-server2               : ok=2    changed=1    unreachable=0    failed=0    skipped=0    rescued=0    ignored=0
確認
Postfixがインストールされていることが確認できました。(MailServer2は割愛)
$ sudo yum list installed | grep postfix
postfix.x86_64                         2:3.7.2-4.amzn2023.0.4             @amazonlinux
Postfixの設定ファイルを更新
次はPostfixの設定です。
Postfixの設定ファイルはいくつか種類がありますが、基本的に/etc/postfix/main.cfを更新できれば、あとは同じ方法で別の設定ファイルも更新できるでしょう。
playbook
更新対象のmain.cfを/etc/postfix/main.cfに配置します。
# Global Postfix configuration file. This file lists only a subset
# of all parameters. For the syntax, and for a complete parameter
# list, see the postconf(5) manual page (command: "man 5 postconf").
#
...(省略)
- #myhostname = host.domain.tld
+ myhostname = example.com
先程のplaybookに追記します。
- name: Setup Postfix on MailServer
  hosts:
    - mailservers
  tasks:
    - name: Install Postfix
      yum:
        name: postfix
        state: present
      become: yes
    # ■■■■ ここから追記 ■■■■
    - name: Edit Postfix Config
      copy:
        src: "{{ playbook_dir }}/etc/postfix/main.cf"
        dest: /etc/postfix/main.cf
      become: yes
- copy: コピーコマンドです。今回はファイル単位でコピーしています
- src:
playbook_dirはAnsibleが提供しているマジック変数です。変数の参照は{{ }}で囲みます
- src:
実行(ansible-playbookコマンド)
$ ansible-playbook -i inventory_hosts setup_postfix.ansible.yaml

PLAY [Setup Postfix on MailServer] **********************************************************************************

TASK [Gathering Facts] **********************************************************************************************
[WARNING]: Platform linux on host mail-server1 is using the discovered Python interpreter at /usr/bin/python3.9, but
future installation of another Python interpreter could change the meaning of that path. See
https://docs.ansible.com/ansible-core/2.15/reference_appendices/interpreter_discovery.html for more information.
ok: [mail-server1]
[WARNING]: Platform linux on host mail-server2 is using the discovered Python interpreter at /usr/bin/python3.9, but
future installation of another Python interpreter could change the meaning of that path. See
https://docs.ansible.com/ansible-core/2.15/reference_appendices/interpreter_discovery.html for more information.
ok: [mail-server2]

TASK [Install Postfix] **********************************************************************************************
ok: [mail-server1]
ok: [mail-server2]

TASK [Edit Postfix Config] ******************************************************************************************
changed: [mail-server1]
changed: [mail-server2]

PLAY RECAP **********************************************************************************************************
mail-server1               : ok=3    changed=1    unreachable=0    failed=0    skipped=0    rescued=0    ignored=0
mail-server2               : ok=3    changed=1    unreachable=0    failed=0    skipped=0    rescued=0    ignored=0
確認
main.cfの中身が更新されていることを確認できました。(MailServer2は割愛)
$ cat /etc/postfix/main.cf | grep example.com
myhostname = example.com
やってみて思ったこと
SSH接続できるだけで設定ファイルを管理できのはとても楽でした。
Ansibleの特性である冪等性(何回実行しても同じ結果が得られる)もあり何度でもトライ&エラーできるのも心強いです。本番環境では冪等性が保たれないケースもあるようですが...
だとしても、設定ファイルをコード管理することで、当時の設定意図や変更履歴を追えるようになるのは、後々チームにとっても資産になるかなと思いました。
補足
- Amazon Linux 2 ではデフォルトで入っている
postfix.serviceサービスがAmazon Linux 2023 では入っていないので、自前でインストールする必要があります
参考


