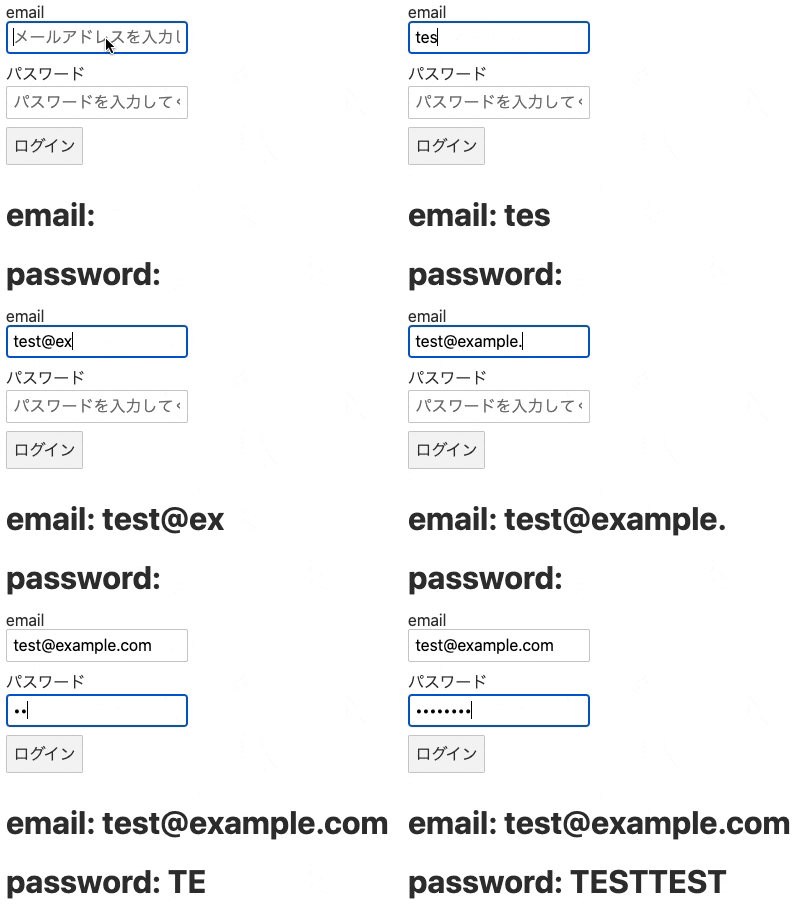
はじめに
Svelte初心者向けの記事です。
コードと動作確認は「こちらのREPL」でできます。
基本
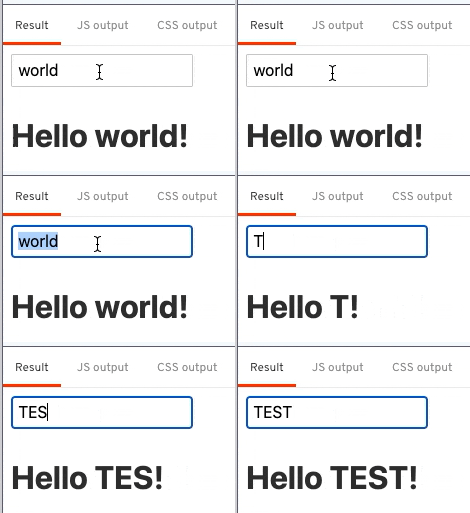
TutorialのBinding / Text inputs にも書いてありますが、Svelteでは要素に対してbindを付けることで<script>タグに書いた変数と双方向バインドしてくれます。
<script>
	let name = 'world';
</script>

<input bind:value={name}>

<h1>Hello {name}!</h1>
子コンポーネントの入力値をbindするには?
ここで、子コンポーネントとしてAppInput.svelteを作成します。
<script>
	// exportで宣言するとコンポーネントのpropsになる
	export let value;
</script>

<input bind:value>
<input bind:value>は<input bind:value={value}>と同じです。
すると、App.svelte(親)からの呼び出し方はこうなります。
<script>
+	import AppInput from './AppInput.svelte';
	let name = 'world';
</script>


- <input bind:value={name}>
+ <AppInput bind:value={name} />

<h1>Hello {name}!</h1>
ポイントは、親も子コンポーネントのどちらにもbind:を付けてあげる必要があります。
孫コンポーネントの入力値をbindするには?
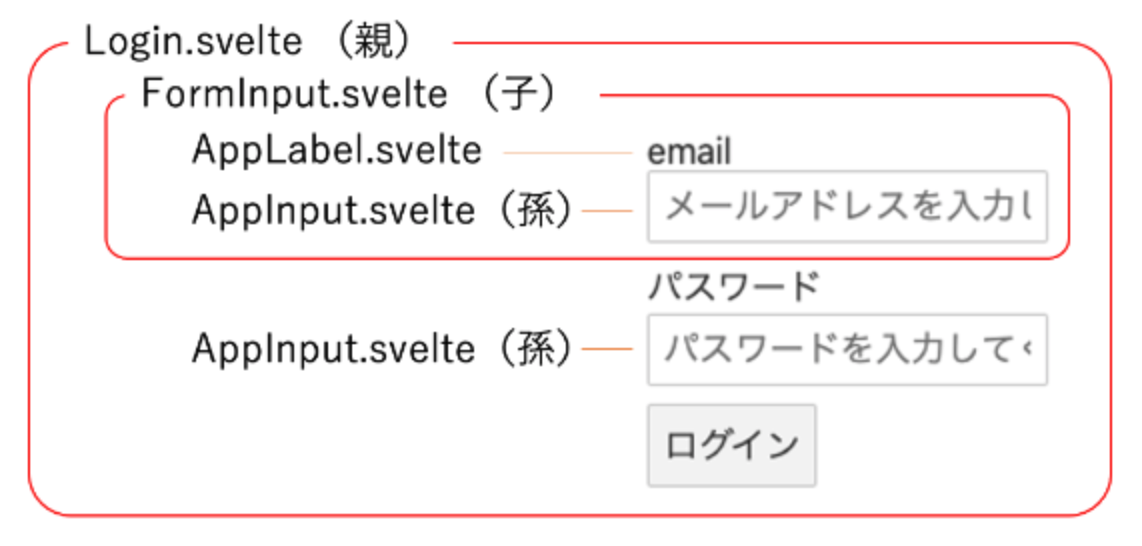
先程のAppInput.svelteを基底コンポーネントとしたとき、1つのコンポーネントの中に、複数のAppInput.svelteが存在することもあるでしょう。
例えば、以下のようなログイン画面が挙げられます。

孫コンポーネント
AppInput.svelte(孫)の実装をもう少し改良してみます。
<script>
-	export let value;
+	export let value = '';
+	export let type = 'text';
+	export let name = '';
+	export let placeholder = '';
+	const props = {
+		type,
+		name,
+		placeholder,
+	};
</script>


- <input bind:value={value}>
+ <input
+	bind:value
+	{...props}
+ />
注意点(input要素にtypeを設定するには?)
input要素に直接typeを設定すると以下のエラーが発生するので、props変数経由でセットしてください。
'type' attribute cannot be dynamic if input uses two-way binding
子コンポーネント
FormInput.svelte(子)の実装は、ラベル+入力項目としています。ただ、親から渡された属性値を孫に渡しているだけです。**ここでもbind:valueでvalue値を連動させる必要があります。
<script>
	import AppLabel from './AppLabel.svelte';
	import AppInput from './AppInput.svelte';

	export let type;
	export let name;
	export let title;
	export let value;
	export let placeholder;
</script>

<AppLabel name='{name}' title='{title}' />
<AppInput
	type='{type}'
	name='{name}'
	placeholder='{placeholder}'
	bind:value
/>
親コンポーネント
ログイン用のコンポーネントとして、emailとpasswordの入力項目が必要なため、子コンポーネントであるFormInputを2つ参照しています。
<script>
	import FormInput from './FormInput.svelte';
	import AppButton from './AppButton.svelte';

	let email;
	let password;

	const login = () => {
		console.log(`${email} | ${password}`);
	};
</script>

<div>
	<FormInput
		type='email'
		name='email'
		title='email'
		bind:value='{email}'
		placeholder='メールアドレスを入力してください'
	/>
	<FormInput
		type='password'
		name='password'
		title='パスワード'
		bind:value='{password}'
		placeholder='パスワードを入力してください'
	/>
</div>
<AppButton on:click='{login}'>ログイン</AppButton>
注意点(bind:valueって何?)
今までbind:valueとして定義してきましたが、これはbind:value='{value}'の省略形です。そのため、それぞれbind:value='{email}'とbind:value='{password}'のようにbindする対象を指定する必要があります。
もちろんbind:valueのvalueもexportした変数名なので、FormInput.svelteで
export let inputValue;
と宣言したなら、bind:inputValue='{email}'となります。

