アクションバーへオーバーフローメニューを表示させ
その中のアイテムを押した時の処理をつくる


アクションバーの設定確認
※アクションバーが表示されない時に確認
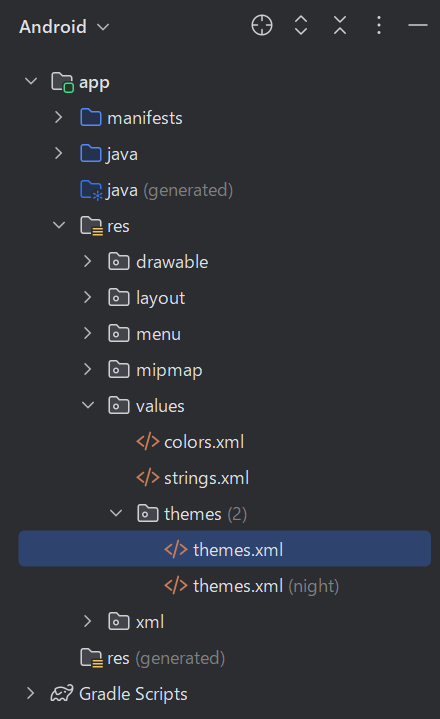
app > values > themes > themes.xmlを開く
<resources xmlns:tools="http://schemas.android.com/tools">
    <!-- Base application theme. -->
    <style name="Base.Theme.CustomLayout" parent="Theme.Material3.DayNight.NoActionBar">
        <!-- Customize your light theme here. -->
        <!-- <item name="colorPrimary">@color/my_light_primary</item> -->
    </style>

    <style name="Theme.CustomLayout" parent="Base.Theme.CustomLayout" />
</resources>
<style name="Base.Theme.CustomLayout" parent="Theme.Material3.DayNight.NoActionBar">
この状態の時はアクションバーが表示されない
なのでこれの
.NoActionBarの部分を消す
消去後↓
<style name="Base.Theme.CustomLayout" parent="Theme.Material3.DayNight>
こうすると表示される
リソースファイルの作成
オーバーフローメニュー用のリソースファイルを作成する
リソース用の新規フォルダーの作成
ファイル > 新規 > Android Resource Directoryを選択

ウィザードの設定
Directory name : 好きな名前を付ける
Resource type : menu を選択

設定が完了したらOKを押す。するとフォルダが作成される
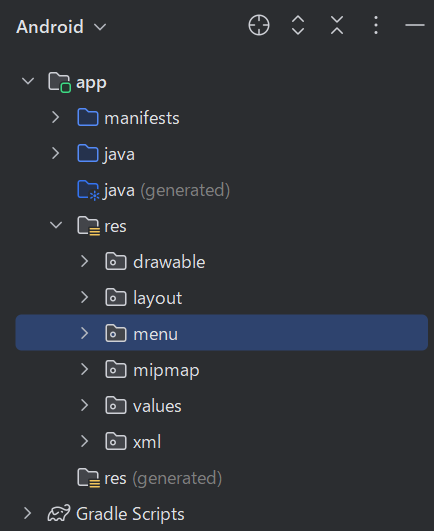
作成したフォルダー内へxmlファイルを作成
menuの所で右クリック > 新規 > menu Resource Fileを選択

作成したxmlへ記述
今回は2つitemを設定
<?xml version="1.0" encoding="utf-8"?>
<menu
    xmlns:android="http://schemas.android.com/apk/res/android"
    xmlns:app="http://schemas.android.com/apk/res-auto">
    <item
        android:id="@+id/menuListOptionfruit"
        app:showAsAction="never"
        android:title="くだもの" />
    <item
        android:id="@+id/menuListOptionvegetable"
        app:showAsAction="never"
        android:title="やさい"/>
</menu>
タグ
-
<menu></menu>と<item>
<item>タグを<menu></menu>で囲う
menuに必要な属性
-
xmlns:android
いつもの="http://schemas.android.com/apk/res/android" -
xmlns:app(任意)
今回はapp:showAsAction属性などをサポートするために追加
itemに必要な属性
-
android:id
アイテムを識別するためのID
android:id="@+id/任意のidを設定" -
android:title
メニューアイテムの表示テキスト
android:title="任意の文字列" -
android:showAsAction
メニューアイテムの表示方法
この属性が重要で、今回の場合は"never"を設定
android:showAsAction="never"
オーバーフローメニューを表示させる
MaineActivityへ記述
public class MainActivity extends AppCompatActivity {

    @Override
    protected void onCreate(Bundle savedInstanceState) {
        super.onCreate(savedInstanceState);
        setContentView(R.layout.activity_main);
        ViewCompat.setOnApplyWindowInsetsListener(findViewById(R.id.main), (v, insets) -> {
            Insets systemBars = insets.getInsets(WindowInsetsCompat.Type.systemBars());
            v.setPadding(systemBars.left, systemBars.top, systemBars.right, systemBars.bottom);
            return insets;
        });
    }

    //追加+++++++++++++++
    @Override
    public boolean onCreateOptionsMenu(Menu menu) {
        MenuInflater inflater = getMenuInflater();
        inflater.inflate(R.menu.menu_options_menu_list, menu);
        return true;
    }
    //+++++++++++++++++
}
解説
-
public boolean onCreateOptionsMenu(Menu menu){}
必ず@Overrideする
オプションメニューを初期化するために呼び出されるメソッドでアクティビティが最初に作成された際、一度だけ呼び出される -
MenuInflater inflater = getMenuInflater();
MenuInflaterオブジェクトを取得 -
inflater.inflate(R.menu.menu_options_menu_list, menu);
- 引数
第1
R.menu.上で作ったxmlファイル名を指定
※menuの部分はフォルダー作成時のフォルダ名のこと
第2
menuは引数の変数名
- 引数
-
return true;
メソッドがboolean型なのでtrueかfalseを返す必要がある
trueを返すことで、Androidはメニューを表示する
これでオーバーフローメニューがでて
それを押すことでxmlのitemに設定したものが表示される

オーバーフローメニューを押した時の処理
MaineActivityへ追記する
public class MainActivity extends AppCompatActivity {

    @Override
    protected void onCreate(Bundle savedInstanceState) {
        super.onCreate(savedInstanceState);
        setContentView(R.layout.activity_main);
        ViewCompat.setOnApplyWindowInsetsListener(findViewById(R.id.main), (v, insets) -> {
            Insets systemBars = insets.getInsets(WindowInsetsCompat.Type.systemBars());
            v.setPadding(systemBars.left, systemBars.top, systemBars.right, systemBars.bottom);
            return insets;
        });
    }

    @Override
    public boolean onCreateOptionsMenu(Menu menu) {
        MenuInflater inflater = getMenuInflater();
        inflater.inflate(R.menu.menu_options_menu_list, menu);
        return true;
    }
    //追加+++++++++++++++
    @Override
    public boolean onOptionsItemSelected(MenuItem item) {
        int itemId = item.getItemId();
        if(itemId == R.id.menuListOptionfruit) {
            //ここに処理を記入
        } else if (itemId == R.id.menuListOptionvegetable) {
            //ここに処理を記入
        }else{
            returnVal = super.onOptionsItemSelected(item);
        }
    }
    //+++++++++++++++++
}
解説
-
public boolean onOptionsItemSelected(MenuItem item){}
オーバーフローメニューの中のアイテムを押した時に
その押したアイテムをidで分岐させて各処理を行わせる
int itemId = item.getItemId();
if(itemId == R.id.menuListOptionfruit) {
    //くだものを押した時の処理を記入
    return true;
} else if (itemId == R.id.menuListOptionvegetable) {
    //やさいを押した時の処理を記入
    return true;
}else{
    return super.onOptionsItemSelected(item);
}
if文でidを識別して処理を行う
今回の場合商品リストを変更する処理を入れるとよい
必ずreturnすること基本的にtrueを返す
swich文は定数式を入れてくださいとエラーがでる
これはバージョンによって違うと思われる
return super.onOptionsItemSelected(item);
エラー回避とデフォルトの動作を維持し、
期待される動作を確実に実現するために必ず分岐させる