セットアップ
ドライバ のインストール
参考: https://nfcpy.readthedocs.io/en/latest/topics/get-started.html
-
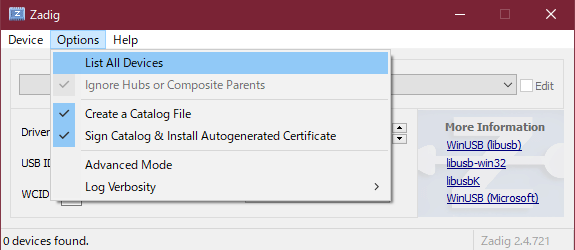
Zadigをダウンロードして実行します
-
Option > List All Devices にチェックを入れます
-
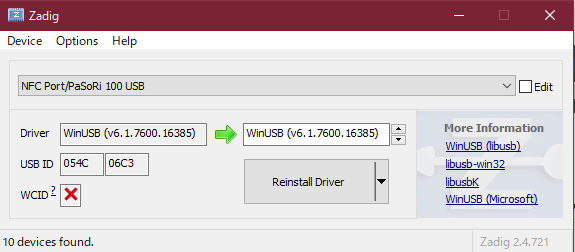
ドロップダウンから USB 接続している NFC リーダーを選択します
-
WinUSB を選択して、 Install Driver をクリックしてインストールを実行します
libusb のインストール
- libusbをダウンロードします
- ダウンロードしたアーカイブを解凍します。7z 形式なので展開できるソフトが無ければ 7zip を使うと良いでしょう
- 64bit 環境の場合、
MS64\dll\libusb-1.0.dllをC:\Windows\System32に
MS32\dll\libusb-1.0.dllをC:\Windows\SysWOW64に
移動します
python のインストール
scoop 等の選択肢もありますが、個人的には Windows の Python 環境はトラブルに遭いがちなので、
公式インストーラを使う方法をおすすめします。
nfcpy は現時点(2019年5月)で残念ながら python2 系にしか対応しておらず python3 系では使用できません。
Python 2.7のインストール に従い python 2.7 をインストールします。
pip は py -2 -m pip install hoge というように使います。
環境によっては LookupError: unknown encoding: cp65001 というようなエラーが表示される場合があります。
これはコンソールを utf-8 に設定している場合に発生します。
このときは PYTHONIOENCODING という環境変数 に utf-8 を設定します。
> [System.Environment]::SetEnvironmentVariable("PYTHONIOENCODING", "utf-8", [System.EnvironmentVariableTarget]::User)
nfcpy のインストール
pip 経由でインストールします
> py -2 -m pip install -U nfcpy
実行
nfcpy のリポジトリをクローンします
> git clone https://github.com/nfcpy/nfcpy.git
クローンしたリポジトリ直下の examples の tagtool.py を実行します
> py -2 .\examples\tagtool.py
waiting for a tag と表示され読み取り待ちになるのでSuicaか何かしら読み取らせてみます

そうしてカードあるいはタグの情報が表示されていれば完璧です。