環境
- Xcode11.3
- Swift5.1.3
概要
今回は文字色の指定、フォント指定、リンク化や下線などの複数の要素を簡単に追加していくため、
NSAttributedStringではなくNSMutableAttributedStringを利用した実装をしていきます。
GitHub: UITextViewWithLink
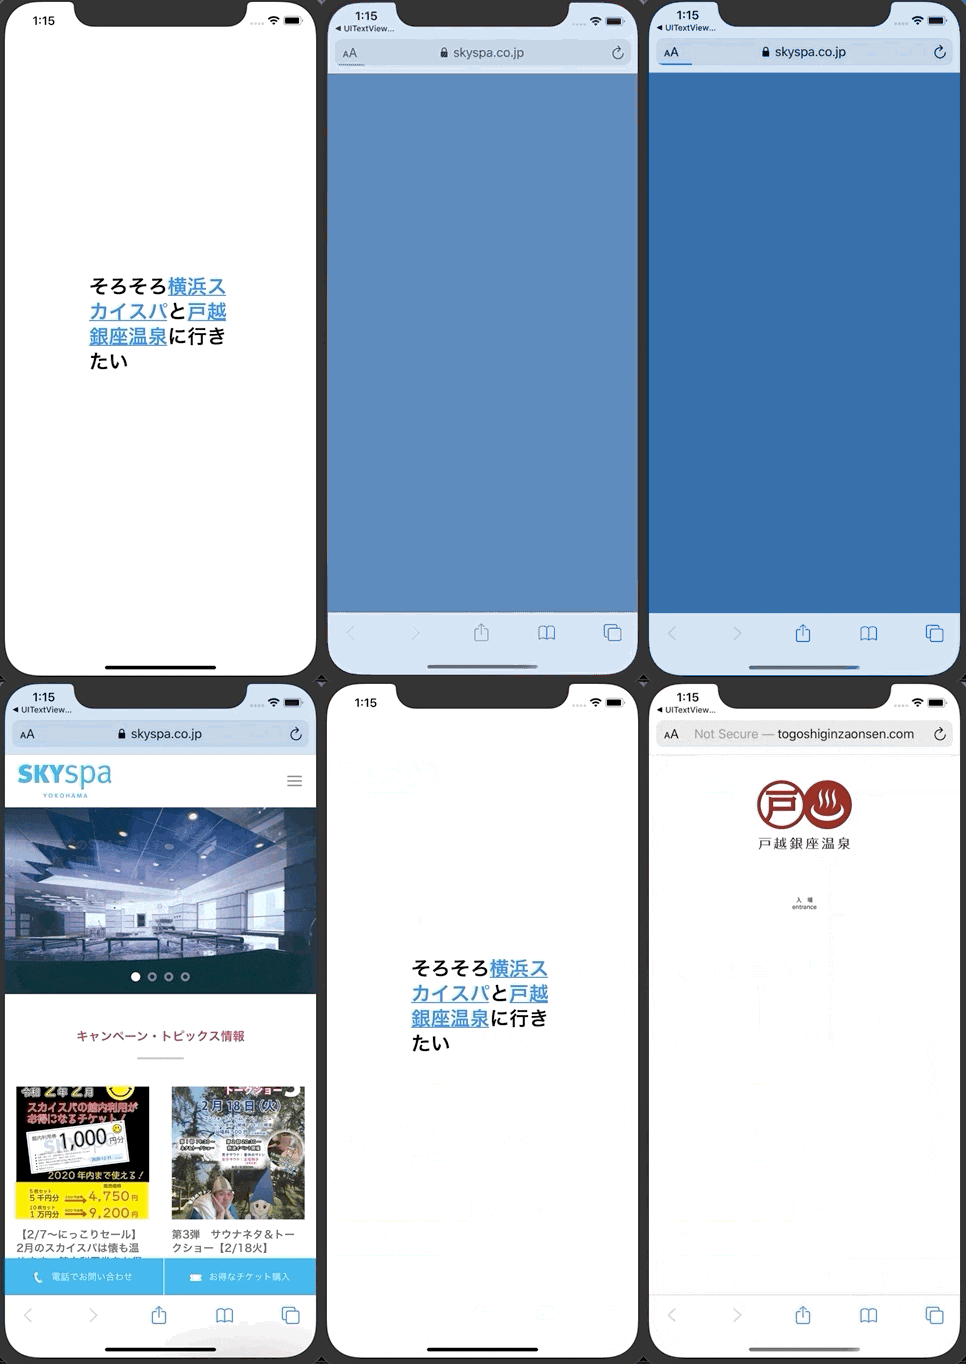
ひとまず完成GIF
通信が遅いのはご愛敬ということで...
スカイスパがとても良さそう

実装
下準備
ViewControllerのメンバ変数に使用する
UITextView- 表示したい文
- 下線付きリンクにしたい特定の文字列
を定義しておきます。(URLも定義しておいた方がいいのでは)
private let textViewWithLink = UITextView()

private let mainText = "そろそろ横浜スカイスパと戸越銀座温泉に行きたい"
private let skySpaText = "横浜スカイスパ"
private let togoshiGinzaBathText = "戸越銀座温泉"
UITextViewの設定
今回の目的はタップした際に、リンクからWebページに遷移することなので、
isEditableやisScrollEnabledは一応無効にしておきます。
(isEditable = trueでもリンクから遷移できたので、DelegateやRx等を利用すれば
打ち込まれた文字列を評価して、特定の文字だけリンク化させることもできますね)
textViewWithLink.text = mainText
textViewWithLink.isScrollEnabled = false
textViewWithLink.isEditable = false
NSMutableAttributedString
表題を達成するためのクラスです。説明は公式ドキュメントを参照してください。
Attributeの追加
こんな関数を用意しています。
下線付きリンクを設定したい文字列を含むUITextViewを引数に取り、
関数内部で特定の文字列に加工を施していきます。
private func addLinkAttributes(target textView: UITextView) {
    // NSMutableAttributedStringのinitializerに渡す文字列を、UITextViewから取得
    guard let targetText = textView.text else { return }
    let attributedString = NSMutableAttributedString(string: targetText)
    // 追加したいAttributeを追加していく
    attributedString.addAttribute(.foregroundColor, // 文字の色
                                  value: UIColor.label,
                                  range: NSString(string: targetText).range(of: targetText))
    attributedString.addAttribute(.font, // フォント
                                  value: UIFont.boldSystemFont(ofSize: 28),
                                  range: NSString(string: targetText).range(of: targetText))
    attributedString.addAttribute(.link, // リンク化
                                  value: "https://www.skyspa.co.jp/",
                                  range: NSString(string: targetText).range(of: skySpaText))
    attributedString.addAttribute(.underlineStyle, // 下線
                                  value: NSUnderlineStyle.single.rawValue,
                                  range: NSString(string: targetText).range(of: skySpaText))
    attributedString.addAttribute(.link, // リンク化
                                  value: "http://togoshiginzaonsen.com/",
                                  range: NSString(string: targetText).range(of: togoshiGinzaBathText))
    attributedString.addAttribute(.underlineStyle, // 下線
                                  value: NSUnderlineStyle.single.rawValue,
                                  range: NSString(string: targetText).range(of: togoshiGinzaBathText))
    // 対象となるUITextViewのattributedTextプロパティにAttributeを追加したattributedStringを格納する
    textView.attributedText = attributedString
}
...うぅん...なんだか繰り返し似た処理書いてる...面倒臭さい...
大丈夫です、こんな悩みを解決する術もちゃんと用意されています
addAttribute(_:value:range:)
先ほど利用していたメソッドです。(公式ドキュメント)。
Attributeをひとつずつ追加していく場合に利用します。
が、先ほどのコードの様に
同じ特定の文字列に対して複数のAttributeを追加する際には、繰り返し記述が必要で若干不便です。
addAttributes(_:range:)
そんな上記の悩みを解決するメソッドです。(公式ドキュメント)
private func addLinkAttributes(target textView: UITextView) {
    guard let targetText = textView.text else { return }
    let attributedString = NSMutableAttributedString(string: targetText)
    attributedString.addAttributes([.foregroundColor: UIColor.label,
                                    .font: UIFont.boldSystemFont(ofSize: 28)],
                                   range: NSString(string: targetText).range(of: targetText))
    attributedString.addAttributes([.link: "https://www.skyspa.co.jp/",
                                    .underlineStyle: NSUnderlineStyle.single.rawValue],
                                   range: NSString(string: targetText).range(of: skySpaText))
    attributedString.addAttributes([.link: "http://togoshiginzaonsen.com/",
                                    .underlineStyle: NSUnderlineStyle.single.rawValue],
                                   range: NSString(string: targetText).range(of: togoshiGinzaBathText))
    textView.attributedText = attributedString
}
第一引数に追加したいAttributeをまとめて渡します。
引数の型は[NSAttributedString.Key : Any]で、keyとvalueを指定するだけです。
だいぶスッキリしましたね。
気を付けること
NSMutableAttributedStringを利用して文字列を加工する場合、
事前にUITextViewに設定したフォントサイズや色などは上書きされるので、
その分のAttributeを追加する必要があります(今回で言うとこの.foregroundColorと.font)。
後記
UITextViewのリンクでの画面遷移が若干遅い気がしたので、タイムラグを減らそうと
UILabelとUITapGestureRecognizerを用いての実装も試しました。
けれども、NSLayoutManagerやNSTextContainerなど
登場するクラスも増え、座標取得する必要も出てきたので
大人しく標準仕様に従う方が良さそうです。
(気になる方はこちらの記事をご覧ください。)