この記事の目的
FILEベースCMS GRAVのインストール方法を記載しています。
今回は vagrant/VirtualBox 上に centos7 を入れて立ち上げてみます。
前提事項
以下の環境で実施しました。
ホストOS: CentOS7 7.7.1908 (Core)
Vagrant: 2.2.6
VitualBox: 5.1.14
セットアップ
centos のイメージを利用してvagrant initを実行
今回は /home/vm に centos-grav というフォルダを作成して開始しました。
$ pwd
/home/vm/centos-grav
$ vagrant init centos/7
A `Vagrantfile` has been placed in this directory. You are now
ready to `vagrant up` your first virtual environment! Please read
the comments in the Vagrantfile as well as documentation on
`vagrantup.com` for more information on using Vagrant.
Vagrant ファイルの編集
異なるIPアドレスをつけて bridge で起動するため、Vagrant ファイルを編集し以下の行のコメントアウトをはずします。
config.vm.network "public_network"
vagrant upにてVMを起動
$ vagrant up
Bringing machine 'default' up with 'virtualbox' provider...
==> default: Box 'centos/7' could not be found. Attempting to find and install...
    default: Box Provider: virtualbox
    default: Box Version: >= 0
==> default: Loading metadata for box 'centos/7'
    default: URL: https://vagrantcloud.com/centos/7
VMに接続
vagrant ssh コマンドでVM上のCentosに接続します。
# vagrant ssh
[vagrant@localhost ~]$
IPアドレスを確認。
# ip a
1: lo: <LOOPBACK,UP,LOWER_UP> mtu 65536 qdisc noqueue state UNKNOWN group default qlen 1000
    link/loopback 00:00:00:00:00:00 brd 00:00:00:00:00:00
    inet 127.0.0.1/8 scope host lo
       valid_lft forever preferred_lft forever
    inet6 ::1/128 scope host
       valid_lft forever preferred_lft forever
2: eth0: <BROADCAST,MULTICAST,UP,LOWER_UP> mtu 1500 qdisc pfifo_fast state UP group default qlen 1000
    link/ether 52:54:00:8a:fe:e6 brd ff:ff:ff:ff:ff:ff
    inet 10.0.2.15/24 brd 10.0.2.255 scope global noprefixroute dynamic eth0
       valid_lft 86201sec preferred_lft 86201sec
    inet6 fe80::5054:ff:fe8a:fee6/64 scope link
       valid_lft forever preferred_lft forever
3: eth1: <BROADCAST,MULTICAST,UP,LOWER_UP> mtu 1500 qdisc pfifo_fast state UP group default qlen 1000
    link/ether 08:00:27:10:ea:73 brd ff:ff:ff:ff:ff:ff
    inet 192.168.0.5/24 brd 192.168.0.255 scope global noprefixroute dynamic eth1
       valid_lft 3402sec preferred_lft 3402sec
    inet6 fe80::a00:27ff:fe10:ea73/64 scope link
       valid_lft forever preferred_lft forever
我が家のDHCPで192.168.0.5 になりました。
Apache/PHP関連のインストール
ここから最低限のパッケージを入れて設定していきます。
# パッケージアップデート
$ sudo yum update -y

# apache http サーバをインストール
$ sudo yum install httpd


# SE Linux をオフにする。
$ setenforce 0
$ vi /etc/selinux/config
$ SELINUX=disabled (値をenabledから変更)
$ reboot
PHP7.3 のインストール
# EPELをインストール
$ sudo yum install epel-release

# yumを更新
$ sudo yum update

# Remiをインストール
$ sudo yum -y install http://rpms.famillecollet.com/enterprise/remi-release-7.rpm

# PHP7.3 バージョンが見つかるかを確認
$ sudo yum search php73

# PHP7.3 と必要なライブラリをインストール
$ sudo yum --enablerepo=remi-php73 -y install php php-curl php-ctype php-dom php-gd php-json php-mbstring php-openssl php-session php-simplexml php-xml php-zip
GRAV のインストール
今回はWEBサイト(https://getgrav.org/download/core/grav-admin/latest)からダウンロードして展開。Admin Package入りを選んだ。
$ yum install unzip
curl -LO https://github.com/getgrav/grav/releases/download/1.6.9/grav-admin-v1.6.9.zip
unzip grav-admin-v1.6.9.zip
mv grav-admin /var/www/html
chown -R apache:apache /var/www/html/

# apache 起動
$ systemctl start httpd
$ systemctl enable httpd
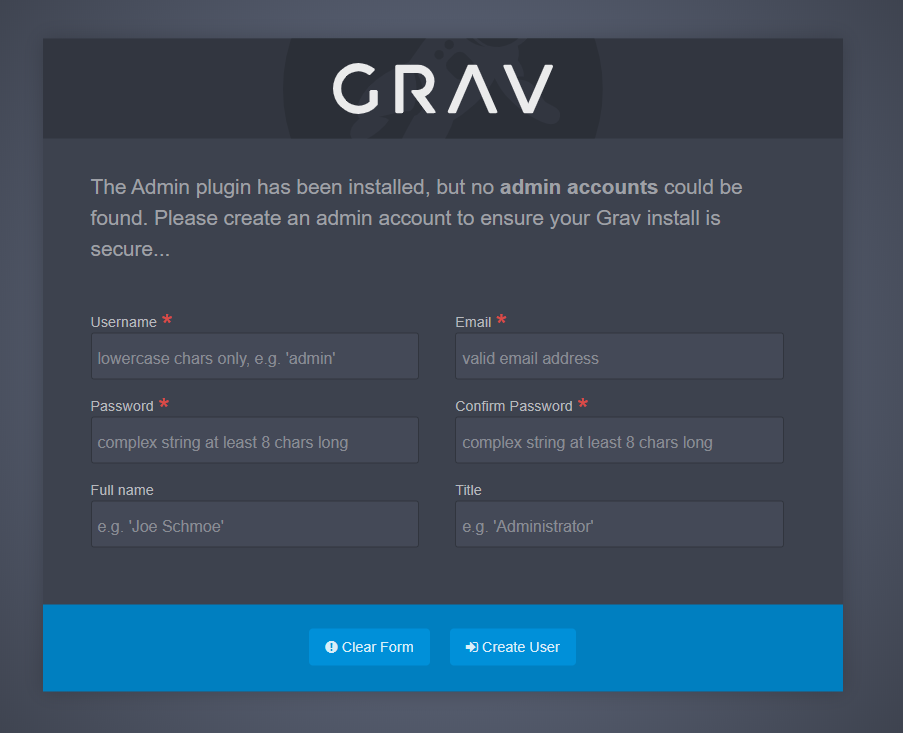
使い方
ブラウザでURLにアクセス
http://localhost/grav-admin/
終わりに
SE Linux などいくつかはまりどころがありますね。
次回はdockerで構築して記事にしたいと思います。また、より簡単に構築ができる skeltonについても記載していきます。