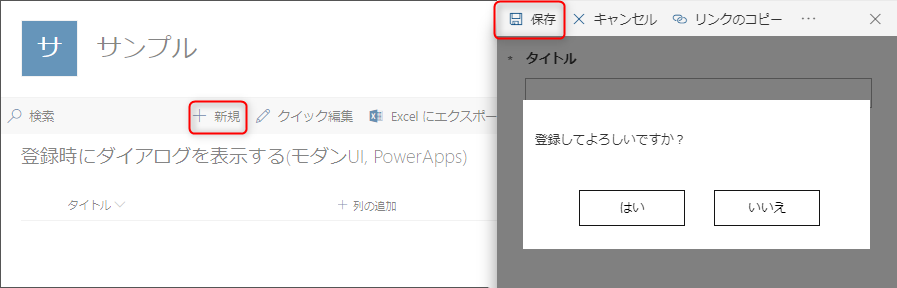
先日、「SharePoint のモダン UI で登録前に警告するダイアログを表示したい」という相談を受け、実装した時のメモになります
環境
- サーバー環境:SharePoint Online
- 開発・検証環境:Windows Pro 10, Chrome
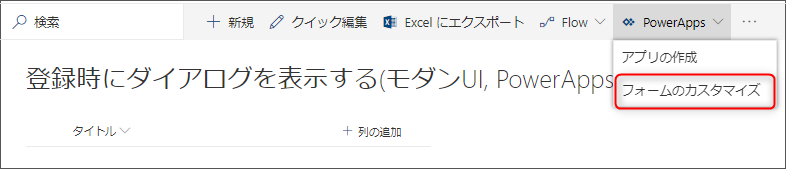
PowerApps の起動
-
モダン UI のリストで、[PowerApps] → [フォームのカスタマイズ] を選択することで PowerApps が起動します

PowerApps の設定
-
フォーム [FormScreen1] を選択し、[OnVisible] のプロパティを
Set(showDialog, false)とする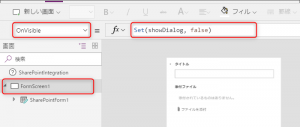
説明- [OnVisible] のプロパティは、ユーザーが FormScreen1 画面に遷移したとき動作
- グローバル変数
showDialogにfalseをセット
-
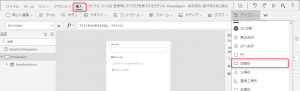
[挿入] → [アイコン] → [四角形] を選択
-
画面全体を囲み、[詳細設定] にある [Fill] のプロパティを
RGBA(0,0,0,.5)とする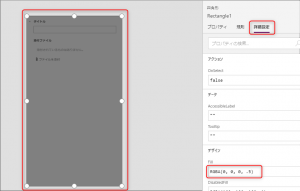
説明- [Fill] プロパティは、オブジェクトの背景色
- RGBA の引数は左から、赤(Red)、緑(Green)、青(Blue)、アルファ(Alpha, 透過度)
設定例
- [Fill] プロパティを
RGBA(0,0,0,.5) - [PressedFill] プロパティを
RGBA(0,0,0,.5) - [HoverFill] プロパティを
RGBA(0,0,0,.5)
-
同様に、[挿入] → [アイコン] → [四角形] と選択してダイアログ用の枠を作り、[詳細設定] にある [Fill] のプロパティを
RGBA(255,255,255,1)とする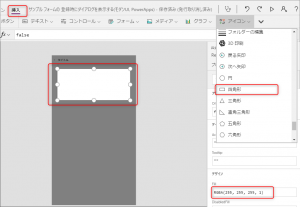
設定例- [Fill] プロパティを
RGBA(255,255,255,1) - [PressedFill] プロパティを
RGBA(255,255,255,1) - [HoverFill] プロパティを
RGBA(255,255,255,1)
- [Fill] プロパティを
-
[挿入] → [ラベル] を選択し、下図のように配置、[詳細設定] にある [Text] のプロパティを
"登録してよろしいですか?"とする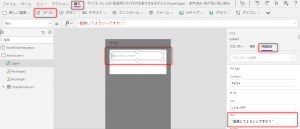
-
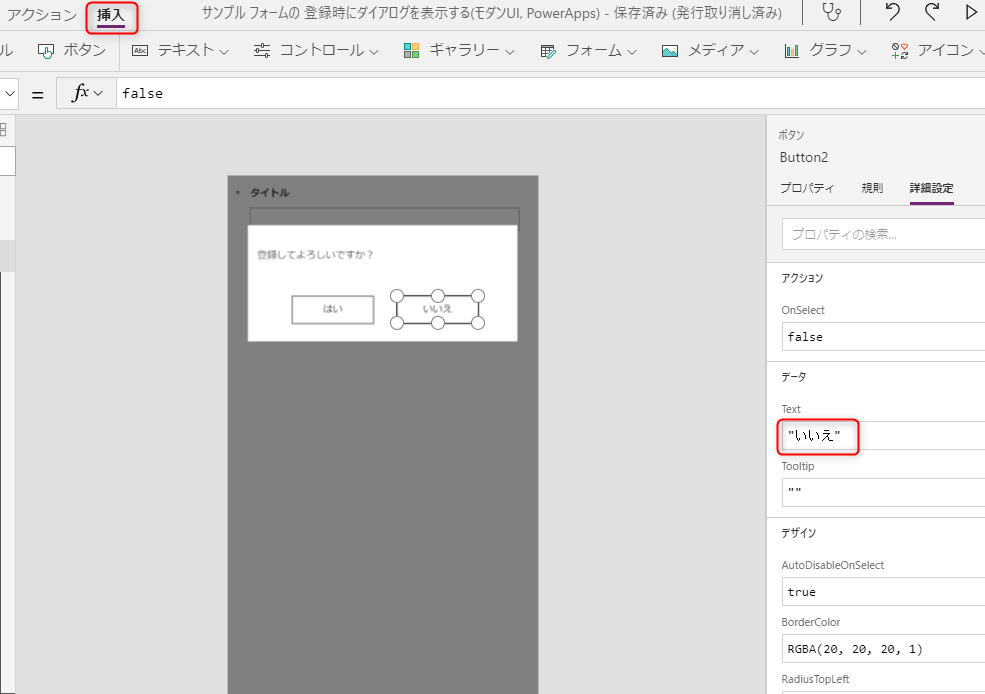
[挿入] → [ボタン] を選択し、下図のように配置、[詳細設定] にある [Text] のプロパティを
"はい"、[BorderStyle] のプロパティをBorderStyle.Solidとし、背景色(Fill)などは適宜変更する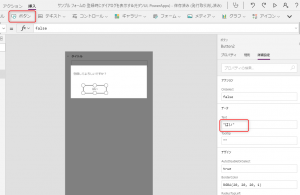
設定例- [Text] プロパティを
"はい" - [BorderColor] プロパティを
RGBA(20, 20, 20, 1) - [BorderStyle] プロパティを
BorderStyle.Solid - [Fill] プロパティを
RGBA(255, 255, 255, 1)
- [Text] プロパティを
-
同様に、いいえ ボタンを作成する

-
今回追加したオブジェクト(Button2, Button1, Label1, Rectangle2, Rectangle1) を Shift キーを押しながら選択していき、 [Visible] プロパティを
showDialogとする
※この設定を行うことで、追加したオブジェクトは画面上に表示されなくなる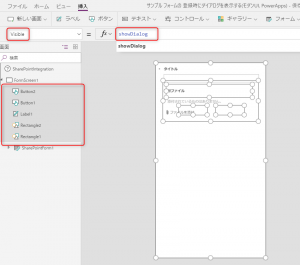
-
保存時にダイアログを表示するようにする
[SharePointIntegration] を選択し、[OnSave] プロパティをSet(showDialog, true)とする
説明- [SharePointIntegration] コントロールは SharePoint と PowerApps でアクションをバインドしている
- [OnSave] プロパティは、保存ボタンをクリック(またはタップ)された時に動作
-
[Button1] を選択し、[OnSelect] プロパティを
SubmitForm(SharePointForm1)とする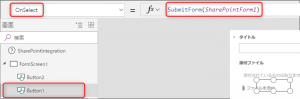
-
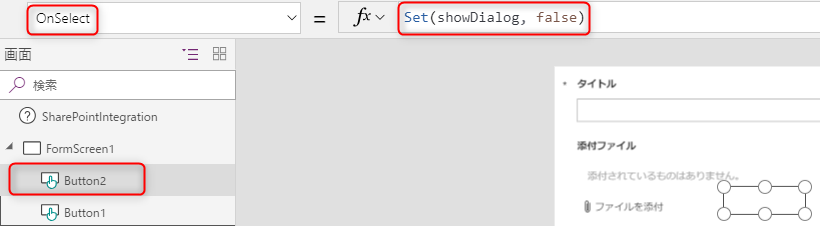
[Button2] を選択し、[OnSelect] プロパティを
Set(showDialog, false)とする


SharePoint への発行
-
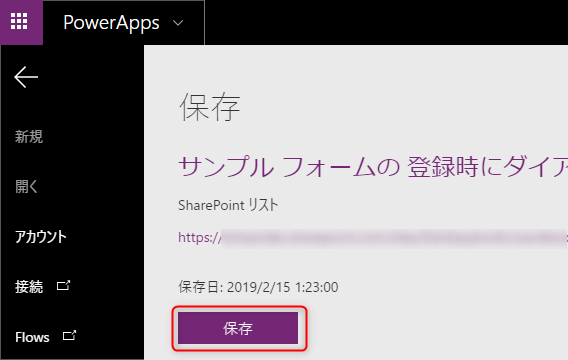
[ファイル] を選択

-
[保存] ボタンを押下

-
[SharePoint に発行] ボタンを押下する
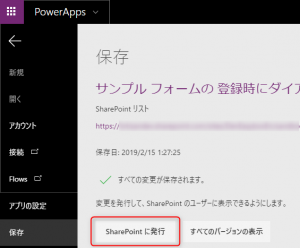
-
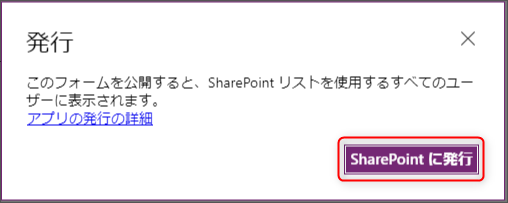
ダイアログが出るので、[SharePoint に発行] ボタンを押下する


動作確認
上記で、設定は完了になり、登録画面で [保存] ボタンを押下すると、下図のような確認ダイアログが表示されるようになります