Power Automate Desktopで複数シートにわたりデータを書き込む様子
みなさん、こんにちは。
紙、印鑑、手作業に埋もれて業務をしている昭和男子の会社員です。
毎月、請求書を大量に発行している業務を行っています。
請求書は、自動でEXCELファイルが作成されるシステムを使用していますが、発行部署名、電話番号が表示されずに毎回コピペしてから発行しています。
この作業をPowerAutomateDesktopで作業の自動化をしてみたいと思います。
使用するもの
・Power Automate Desktop
・Excel
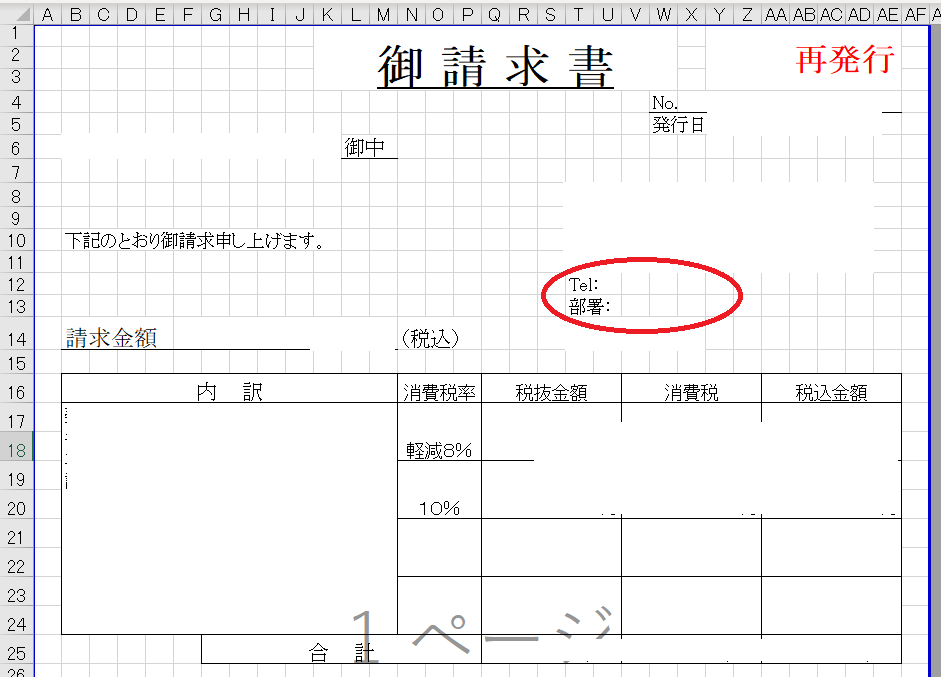
請求書(Excel)
ここに電話番号と発行部署名を入力していきます。
Power Automate Desktopの設定
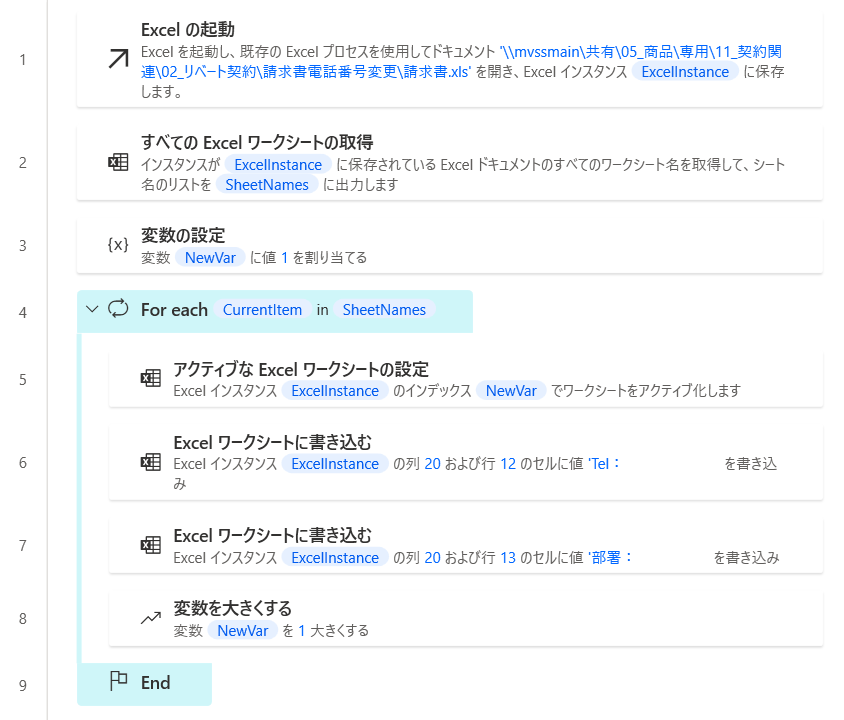
フローのソースコード
Excelの複数シートデータ入力
FUNCTION Main_copy GLOBAL
    Excel.LaunchExcel.LaunchAndOpenUnderExistingProcess Path: $'''\\\\mvssmain\\共有\\05_商品\\専用\\11_契約関連\\02_リベート契約\\請求書電話番号変更\\請求書.xls''' Visible: True ReadOnly: False Instance=> ExcelInstance
    Excel.GetAllWorksheets Instance: ExcelInstance Worksheets=> SheetNames
    SET NewVar TO 1
    LOOP FOREACH CurrentItem IN SheetNames
        Excel.SetActiveWorksheet.ActivateWorksheetByIndex Instance: ExcelInstance Index: NewVar
        Excel.WriteToExcel.WriteCell Instance: ExcelInstance Value: $'''Tel:000-000-0000''' Column: 20 Row: 12
        Excel.WriteToExcel.WriteCell Instance: ExcelInstance Value: $'''部署:○○部''' Column: 20 Row: 13
        Variables.IncreaseVariable Value: NewVar IncrementValue: 1
    END
    Excel.CloseExcel.CloseAndSave Instance: ExcelInstance
END FUNCTION
ポイントは、変数の設定
入力したいExcelシートを指定するのに変数を使用しました。シート数は、「SheetNames」でカウントされていますので、1からスタートして1つづつ変数を増やしていくと左端のシートから順に指定されていきます。Excelのマクロを動かしたように動いてくれます。
マクロが使えない方にお勧めです。
(私も使えませ~ん!)