はじめに
Playwrightを用いてVRTをGitHub Actionsで動く過程を小さく実装したので、メモとして残します。
開発環境
- VS Code
- node:v22.9.0
- npm: v10.8.3
- playwright:v1.17.134
- reg-actions
ビジュアルリグレッションテストについて
アプリケーションのユーザーインターフェース(UI)が意図した通りに表示されているかを以下の3つのフェーズを経て見た目のリグレッション(後退)が発生していないかを検証するテスト手法
- スナップショットの取得
変更前のUIのスクリーンショットを取得 - 比較
コードに変更を加えた後、再度UIのスクリーンショットを取得 - 差分の確認
取得した変更後の画像と基準画像を比較し、UIに予期しない変更がないかをチェック
前提条件
- node/npmインストール済み
- GitHubアカウントあり
- VS Code設定済み
実装
VS Code設定
-
以下に沿って、設定する
-
VS Code の拡張機能タブからVS Code 拡張機能をインストール
- インストールしたら、コマンドパネルを開いて
Install Playwrightと入力する
- okをクリック
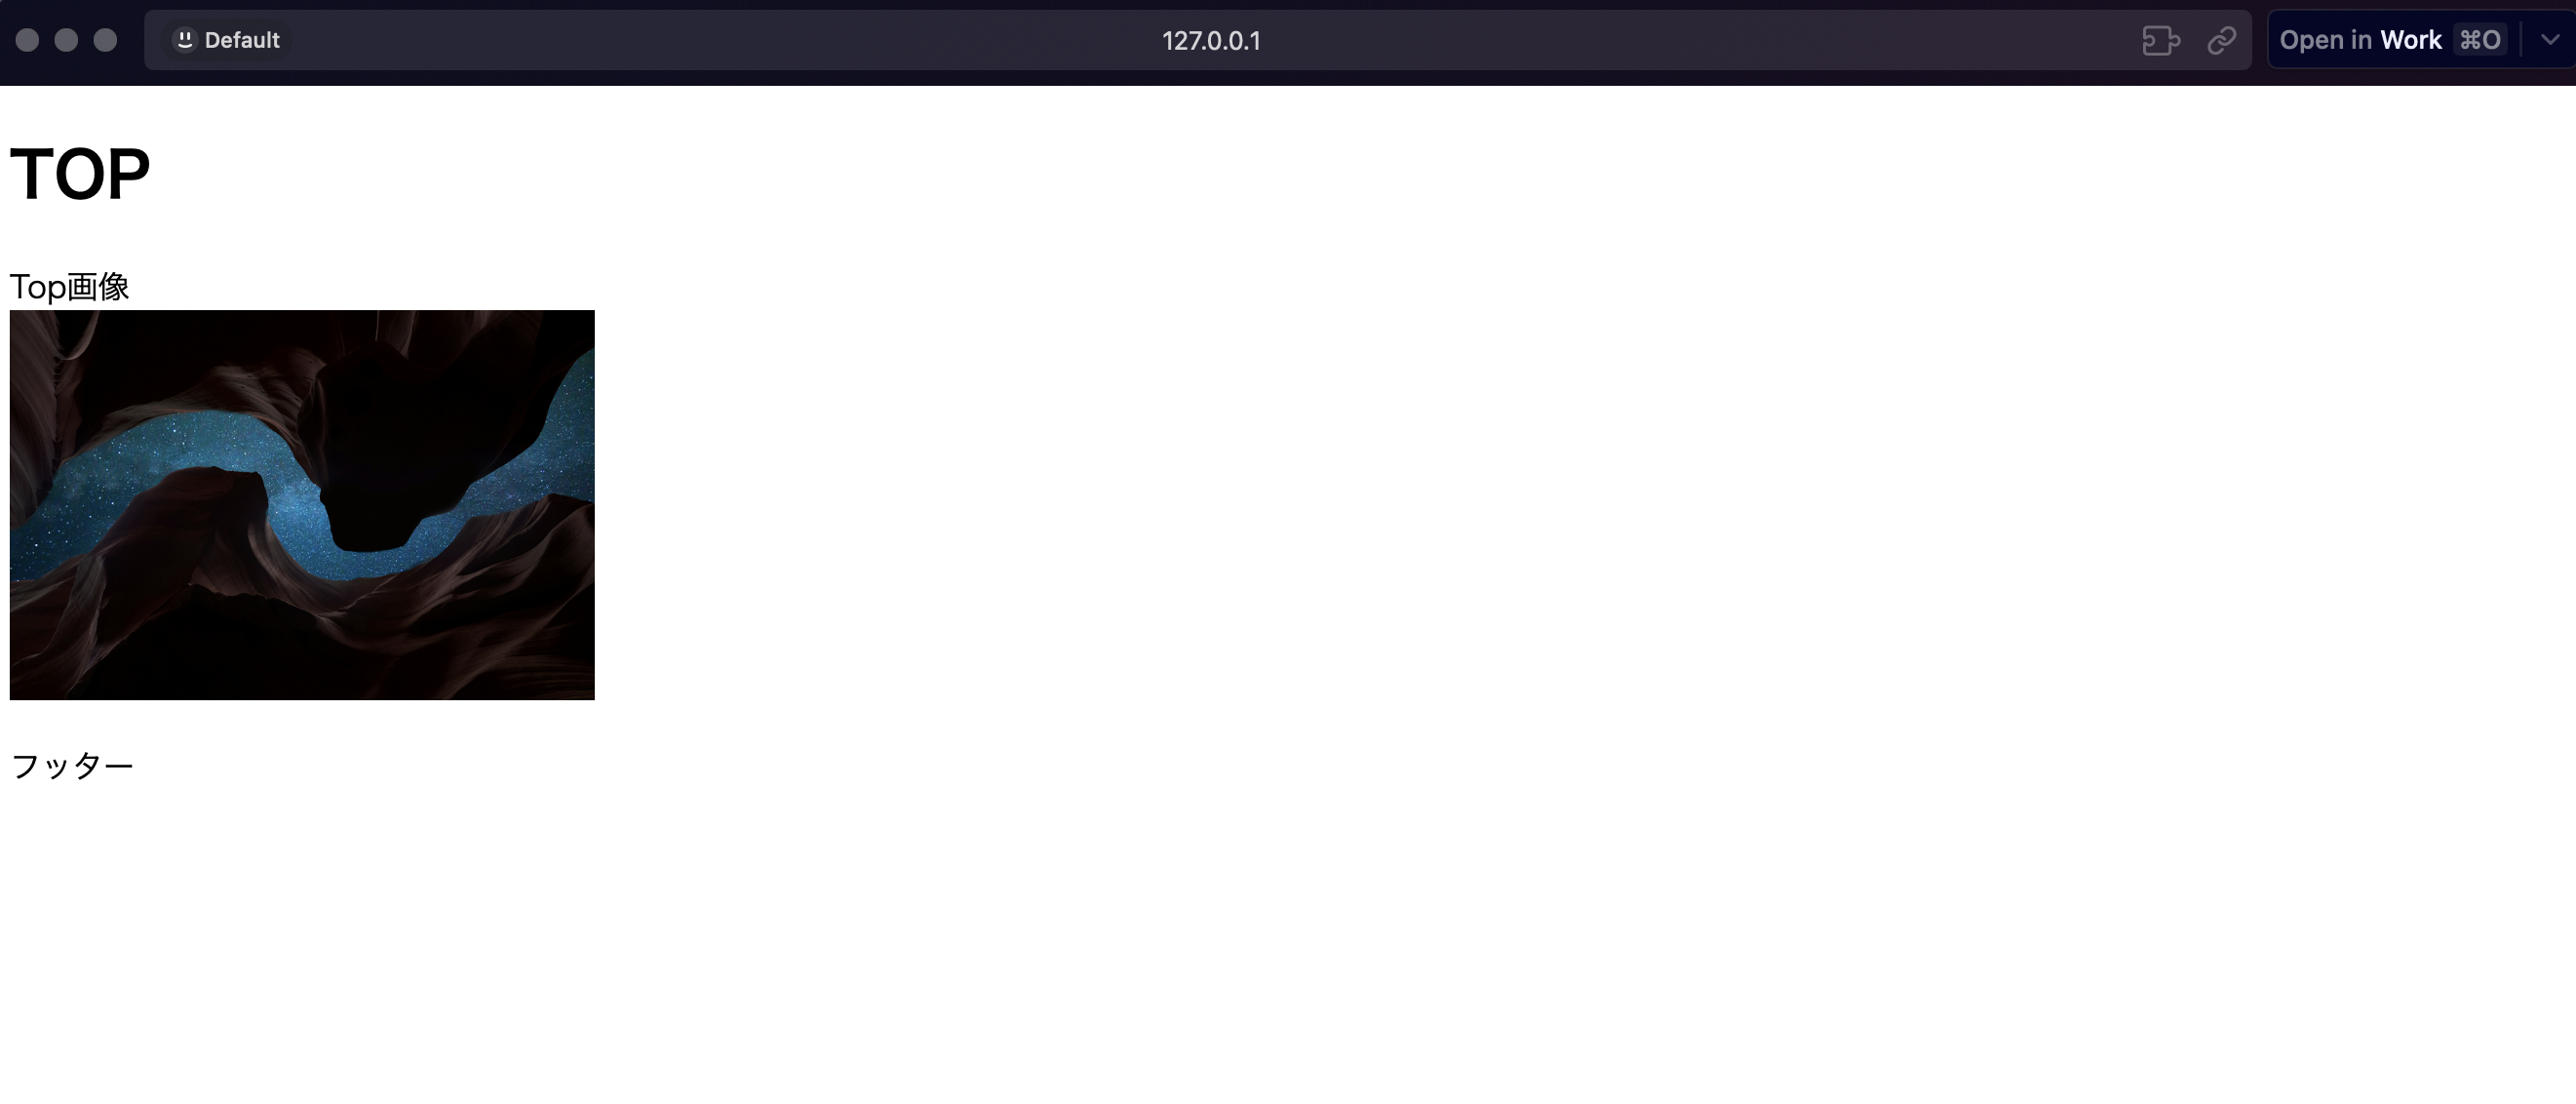
node環境でindex.htmlを表示する
-
以下に沿って簡易的に作成する
Node.js v16.20.2 ドキュメント -
プロジェクト配下にindex.htmlとserver.jsを作成
<!DOCTYPE html>
<html lang="ja">
<head>
    <meta charset="UTF-8">
    <meta name="viewport" content="width=device-width, initial-scale=1.0">
    <title>TOP</title>
</head>
<body>
    <header>
        <h1>TOP</h1>
    </header>

    <main>
        <div>Top画像</div>
        <img src="images/top2.jpg" alt="TOP画像" width="300" height="200">
    </main>

    <footer>
        <p>フッター</p>
    </footer>
</body>
</html>
const http = require("node:http");
const fs = require("fs");
const path = require("path");

const hostname = "127.0.0.1";
const port = 3001;

const server = http.createServer((req, res) => {
  // リクエストされたファイルのパスを取得
  let filePath = req.url === '/' ? 'index.html' : `public${req.url}`;

  // ファイルのフルパスを作成
  filePath = path.join(__dirname, filePath);

  // ファイルを読み込む
  fs.readFile(filePath, (err, data) => {
    if (err) {
      res.statusCode = 404;
      res.setHeader("Content-Type", "text/plain");
      res.end("Not Found\n");
    } else {
      // コンテンツタイプを判別
      const extname = path.extname(filePath);
      let contentType = 'text/html';
      if (extname === '.js') {
        contentType = 'text/javascript';
      } else if (extname === '.css') {
        contentType = 'text/css';
      } else if (extname === '.png') {
        contentType = 'images/png';
      } else if (extname === '.jpg') {
        contentType = 'images/jpeg';
      }

      res.statusCode = 200;
      res.setHeader("Content-Type", contentType);
      res.end(data);
    }
  });
});

// サーバーの起動
server.listen(port, hostname, () => {
  console.log(`Server running at http://${hostname}:${port}/`);
});
- サーバー実行しweb上で確認
node server.js
Playwrightインストール
- Playwrightをインストール
npm init playwright@latest
- 自分の環境に合ったものを選択してインストール
・TypeScript または JavaScript を選択します (デフォルトは TypeScript)
・テスト フォルダの名前 (プロジェクトに既にテスト フォルダがある場合は、デフォルトは tests または e2e です)
・GitHub Actionsワークフローを追加してCIで簡単にテストを実行
・Playwright ブラウザをインストールする (デフォルトは true)
- ファイル構成
playwright.config.ts
package.json
package-lock.json
tests/
  example.spec.ts
tests-examples/
  demo-todo-app.spec.ts
- サンプルでテスト実行してみる
npx playwright test
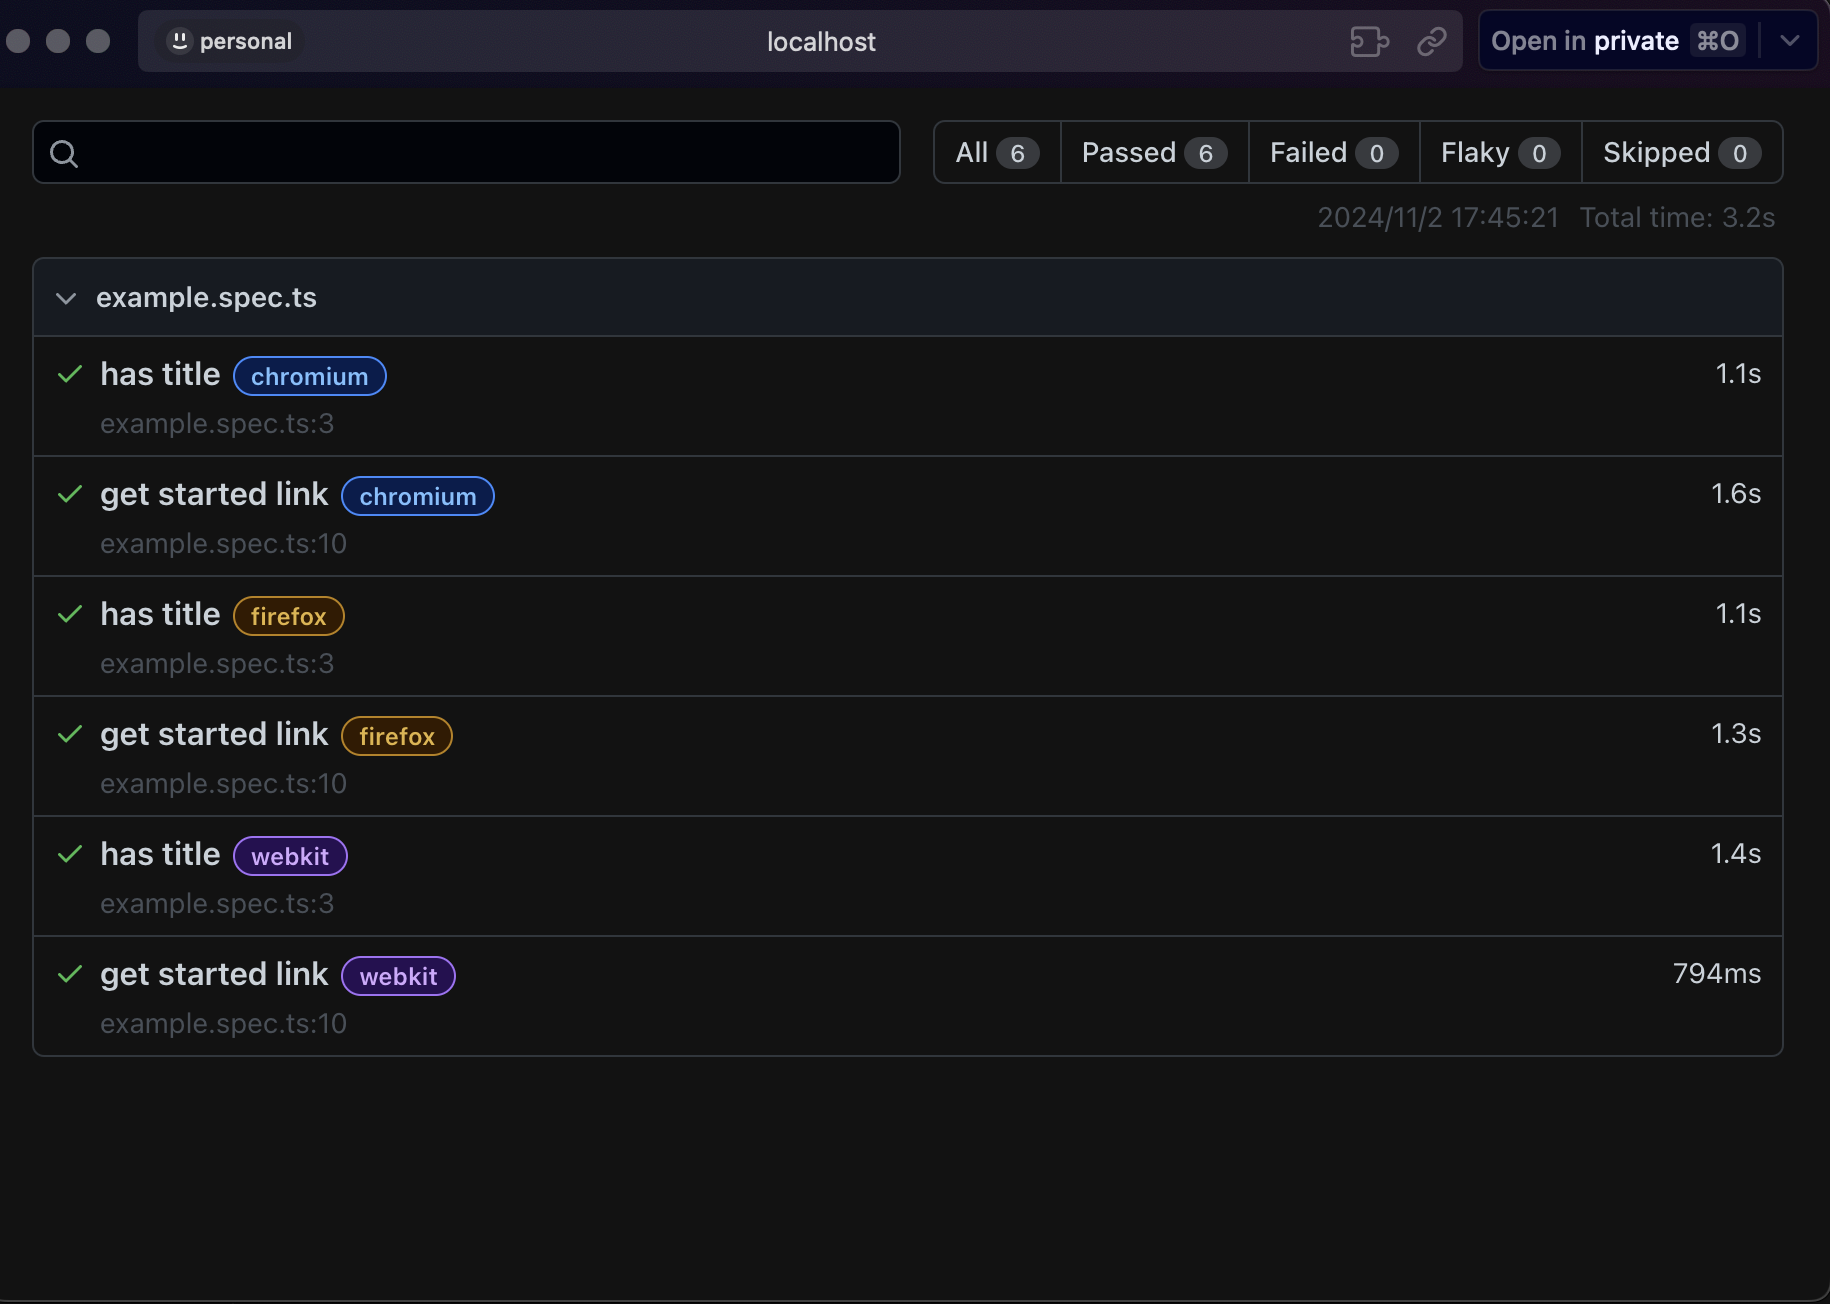
- HTMLテストを実行してみる
npx playwright show-report
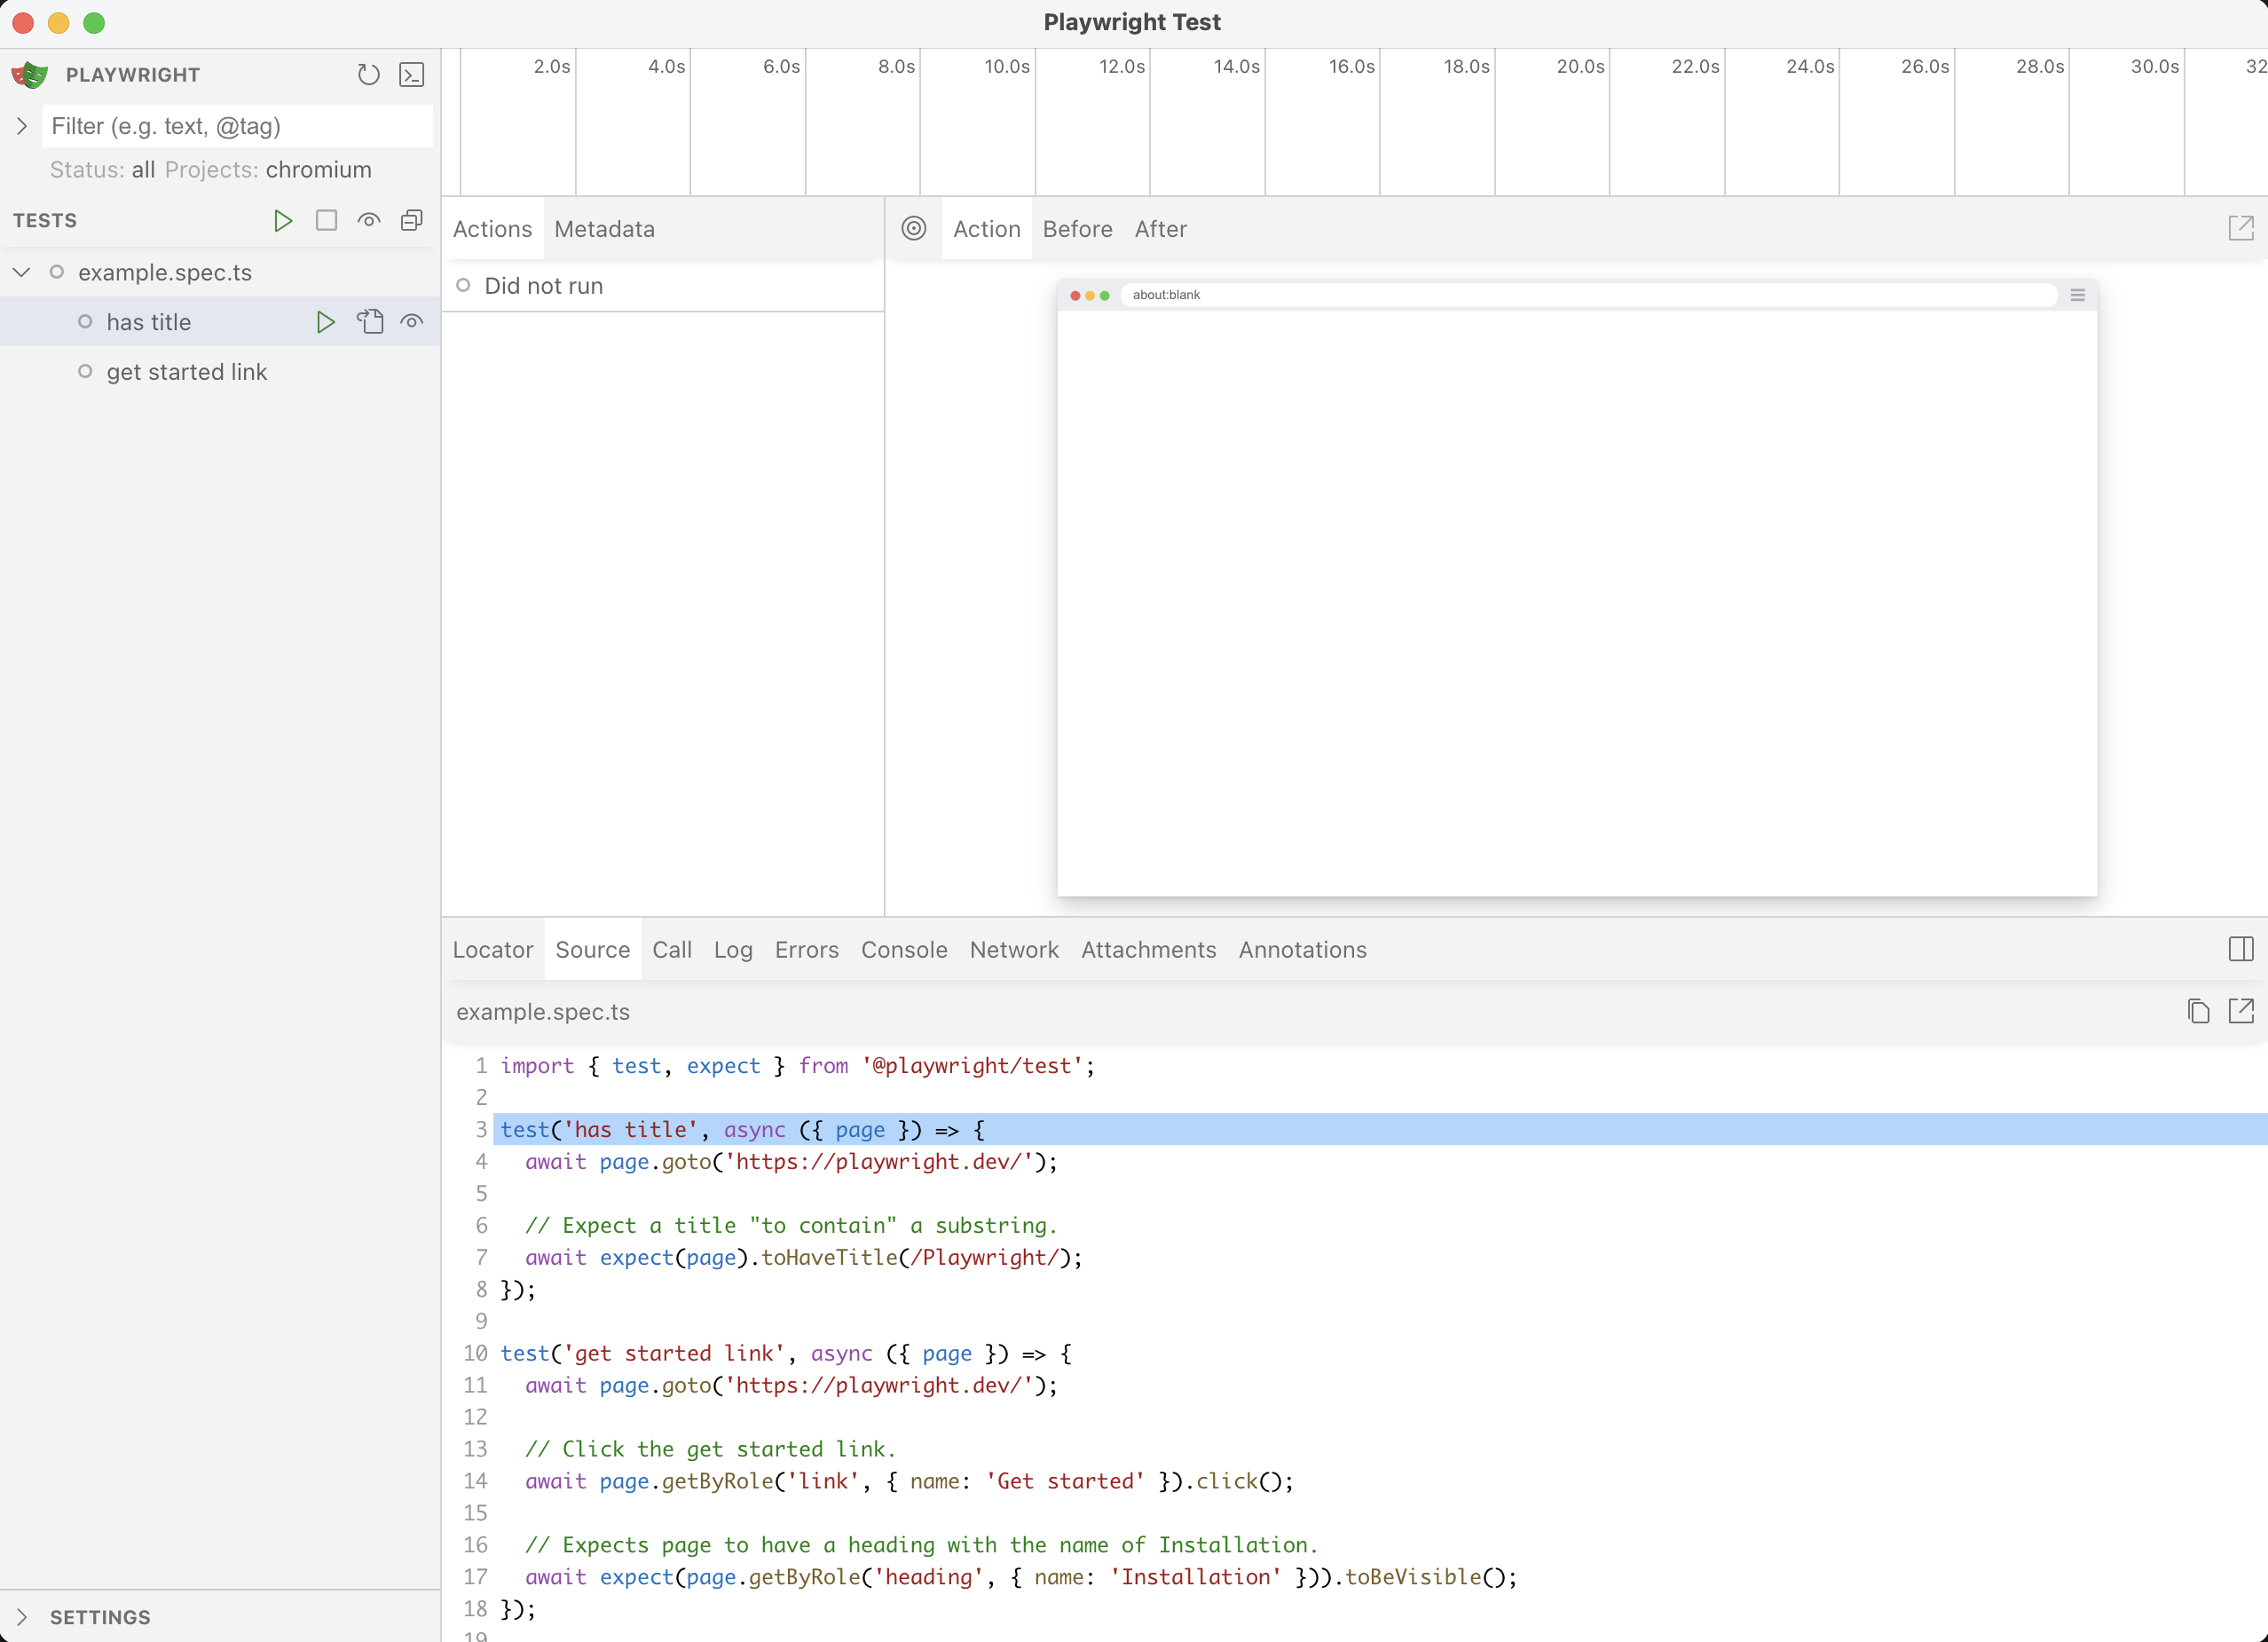
- UIでも動作している
npx playwright test --ui
- Chromiumブラウザーでのみテストを実行するには、--projectオプションを使用する見たい。
npx playwright test --project chromium
VS Codeで実行してみる
- デバッグの場合は、Show trace Viewer オプションに入れておくとわかりやすい。
- 視覚的にわかりやすい。
- 以下から色々触ってみる。Chrome以外はコメントアウト
  /* Configure projects for major browsers */
  projects: [
    {
      name: 'chromium',
      use: { ...devices['Desktop Chrome'] },
    },

    // {
    //   name: 'firefox',
    //   use: { ...devices['Desktop Firefox'] },
    // },
    //
    // {
    //   name: 'webkit',
    //   use: { ...devices['Desktop Safari'] },
    // },

    /* Test against mobile viewports. */
    // {
    //   name: 'Mobile Chrome',
    //   use: { ...devices['Pixel 5'] },
    // },
    // {
    //   name: 'Mobile Safari',
    //   use: { ...devices['iPhone 12'] },
    // },

    /* Test against branded browsers. */
    // {
    //   name: 'Microsoft Edge',
    //   use: { ...devices['Desktop Edge'], channel: 'msedge' },
    // },
    // {
    //   name: 'Google Chrome',
    //   use: { ...devices['Desktop Chrome'], channel: 'chrome' },
    // },
  ],
- TOP画面の画像をスクショ撮るテストを追加
import { test, expect } from '@playwright/test';

test('top', async ({ page }) => {
    // トップページにアクセスする
    await page.goto('/');
    // スクリーンショットを撮る
    await page.screenshot({ path: `screenshots/top.jpg`, fullPage: true });
});
エラー①
-
npx playwright test実行すると下記のエラーになる
- 公式通り、useにスキップするように設定を追加
- test-use-options
  use: {
    /* Base URL to use in actions like `await page.goto('/')`. */
    baseURL: 'http://127.0.0.1:3001',

    /* Collect trace when retrying the failed test. See https://playwright.dev/docs/trace-viewer */
    trace: 'on-first-retry',

    // Whether to ignore HTTPS errors during navigation.
    ignoreHTTPSErrors: true,
  },
CI環境で動かしてみる
- GitHub Actionsでも確認できるように設定をしてみる
- 以下公式に沿って、設定
name: Playwright Tests
on:
  push:
    branches: [ main ]
  pull_request:
    branches: [ main ]
jobs:
  test:
    timeout-minutes: 60
    runs-on: ubuntu-latest
    steps:
    - uses: actions/checkout@v4
    - uses: actions/setup-node@v4
      with:
        node-version: lts/*
    - name: Install dependencies
      run: npm ci
    - name: Install Playwright Browsers
      run: npx playwright install --with-deps
    - name: Run Playwright tests
      run: npx playwright test
    - uses: actions/upload-artifact@v4
      if: ${{ !cancelled() }}
      with:
        name: playwright-report
        path: playwright-report/
        retention-days: 30
- GitHub Actions上でブログのローカルサーバーを起動するために以下を設定
  webServer: {
    command: 'npm run start',
    url: 'http://127.0.0.1:3001',
    reuseExistingServer: !process.env.CI,
  },
- GitHub actionsを修正
name: Playwright Tests
on:
  # mainプッシュ時に実行
  push:
    branches: [ main ]
  # mainへプルリク作成時に実行
  pull_request:
    branches: [ main ]
jobs:
  test:
    # タイムアウトを短く設定
    timeout-minutes: 5
    # ジョブを実行する環境は最新のubuntu
    runs-on: ubuntu-latest
    steps:
    # リポジトリのソースコードをチェックアウト
    - uses: actions/checkout@v4
    # nodeのバージョン
    - uses: actions/setup-node@v4
      with:
        node-version: 22.x
    # 依存関係をインストール
    - name: Install dependencies
      run: npm ci
    # Playwrightが使用するブラウザをインストール
    - name: Install Playwright Browsers
      run: npx playwright install --with-deps
    # test実行
    - name: Run Playwright tests
      run: npx playwright test
    # テストの結果をアップロード
    - uses: actions/upload-artifact@v4
      if: ${{ !cancelled() }}
      with:
        name: playwright-report
        path: playwright-report/
        retention-days: 7
-
actions/checkout@v4に関して以下の記事が詳しく書いていて参考になりました。 - 【初心者向け】【入門】GitHub Actionsとは?書き方、デバッグ設定、runs-onやcheckoutなどの仕組みや構造も含めて徹底解説
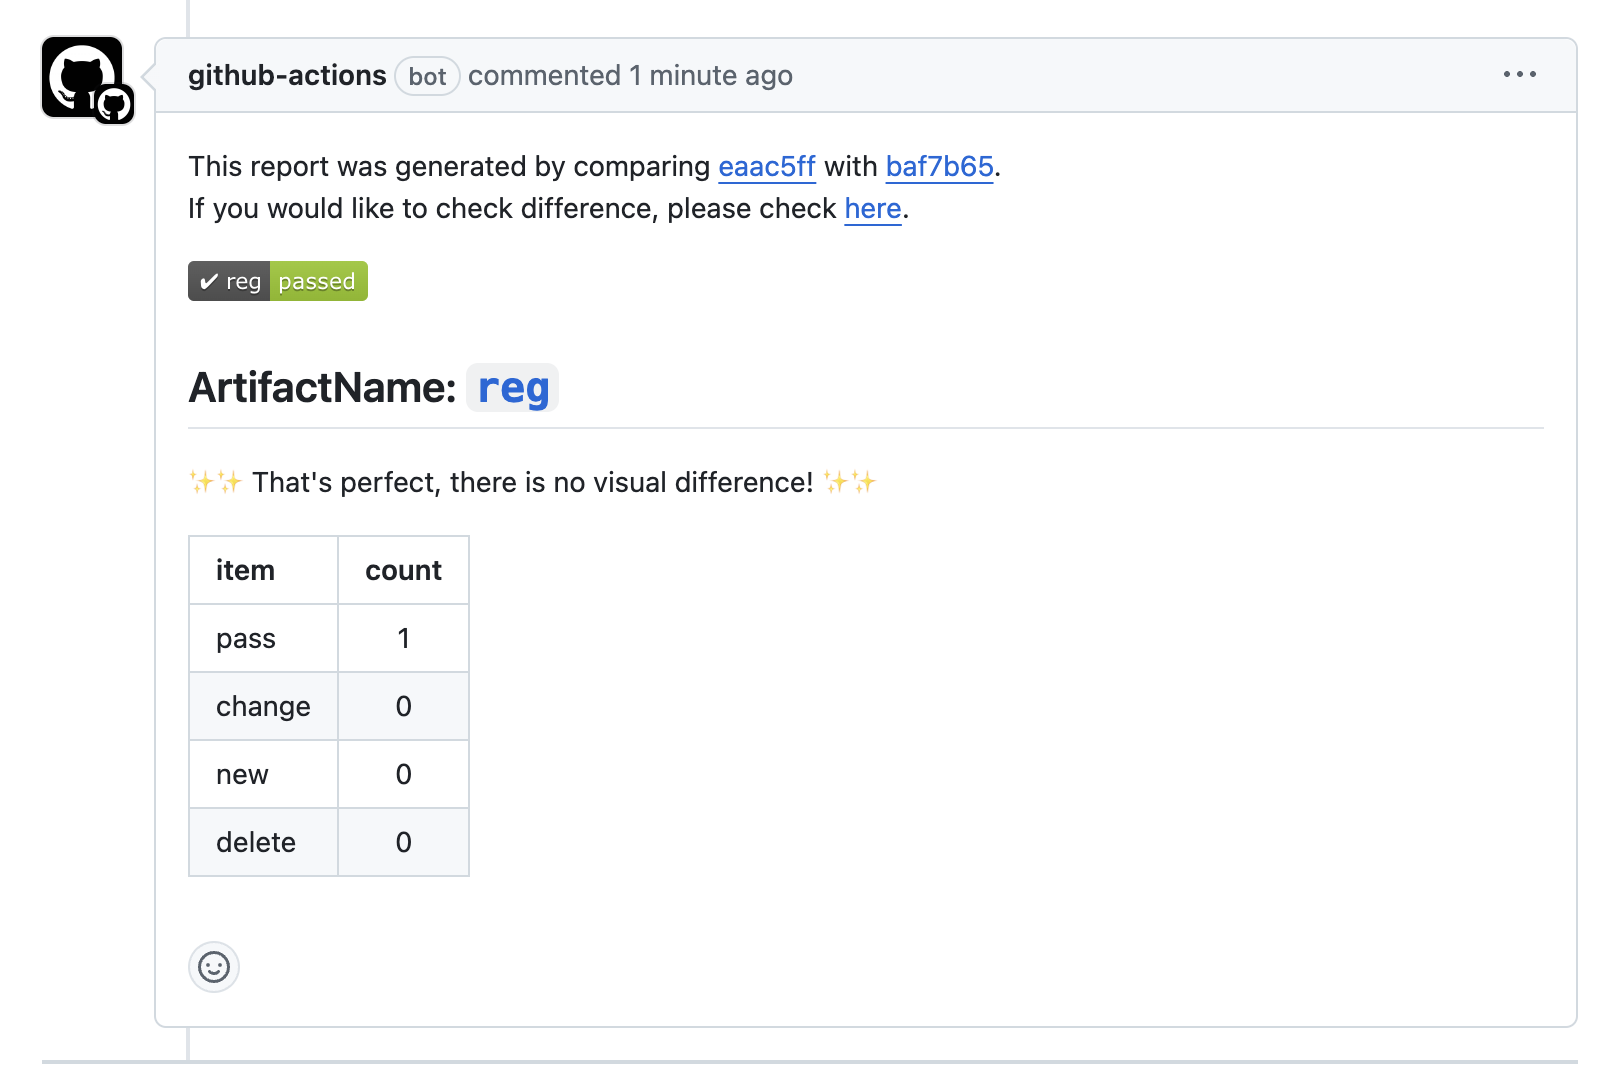
reg-actionsを設定
- Playwrightの
toMatchSnapshotを使えば、スクリーンショットの差分を確認できるみたいだけど、変更前の画像をリポジトリで管理する必要があるみたいので、今回は管理する必要のないreg-actionsを設定してみる
name: Playwright Tests
on:
  # mainへプルリク作成時に実行
  pull_request:
    branches: [ main ]
permissions:
  # リリースを作成するアクションを許可
  contents: write
  # ワークフローの実行をキャンセルするアクションを許可
  actions: write
  # プルリクエストにラベルを追加するアクションを許可
  pull-requests: write

jobs:
  test:
    # タイムアウトを短く設定
    timeout-minutes: 5
    # ジョブを実行する環境は最新のubuntu
    runs-on: ubuntu-latest
    steps:
    # リポジトリのソースコードをチェックアウト
    - uses: actions/checkout@v4
    # nodeのバージョン
    - uses: actions/setup-node@v4
      with:
        node-version: 22.x
    # 依存関係をインストール
    - name: Install dependencies
      run: npm ci
    # フォントのキャッシュ
    - name: Cache fonts
      uses: actions/cache@v3
      id: fonts-cache
      with:
        path: ~/.fonts
        key: ${{ runner.OS }}-fonts

    # 日本語フォントのインストール
    - name: Install Japanese font
      if: steps.fonts-cache.outputs.cache-hit != 'true'
      run: sudo apt install fonts-noto-cjk

    # Playwrightが使用するブラウザをインストール
    - name: Install Playwright Browsers
      run: npx playwright install --with-deps
    # test実行
    - name: Run Playwright tests
      run: npx playwright test
    # テストの結果をアップロード
    - uses: actions/upload-artifact@v4
      if: ${{ !cancelled() }}
      with:
        name: playwright-report
        path: playwright-report/
        retention-days: 7
    # スクリーンショットを保存
    - uses: reg-viz/reg-actions@v2
      with:
        github-token: "${{ secrets.GITHUB_TOKEN }}"
        image-directory-path: "./screenshots"
- プルリクするといい感じにできている。すごい。
エラー①
- 画像がないってなってしまい、画像の差分が表示されない。
- スナップショットの保存が上手くいっていないのか?と思い
npx playwright test --update-snapshotsでupdateすることにした。
name: Playwright Tests
on:
  # mainへプルリク作成時に実行
  pull_request:
    branches: [ main ]
permissions:
  # リリースを作成するアクションを許可
  contents: write
  # ワークフローの実行をキャンセルするアクションを許可
  actions: write
  # プルリクエストにラベルを追加するアクションを許可
  pull-requests: write

jobs:
  test:
    # タイムアウトを短く設定
    timeout-minutes: 5
    # ジョブを実行する環境は最新のubuntu
    runs-on: ubuntu-latest
    steps:
    # リポジトリのソースコードをチェックアウト
    - uses: actions/checkout@v4
    # nodeのバージョン
    - uses: actions/setup-node@v4
      with:
        node-version: 22.x
    # 依存関係をインストール
    - name: Install dependencies
      run: npm ci
    # フォントのキャッシュ
    - name: Cache fonts
      uses: actions/cache@v3
      id: fonts-cache
      with:
        path: ~/.fonts
        key: ${{ runner.OS }}-fonts

    # 日本語フォントのインストール
    - name: Install Japanese font
      if: steps.fonts-cache.outputs.cache-hit != 'true'
      run: sudo apt install fonts-noto-cjk

    # Playwrightが使用するブラウザをインストール
    - name: Install Playwright Browsers
      run: npx playwright install --with-deps
    # test実行
    - name: Run Playwright tests
      run: npx playwright test --update-snapshots
    # テストの結果をアップロード
    - uses: actions/upload-artifact@v4
      if: ${{ !cancelled() }}
      with:
        name: playwright-report
        path: playwright-report/
        retention-days: 7

    # スクリーンショットを保存
    - uses: reg-viz/reg-actions@v2
      with:
        github-token: "${{ secrets.GITHUB_TOKEN }}"
        image-directory-path: screenshots/
        artifact-name: 'test'
-
レポートが表示が安定しなかったので、ここはdocker使用したりして、画像の差分を安定して表示できるように工夫が必要かと思いました。今回は小さく実装が目的だったので、その目的はクリアかなと。
まとめ
実際のプロジェクトでは、S3へ保存した画像と比べたり、テスト/本番環境の差分を比較してどうUIが変更されたのかなど、応用として色々便利に使えそうと思いました。
今回は、差分があったとしてもreg-actionsのワークフローは失敗しないので、要注意なところだな・・と、Playwrightを使ったことなかったので勉強になりました!


