はじめに
OnsenUI2を使ってWebページをモバイル対応にするシンプルなサンプルを紹介すると明言してから、どうしようかな〜と考え始め、モバイルっぽくする手始めにはメニューとタブバーの使用が良いかなと思ったので、これを組み合わせたページの作り方を紹介します。
ページ構成
Monacaで、メニューを使えるテンプレートからプロジェクトを生成すると手っ取り早くメニュー機能が手に入るので、これにタブバーを追加するような流れで作っていきます。
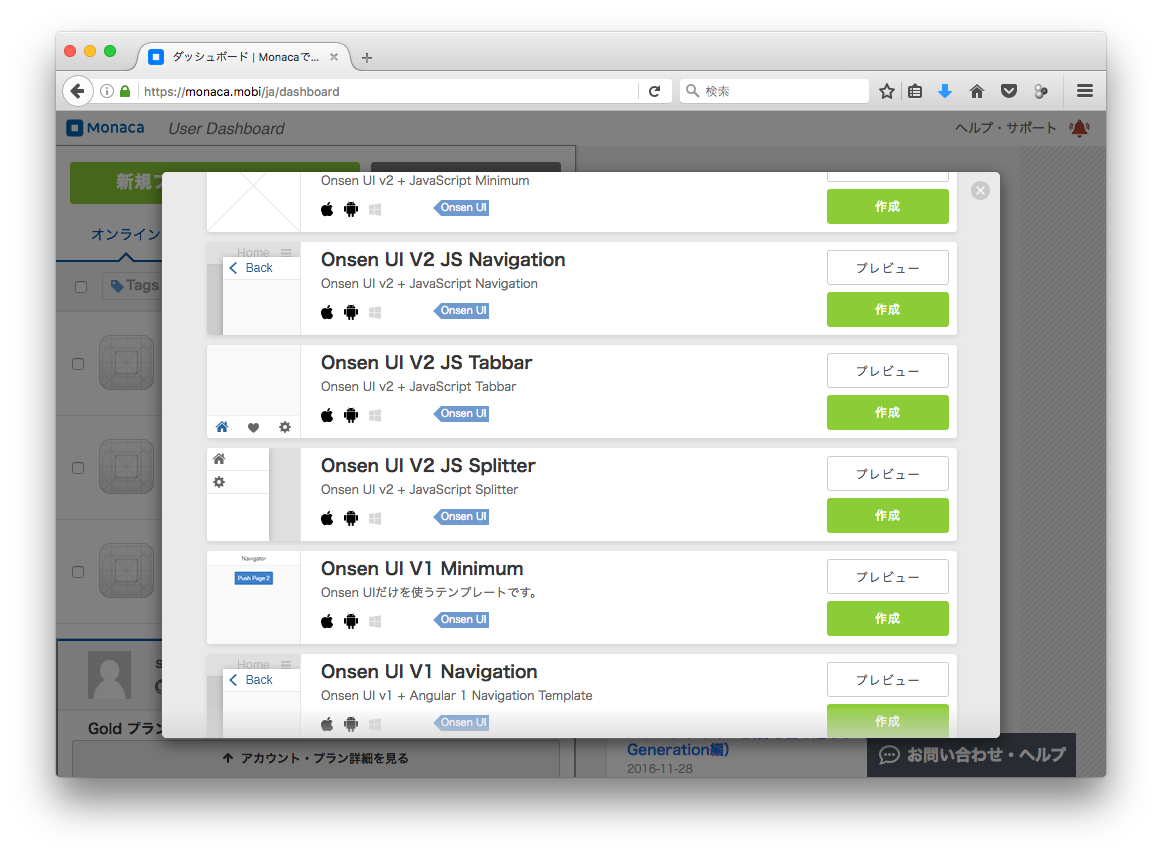
まず、新規プロジェクトの作成で「Onsen UI V2 JS Splitter」の「作成」ボタンをクリックします。
プロジェクトが作成されると、以下のメニューが初期設定されています。
- Home
- Setting
- About
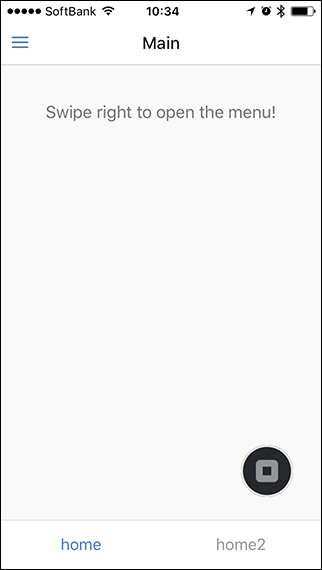
ここからHomeで表示されるページの下部にHomeとHome2というタブを追加します。
できあがりのイメージは下図のとおり。
HTMLの図解
僕の理解では、各タグと表示部分の関係を図に表すと下図のようになる感じです。

そこで、Homeで表示されるテンプレート部分にタブバーの表示を追記して、タブを使用できるように変更してみます。
Home2のテンプレート作成
もともとはHomeしかないので、Home2のテンプレート追加します。
内容はHomeをコピーし、idを「home2.html」にするだけですが、表示が切り替わったことがわかるように「Main」というタイトルも「Main2」と書き換えます。
  <ons-template id="home2.html">
    <ons-page>
      <ons-toolbar>
        <div class="left">
          <ons-toolbar-button onclick="fn.open()">
            <ons-icon icon="ion-navicon, material:md-menu"></ons-icon>
          </ons-toolbar-button>
        </div>
        <div class="center">
          Main2
        </div>
      </ons-toolbar>
      <p style="text-align: center; opacity: 0.6; padding-top: 20px;">
        Swipe right to open the menu!
      </p>
    </ons-page>
  </ons-template>
タブバーの追加されたテンプレートの作成
次に、タブバーはhomeとhome2だけに表示すれば良いのでこれをどうするか考えます。
そこで、メニューのHomeから呼び出すページをタブバー用のページとして、タブバー用のページからhome.htmlとhome2.htmlを呼び出すという仕組みにしてみます。
...って説明がややこしいですね。
とりあえず、以下のコードを追加。
  <ons-template id="tab.html">
    <ons-page>
      <ons-tabbar>
        <ons-tab page="home.html" label="home" active>
        </ons-tab>
        <ons-tab page="home2.html" label="home2">
        </ons-tab>
      </ons-tabbar>
    </ons-page>
  </ons-template>
初期表示設定の変更
初期表示がhome.htmlになっているので、この部分をtab.htmlに書き換えます。
ちなみに、修正箇所は2箇所あります。
  <ons-splitter>
    <ons-splitter-side id="menu" side="left" width="220px" collapse swipeable>
      <ons-page>
        <ons-list>
          <ons-list-header>Default</ons-list-header>
          <ons-list-item onclick="fn.load('tab.html')" tappable>
            Home
          </ons-list-item>
          <ons-list-item onclick="fn.load('settings.html')" tappable>
            Settings
          </ons-list-item>
          <ons-list-item onclick="fn.load('about.html')" tappable>
            About
          </ons-list-item>
        </ons-list>
      </ons-page>
    </ons-splitter-side>
    <ons-splitter-content id="content" page="tab.html"></ons-splitter-content>
  </ons-splitter>
蛇足ですが、メニューに<ons-list-header> 〜 </ons-list-header>と書くとグループ分けしたようなUIになるので、ここではそれも追記してあります。
表示部分の全ソース
<body> 〜 </body>の内容を以下にまとめます。
<body>
  <ons-splitter>
    <ons-splitter-side id="menu" side="left" width="220px" collapse swipeable>
      <ons-page>
        <ons-list>
          <ons-list-header>Default</ons-list-header>
          <ons-list-item onclick="fn.load('tab.html')" tappable>
            Home
          </ons-list-item>
          <ons-list-item onclick="fn.load('settings.html')" tappable>
            Settings
          </ons-list-item>
          <ons-list-item onclick="fn.load('about.html')" tappable>
            About
          </ons-list-item>
        </ons-list>
      </ons-page>
    </ons-splitter-side>
    <ons-splitter-content id="content" page="tab.html"></ons-splitter-content>
  </ons-splitter>

  <ons-template id="tab.html">
    <ons-page>
      <ons-tabbar>
        <ons-tab page="home.html" label="home" active>
        </ons-tab>
        <ons-tab page="home2.html" label="home2">
        </ons-tab>
      </ons-tabbar>
    </ons-page>
  </ons-template>

  <ons-template id="home.html">
    <ons-page>
      <ons-toolbar>
        <div class="left">
          <ons-toolbar-button onclick="fn.open()">
            <ons-icon icon="ion-navicon, material:md-menu"></ons-icon>
          </ons-toolbar-button>
        </div>
        <div class="center">
          Main
        </div>
      </ons-toolbar>
      <p style="text-align: center; opacity: 0.6; padding-top: 20px;">
        Swipe right to open the menu!
      </p>
    </ons-page>
  </ons-template>

  <ons-template id="home2.html">
    <ons-page>
      <ons-toolbar>
        <div class="left">
          <ons-toolbar-button onclick="fn.open()">
            <ons-icon icon="ion-navicon, material:md-menu"></ons-icon>
          </ons-toolbar-button>
        </div>
        <div class="center">
          Main2
        </div>
      </ons-toolbar>
      <p style="text-align: center; opacity: 0.6; padding-top: 20px;">
        Swipe right to open the menu!
      </p>
    </ons-page>
  </ons-template>

  <ons-template id="settings.html">
  <ons-page>
    <ons-toolbar>
      <div class="left">
        <ons-toolbar-button onclick="fn.open()">
          <ons-icon icon="ion-navicon, material:md-menu"></ons-icon>
        </ons-toolbar-button>
      </div>
      <div class="center">
        Settings
      </div>
    </ons-toolbar>
    <div>
        設定用の内容
    </div>
  </ons-page>
  </ons-template>

  <ons-template id="about.html">
  <ons-page>
    <ons-toolbar>
      <div class="left">
        <ons-toolbar-button onclick="fn.open()">
          <ons-icon icon="ion-navicon, material:md-menu"></ons-icon>
        </ons-toolbar-button>
      </div>
      <div class="center">
        About
      </div>
    </ons-toolbar>
    <div>
        アプリについての説明
    </div>
  </ons-page>
  </ons-template>

</body>
できた!