概要
windows formアプリケーションから画像処理の環境をUnityへお引っ越し作業をした時に,ところどころ苦労したのでその手順を共有
画像処理といっても様々な方法がありますが,私は今回OpenCvSharpを使っていたのでその方向で
調べたところ先人の知恵を利用した簡単な方法として,UnityでNugetの拡張パッケージを使用してOpenCvSharp3や4をインポートする方法と,OpenCv plus Unity(for Unityはコスト面から今回は除外)というアセットをストアからダウンロードする方法が挙げられます
今回は後者のやり方を紹介します
環境
windows10
Visual Studio 2019
Unity 2019.2.8f1(64-bit)
実装
3D空間でプロジェクトを作成
OpenCV plus Unityのインポート
1.UnityのAsset Store内のSearch for assetsにopencv plus unityと入力してパッケージをインポートしてください
2.ライブラリ使用の許可をする
インポートをするとこれでもかとunsafe,unsafeと言ってくるので直します
「Edit」→「Project Settings」の中のOther Settings内の「Arrow 'unsafe' Code」チェックボックスにチェックを入れます

エラーがなくなるはずです
Webカメラの映像を出力する
1.Hierarchyタブから「Create」→「UI」→「rawimage」と選択しSceneに追加
2.スクリプトを追加
以下のスクリプトを作成し,rawimageにアタッチ
namespace OpenCvSharp
{
    using System.Collections;
    using System.Collections.Generic;
    using UnityEngine;
    using UnityEngine.UI;

    public class WebCamController : MonoBehaviour
    {

        int width = 1920;
        int height = 1080;
        int fps = 30;
        Texture2D cap_tex;
        Texture2D out_tex;
        WebCamTexture webcamTexture;
        Color32[] colors = null;

        IEnumerator Init()
        {
            while (true)
            {
                if (webcamTexture.width > 16 && webcamTexture.height > 16)
                {
                    colors = new Color32[webcamTexture.width * webcamTexture.height];
                    cap_tex = new Texture2D(webcamTexture.width, webcamTexture.height, TextureFormat.RGBA32, false);
                    //GetComponent<Renderer>().material.mainTexture = texture;
                    break;
                }
                yield return null;
            }
        }
        void Start()
        {
            WebCamDevice[] devices = WebCamTexture.devices;
            webcamTexture = new WebCamTexture(devices[0].name, this.width, this.height, this.fps);
            webcamTexture.Play();

            StartCoroutine(Init());
        }
        void Update()
        {
            if (colors != null)
            {
                webcamTexture.GetPixels32(colors);

                int width = webcamTexture.width;
                int height = webcamTexture.height;
                Color32 rc = new Color32(0, 0, 0, byte.MaxValue);

                for (int x = 0; x < width; x++)
                {
                    for (int y = 0; y < height; y++)
                    {
                        Color32 c = colors[x + y * width];
                        byte gray = (byte)(0.1f * c.r + 0.7f * c.g + 0.2f * c.b);
                        rc.r = rc.g = rc.b = gray;
                        colors[x + y * width] = rc;
                    }
                }
                cap_tex.SetPixels32(this.colors);
                cap_tex.Apply();
            }
            GetComponent<RawImage>().texture = cap_tex;
        }
    }
}
3.rawimageのInspectorからWidthとHeightを1920と1080にして実行
ここで,画像がひっくり返ってるのであればxのスケールを-1にしたりして調整してください
二値化
ここからやっとopencv
webカメラの映像を二値化する
1.さっき作ったスクリプトに二値化する関数を追加します
Texture2D To_Mono(Texture2D tex)
        {
            //matの定義
            Mat mat;

            //textureをmatに変換
            mat = Unity.TextureToMat(tex);

            //画像をグレスケに変換
            Mat matGray = mat.CvtColor(ColorConversionCodes.BGR2GRAY);

            //画像を2値化
            Mat matMono = matGray.Threshold(100, 255, ThresholdTypes.Otsu);

            //2値化画像を白黒反転
            Cv2.BitwiseNot(matMono, matMono);

            //matMonoをtexture2Dに変換
            tex = Unity.MatToTexture(matMono);

            return tex;
        }
3.Update内のrawimageにレンダリングするところのコードを以下に変更
out_tex = To_Mono(cap_tex);
GetComponent<RawImage>().texture = out_tex;
うまくいっていればモノクロの世界にいざなわれます
画像を二値化する
1.publicでtexture2Dを定義する
public Texture2D imj_tex;//入力画像
2.今回使用する画像↓

これをProjectタブのAssetsにD&Dして追加する
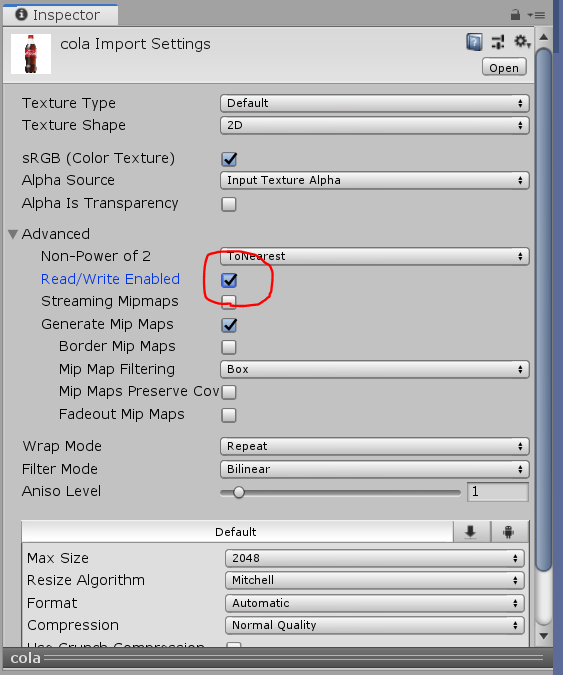
ここで,写真をスクリプト内で編集するためにRead/Write Enabledにチェックする

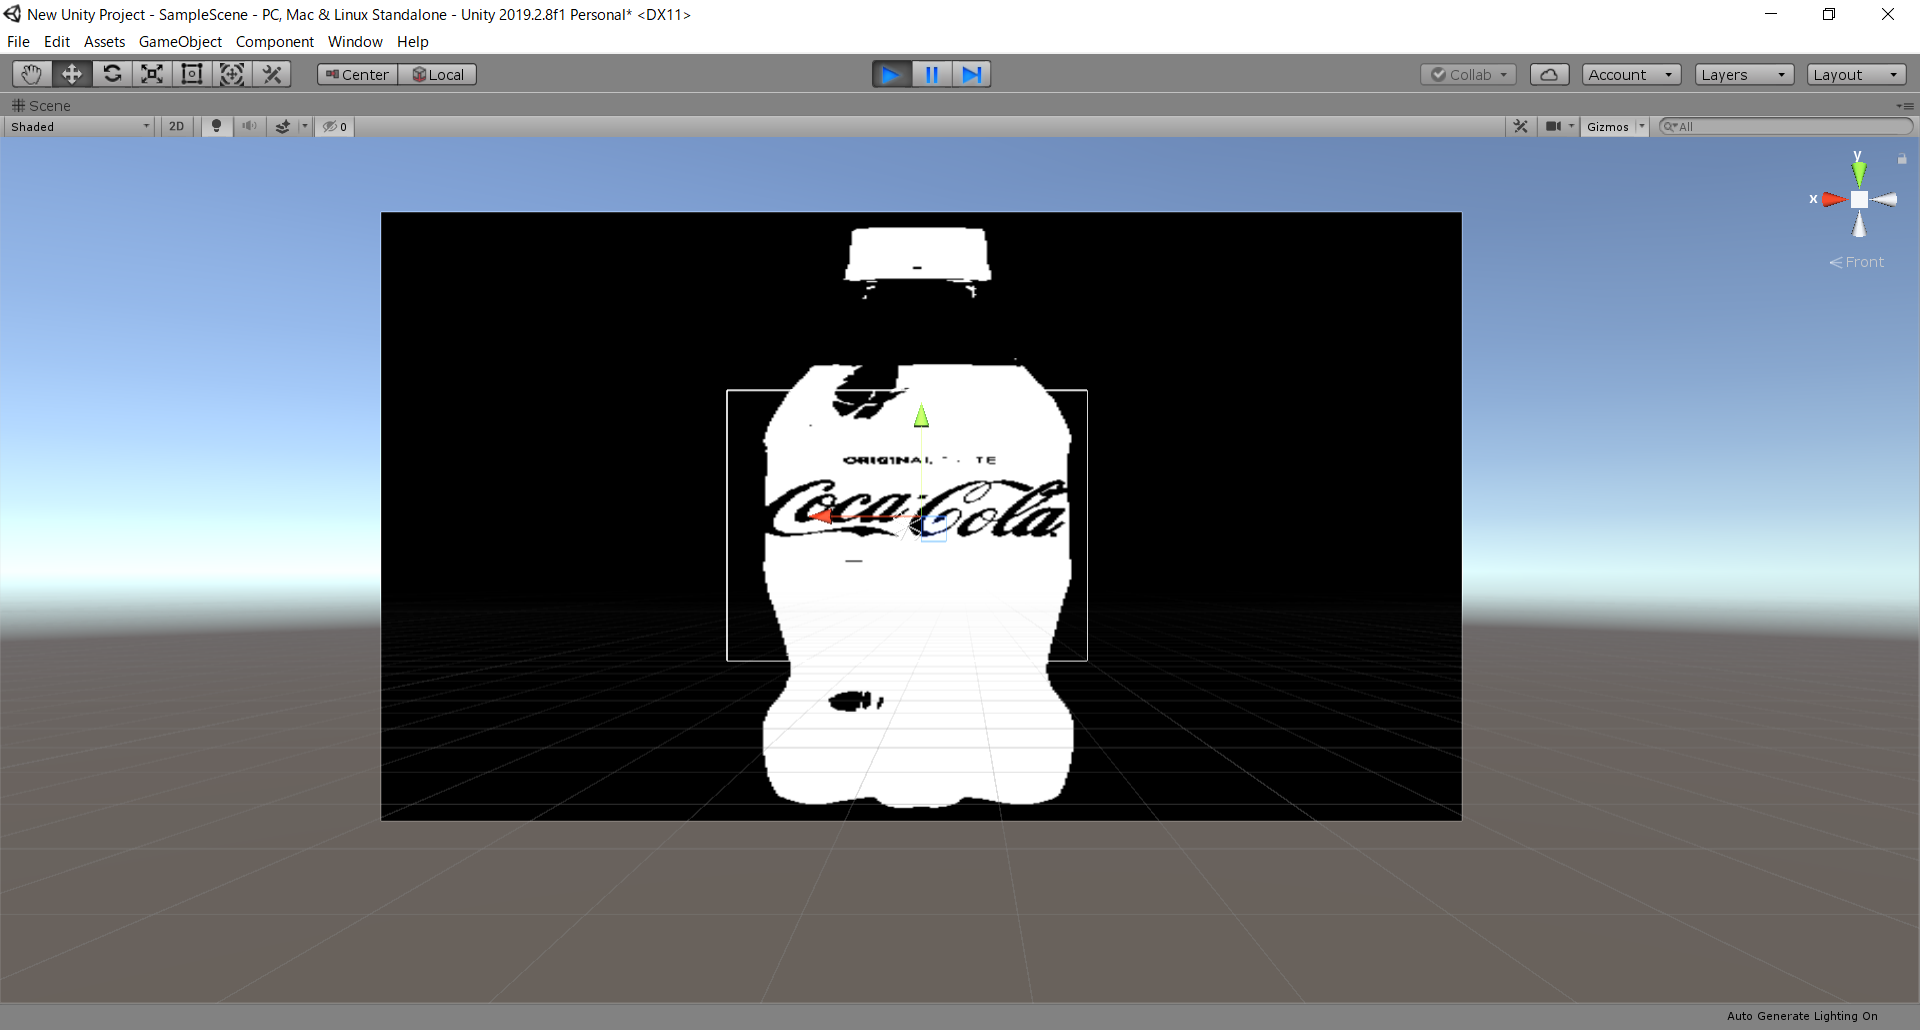
3.WebCamControllerのimj_texにcola.jpgをアタッチして,To_Monoの引数をcap_texからimj_texにすると白黒のコーラができます
実行結果
太っちょコーラ
参考URL
webカメラの映像出力
http://nn-hokuson.hatenablog.com/entry/2017/08/09/192813
画像処理参考コード
https://github.com/yoyoyo-yo/Gasyori100knock
