「PORT」アドベントカレンダー2日目。
今年の4月に新卒でフロントエンドエンジニアとして入った三輪です。
案件で軽くthree.jsについてさわる機会があったので、共有していきたいと思います。
three.jsとはなにか
詳しくはThree.js-Wikipediaを見ていただければと思いますが、
簡単にいうとHTML5で3Dコンテンツを制作するためのJavaScriptライブラリ。
WebGLだけで3D表現しようとするとJavascriptやGLSLコードなどで必要があるので、Three.jsを使うことにより、JavaScriptの知識だけで3D表現を行うことができる。
作っていく上で参考にしたサイト一覧
- Three.js公式サイト
- Three.jsのGithubページ
- Three.js入門サイト - ICS MEDIA
- 初心者でも絶対わかる、WebGLプログラミング<three.js最初の一歩> | HTML5Experts.jp
作ったものについて
今回作ったものは球体っぽい図形をまわしているものです。
完成しているものをすぐに見たい場合はこちらを見ればわかります。
See the Pen three-end by miwa_shuntaro (@miwashutaro0611) on CodePen.
制作を行なった手順
3D表示用のHTML,CSS,JSのベース部分を作成
HTML
<canvas class="stage"></canvas>
CSS
body {
  margin: 0;
  padding: 0;
  overflow: hidden;
}
JS
function init() {
  //canvasに描画する要素の大きさ
  const width = window.innerWidth;
  const height = window.innerHeight;
  //この下にコードを記述していきます。
}
window.addEventListener('load', init);
Three.jsの読み込み
とりあえずこの記事ではCDNで読み込みを行います。
CDNで読み込みを行う
cdnjsへアクセスして、three.jsの読み込みを行います。
今回使っていくものは
<script src="https://cdnjs.cloudflare.com/ajax/libs/three.js/99/three.min.js"></script>
になります。
NPMで読み込みを行う
この記事では使いませんがnpmで使っていく場合には、
$ npm install three
を行なって
import * as THREE from "three";
で読み込みを行うことができます。
シーンの作成
物体(メッシュ)を置くためのステージ(シーン)を用意します。
function init() {
  // シーンを作成
  const scene = new THREE.Scene();
}
この状態では表示するときの土台ができただけなので、何も表示はされていません。
メッシュを作成
土台はできたので、次にメッシュを作成します。
今回は形状を指定するgeometryと素材を指定するmaterialを使っていきます。
function init() {
  // ジオメトリーを作成
  const geometry = new THREE.IcosahedronGeometry( 100, 1 );
  // マテリアルを作成
  const material = new THREE.MeshBasicMaterial({color: 0xa6b5d7, wireframe: true});
  // メッシュを作成
  const cube = new THREE.Mesh(geometry, material);
  // 3D空間にメッシュを追加
  scene.add(cube);
}
これで今回使う物体についてはできました。
補足
geometryについて
今回使った図形以外にも
BoxGeometry(立方体)、SphereGeometry(球体)、CylinderGeometry(円柱)などいろいろな図形を作ることができます。
//BoxGeometry(立方体)
const geometry = new THREE.BoxGeometry(幅, 高さ, 奥行き);
const geometry = new THREE.BoxGeometry(70, 100, 200);

//SphereGeometry(球体)
const geometry = new THREE.SphereGeometry(半径, 経度分割数, 緯度分割数, 開始経度, 経線中心角, 開始緯度, 緯線中心角);
const geometry = new THREE.SphereGeometry(50, 20, 20);

//CylinderGeometry(円柱)
const geometry = new THREE.CylinderGeometry(上面の半径, 底面の半径, 高さ,円周の分割数, 高さの分割数, フタをしない:true,フタをする:false);
const geometry = new THREE.CylinderGeometry(100, 100, 50, 30, 5, false);
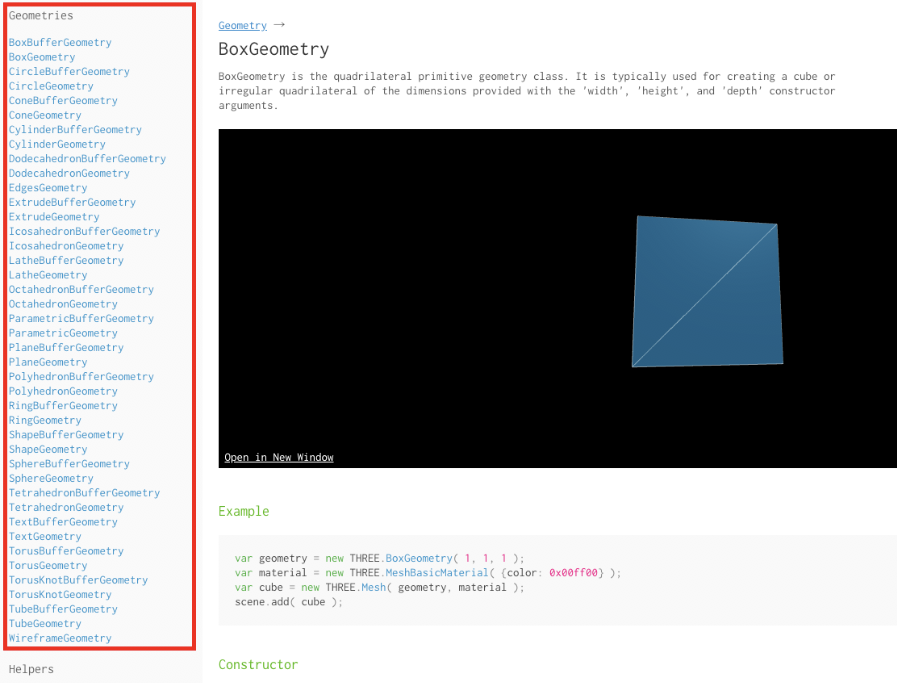
もっといろいろな図形を見たい場合にはBoxGeometry - three.js docsの赤い枠の部分から図形を見ることができます。
materialについて
materialについては
- MeshBasicMaterial : 質感が一番低い。光源の影響を受けないので陰がつかない。
- MeshLambertMaterial : MeshBasicMaterialより質感が高い。影がつく。
- MeshPhongMaterial : 質感が一番高い。影も光も綺麗につく。
などがあります。
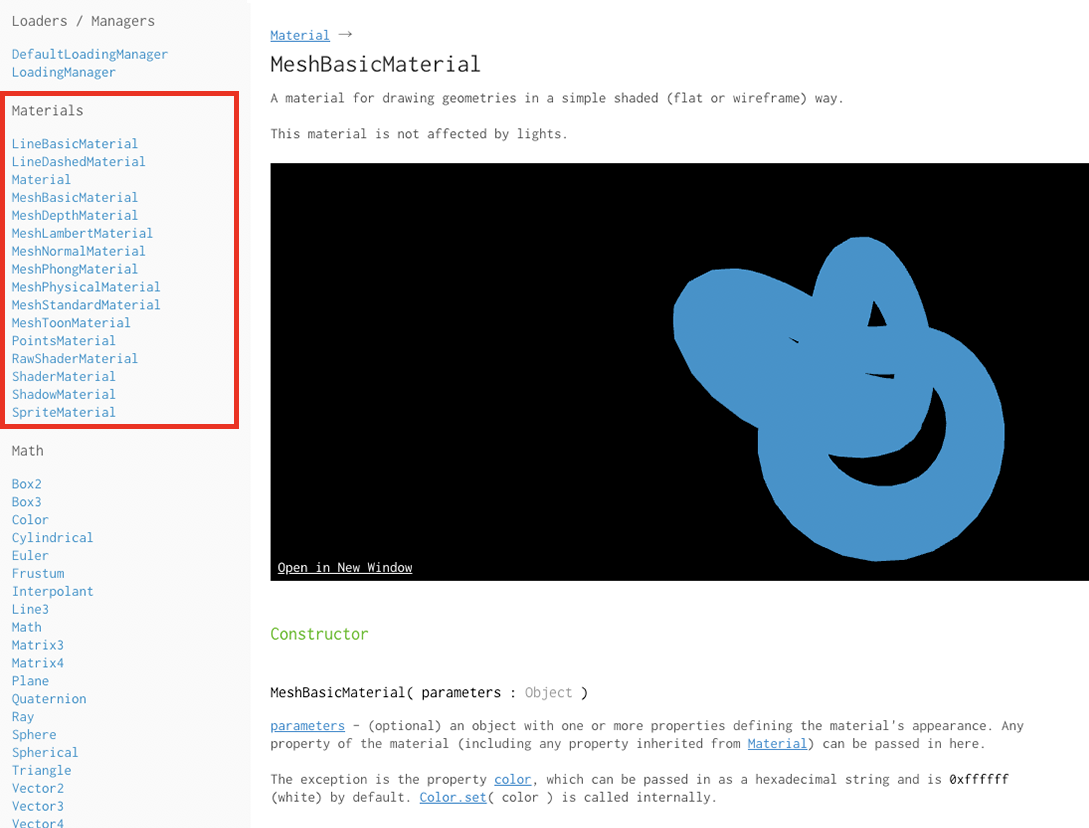
もっと見たい場合にはMeshBasicMaterial - three.js docsの赤い枠の部分から見ることができます。
カメラを作成
カメラごしに物体をみるイメージなので、シーンにカメラを設置します。
function init() {
  // カメラを作成
  const camera = new THREE.PerspectiveCamera(45, 1.0);
  camera.aspect = width / height;
  camera.updateProjectionMatrix();
  camera.position.set(0, 0, +600);
}
下のコードの部分でカメラのアスペクト比を正しており、
camera.aspect = width / height;
camera.updateProjectionMatrix();
camera.position.setでは、
camera.position.set(x方向, Y方向, Z方向);
camera.position.set(0, 0, +600);
のようにセットを行います。
補足
カメラの基本関数について、
- PerspectiveCamera : 透視投影。通常生活における物の見え方。
- OrthographicCamera : 正投影。どこから見ても物体のサイズは同じ。
がある。
どちらも画角、アスペクト比、ニアークリップ、ファークリップの値を渡すことができる
画角
カメラに写る光景の範囲を角度で表したもの
アスペクト比
画面の長辺対短辺(横対縦)の比率を表したもの
ニアクリップ
視点から、光景が見え始める面までの距離
ファークリップ
視点から最も遠い面までの距離
実際に
new THREE.PerspectiveCamera(画角, アスペクト比, ニアークリップ, ファークリップ)
new THREE.OrthographicCamera(画角, アスペクト比, ニアークリップ, ファークリップ)
のように記載する。
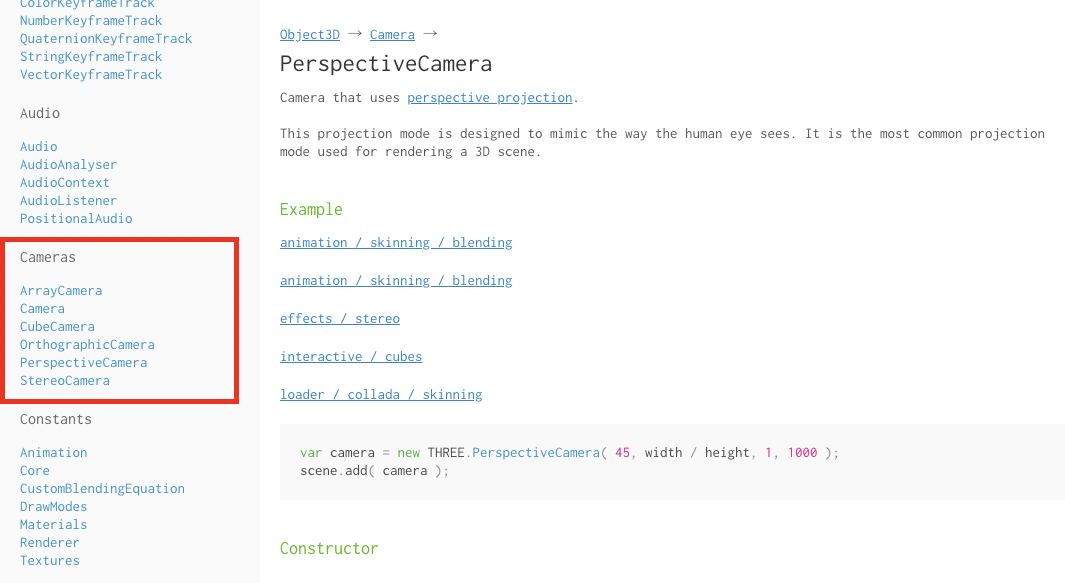
こちらも詳細はPerspectiveCamera - three.js docsの赤い部分から確認ができます。
レンダラーの作成
ここまではあくまでも図形の設定などについての記載なので、その情報をHTMLに記載していきたいと思います。
function init() {
  // レンダラーを作成
  const renderer = new THREE.WebGLRenderer({
    canvas: document.querySelector('.stage'),
    antialias: true
  });
  renderer.setPixelRatio(window.devicePixelRatio);
  renderer.setSize(width, height);
  renderer.render(scene, camera);
}
下のコードの部分でレンダラーのサイズを調整しており、
renderer.setPixelRatio(window.devicePixelRatio);
renderer.setSize(width, height);
renderer.renderでは、
renderer.render(scene, camera);
のように記載してレンダリングを行う。
これで3D画像が表示されたと思うので、現状は下のような状態になります。
See the Pen three-1 by miwa_shuntaro (@miwashutaro0611) on CodePen.
補足
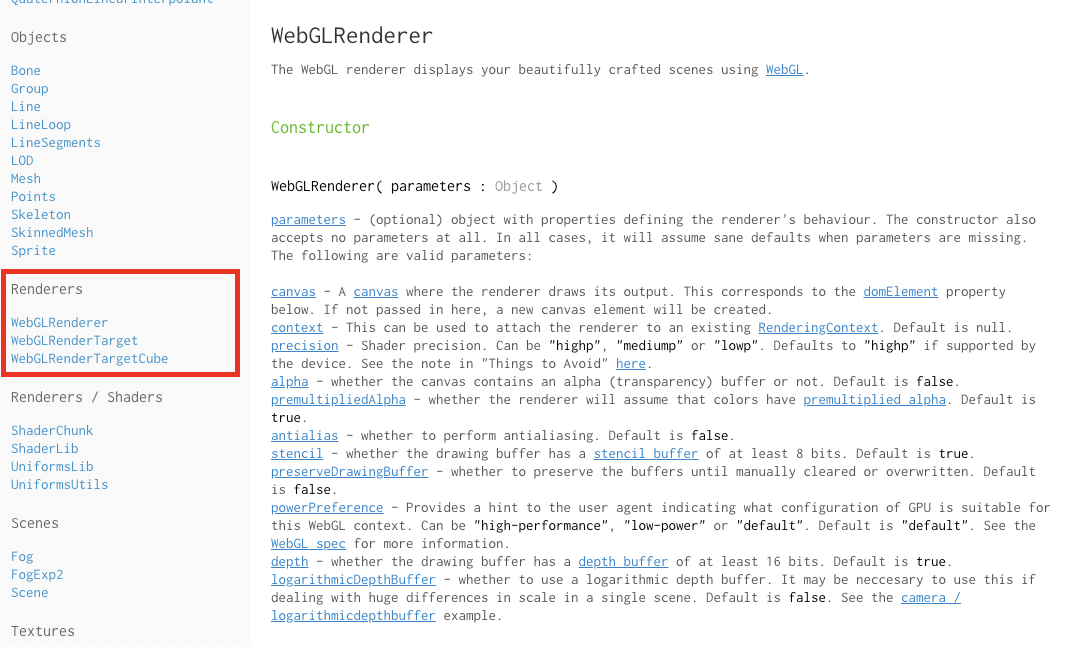
もっと詳しく知りたい場合はWebGLRenderer - three.js docsの赤い部分を参照。
回転させる
もう少し3Dをおしゃれに見せていこうと思うので、回転させていきます。
function init() {
  //回転のアニメーション
  tick();
  function tick() {
    renderer.render(scene, camera); //この部分はtickの中に移動させる
    cube.rotation.x += 0.005;
    cube.rotation.y += 0.01;
    requestAnimationFrame(tick);
  }
}
See the Pen three-2 by miwa_shuntaro (@miwashutaro0611) on CodePen.
この状態で画像が回転していてば図形は完成です。
リサイズの処理を入れる
図形自体は上のものでいいのですが、リサイズをすると図形の場所やcanvasがおかしくなるので、修正をしていきます。
function init() {
  //リサイズした時の処理
  onResize();
  window.addEventListener('resize', onResize);
  function onResize() {
    const width = window.innerWidth;
    const height = window.innerHeight;
    renderer.setPixelRatio(window.devicePixelRatio);
    renderer.setSize(width, height);
    camera.aspect = width / height;
    camera.updateProjectionMatrix();
  }
}
前の状態までで記載した
//canvasに描画する要素の大きさ
const width = window.innerWidth;
const height = window.innerHeight;
// レンダラーを作成
renderer.setPixelRatio(window.devicePixelRatio);
renderer.setSize(width, height);
renderer.render(scene, camera);
// カメラを作成
camera.aspect = width / height;
camera.updateProjectionMatrix();
の部分についてはリサイズとの処理と重複してしまうので、削除してください。
これでリサイズを行なっても
- 図形は中央にある
-
canvasのサイズはウィンドウの幅
になりました。
完成したものはこちらになります。
See the Pen three-end by miwa_shuntaro (@miwashutaro0611) on CodePen.
最後に
今回は軽くさわっただけですが、Three.js公式サイトを見てみるといろいろとあるので、またどこかのタイミングでThree.jsについてまとめていきたいと思います。