初心者目線!!
はじめに自己紹介。。
2020年の4月にたき工房という会社にエンジニアとして新卒入社しました。主に、touchdesignerとかunityとか使って、インタラクティブコンテンツやAR,VRなどのプロトタイプを制作しています。
こんなん作りました。
https://lab.taki.co.jp/gaikan/
今は何もわからないことだらけなので、この記事もなるべく優しく分かりやすいよう書いているつもりです。難しい部分はカット!というか別のリンク貼ります。
ARFoundationでTimelineを使う
ARFoundationとは
から入りますが
AR Foundationとは、Unityが作っているARアプリケーション開発用のパッケージです。
ARに関する共通な基本機能をひとまとめにし、各プラットフォーム向けARアプリ開発を最小限の変更で行う ことを目的としています。
てな感じで要は、unityでARアプリやゲームを開発する際には絶対必要てことです。
そしてTimelineですが
こんなやつ
animationのclipをドラックアンドドロップで簡単に演出できる機能です。 adobeのpremiere proとかafter effectsに近い感じでやりやすいなと思っていたが、、、Learn more about Timeline, our new powerful visual tool 4 creating cinematic content, from the #UniteEurope keynote https://t.co/D0GVcTtPWB pic.twitter.com/ORIHAv0cUf
— Unity (@unity3d) June 28, 2017
Timelineだけどコードは書かなければならない
コードは書かないのが取り柄なのに書かないといけないんかい
という矛盾。。。
大丈夫、概念自体は少し難しいですが、コード自体はそこまで難しくありません。
手順は主に4つに分かれます。
1.ARの開発準備する
2.Timelineを作る
3.演出のコードを書く
4.コードをTimelineに実装
5.実機ビルド
開発環境
macOS Catalina:バージョン10.15.5
unity:2020.1.6f.1
iphone11:ios14
xcode:12
1.ARの開発準備をする
projectを作成したら
まず、main cameraを削除し、
window → package managerを開き、ARFoundationをinstallします。
もしARFoundationが出てこない場合は、Packages:をUnity Registryにしてみてください。
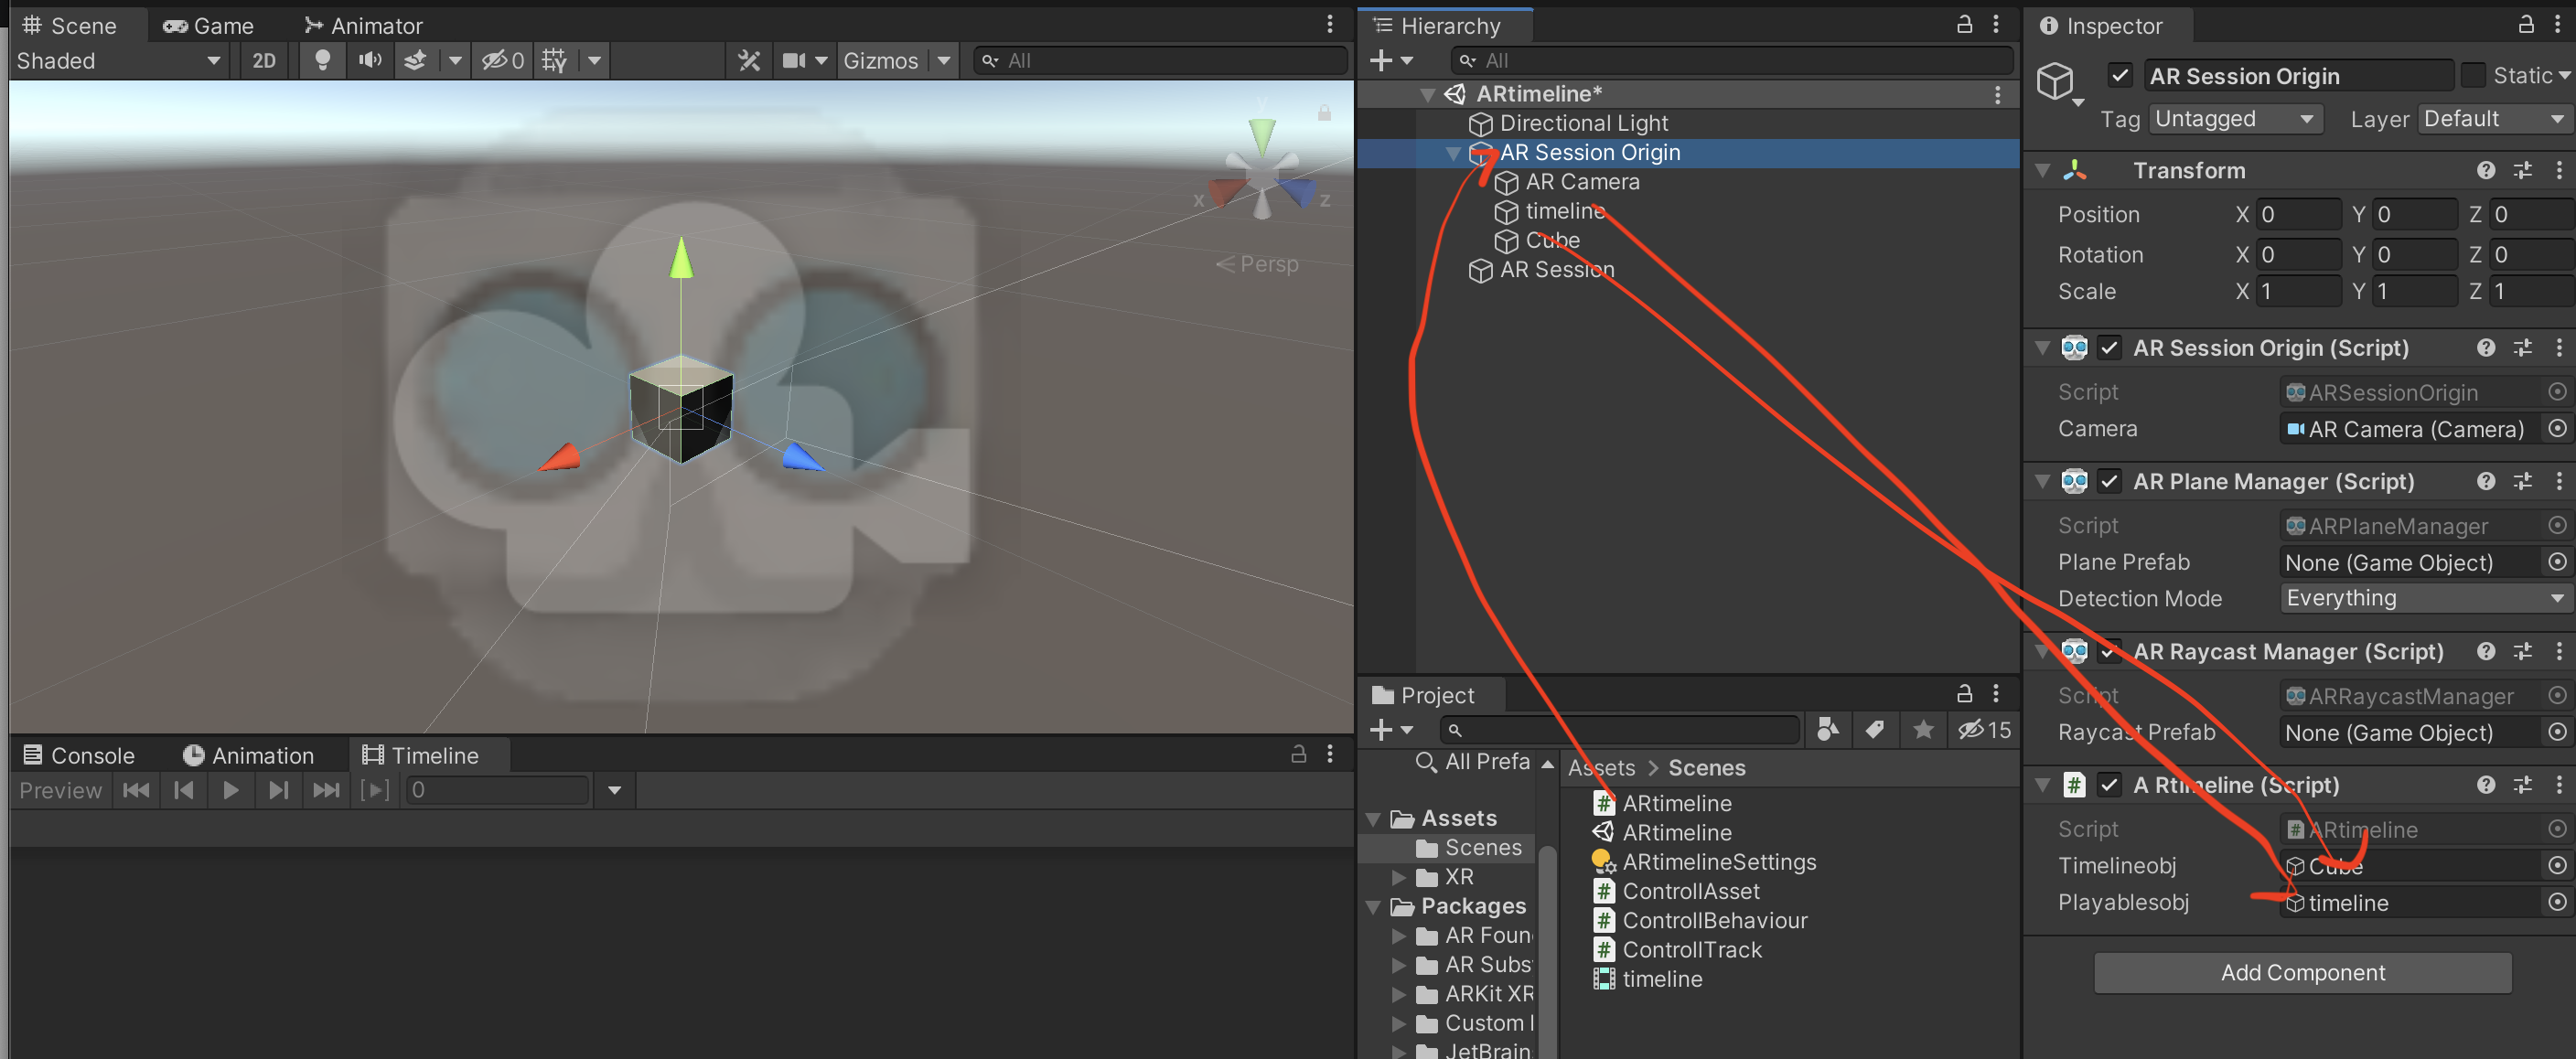
ヒエラルキー上で右クリック → XR → AR Session Origin と AR Session を追加
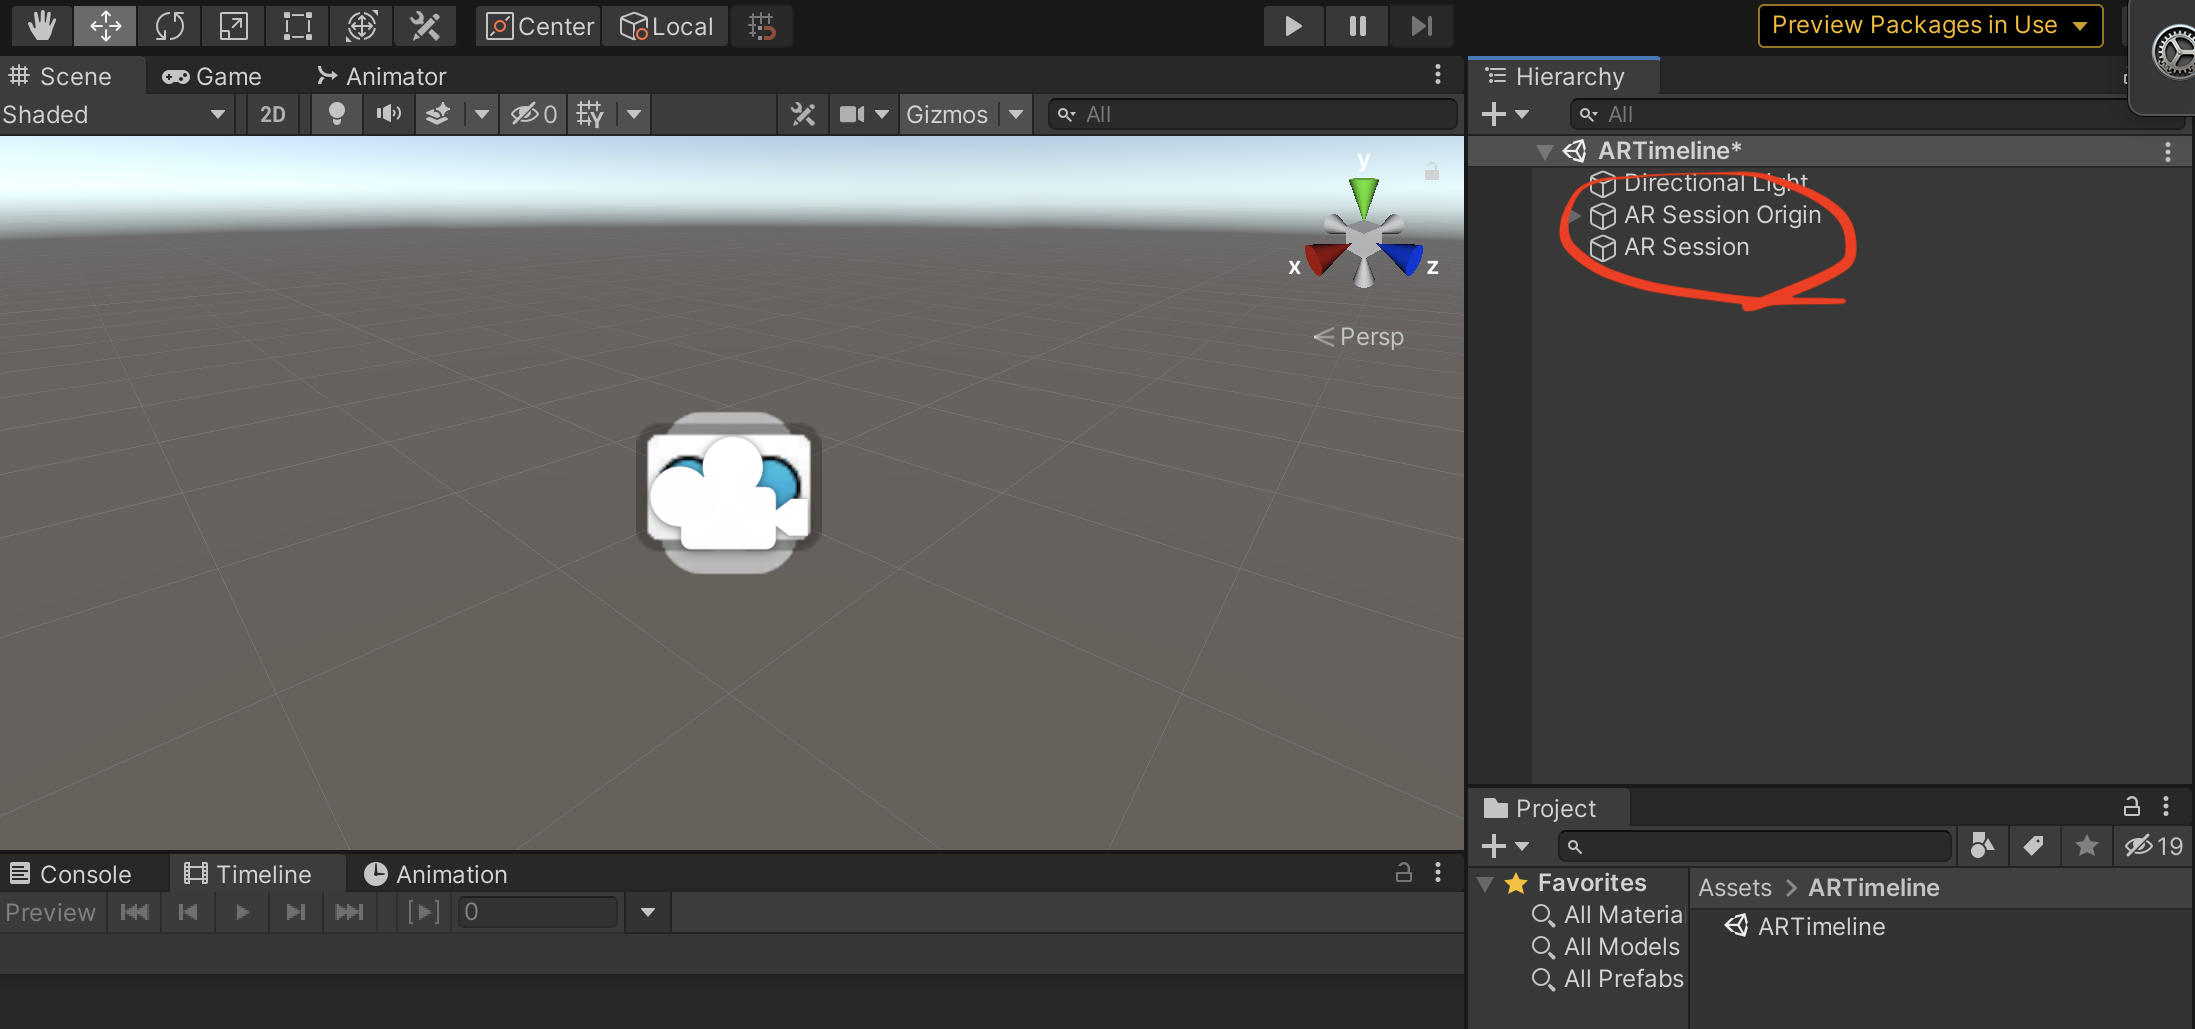
AR Session OriginにAdd ComponentからAR Plane Manager と AR Raycast Managerを追加
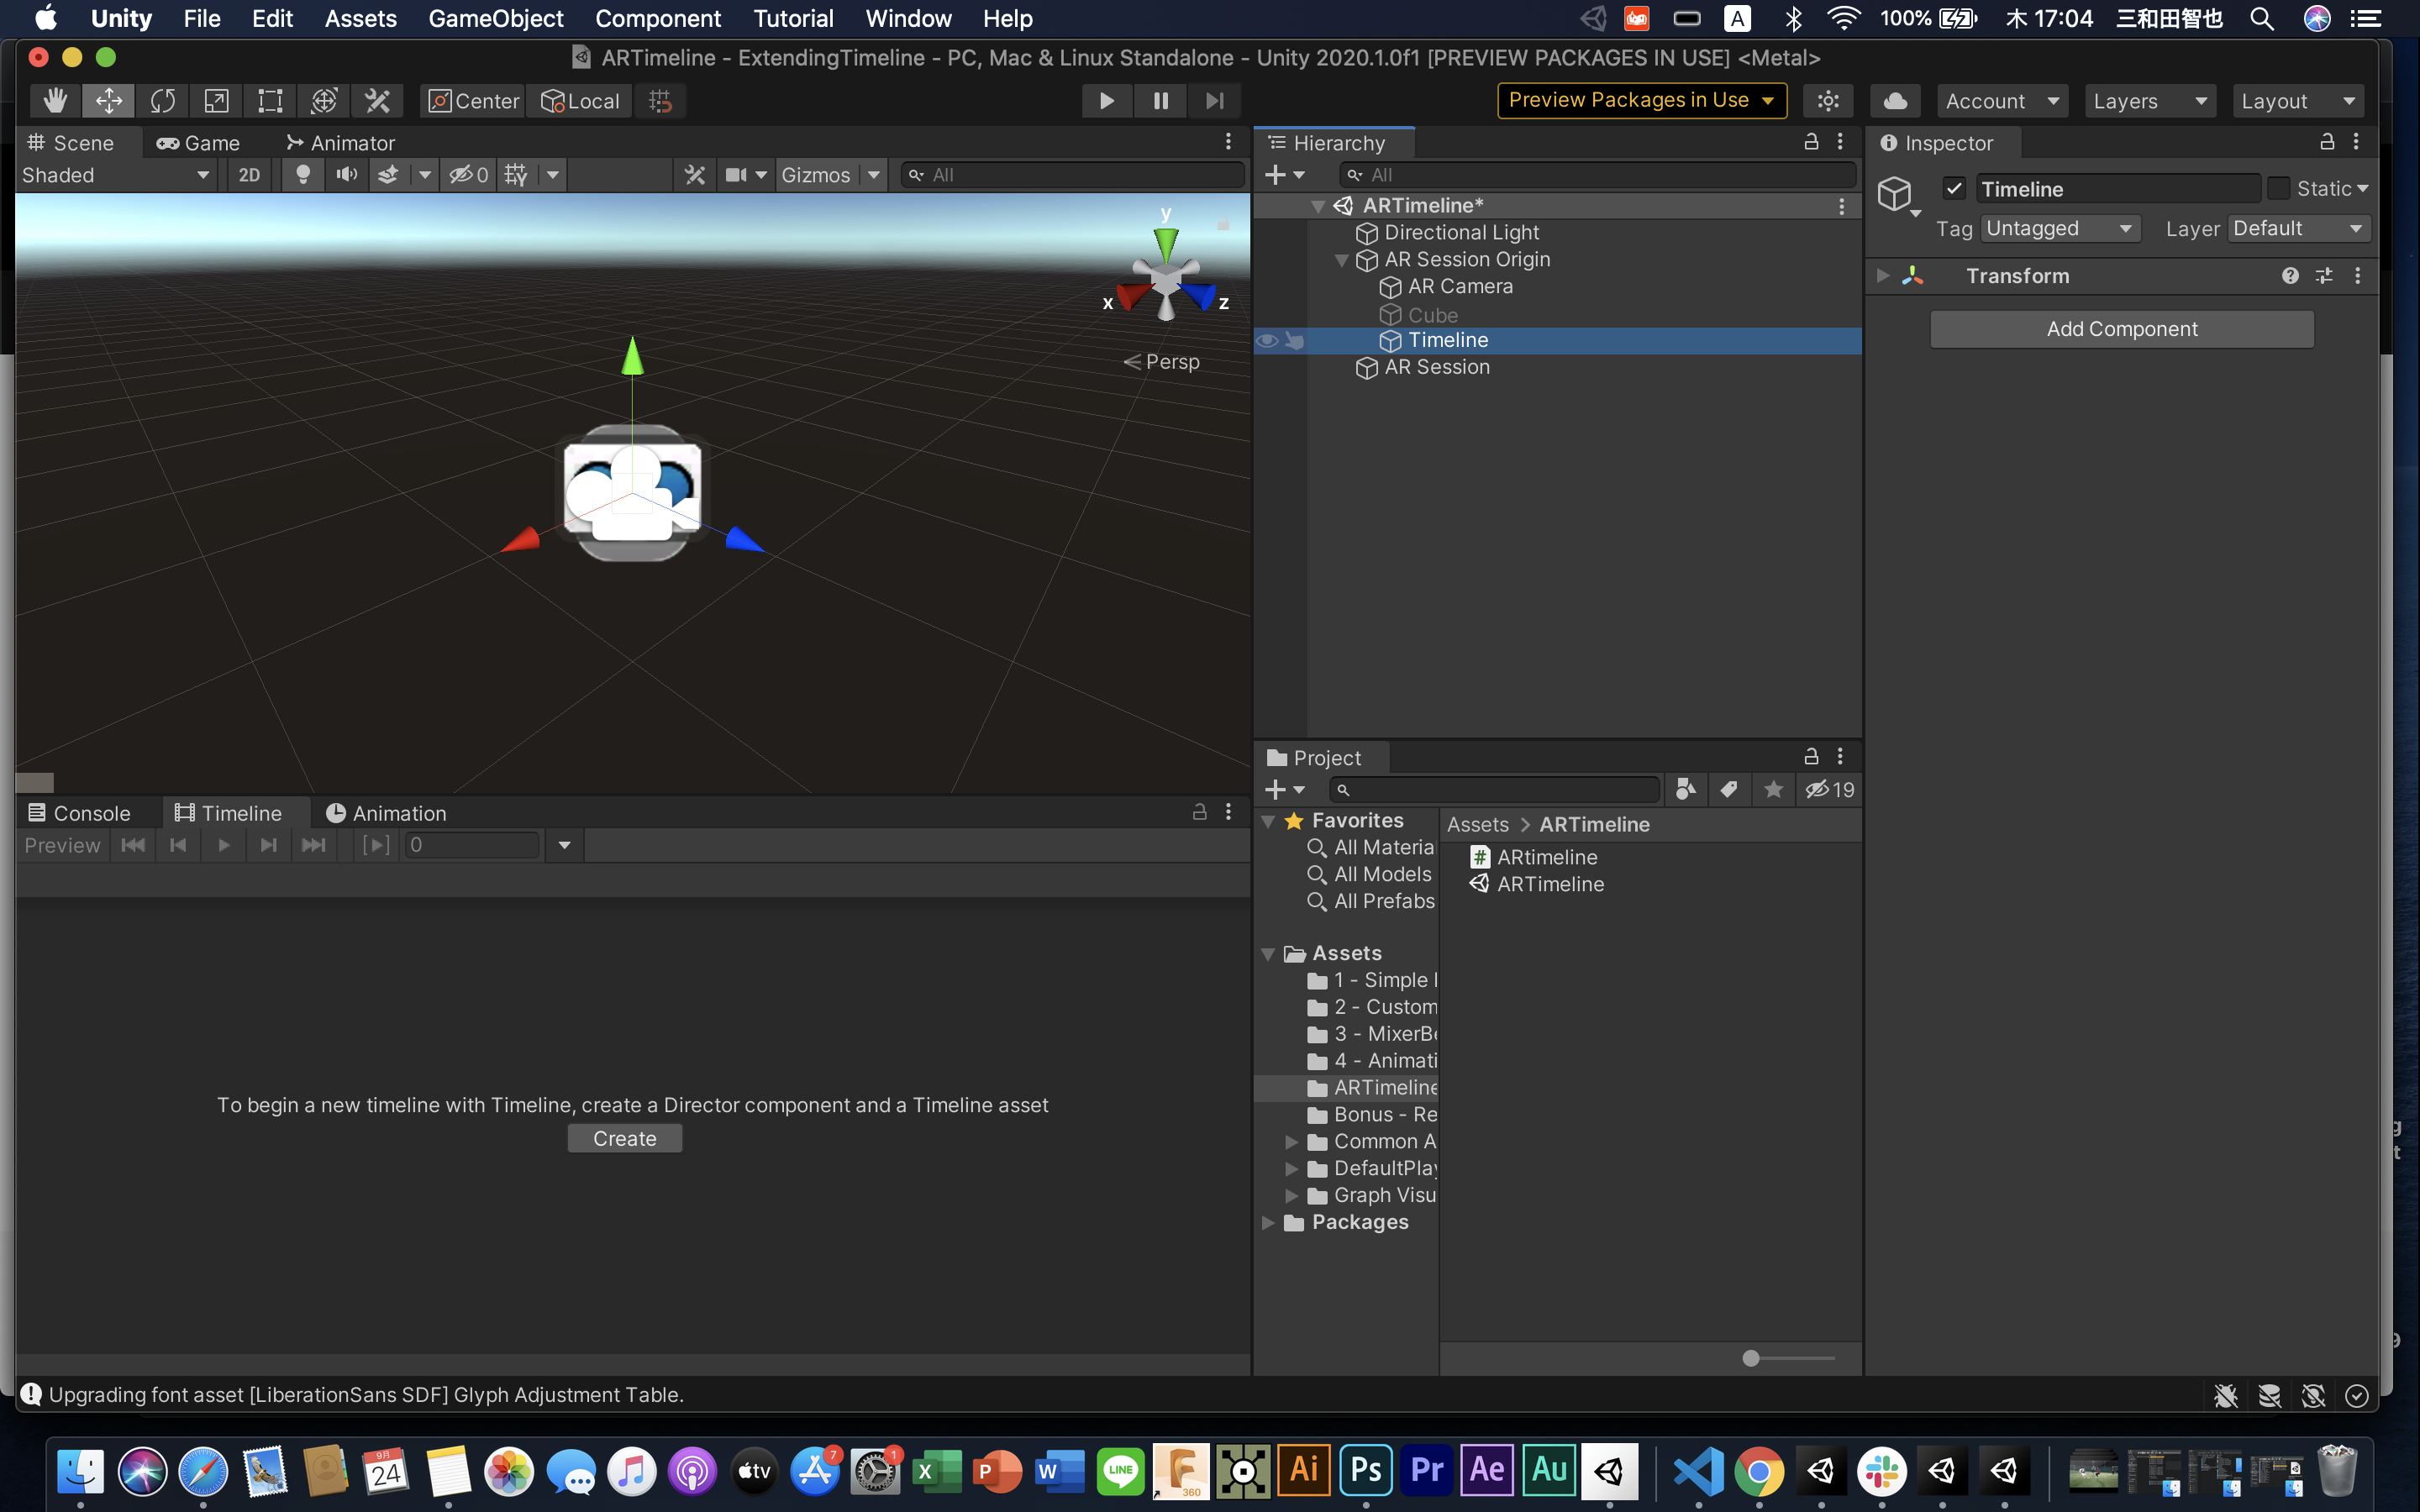
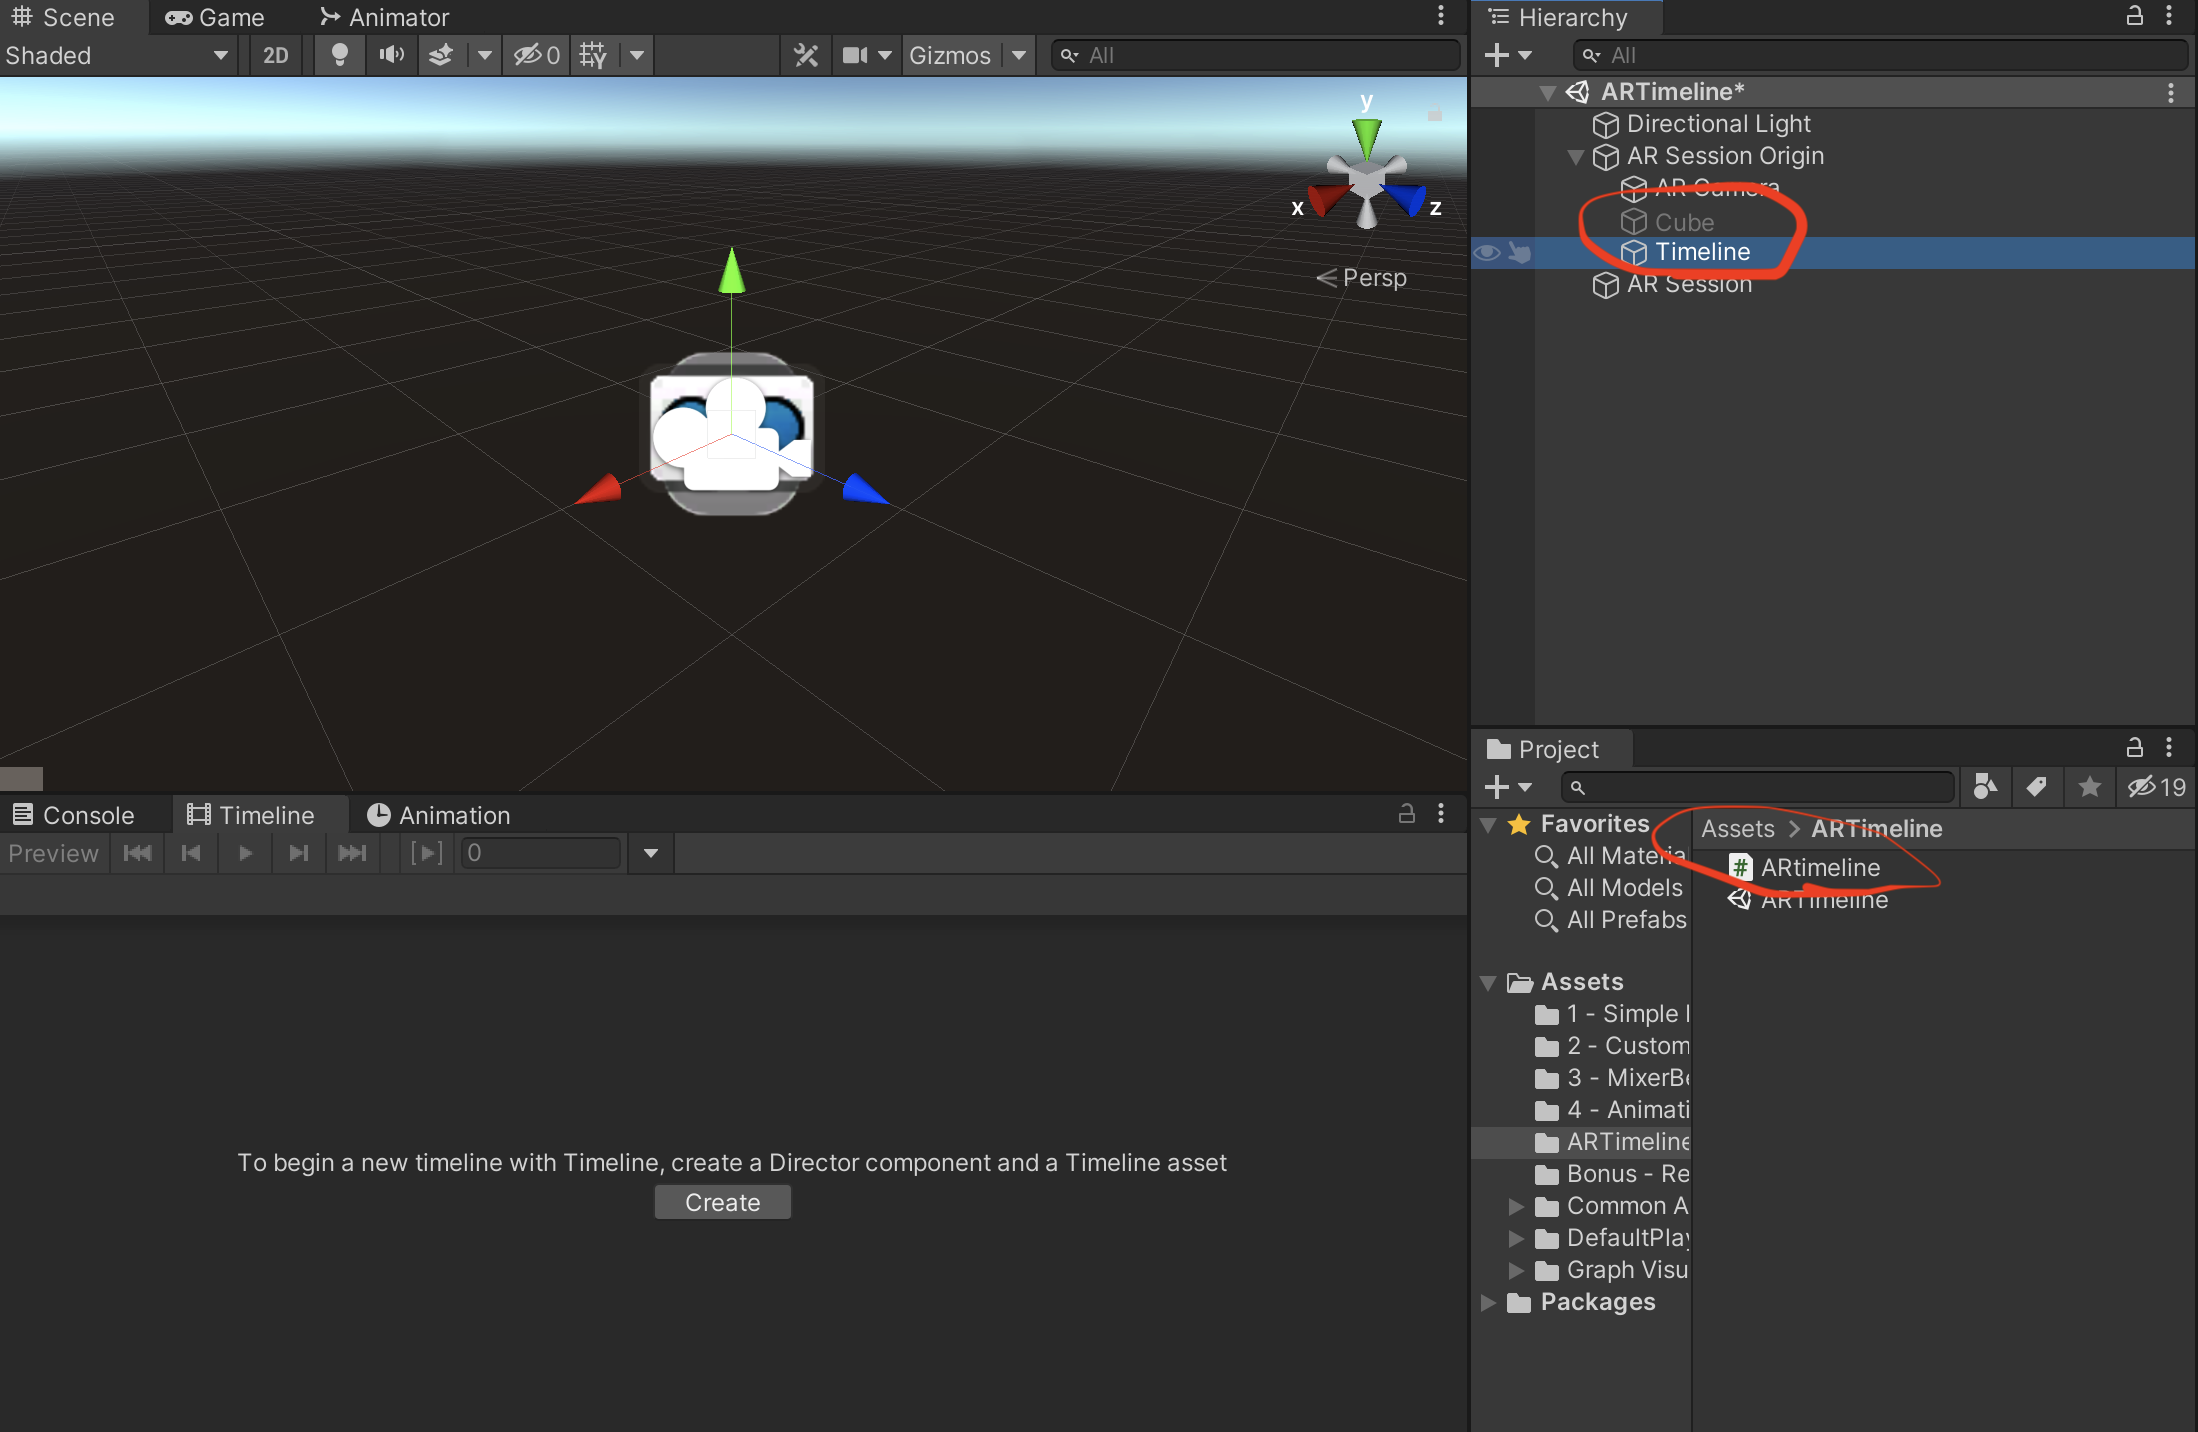
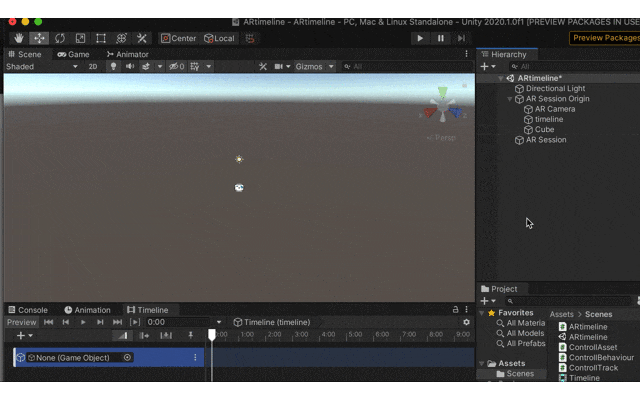
Cubeと空のGameobjectを作成し、名前をTimelineに変更
project上で右クリック→Create→C# Script で名前を「ARtimeline」に変更
ARtimelineスクリプトを下記に書き換え。
using System.Collections;
using System.Collections.Generic;
using UnityEngine;
using UnityEngine.XR.ARFoundation;
using UnityEngine.XR.ARSubsystems;
using UnityEngine.Playables;

namespace ARtimeline{
    public class ARtimeline : MonoBehaviour
    {
        public GameObject timelineobj;
        private ARRaycastManager raycastManager;
        private static List<ARRaycastHit> hits = new List<ARRaycastHit>();
        private bool active = false;

        public GameObject playablesobj;
        private PlayableDirector director;

        // Start is called before the first frame update
        void Start()
        {
            raycastManager = GetComponent<ARRaycastManager>();
            timelineobj.SetActive(active);

            director = playablesobj.GetComponent<PlayableDirector>();
        }

        // Update is called once per frame
        void Update()
        {
            if(Input.touchCount > 0)
            {
                Vector2 touchPosition = Input.GetTouch(0).position;
                if(raycastManager.Raycast(touchPosition, hits, TrackableType.Planes))
                {
                    var hitPose = hits[0].pose;

                    if(active)
                    {
                        timelineobj.transform.position = hitPose.position;

                        director.Play();
                    }
                    else
                    {
                        active = true;
                        timelineobj.SetActive(active);
                    }
                }
            }
        }
    }

}
何をしているかというと、簡単には、
画面をタッチするとCubeが表示され、その位置が画面でタッチしたAR上で検出した平面ポジションに配置
その後timelineを動かす
ってな感じ。
引用
https://qiita.com/shun-shun123/items/1aa646049474d0e244be
スクリプトとGameobjectのアタッチお忘れなく!
2.Timelineを作る
Timelineを選択し、window→Sequencing→Timeline でTimelineの画面を出し
Createボタンを押します。
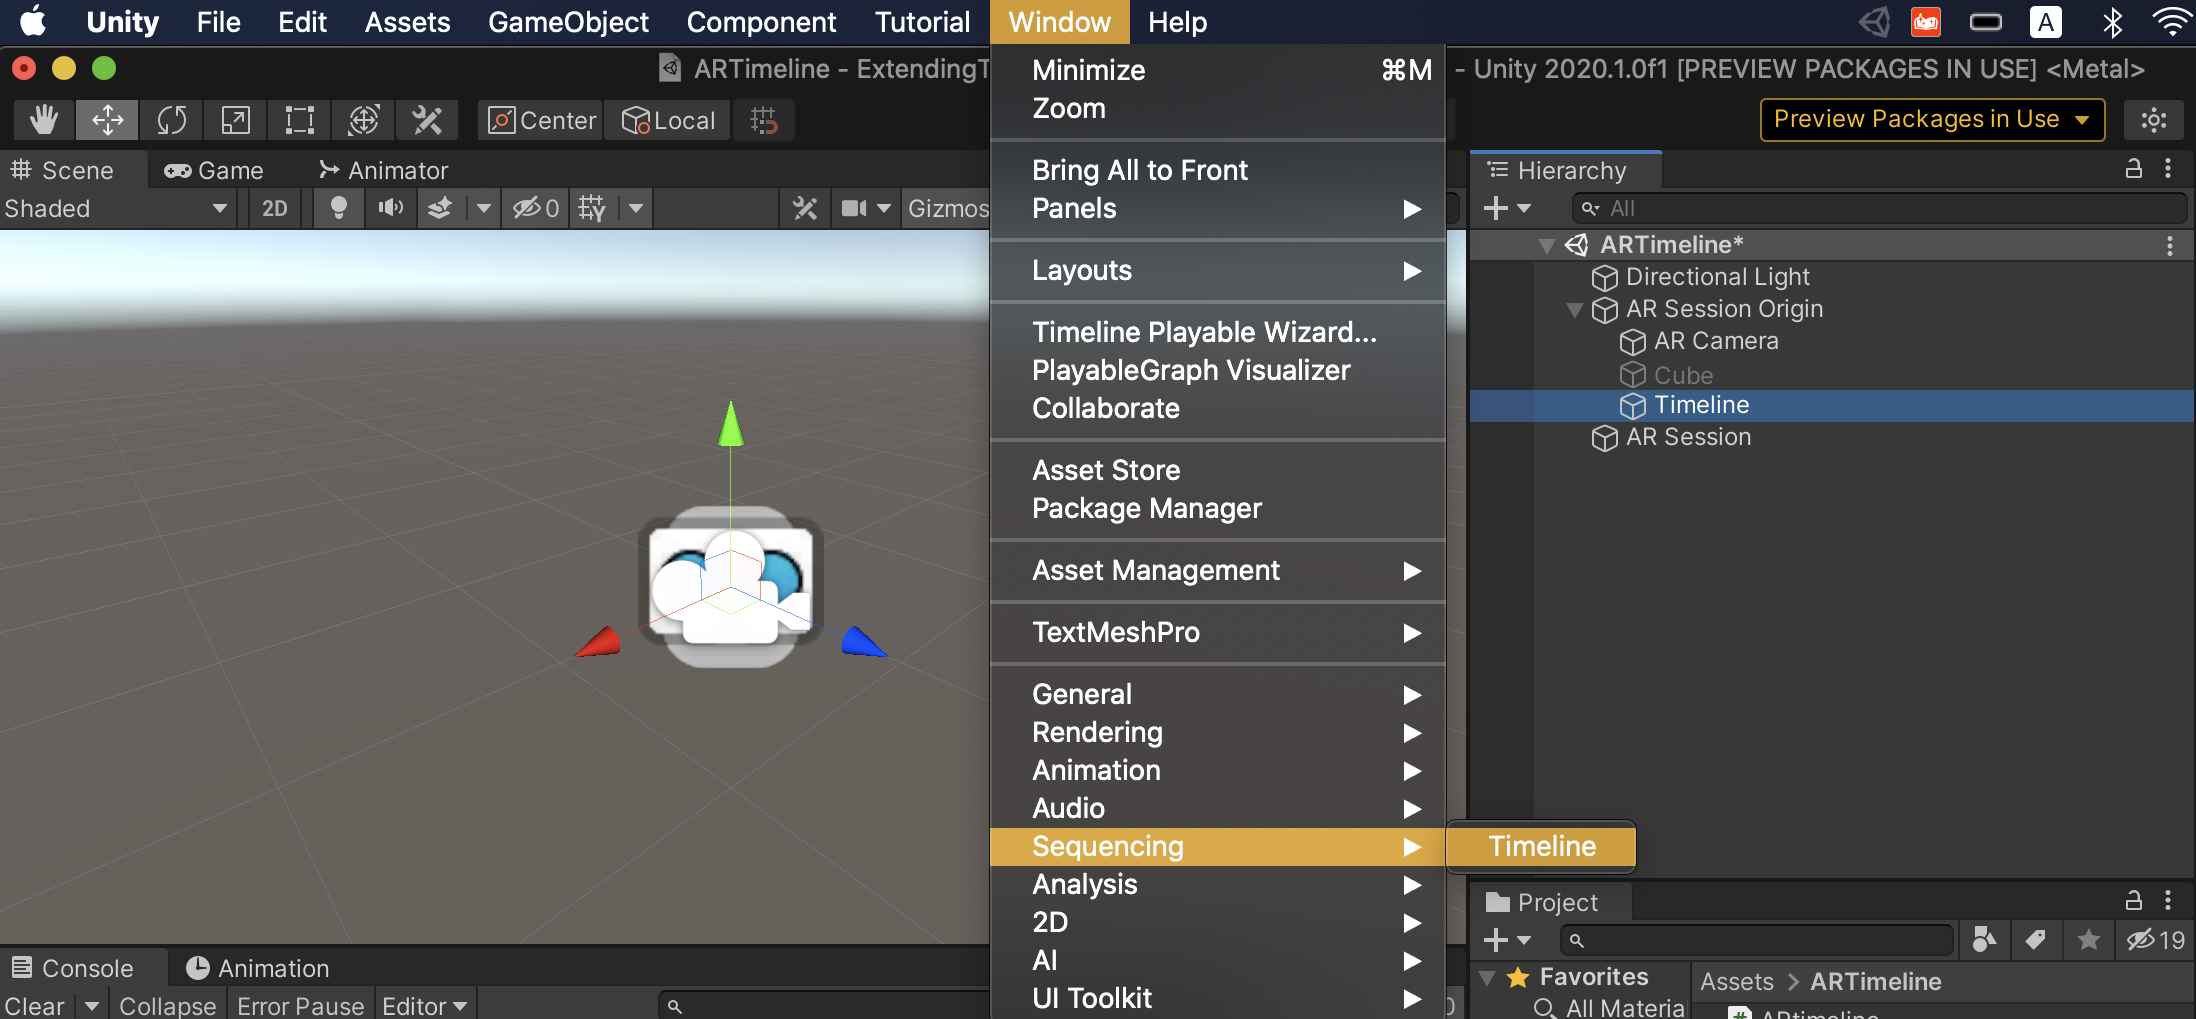
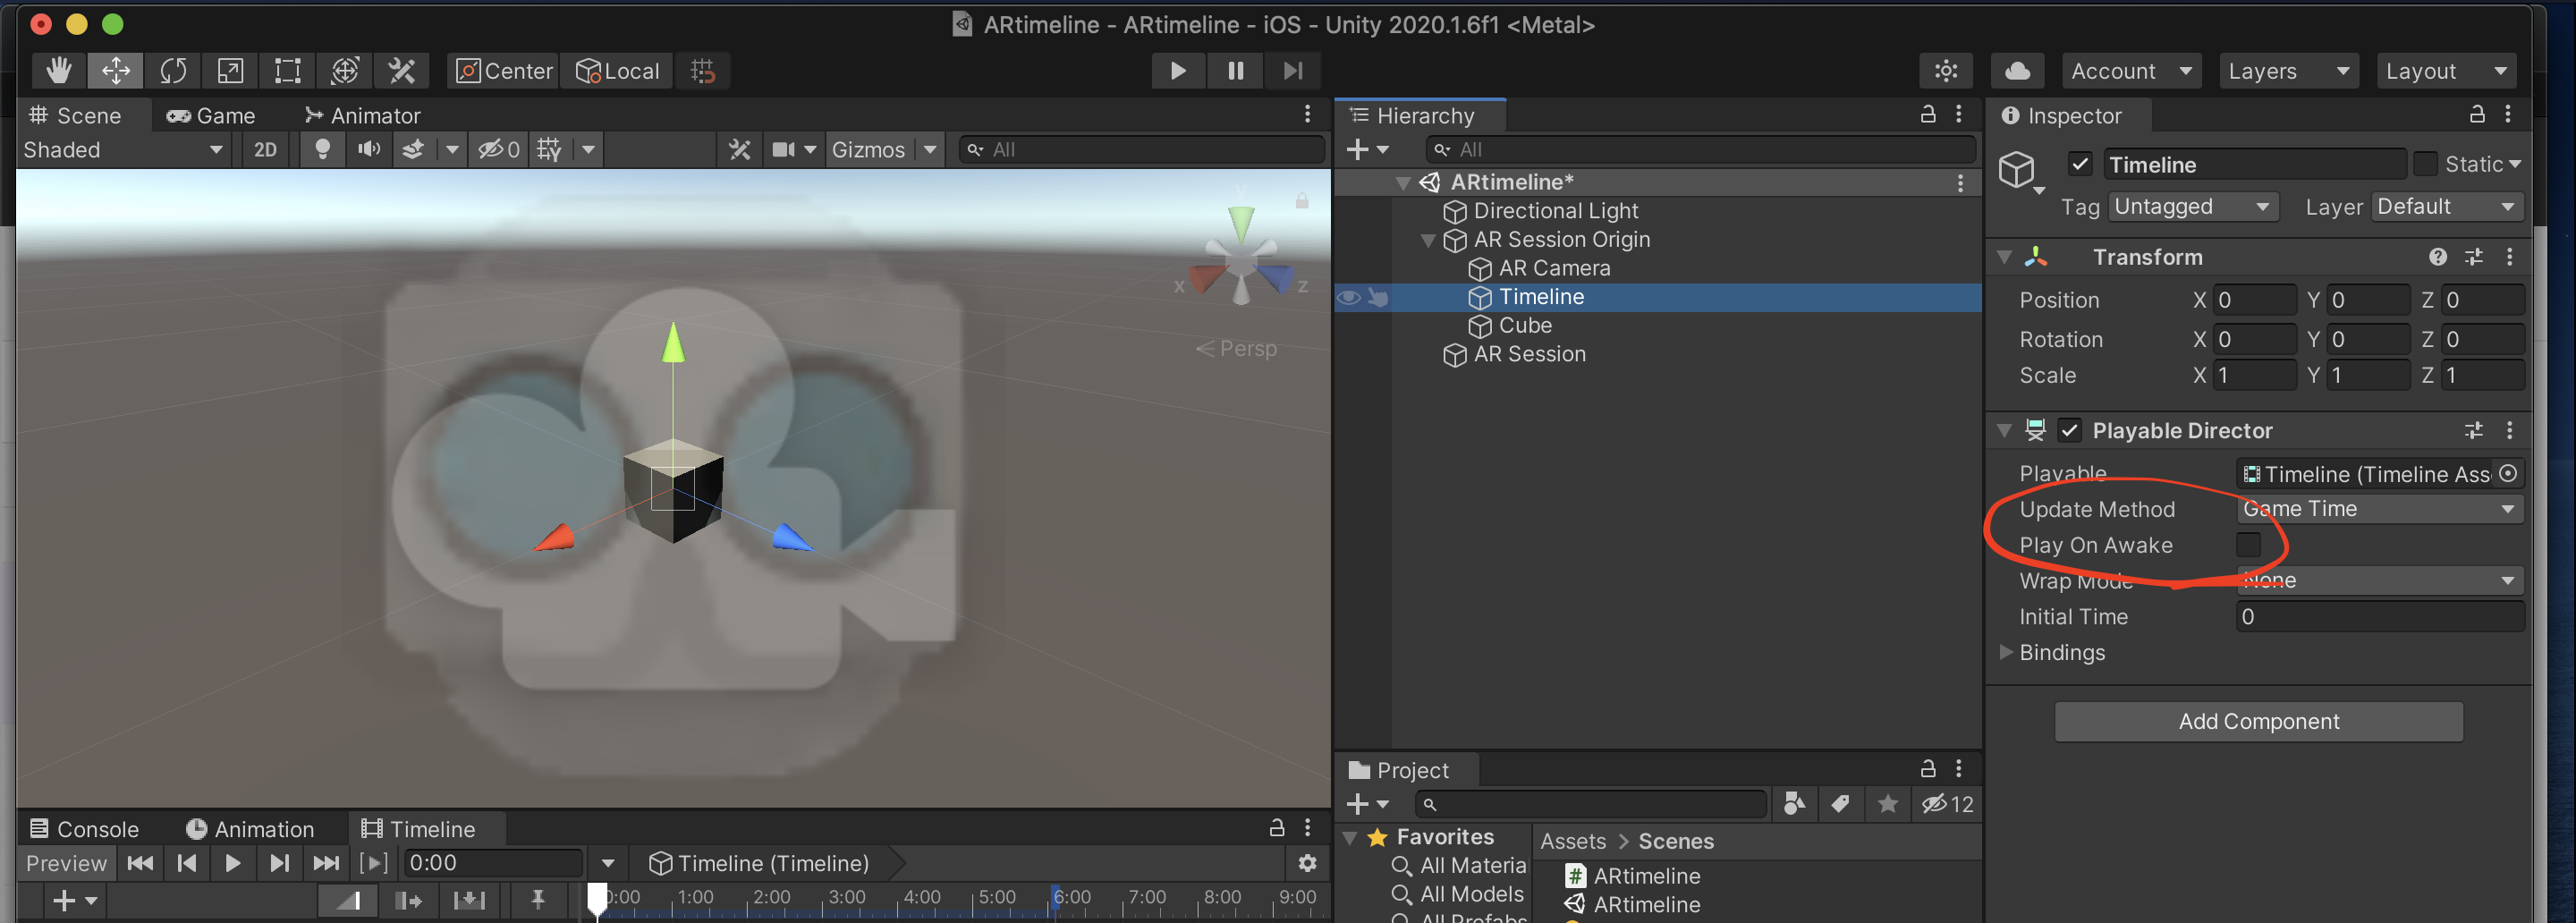
すると、Playable Directorというコンポーネントが追加されます。
このPlay On Awakeのチェックを外します。
3.演出のコードを書く
Timelineの演出をコードでつくるわけだが、そのスクリプトはオブジェクトにアタッチする必要がなくproject内にあれば良い。
その必要なスクリプトは3つ。
・1つめが「ControllTrack」
主にTimelineのトラックを設定する。
project内にC# Scriptを作って名前を「ControllTrack」にします。
下記コードに変更
using System.Collections;
using System.Collections.Generic;
using UnityEngine;
using UnityEngine.Playables;
using UnityEngine.Timeline;

namespace ARtimeline{
    [TrackClipType(typeof(ControllAsset))]
    [TrackBindingType(typeof(GameObject))]
    public class ControllTrack : TrackAsset{}
}
ちなみに
[TrackBindingType(typeof(GameObject))]
はGameObjectだけでなく
[TrackBindingType(typeof(コンポーネント名))]
でもOK
例えば、Light入れたり、Transform入れたりなんでも
・2つめが「ControllAsset」
これはTimeline内で動きを格納する箱みたいなもん
コードはこちら
using System.Collections;
using System.Collections.Generic;
using UnityEngine;
using UnityEngine.Playables;
using UnityEngine.Timeline;

namespace ARtimeline{
    public class ControllAsset : PlayableAsset
    {
        public override Playable CreatePlayable(PlayableGraph graph, GameObject owner)
        {
            var playable = ScriptPlayable<ControllBehaviour>.Create(graph);

            var ControllBehaviour = playable.GetBehaviour();

            return playable;
        }
    }
}
・3つめが「ControllBehaviour」
これが実際に動きをつけたり、いろいろいじれるスクリプト
同じように、C# Script作って、コードは下記
using System.Collections;
using System.Collections.Generic;
using UnityEngine;
using UnityEngine.Playables;
using UnityEngine.Timeline;

namespace ARtimeline{
    public class ControllBehaviour : PlayableBehaviour
    {
        private GameObject timelineobj;

        public override void ProcessFrame(Playable playable, FrameData info, object playerData)
        {
            timelineobj = playerData as GameObject;
            timelineobj.transform.position += timelineobj.transform.forward * 0.1f * Time.deltaTime;
        }
    }
}
これは
timelineobj.transform.position += timelineobj.transform.forward * 0.1f * Time.deltaTime;
ここで、GameObject(ここで言うならCube)を動かしています
PlayableAPIについて詳しく知りたい方は下記から。
このチュートリアルが一番いい
https://blogs.unity3d.com/jp/2018/09/05/extending-timeline-a-practical-guide/
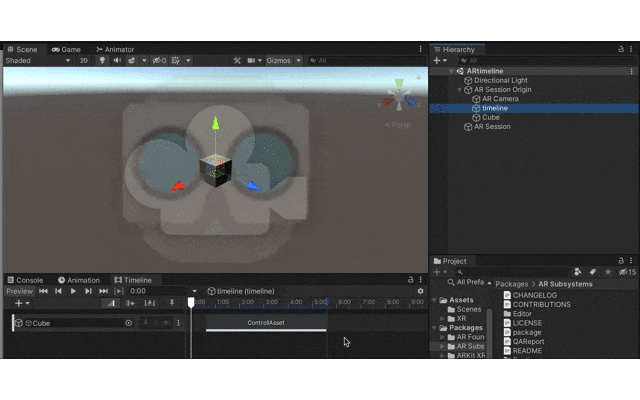
4.コードをTimelineに実装する
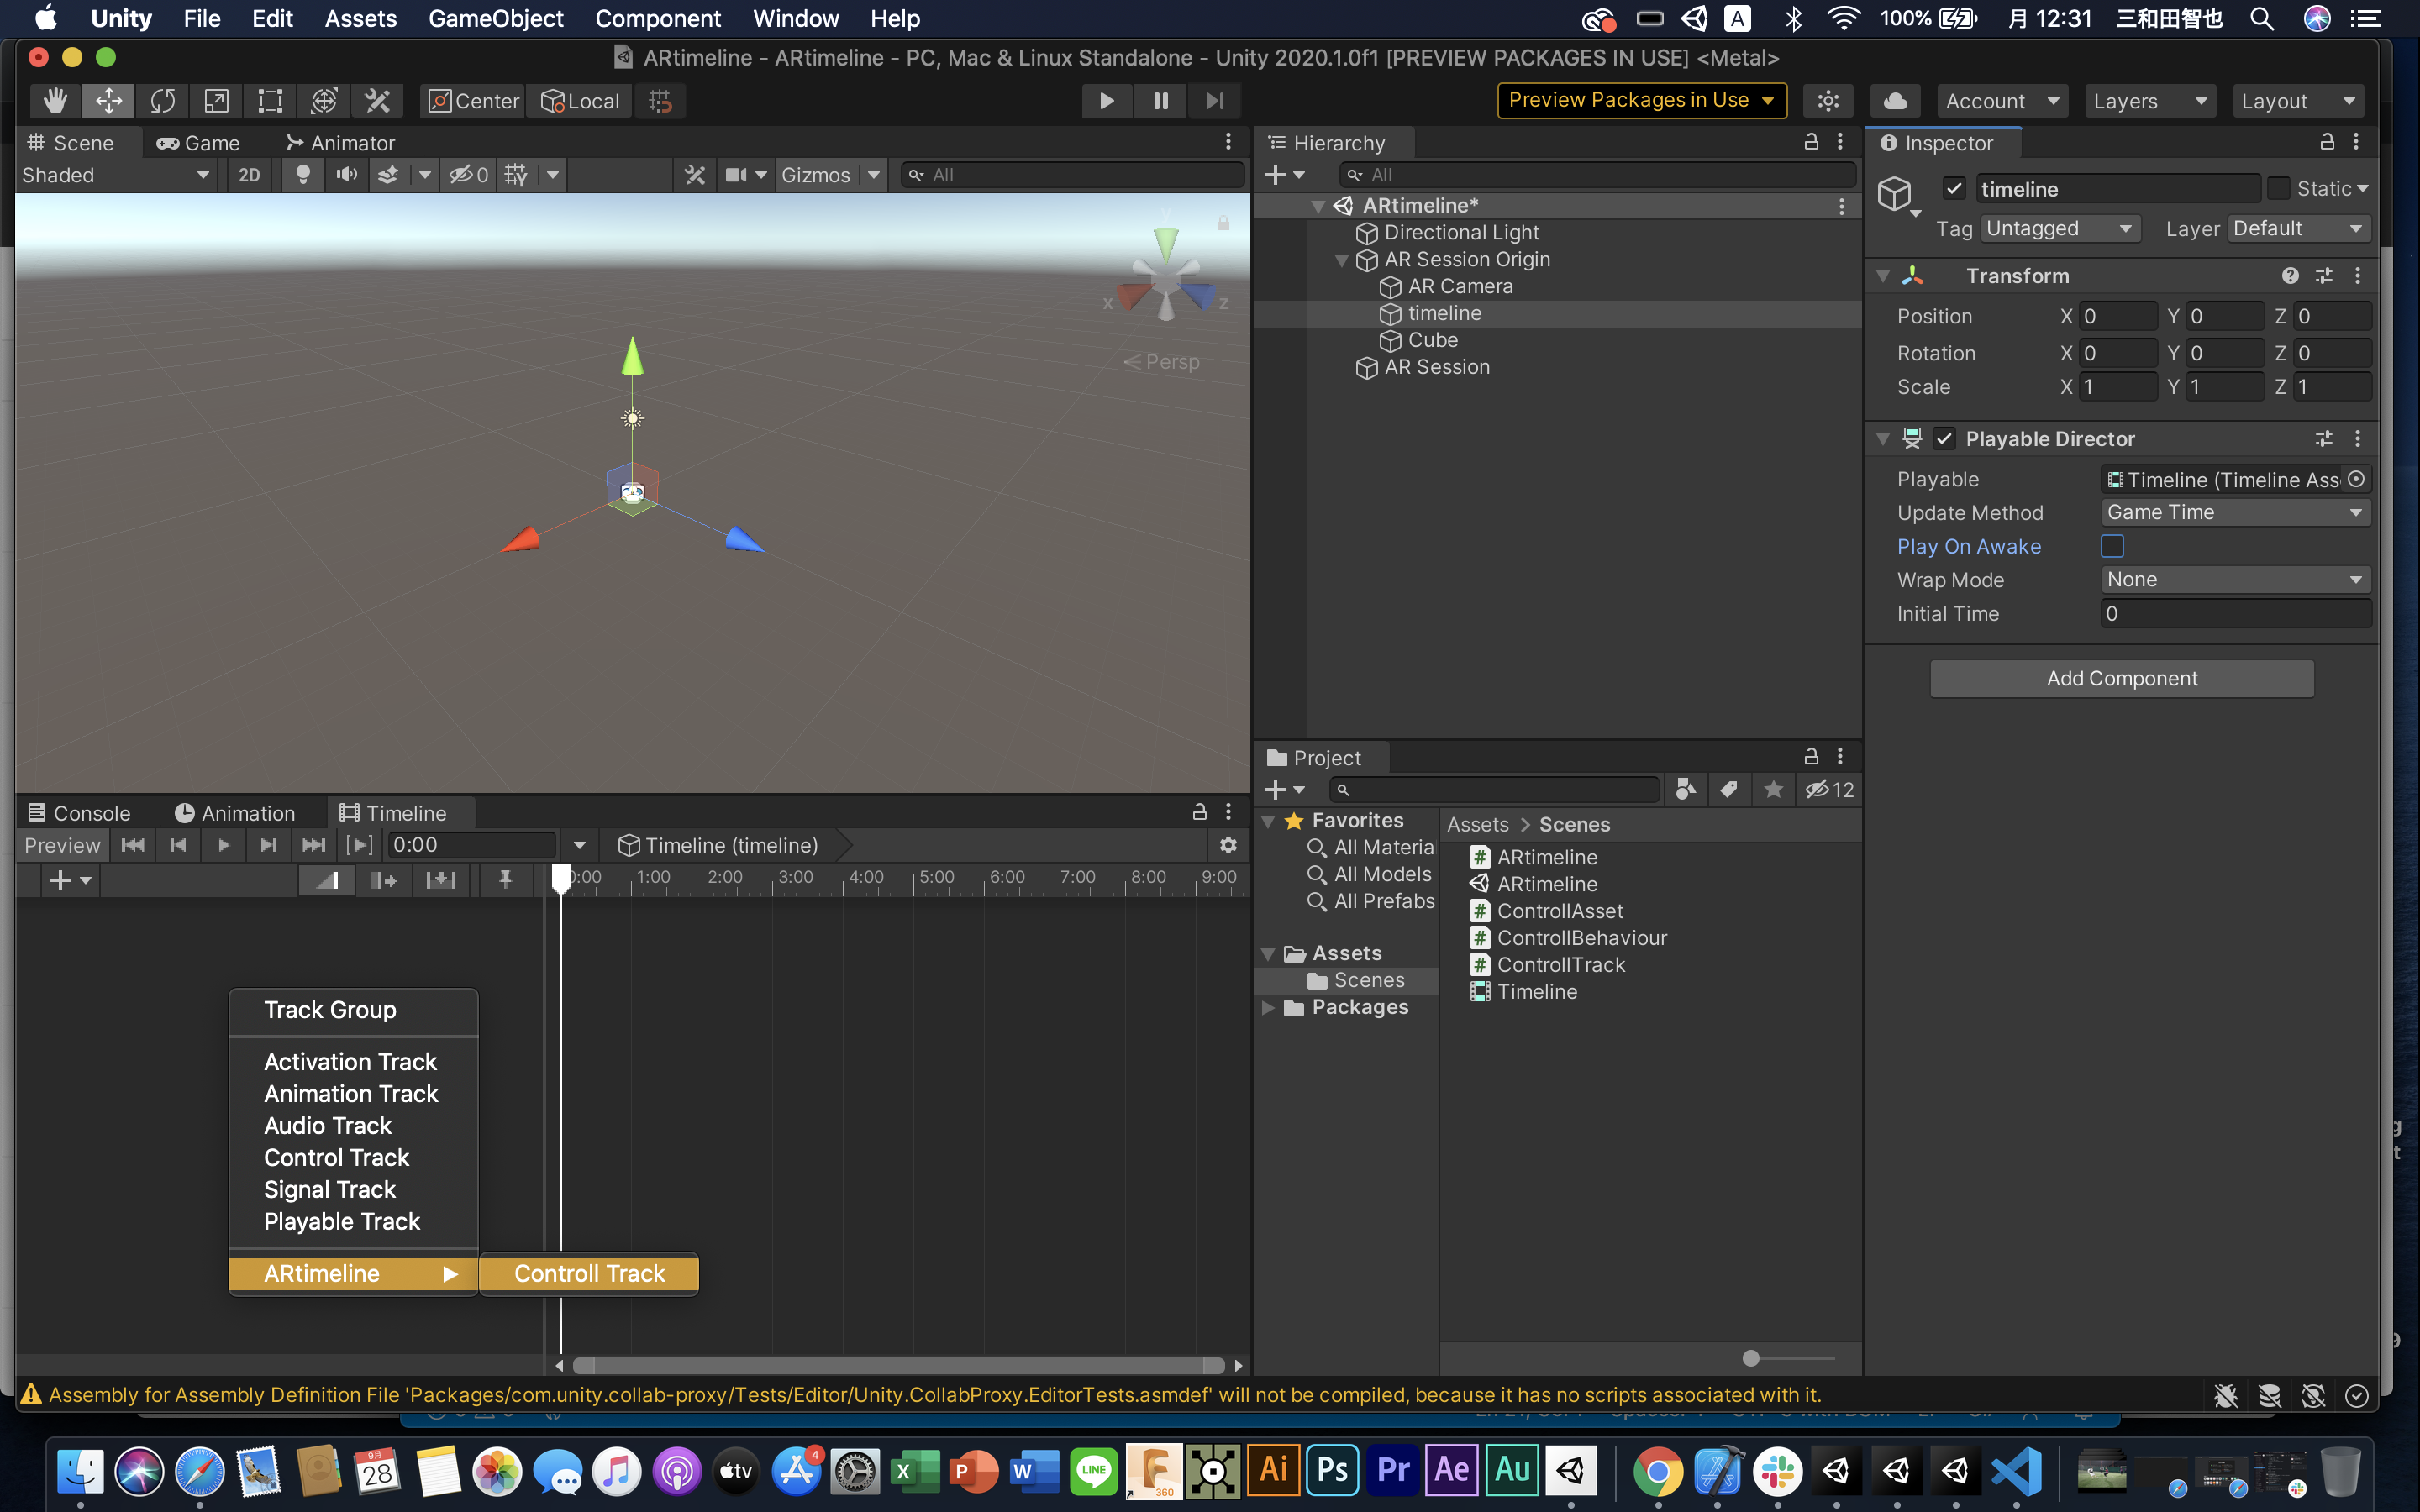
右クリック→ARtimeline→Controll Trackでトラックを作ります
トラックの右の●3つからAdd Controll Assetを選択
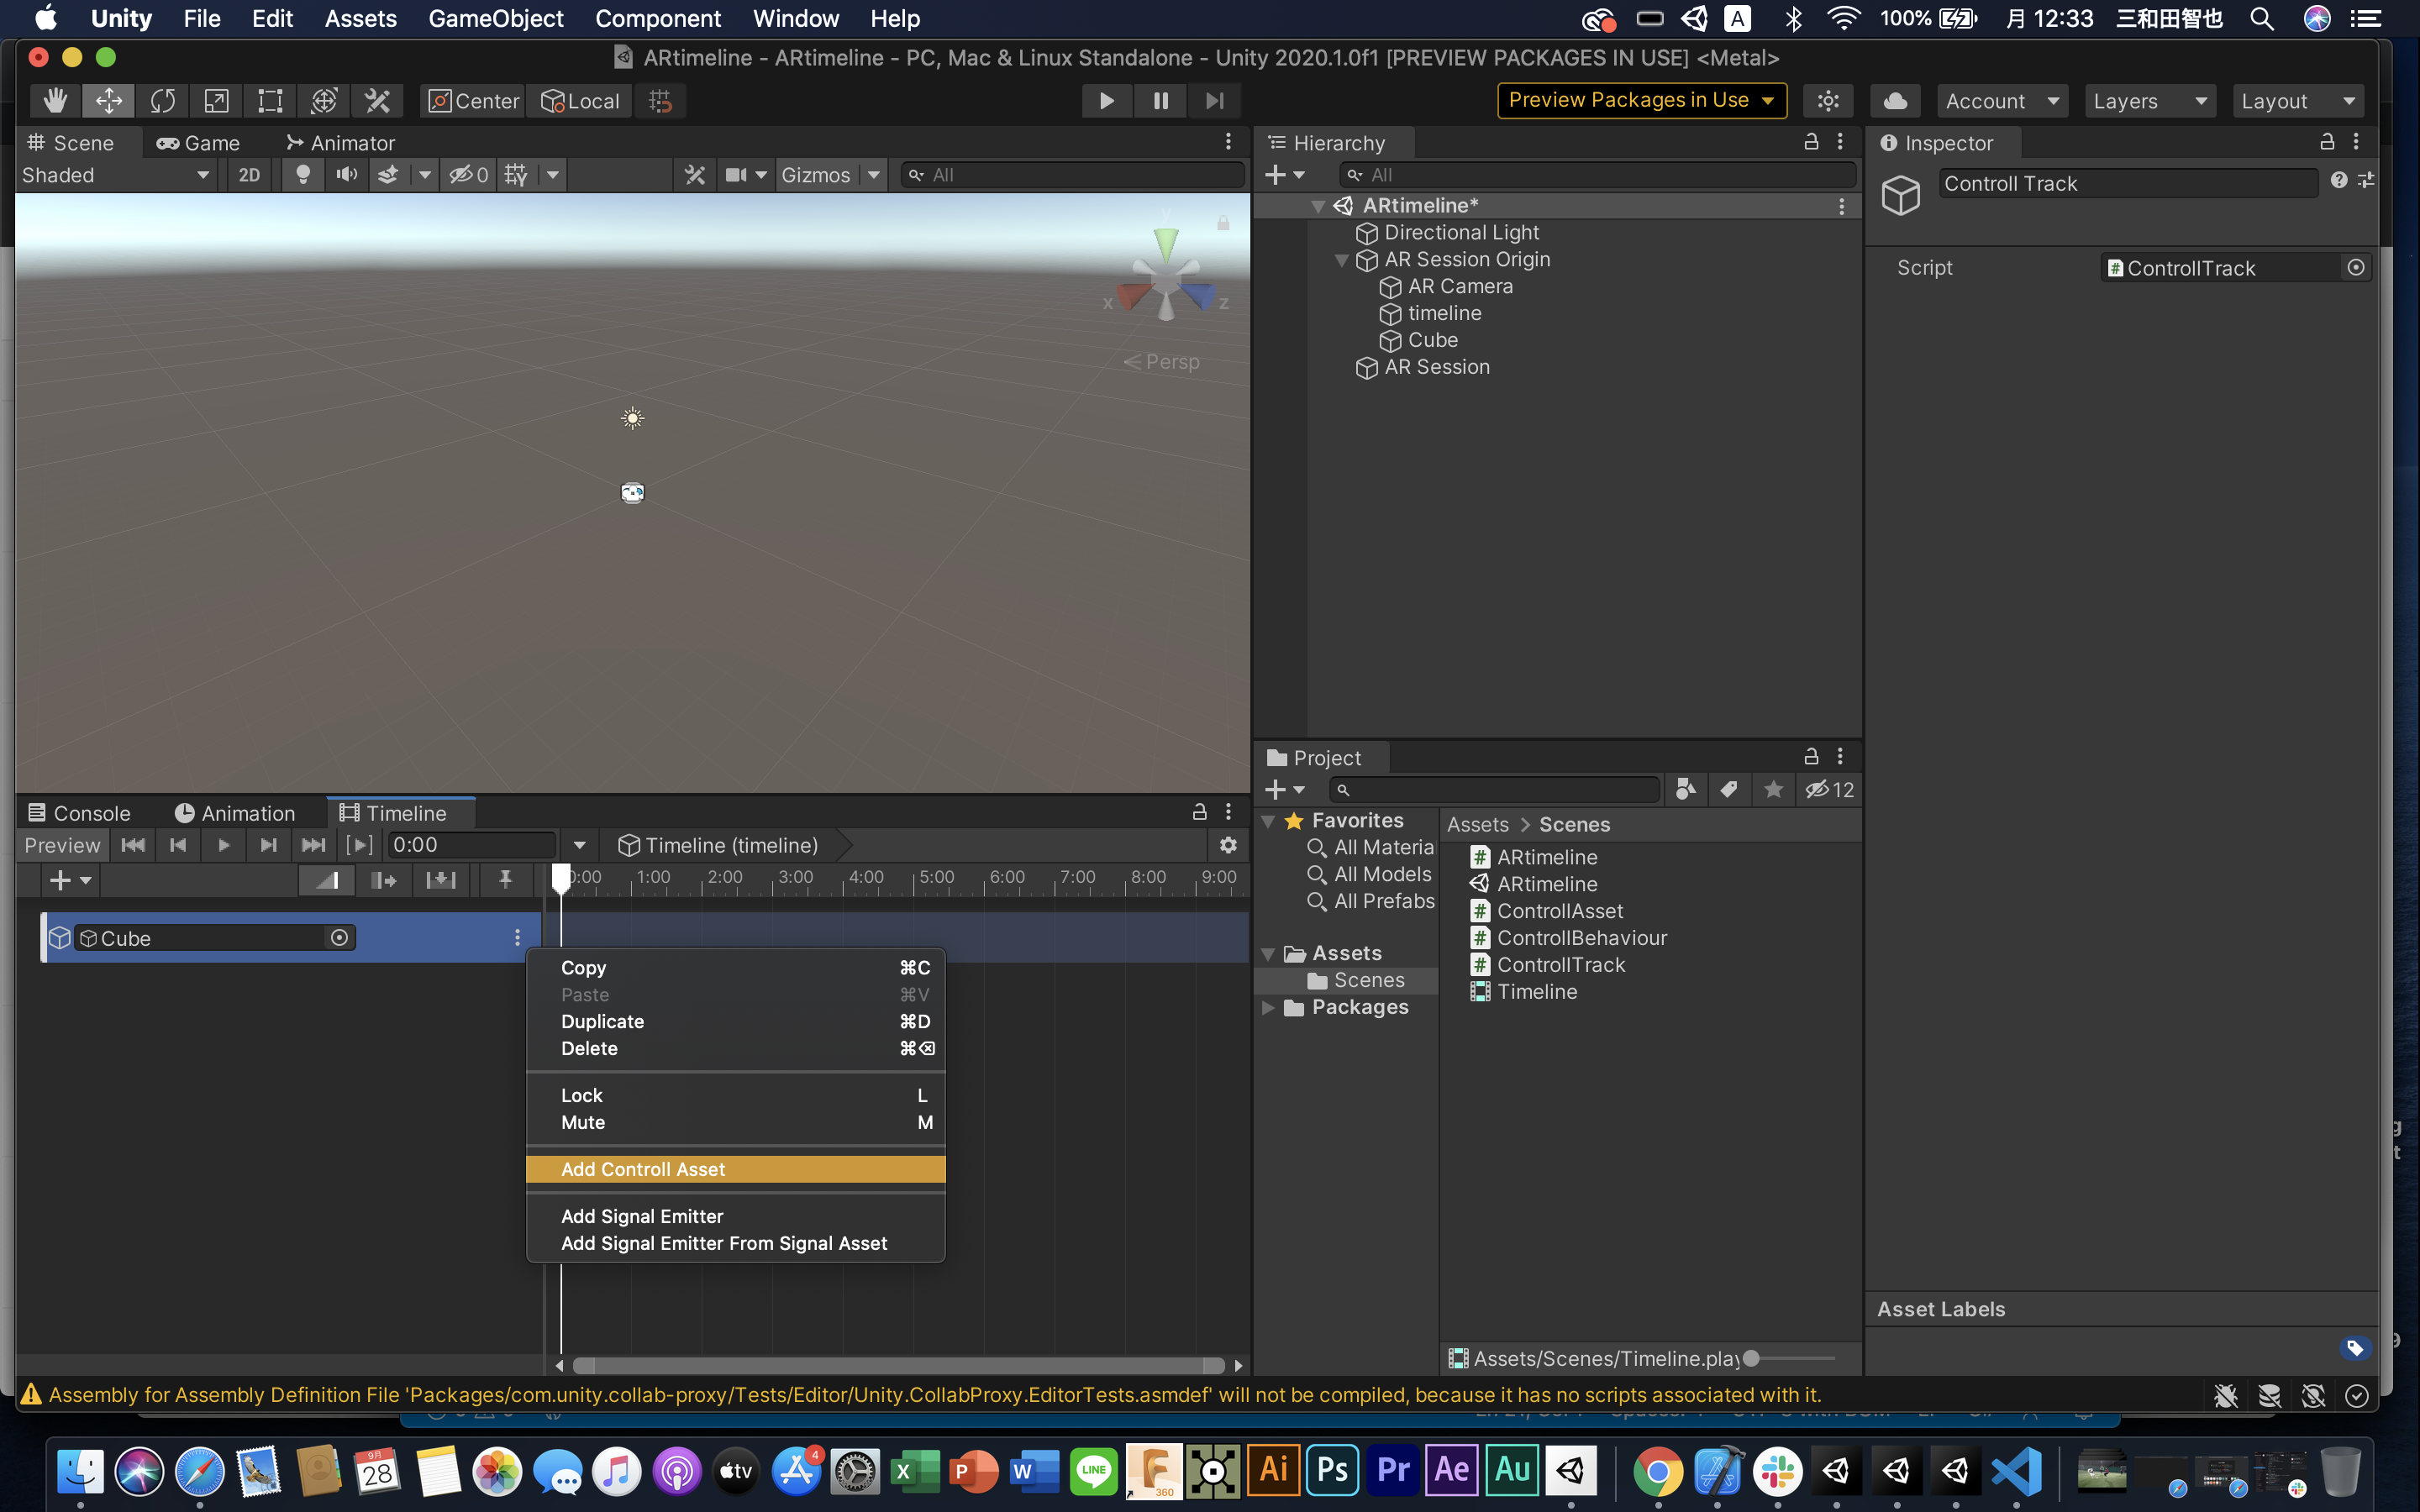
最後にCubeをトラックにアタッチします。
Timelineを再生すると、Cubeが動くのが確認できます。
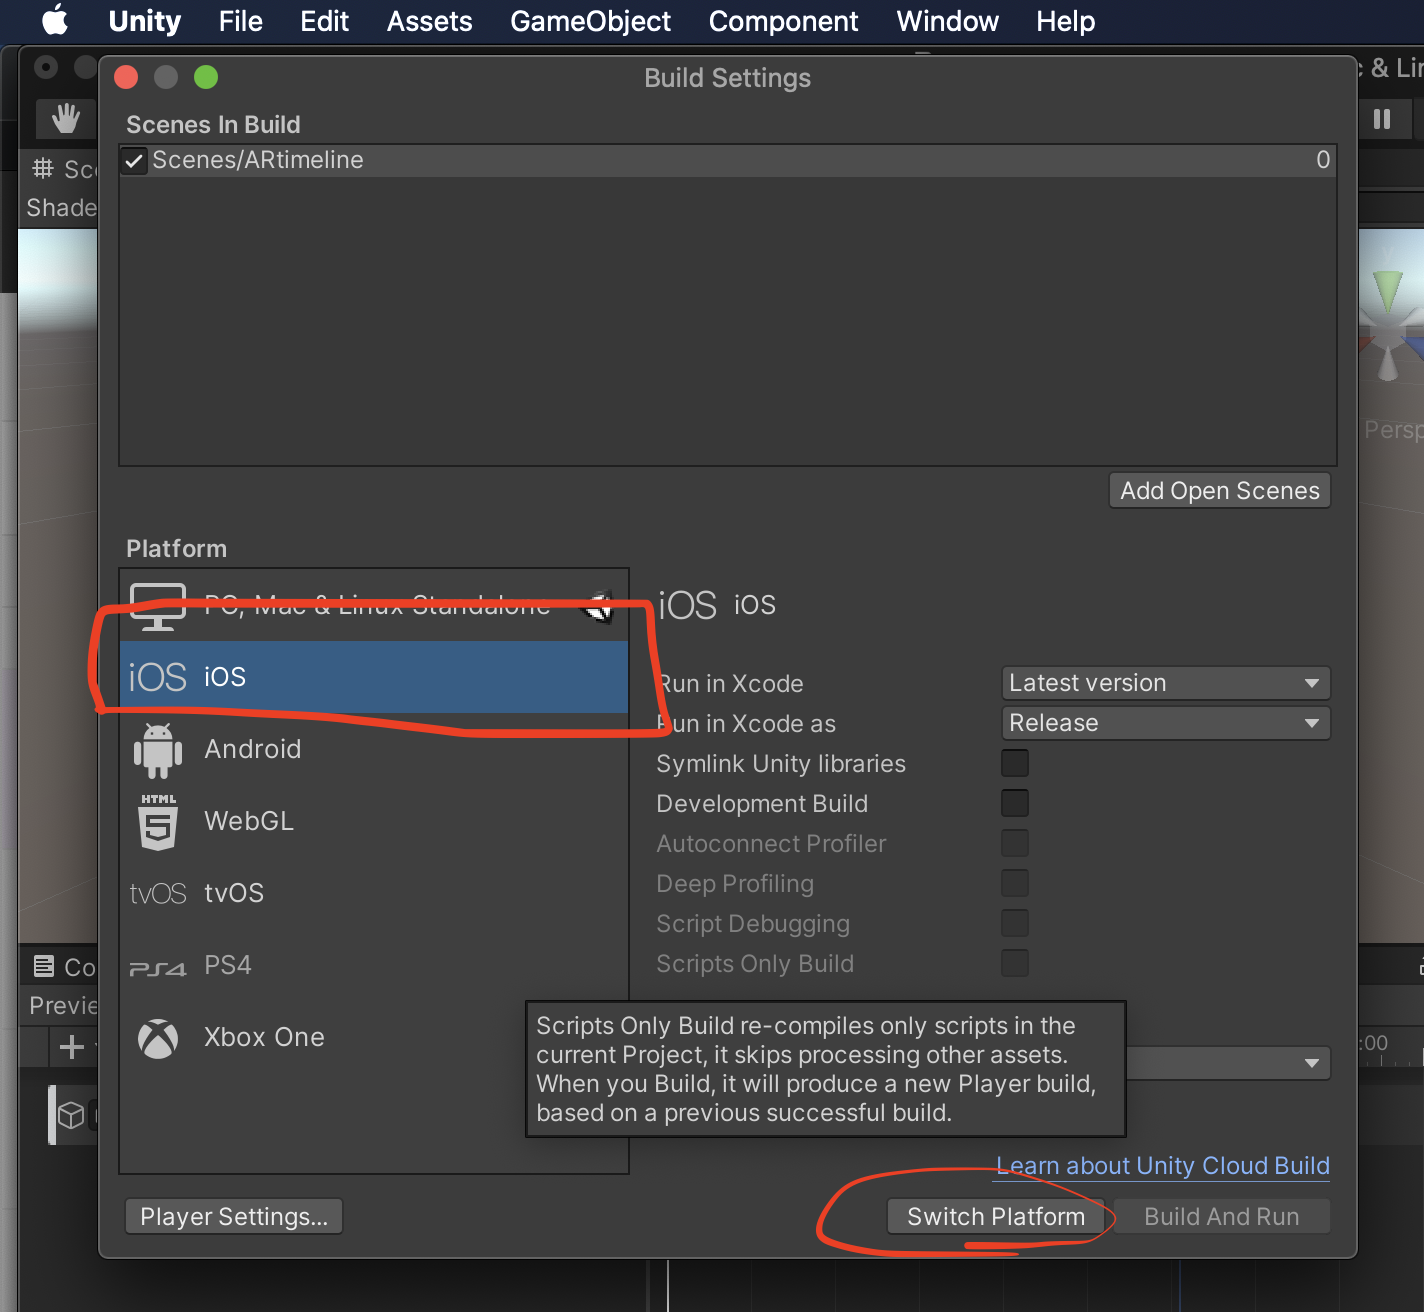
5.実機ビルド
File→Build settingから
Add Open Scenesボタンを押して、sceneを追加
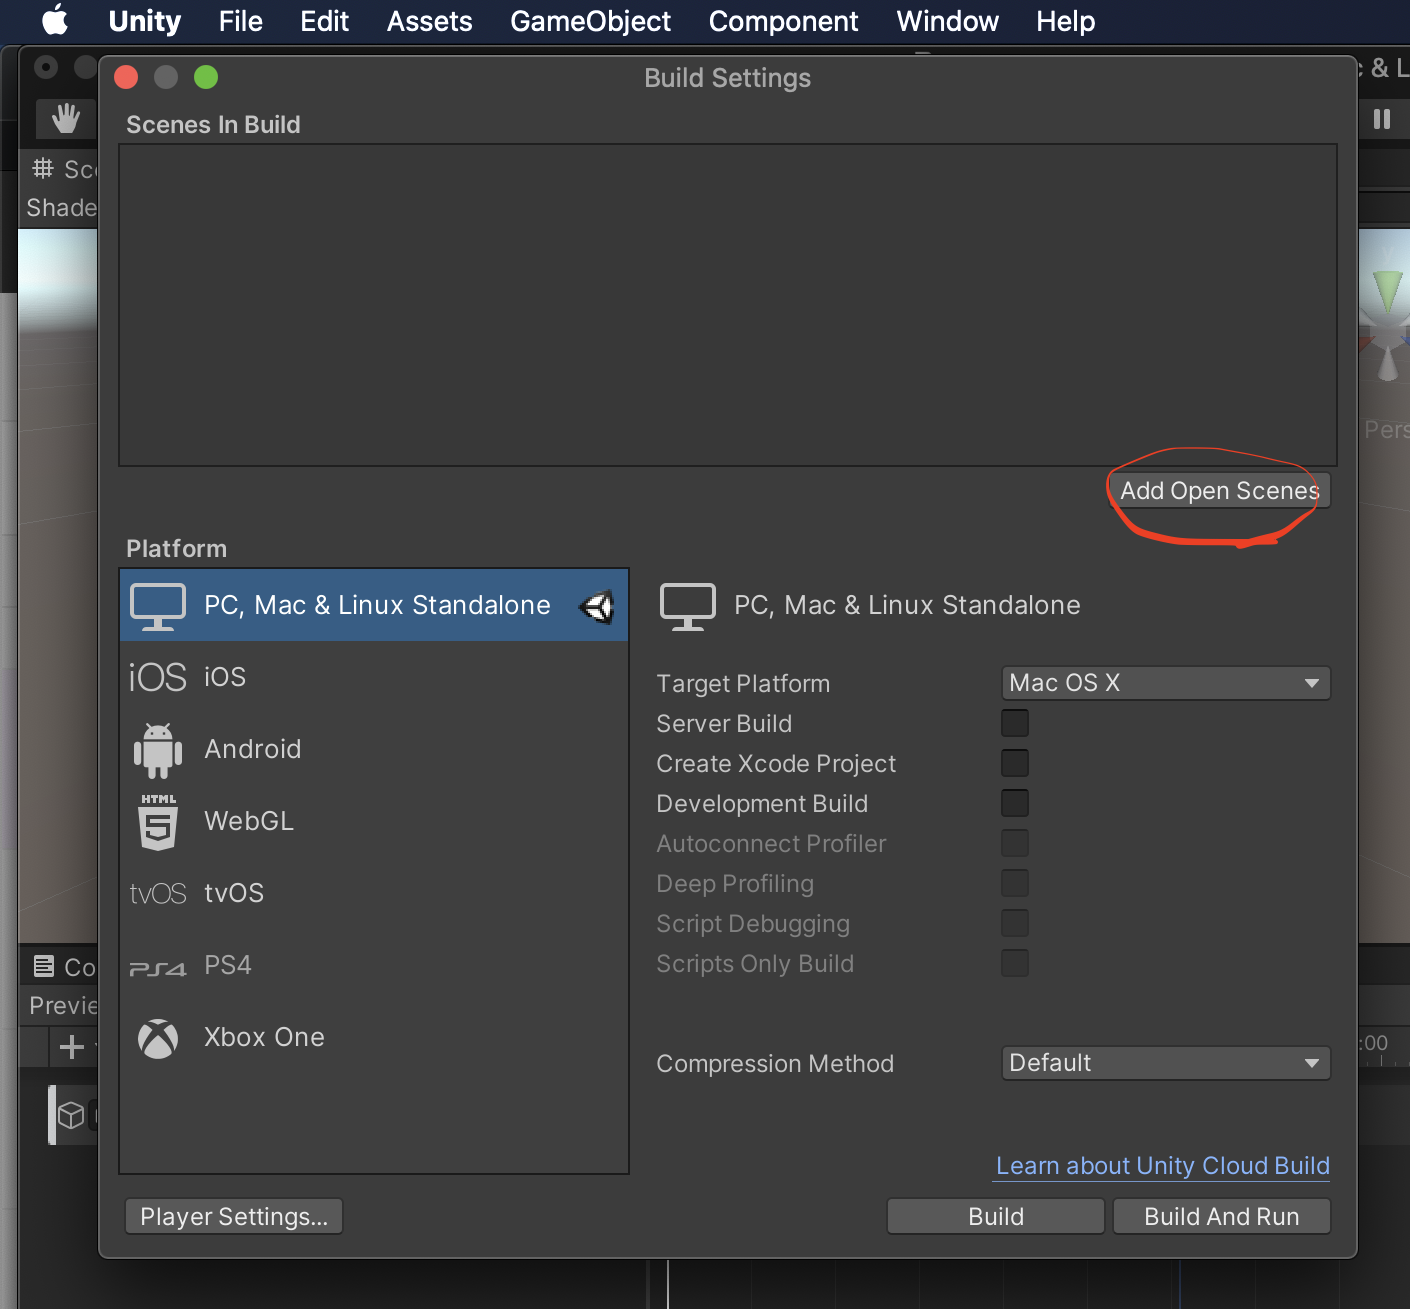
platformをiosに変更して、switch platform
Player Settingsを開き、OtherSettingsの中の、Camera Usage Discription(カメラ使用しますぞのメッセージ)を入力します。
同じくOther Settingsの中の、ArchitectureをARM64にします。
同じくOther Settingsの中のTarget minimum iOS Versionを11.0にします。
これでbuildしましょう。
すると、xcodeのファイルが作られるので、これを開き、signingのteamを設定し実機ビルドしましょう
https://uni.gas.mixh.jp/unity/unity-for-ios.html
完成
ここに音や他のTrackを入れれば、いい感じになるのでは、、、
あとは開発者次第ですね
Timelineは奥が深い
Timelineを使えばお手軽に演出を作れるが、ARのように少し込み入ったことをしようとすると、ガッツリ拡張しないといけません。
そんな迷路に入りたい方はこちら
https://www.youtube.com/watch?v=6SPpjSKy9LI