今日(11/13)はこの記事を訳していこうと思う。
プロジェクトで必要ってわけではないので、まあ趣味の範囲内かな...
めっちゃ内容を簡単に伝えると、どうやって自分で作ったアーキテクチャのモデルをhuggingfacehubで共有するか、という内容の記事です。これができれば、ほかのユーザがmodel.from_pretrained("model's repository name")で簡単にロードすることができるようになります。
それでは本番。
Sharing custom models
The 🤗 Transformers library is designed to be easily extensible. Every model is fully coded in a given subfolder of the repository with no abstraction, so you can easily copy a modeling file and tweak it to your needs.
If you are writing a brand new model, it might be easier to start from scratch. In this tutorial, we will show you how to write a custom model and its configuration so it can be used inside Transformers, and how you can share it with the community (with the code it relies on) so that anyone can use it, even if it’s not present in the 🤗 Transformers library.
We will illustrate all of this on a ResNet model, by wrapping the ResNet class of the timm library into a PreTrainedModel.
huggingface Transformers libraryは簡単に拡張できるよう設計されています。
全てのモデルは曖昧性なくリポジトリのサブフォルダ内で完全に記述されるので、簡単にモデルファイルをコピーしたり、必要に応じて微調整を加えることができます。
もし新しいモデルを書きたい場合、スクラッチから始めるのが良いでしょう。このチュートリアルでは、transformersの中で使用できるようにカスタムモデルやコンフィギュレーションを書く方法と、現在huggingface Transfomers Libraryで用意されていないモデルであっても、コミュニティーにこれを共有する方法について説明します。
ここではtimm libraryのResnetクラスをPretrainedModelに内包することで、ResNetモデルを例に説明していきます。
Writing a custom configuration
Before we dive into the model, let’s first write its configuration. The configuration of a model is an object that will contain all the necessary information to build the model. As we will see in the next section, the model can only take a config to be initialized, so we really need that object to be as complete as possible.
In our example, we will take a couple of arguments of the ResNet class that we might want to tweak. Different configurations will then give us the different types of ResNets that are possible. We then just store those arguments, after checking the validity of a few of them.
モデルを書き始める前に、コンフィギュレーションをまず書いていきます。モデルのコンフィギュレーションはモデル構築に必要な情報を含めるオブジェクトです。次のセクションで見るように、モデルは一つしか初期化のためのconfigを持つことができず、私たちはできる限り完全なこのオブジェクトが必要です。
ここでは、微調整したいResnetクラスの引数を一組取っています。異なる設定は異なるResnetのモデル型を与えます。それらの妥当性を確認した後、これらの引数を保存しておくことができます。
from transformers import PretrainedConfig
from typing import List


class ResnetConfig(PretrainedConfig):
    model_type = "resnet" #モデルの名前を命名?

    def __init__(
        self,
        block_type="bottleneck",
        layers: List[int] = [3, 4, 6, 3],
        num_classes: int = 1000,
        input_channels: int = 3,
        cardinality: int = 1,
        base_width: int = 64,
        stem_width: int = 64,
        stem_type: str = "",
        avg_down: bool = False,
        **kwargs,
    ):
        if block_type not in ["basic", "bottleneck"]:
            raise ValueError(f"`block_type` must be 'basic' or bottleneck', got {block_type}.")
        if stem_type not in ["", "deep", "deep-tiered"]:
            raise ValueError(f"`stem_type` must be '', 'deep' or 'deep-tiered', got {stem_type}.")

        self.block_type = block_type
        self.layers = layers
        self.num_classes = num_classes
        self.input_channels = input_channels
        self.cardinality = cardinality
        self.base_width = base_width
        self.stem_width = stem_width
        self.stem_type = stem_type
        self.avg_down = avg_down
        super().__init__(**kwargs)
The three important things to remember when writing you own configuration are the following:
- you have to inherit from PretrainedConfig,
- the init of your PretrainedConfig must accept any kwargs,
- those kwargs need to be passed to the superclass init.
The inheritance is to make sure you get all the functionality from the 🤗 Transformers library, while the two other constraints come from the fact a PretrainedConfig has more fields than the ones you are setting. When reloading a config with the from_pretrained method, those fields need to be accepted by your config and then sent to the superclass.
自分のコンフィギュレーションを書く際に覚えておきたい3つのこと。
- PretrainedConfigクラスを継承すること
-
__init()__メソッドで全てのキーワード引数を受けとる必要があります - これらの引数はスーパークラスの
__init__()メソッドに引き渡される必要があります。
一番初めのクラスの継承については、🤗 Transformers ライブラリからすべての機能を取得するために行います。ただし、他の2つの制約は、PretrainedConfigが設定しているものよりもフィールドが多いという事実から来ています。from_pretrainedメソッドを使用して構成を再ロードする際、これらのフィールドは構成によって受け入れられ、それからスーパークラスに送信される必要があります。
Defining a model_type for your configuration (here model_type="resnet") is not mandatory, unless you want to register your model with the auto classes (see last section).
model_typeの定義については(ここではmodel_type="resnet"の部分)、モデルをauto classesとして登録したいわけではないなら、必要ではありません。
With this done, you can easily create and save your configuration like you would do with any other model config of the library. Here is how we can create a resnet50d config and save it:
これが終わったら、あなたは自分のコンフィギュレーションをライブラリにある他のモデルのコンフィギュレーションのように保存することができます。次のコードではresnet50d configを作成し、保存しています。
resnet50d_config = ResnetConfig(block_type="bottleneck", stem_width=32, stem_type="deep", avg_down=True)
resnet50d_config.save_pretrained("custom-resnet")
This will save a file named config.json inside the folder custom-resnet. You can then reload your config with the from_pretrained method:
これを行うとconfig.jsonという名前のファイルが、カスタムしたレズネットフォルダの中に作成されます。このコンフィギュレーションはfrom_pretrained()メソッドを使用してリロードすることができます。
resnet50d_config = ResnetConfig.from_pretrained("custom-resnet")
You can also use any other method of the PretrainedConfig class, like push_to_hub() to directly upload your config to the Hub.
また、push_to_hub()メソッドを使用して直接Hubにコンフィギュレーションをアップロードして、PretrainedConfigクラスの他のメソッドを使用することもできます。
try:
Google Colabで、とりあえずここまでやってみる。
!pip install transformers
from transformers import PretrainedConfig
from typing import List

class FSVAEConfig(PretrainedConfig):
    model_type = "fsvae"

    def __init__(
        self,
        in_channels: int = 1,
        hidden_dims : List[int] = [32, 64, 128, 256],
        k : int = 20,
        n_steps : int = 16,
        latent_dim : int = 128,
        scheduled : bool = True,
        # loss_func : str = "kld",
        dt:float = 5,
        a:float = 0.25,
        aa: float = 0.5,
        Vth : float = 0.2, # しきい値電位
        tau : float = 0.25,
        **kwargs,
    ):
        # if block_type not in ["basic", "bottleneck"]:
        #     raise ValueError(f"`block_type` must be 'basic' or bottleneck', got {block_type}.")
        # if stem_type not in ["", "deep", "deep-tiered"]:
        #     raise ValueError(f"`stem_type` must be '', 'deep' or 'deep-tiered', got {stem_type}.")

        self.in_channels = in_channels
        self.hidden_dims  = hidden_dims
        self.k = k
        self.n_steps = 16
        self.latent_dim = latent_dim
        self.scheduled = scheduled
        self.dt = dt
        self.a = a
        self.aa = aa
        self.Vth = Vth
        self.tau = tau
        super().__init__(**kwargs)
fsvae_config = FSVAEConfig()
fsvae_config.save_pretrained( save_directory="/content/mikan")

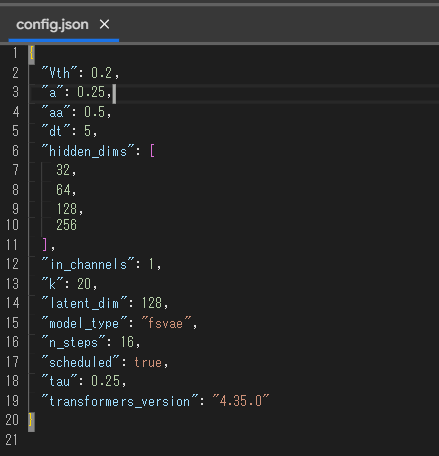
フムフム(・_・D
Writing a custom model
Now that we have our ResNet configuration, we can go on writing the model. We will actually write two: one that extracts the hidden features from a batch of images (like BertModel) and one that is suitable for image classification (like BertForSequenceClassification).
As we mentioned before, we’ll only write a loose wrapper of the model to keep it simple for this example. The only thing we need to do before writing this class is a map between the block types and actual block classes. Then the model is defined from the configuration by passing everything to the ResNet class:
Resnetのコンフィギュレーションができたので、ここからモデルについて書いていきます。ここでは、二つのモデルが書きます。一つ目は、BertModelのように画像のバッチから隠れ層の特徴量を抽出するモデル、もう一つは画像分類に適したモデルです。
以前に言及したように、この例をシンプルにするため、モデルの緩いラッパーだけを書きます。このクラスを書く前に行うのは、ブロックのタイプと実際のブロッククラスを指定することだけ。その後、モデルはコンフィギュレーションをすべてResNetクラスに引きわたすことで、定義されます。
from transformers import PreTrainedModel
from timm.models.resnet import BasicBlock, Bottleneck, ResNet
from .configuration_resnet import ResnetConfig


BLOCK_MAPPING = {"basic": BasicBlock, "bottleneck": Bottleneck}


class ResnetModel(PreTrainedModel):
    config_class = ResnetConfig

    def __init__(self, config):
        super().__init__(config)
        block_layer = BLOCK_MAPPING[config.block_type]
        self.model = ResNet(
            block_layer,
            config.layers,
            num_classes=config.num_classes,
            in_chans=config.input_channels,
            cardinality=config.cardinality,
            base_width=config.base_width,
            stem_width=config.stem_width,
            stem_type=config.stem_type,
            avg_down=config.avg_down,
        )

    def forward(self, tensor):
        return self.model.forward_features(tensor)
For the model that will classify images, we just change the forward method:
画像分類のモデルは、forward()メソッドを変えるだけです。
import torch


class ResnetModelForImageClassification(PreTrainedModel):
    config_class = ResnetConfig

    def __init__(self, config):
        super().__init__(config)
        block_layer = BLOCK_MAPPING[config.block_type]
        self.model = ResNet(
            block_layer,
            config.layers,
            num_classes=config.num_classes,
            in_chans=config.input_channels,
            cardinality=config.cardinality,
            base_width=config.base_width,
            stem_width=config.stem_width,
            stem_type=config.stem_type,
            avg_down=config.avg_down,
        )

    def forward(self, tensor, labels=None):
        logits = self.model(tensor)
        if labels is not None:
            loss = torch.nn.cross_entropy(logits, labels) # ここで損失関数にかけてしまっている!
            return {"loss": loss, "logits": logits}
        return {"logits": logits}
In both cases, notice how we inherit from PreTrainedModel and call the superclass initialization with the config (a bit like when you write a regular torch.nn.Module). The line that sets the config_class is not mandatory, unless you want to register your model with the auto classes (see last section).
(If your model is very similar to a model inside the library, you can re-use the same configuration as this model.
どちらの場合も、PretrainedModelをどのように継承するかと、親クラスの初期化をconfigを用いて呼び出しているかが分かります。(ちょっと通常のtorch.nn.Moduleを書くのに似ていますね。)auto classesを指定しないなら、config_classを設定することは強制ではありません.(もしあなたのモデルがライブラリにある他のモデルに非常に似ているなら、あなたはそのモデルのコンフィギュレーションと同じconfigを自分のモデルのコンフィグとして使用できます。)
You can have your model return anything you want, but returning a dictionary like we did for ResnetModelForImageClassification, with the loss included when labels are passed, will make your model directly usable inside the Trainer class. Using another output format is fine as long as you are planning on using your own training loop or another library for training.
forward()メソッド内のreturn値にはどんな値でも指定することができますが、ResnetModelForImageClassificationで私たちが行ったように、labelが指定されているときにlabelと損失値の辞書型オブジェクトを返すと、モデルをTrainerクラスで使用できるようになります。そのほかのアウトプットを行うモデルに関しては、自分で設定したトレーニングループや他のライブラリのトレーニングメゾットで使用可能です。
Now that we have our model class, let’s create one:
モデルクラスが使用できるようになったので、ちょっと作ってみましょう...
resnet50d = ResnetModelForImageClassification(resnet50d_config)
Again, you can use any of the methods of PreTrainedModel, like save_pretrained() or push_to_hub(). We will use the second in the next section, and see how to push the model weights with the code of our model. But first, let’s load some pretrained weights inside our model.
In your own use case, you will probably be training your custom model on your own data. To go fast for this tutorial, we will use the pretrained version of the resnet50d. Since our model is just a wrapper around it, it’s going to be easy to transfer those weights:
ここでも、save_pretrained()やpush_to_hub()のようなPretrainedModelクラスのメソッドを使うことができます。次のセクションではpush_to_hub()メゾットを使用し、コードを使ってモデルの重みをpushする方法を見ていきます。しかしまず、事前学習済みの重みをモデルにロードしておきましょう。
ユースケースによっては、自分のデータでモデルを訓練していることでしょう。個のチュートリアルでは、私たちは事前学習済みのresenet50dモデルを使用します。私たちのモデルはただのwrapperにすぎず、これらの重みをロードするのは簡単です。
import timm

pretrained_model = timm.create_model("resnet50d", pretrained=True)
resnet50d.model.load_state_dict(pretrained_model.state_dict())
Now let’s see how to make sure that when we do save_pretrained() or push_to_hub(), the code of the model is saved.
それではここから、モデルのコードが保存されている状態のとき、どのようにsave_pretrained()やpush_to_hub()を実行するかについてみていきましょう。
try:
またとりあえずここまでやってみることにする。
まず、Configurationはpyファイルでまとめておきたいので前章のコードを以下のようにuploadしておく。

from transformers import PreTrainedModel
from mikan.FSVAEConfig import *

class FSVAE(PreTrainedModel):
     config_class = FSVAEConfig

    def __init__(self, config):
        super().__init__(config)
        self.in_channels = config.in_channels
        in_channels = self.in_channels
        self.hidden_dims  = config.hidden_dims
        hidden_dims = self.hidden_dims
        self.latent_dim = config.latent_dim
        latent_dim = self.latent_dim
        self.n_steps = config.n_steps
        n_steps = self.n_steps
        self.k = config.k
        k = self.k

        # Build Encoder
        modules = []
        is_first_conv = True
        for h_dim in hidden_dims:
            modules.append(
                tdConv(in_channels,
                        out_channels=h_dim,
                        kernel_size=3,
                        stride=2,
                        padding=1,
                        bias=True,
                        bn=tdBatchNorm(h_dim),....(以下略)
で、これを別セルで
fsvae_config = FSVAEConfig()
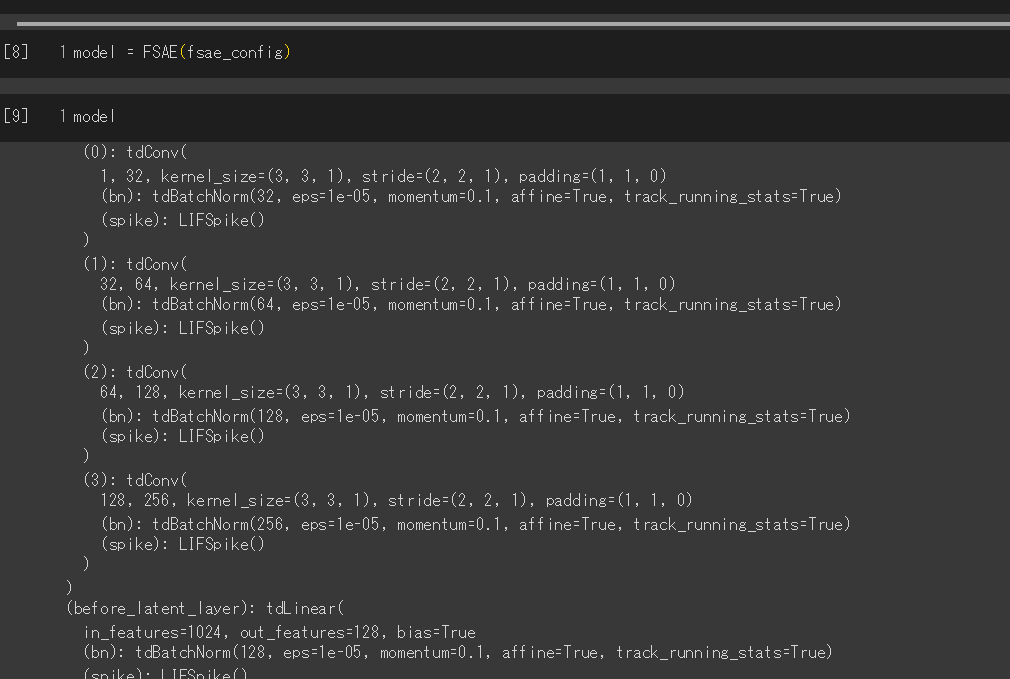
model = FSVAE(fsvae_config)
のように実行する。
-
PreTrainedModelの引数に与えられるのはPreTrainedConfigのインスタンスらしい。
-
すると、以下のようにモデルが構築される。
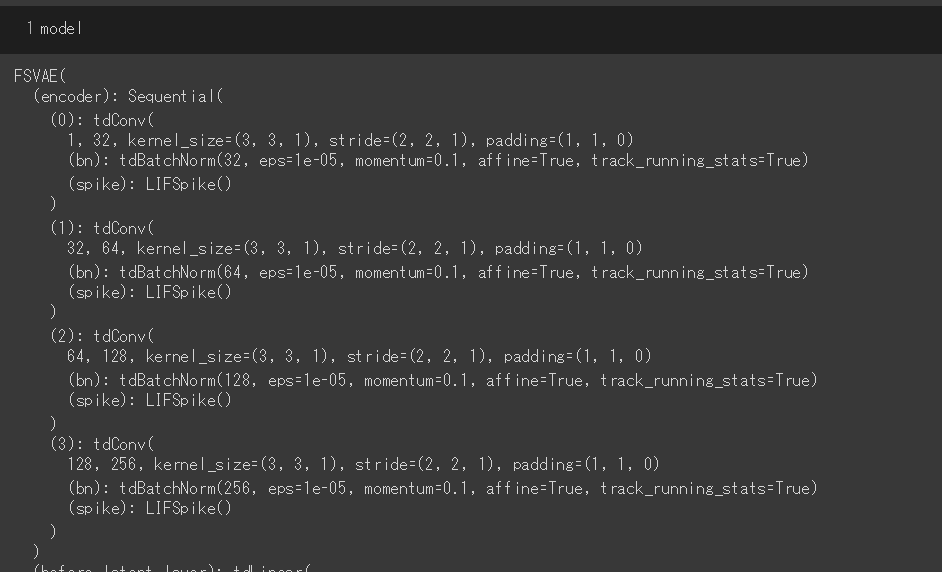
-
スクリーンショットは途中で切れているけど、まあこんな感じになるってことで....
-
実は、FSVAEの重みは入手していないのでFSAE(Fully Spiking Auto Encoder)の方のモデルを後で構築して同じような処理をしている。ここから先のtryではFSVAEじゃなくて、FSAEでhuggingfaceのtransfomerを使っているので注意)
(FSAEでも同じことやってみた)
モデルの型を作って...
重みをtorch.load("pthへのパス")して...
wandb = torch.load("path_to_pth", map_location=torch.device('cpu'))
ちなみに、このモデルの中身はこんな感じ...
for key, values in wandb.items():
    print(key)
encoder.0.weight
encoder.0.bias
encoder.0.bn.weight
encoder.0.bn.bias
encoder.0.bn.running_mean
encoder.0.bn.running_var
encoder.0.bn.num_batches_tracked
encoder.1.weight
encoder.1.bias
encoder.1.bn.weight
encoder.1.bn.bias
encoder.1.bn.running_mean
encoder.1.bn.running_var
encoder.1.bn.num_batches_tracked
encoder.2.weight
encoder.2.bias
encoder.2.bn.weight
encoder.2.bn.bias
encoder.2.bn.running_mean
encoder.2.bn.running_var
encoder.2.bn.num_batches_tracked
encoder.3.weight
encoder.3.bias
encoder.3.bn.weight
encoder.3.bn.bias
encoder.3.bn.running_mean
encoder.3.bn.running_var
encoder.3.bn.num_batches_tracked
before_latent_layer.weight
before_latent_layer.bias
before_latent_layer.bn.weight
before_latent_layer.bn.bias
before_latent_layer.bn.running_mean
before_latent_layer.bn.running_var
before_latent_layer.bn.num_batches_tracked
decoder_input.weight
decoder_input.bias
decoder_input.bn.weight
decoder_input.bn.bias
decoder_input.bn.running_mean
decoder_input.bn.running_var
decoder_input.bn.num_batches_tracked
decoder.0.weight
decoder.0.bias
decoder.0.bn.weight
decoder.0.bn.bias
decoder.0.bn.running_mean
decoder.0.bn.running_var
decoder.0.bn.num_batches_tracked
decoder.1.weight
decoder.1.bias
decoder.1.bn.weight
decoder.1.bn.bias
decoder.1.bn.running_mean
decoder.1.bn.running_var
decoder.1.bn.num_batches_tracked
decoder.2.weight
decoder.2.bias
decoder.2.bn.weight
decoder.2.bn.bias
decoder.2.bn.running_mean
decoder.2.bn.running_var
decoder.2.bn.num_batches_tracked
final_layer.0.weight
final_layer.0.bias
final_layer.0.bn.weight
final_layer.0.bn.bias
final_layer.0.bn.running_mean
final_layer.0.bn.running_var
final_layer.0.bn.num_batches_tracked
final_layer.1.weight
final_layer.1.bias
membrane_output_layer.coef
これを本文のようにload_state_dict()でモデルに重みを流し込んでおきます。
model.load_state_dict(wandb)
Sending the code to the Hub
This API is experimental and may have some slight breaking changes in the next releases.
(注意)このAPI(文書)は経験的であり、次回からのリリースでは変更がいくつかあって実行できない可能性もあります。
First, make sure your model is fully defined in a .py file. It can rely on relative imports to some other files as long as all the files are in the same directory (we don’t support submodules for this feature yet). For our example, we’ll define a modeling_resnet.py file and a configuration_resnet.py file in a folder of the current working directory named resnet_model. The configuration file contains the code for ResnetConfig and the modeling file contains the code of ResnetModel and ResnetModelForImageClassification.
まず、あなたのモデルが.pyファイルで定義されていることを確認してください。
全てのファイルが同じディレクトリにある限り、他のファイルへの関連するインポートを実行できます(この特徴に関するサブモジュールはまだサポートしていません)。例えば、私たちの場合はrenet_modelという現在のワーキングディレクトリのフォルダ内にmodeling_resnet.pyとconfiguration_resnet.pyというファイルを定義します。前者はコンフィギュレーションを、後者はモデル(ResNetモデルとResNetModelForImageClassification)のコードが書かれています。
.
└── resnet_model
    ├── __init__.py
    ├── configuration_resnet.py
    └── modeling_resnet.py
The init.py can be empty, it’s just there so that Python detects resnet_model can be use as a module.
(If copying a modeling files from the library, you will need to replace all the relative imports at the top of the file to import from the transformers package.)
Note that you can re-use (or subclass) an existing configuration/model.
__init__.pyには何も書かなくてOK。これはPythonにResnet_modelをモジュールとして使用できることを感知させるために存在しています。
(もしライブラりからモデルをコピーする場合、ファイルのトップに書かれたすべての関連するインポートを、トランスフォーマーパッケージからのインポートに置き換える必要があります?)ちなみに、モデルやコンフィギュレーションは再利用できることは覚えておいてください
To share your model with the community, follow those steps: first import the ResNet model and config from the newly created files:
モデルをコミュニティーに共有には、次のステップに従ってください。
まずは、新しく作成されたファイルからReNetモデルとコンフィグをインポートします。
from resnet_model.configuration_resnet import ResnetConfig
from resnet_model.modeling_resnet import ResnetModel, ResnetModelForImageClassification
Then you have to tell the library you want to copy the code files of those objects when using the save_pretrained method and properly register them with a given Auto class (especially for models), just run:
それからライブラリに、save_pretrained()を使用する際にこれらのオブジェクトをコピーしたいこととを伝え、正しく与えられたAutoクラスにそれらを登録することを伝えるには、次のコードを実行します。
ResnetConfig.register_for_auto_class()
ResnetModel.register_for_auto_class("AutoModel")
ResnetModelForImageClassification.register_for_auto_class("AutoModelForImageClassification")
Note that there is no need to specify an auto class for the configuration (there is only one auto class for them, AutoConfig) but it’s different for models. Your custom model could be suitable for many different tasks, so you have to specify which one of the auto classes is the correct one for your model.
コンフィギュレーションのためにAutoクラスを指定する必要はありません。(それらのためのautoクラスにはAutoConfigしか指定できません。)
しかしそれはモデルによって異なります。カスタムモデルは様々なタスクに適しているはずなので、あなたはどのAutoclassが自分のモデルに合うかを指定する必要があります。
Next, let’s create the config and models as we did before:
つぎに、前章と同じようにconfigとモデルを作成します。
resnet50d_config = ResnetConfig(block_type="bottleneck", stem_width=32, stem_type="deep", avg_down=True)
resnet50d = ResnetModelForImageClassification(resnet50d_config)

pretrained_model = timm.create_model("resnet50d", pretrained=True)
resnet50d.model.load_state_dict(pretrained_model.state_dict())
Now to send the model to the Hub, make sure you are logged in. Either run in your terminal:
そして、huggingfacehubにモデルを送るので、ログインしていることを確認してください。
!pip install huggingface_hub
!huggingface-cli login
or from a notebook:
from huggingface_hub import notebook_login
notebook_login()
You can then push to your own namespace (or an organization you are a member of) like this:
それから、次のように自分のアカウントスペースにモデルをプッシュすることができます。
resnet50d.push_to_hub("custom-resnet50d")
On top of the modeling weights and the configuration in json format, this also copied the modeling and configuration .py files in the folder custom-resnet50d and uploaded the result to the Hub. You can check the result in this model repo.
See the sharing tutorial for more information on the push to Hub method.
json型のモデルの重みとコンフィギュレーションのトップでは、フォルダ内のモデリングとコンフィギュレーションのpyファイルをコピーして結果をhuggingfacehub上にアップロードしています。
このモデルのリポジトリで結果を確認することができます。
push_to_hub()メソッドについての詳細は、sharing tutorialをご覧ください。
try:
- とりあえずここまでまた試してみる。
- まずはconfiguration_fsae.pyと、modeling_fsae.pyファイルを用意する。
from transformers import PretrainedConfig
from typing import List

class FSAEConfig(PretrainedConfig):
    model_type = "fsae"

    def __init__(
        self,
        in_channels: int = 1,
        hidden_dims : List[int] = [32, 64, 128, 256],
        k : int = 20,
        n_steps : int = 16,
        latent_dim : int = 128,
        scheduled : bool = True,
        # loss_func : str = "kld",
        dt:float = 5,
        a:float = 0.25,
        aa: float = 0.5,
        Vth : float = 0.2, # しきい値電位
        tau : float = 0.25,
        **kwargs,
    ):
        # if block_type not in ["basic", "bottleneck"]:
        #     raise ValueError(f"`block_type` must be 'basic' or bottleneck', got {block_type}.")
        # if stem_type not in ["", "deep", "deep-tiered"]:
        #     raise ValueError(f"`stem_type` must be '', 'deep' or 'deep-tiered', got {stem_type}.")

        self.in_channels = in_channels
        self.hidden_dims  = hidden_dims
        self.k = k
        self.n_steps = n_steps
        self.latent_dim = latent_dim
        self.scheduled = scheduled
        self.dt = dt
        self.a = a
        self.aa = aa
        self.Vth = Vth
        self.tau = tau
        super().__init__(**kwargs)
import torch
import torch.nn as nn
import torch.nn.functional as F
import torch.optim as optim
from argparse import ZERO_OR_MORE
import math
import random
from torch.nn.modules.module import T

from transformers import PreTrainedModel
from .configuration_fsae import FSAEConfig

dt = 5
a = 0.25
aa = 0.5
Vth = 0.2
tau = 0.25


class SpikeAct(torch.autograd.Function):
    """
        Implementation of the spiking activation function with an approximation of gradient.
    """
    @staticmethod
    def forward(ctx, input):
        ctx.save_for_backward(input)
        # if input = u > Vth then output = 1
        output = torch.gt(input, Vth)
        return output.float()
'''
中略
'''
class FSAEModel(PreTrainedModel):
    config_class = FSAEConfig

    def __init__(self, config):
        super().__init__(config)
        self.in_channels = config.in_channels
        in_channels = self.in_channels
        self.hidden_dims  = config.hidden_dims
        hidden_dims = self.hidden_dims
        self.latent_dim = config.latent_dim
        latent_dim = self.latent_di.
        '''
        記事が長すぎるとスクロールが面倒なので以下略
        '''
- で、これを一つのディレクトリの中にまとめ、
__init__.pyという空のファイルも用意しました。つまりグーグルドライブのディレクトリ構成はこんな感じ。
.
└── FSAE
    ├── __init__.py
    ├── configuration_fsae.py
    |── modeling_fsae.py
    |-- other files(ごちゃごちゃ入れてた(;'∀'))
このモジュールをインポートします
from drive.MyDrive.Colab_Notebooks.Project13.FSAE.configuration_fsae import FSAEConfig
from drive.MyDrive.Colab_Notebooks.Project13.FSAE.modeling_fsae import FSAEModel
モデルの型をライブラリに登録します
FSAEConfig.register_for_auto_class()
FSAEModel.register_for_auto_class("AutoModel")
モデルに学習済みの重みを流し込みます。
fsae_config = FSAEConfig()
fsae_model = FSAEModel(fsae_config)

import torch
wandb = torch.load("/content/drive/MyDrive/Colab_Notebooks/Project13/FSAE/best.pth", map_location=torch.device('cpu'))
fsae_model.load_state_dict(wandb)
- 注意。このload_state_dictはエラーが出た際、モデルをリフレッシュせずに何度も行うと「重みとモデルの大きさの型が違います」というエラーを吐くので少し取扱注意。
忘れずにhuggingface-hubにログインしましょう。
!pip install huggingface_hub
!huggingface-cli login
モデルの名前を引数に入れて、push_to_hub()メソッドでpushします。
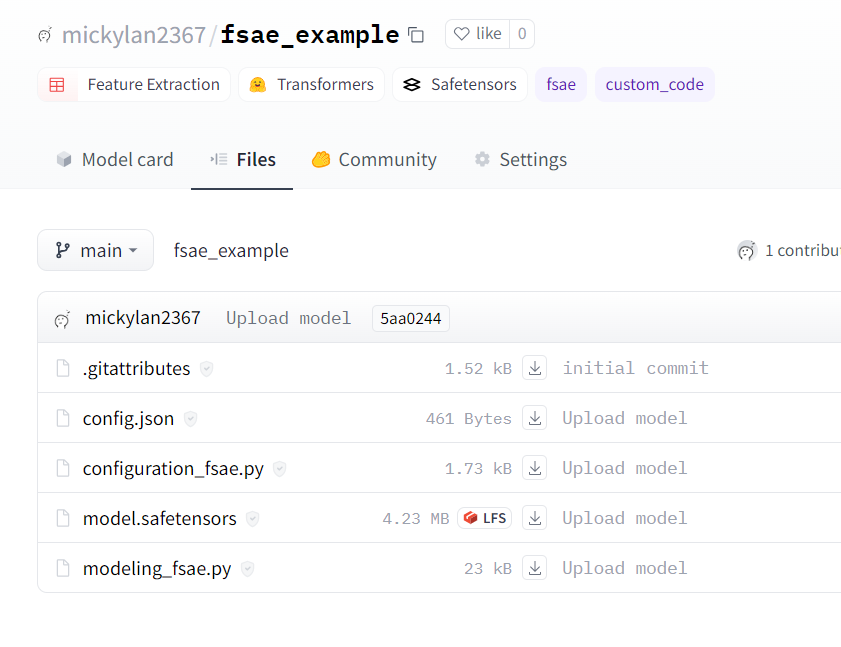
すると、自分のアカウントの場所に新しいモデルリポジトリが作られていることが分かるでしょう!
fsae_model.push_to_hub("fsae_example")
なんかある!(*'▽')
Using a model with custom code
You can use any configuration, model or tokenizer with custom code files in its repository with the auto-classes and the from_pretrained method. All files and code uploaded to the Hub are scanned for malware (refer to the Hub security documentation for more information), but you should still review the model code and author to avoid executing malicious code on your machine. Set trust_remote_code=True to use a model with custom code:
あなたはauto-classesとfrom_pretrained()メソッドを用いて、リポジトリ内のカスタムコードファイルからどんなコンフィギュレーション、モデル、トークナイザーでも使用することができます。すべてのHubにアップロードされたファイルとコードはマルウェアによってスキャンされ(詳しくはドキュメンテーションんをご参照ください)、モデルのコードと著者を、(ローカルマシンで悪意のあるコードを実行するのを避けるため)確認した方が良いでしょう。trust_remote_code引数をTrueに設定して、カスタムコードでモデルを使用しましょう。
from transformers import AutoModelForImageClassification
model = AutoModelForImageClassification.from_pretrained("sgugger/custom-resnet50d", trust_remote_code=True)
It is also strongly encouraged to pass a commit hash as a revision to make sure the author of the models did not update the code with some malicious new lines (unless you fully trust the authors of the models).
完全にモデル作成者を信頼している場合でないなら、改訂(リビジョン)として、コミットのハッシュ値を付けてモデル作成者が悪意のあるコードを追加したのではないことを確認することが、強く推奨されます。
commit_hash = "ed94a7c6247d8aedce4647f00f20de6875b5b292"
model = AutoModelForImageClassification.from_pretrained(
    "sgugger/custom-resnet50d", trust_remote_code=True, revision=commit_hash
)
Note that when browsing the commit history of the model repo on the Hub, there is a button to easily copy the commit hash of any commit.
Hub上のモデルリポジトリでコミットヒストリ-を閲覧するとき、ハッシュ値を簡単にコピーできるボタンがあるので覚えておいてください。
Registering a model with custom code to the auto classes
If you are writing a library that extends 🤗 Transformers, you may want to extend the auto classes to include your own model. This is different from pushing the code to the Hub in the sense that users will need to import your library to get the custom models (contrarily to automatically downloading the model code from the Hub).
As long as your config has a model_type attribute that is different from existing model types, and that your model classes have the right config_class attributes, you can just add them to the auto classes like this:
もしhuggingface Transformersを拡張するライブラリを書いているなら、autoクラスに自分のモデルが含まれるように拡張したいでしょう。これはユーザがカスタムモデルを得るのにあなたのライブラリをインポートする必要があるという意味で、Hubにモデルをプッシュするのとは違います。
すでに存在しているモデル型とは異なるmodel_type引数をコンフィグが持ち、モデルクラスが正しいconfig_classの属性を持っているならば、ただそれらをautoクラスに付け加えるだけでよいです。
from transformers import AutoConfig, AutoModel, AutoModelForImageClassification

AutoConfig.register("resnet", ResnetConfig) # ここで名前を定義している
AutoModel.register(ResnetConfig, ResnetModel)
AutoModelForImageClassification.register(ResnetConfig, ResnetModelForImageClassification)
Note that the first argument used when registering your custom config to AutoConfig needs to match the model_type of your custom config, and the first argument used when registering your custom models to any auto model class needs to match the config_class of those models.
カスタムモデルをAutoConfigに登録している一番初めの引数がカスタムしたConfigクラスのmodel_type引数と合致していること、そしてこれが、ほかのモデルのconfig_class引数と合致する必要があることに注意してください。
次の課題:
- モデルのリポジトリを作ろうとしたら、こんなデータセット一覧が出てきた。
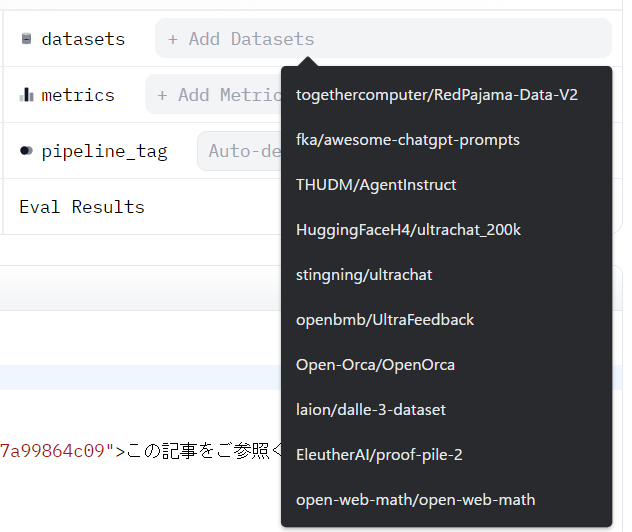
このデータセットたちについて調べてみたいかも?