準備
車にMPU6050を取り付ける
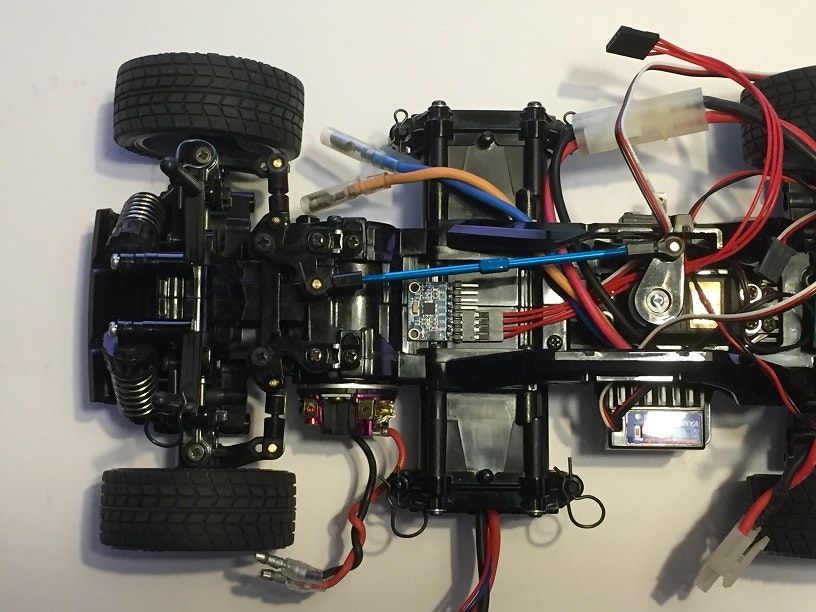
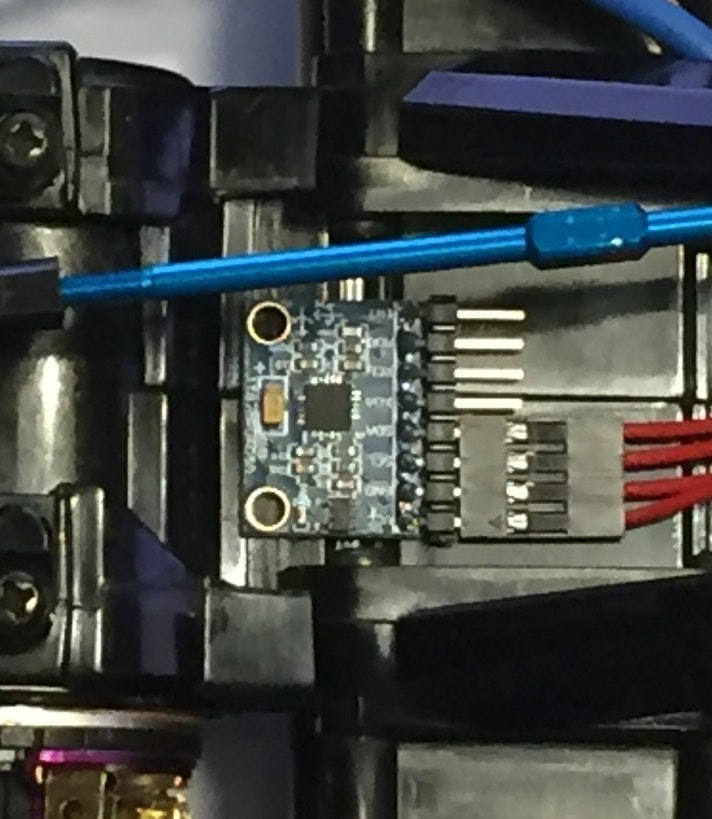
VCC,GND,SCL,SDAをCPUボードのI2Cに接続
myconfig.py の
# HAVE_IMU = False
を
HAVE_IMU = True
に書換える
ホストPCの
~/projects/donkeycar/donkeycar/management/makemovie.py
の
def draw_user_input(self, record, img):
の最後に以下を追加
    if 'imu/acl_x' in record:
        imu_acl_x = float(record["imu/acl_x"]) / 10
        imu_acl_y = float(record["imu/acl_y"]) / 10
        imu_acl_z = float(record["imu/acl_z"]) / 10
        imu_gyr_x = float(record["imu/gyr_x"]) / 100
        imu_gyr_y = float(record["imu/gyr_y"]) / 100
        imu_gyr_z = float(record["imu/gyr_z"]) / 100

        textFontFace = cv2.FONT_HERSHEY_SIMPLEX
        textFontScale = 0.4
        textColor = (255,255,255)
        textThickness = 1

        cv2.putText(img,str(round(imu_acl_x,2)),(0,29),textFontFace,textFontScale,textColor,textThickness)
        cv2.putText(img,str(round(imu_acl_y,2)),(0,39),textFontFace,textFontScale,textColor,textThickness)
        cv2.putText(img,str(round(imu_acl_z,2)),(0,49),textFontFace,textFontScale,textColor,textThickness)
        cv2.putText(img,str(round(imu_gyr_x,2)),(0,79),textFontFace,textFontScale,textColor,textThickness)
        cv2.putText(img,str(round(imu_gyr_y,2)),(0,89),textFontFace,textFontScale,textColor,textThickness)
        cv2.putText(img,str(round(imu_gyr_z,2)),(0,99),textFontFace,textFontScale,textColor,textThickness)

        cv2.line(img,(width//2,0),(width//2,height-1),(255,255,0),1)
        cv2.line(img,(0,height//2),(width-1,height//2),(255,255,0),1)

        x=int(round(width/2+width/2*imu_acl_y))
        y=int(round(height/2))
        img = cv2.circle(img,(x,y),2,(0,255,0),-1)
        x=int(round(width/2))
        y=int(round(height/2+height/2*imu_acl_x))
        img = cv2.circle(img,(x,y),2,(0,255,0),-1)

        x=int(round(width/2+width/2*imu_gyr_y))
        y=int(round(height/2))
        img = cv2.circle(img,(x,y),2,(255,0,0),-1)
        x=int(round(width/2))
        y=int(round(height/2+height/2*imu_gyr_x))
        img = cv2.circle(img,(x,y),2,(255,0,0),-1)

        x=int(round(width/2+width/2*imu_gyr_z))
        y=int(round(height/2))
        img = cv2.circle(img,(x,y),2,(0,0,255),-1)
注:基板の取り付け方向をシルクのx-yの向きに合わせたが表示を見ると違和感があったのでxとyを入れ替えている(24,25,28,29行目)
動画生成
教師データを作成してホストPCに転送
ホストPCで
donkey makemovie --tub ./data/ --out ./movie.mp4
を実行する