作成にいたる経緯
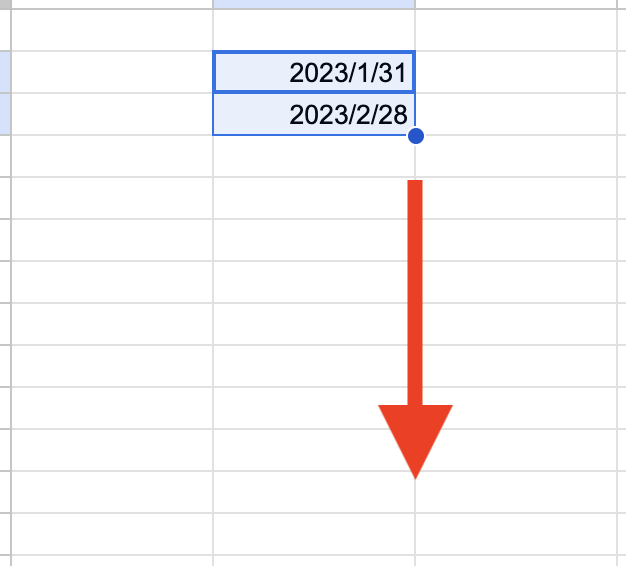
Google スプレッドシートで日付を1ヶ月ごとに連続入力したい場合、フィルハンドルをクリックしてドラッグするか、EDATE関数やDATE関数を使用すると実現できます。
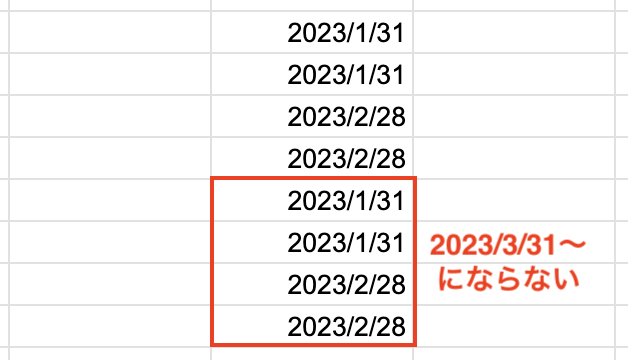
ただし、以下のような点で上手く入力できないケースがあります。
-
EDATE関数やDATE関数
フィルターなどで行が非表示になっている場合、参照しているセルがずれるため、連続入力できません。
例)こんなデータがあるとして
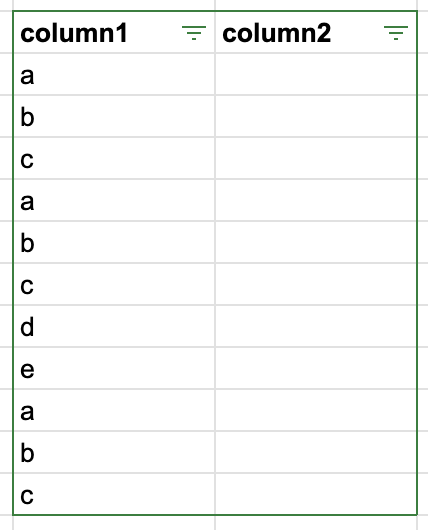
"a"でフィルターして、1つ目に"2023/1/31"を入力、2つ目にEDATE関数を入力

3つ目にEDATE関数をコピペすると・・・
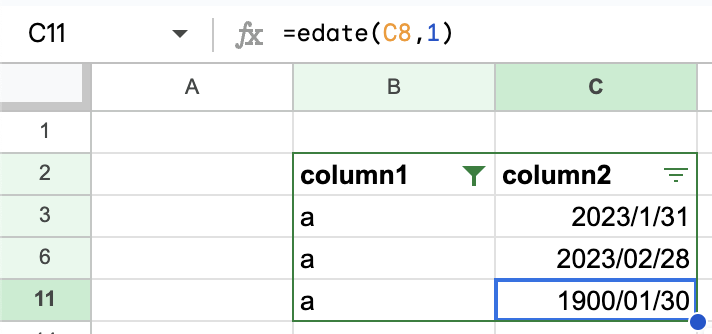
思い通りになりません(--#)
メニューの作成
ということで、まずはフォームを表示するためのメニューを作成します。
スプレッドシートの「拡張機能」→「Apps Script」でエディタを表示して、以下のコードを入力します。
function onOpen() {
  var ui = SpreadsheetApp.getUi();
  ui.createMenu('カスタムメニュー')
    .addItem('日付入力', 'showDateAutofillForm')
    .addToUi();
}
フォームの作成
次に、フォームを作成します。
エディタ上でHTMLファイルを追加し、以下のコードを入力します。
なお、ファイル名は「DateAutofillForm」としています。
<!DOCTYPE html>
<html>
  <head>
    <script>
      // あとで作成する
    </script>
  </head>
  <body>
    <form id="myForm">
      <table>
        <tr>
          <td>最初の日付(例:2023/05/31)</td>
          <td><input type="text" id="firstDate"></td>
        </tr>
        <tr>
          <td><label>何ヶ月ずつ増やす?</label></td>
          <td><input type="text" id="incrementMonth"></td>
        </tr>
        <tr>
          <td><label>何行ずつ増やす?</label></td>
          <td><input type="text" id="incrementCycle"></td>
        </tr>
      </table>
      <input id="btn" type="button" value="選択範囲に入力" onclick="handleButtonClick()" />
    </form>
  </body>
</html>
フォームの表示
作成したフォームを、メニューの「日付入力」をクリックした際に表示するようにします。
function showDateAutofillForm() {
  var htmlOutput = HtmlService.createHtmlOutputFromFile("DateAutofillForm");
  SpreadsheetApp.getUi().showModelessDialog(htmlOutput, '日付入力');
}
ボタンイベントの作成
フォーム上のボタンをクリックした際に、Google Apps Script側の関数を呼ぶようにします。
まずは、gsファイルの方に以下のコードを追加します。
function buttonClick(firstDate, incrementMonth, incrementCycle) {
  // あとで作成する
}
続いて、htmlファイルのscriptタグ内に以下のコードを追加します。
function handleButtonClick() {
    // 処理が終了するまではボタンを押下不可に
  document.getElementById("btn").disabled = true;
  google.script.run
    .withSuccessHandler(function() {
        // 処理が終了したのでボタンを押下可に
      document.getElementById("btn").disabled = false;
    })
    .buttonClick(
      document.getElementById("firstDate").value,
      document.getElementById("incrementMonth").value,
      document.getElementById("incrementCycle").value
    );
}
ポイントとして、
このような形式でgs側の関数を呼ぶことができます。
google.script.run.buttonClick()
また、処理成功時にコールバック関数を指定することもできます。
google.script.run.withSuccessHandler(コールバック関数).buttonClick()
連続入力の処理作成
最後に、連続入力の処理を作成します。
gs側のbuttonClick関数を以下のように変更します。
function buttonClick(firstDate, incrementMonth, incrementCycle) {

  incrementMonth = Number(convertToHalfWidth(incrementMonth));
  incrementCycle = Number(convertToHalfWidth(incrementCycle));

  var sheet = SpreadsheetApp.getActiveSpreadsheet().getActiveSheet();
  var count = sheet.getSelection().getActiveRange().getNumRows();
  var currentDate = new Date(firstDate);
  var values = [];
  var inputtedCount = 0;
  var selectionTopRow = sheet.getSelection().getActiveRange().getRow();

  for (var i = 0; i < count; i++) {

    if (sheet.isRowHiddenByFilter(selectionTopRow + i)) {
      values.push([sheet.getSelection().getActiveRange().getCell(i + 1, 1).getValue()]);
      continue;
    }

    values.push([formatDate(currentDate, "yyyy/MM/dd")]);
    inputtedCount++;
    if (inputtedCount % incrementCycle === 0) {
      currentDate = isLastDate(currentDate)
          ? new Date(currentDate.getFullYear(), currentDate.getMonth() + 1 + incrementMonth, 0)
          : new Date(currentDate.getFullYear(), currentDate.getMonth() + incrementMonth, currentDate.getDate());
    }
  }

  sheet.getSelection().getActiveRange().setValues(values);
}
また、以下の関数も追加します。
function formatDate(date, format) {
  format = format.replace(/yyyy/g, date.getFullYear());
  format = format.replace(/MM/g, ('0' + (date.getMonth() + 1)).slice(-2));
  format = format.replace(/dd/g, ('0' + date.getDate()).slice(-2));
  format = format.replace(/HH/g, ('0' + date.getHours()).slice(-2));
  format = format.replace(/mm/g, ('0' + date.getMinutes()).slice(-2));
  format = format.replace(/ss/g, ('0' + date.getSeconds()).slice(-2));
  format = format.replace(/SSS/g, ('00' + date.getMilliseconds()).slice(-3));
  return format;
};

function isLastDate(date) {
  return date.getDate() === new Date(date.getFullYear(), date.getMonth() + 1, 0).getDate();
}

function convertToHalfWidth(text) {
  var halfWidthText = text.replace(/[A-Za-z0-9]/g, function(match) {
    return String.fromCharCode(match.charCodeAt(0) - 0xFEE0);
  });
  return halfWidthText;
}
ポイントとして、
このようにしてフィルターで行が非表示になっているか判定することができます。
sheet.isRowHiddenByFilter(selectionTopRow + i)
動作確認
連続入力したい行を事前に選択しておき、フォーム上で日付などを指定します。
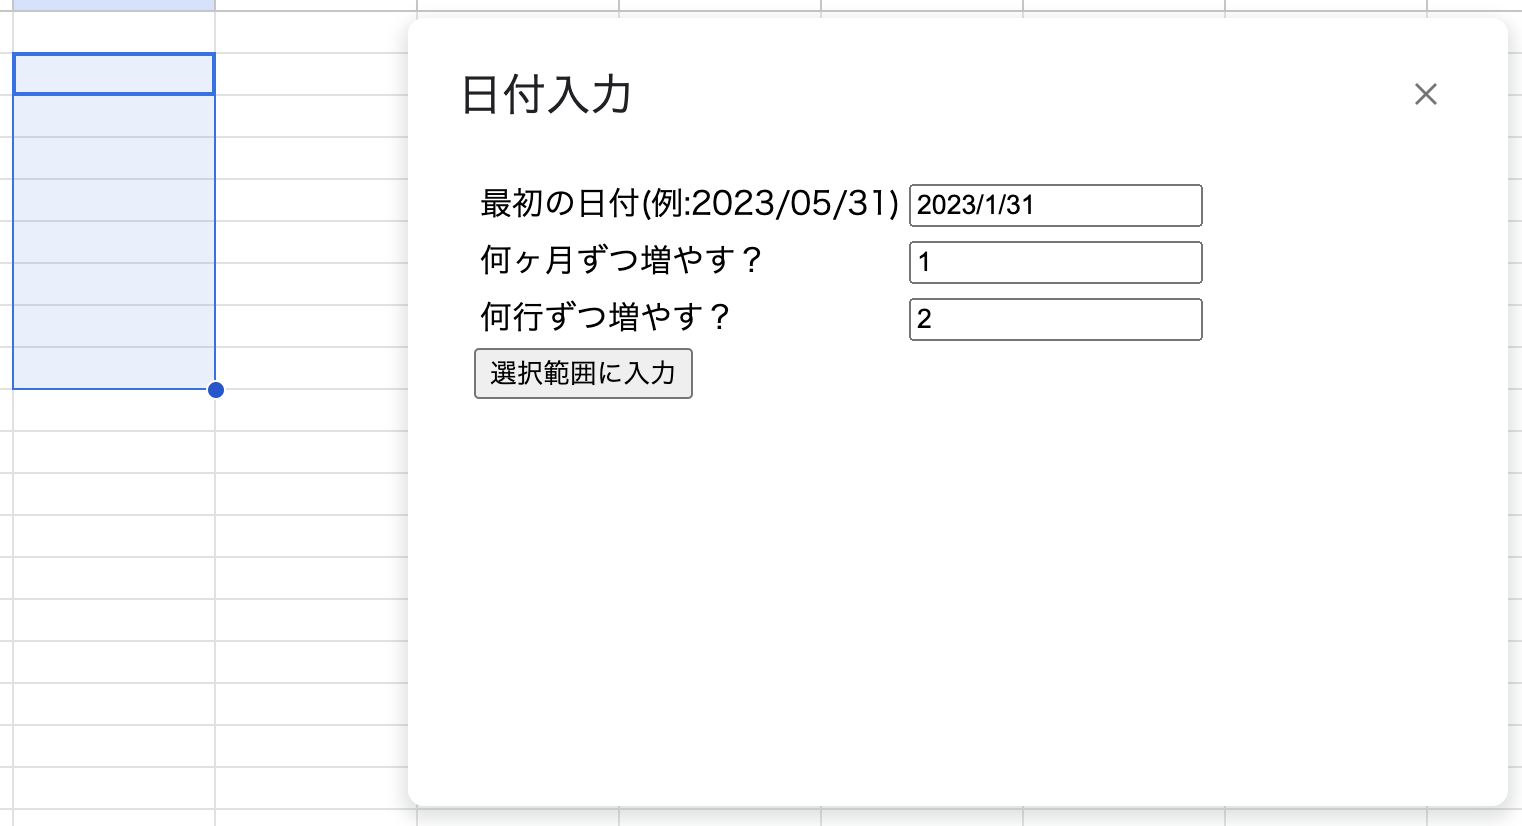
その後、「選択範囲に入力」をクリックすると・・・

良い感じに連続入力できました!!
