はじめに
デバイスから IoT ハブに利用統計情報を送信してバックエンド アプリケーションで読み取るを参考にサンプルコードを動かしてみます。
接続文字列は Azure CLI を使わずに、コンソールから取得します。
Azure IoT についてはこちらを参照。
準備
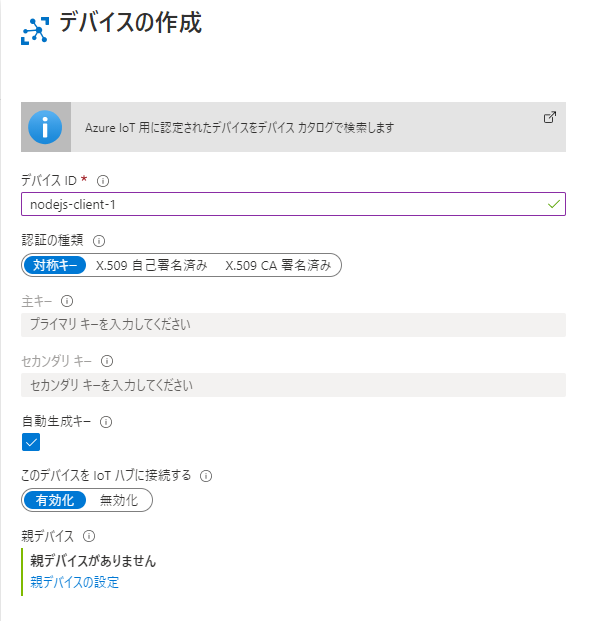
IoTデバイスを登録する
Azure IoT Hubコンソール > サイドバー > IoTデバイス > 新規からデバイスを追加する。
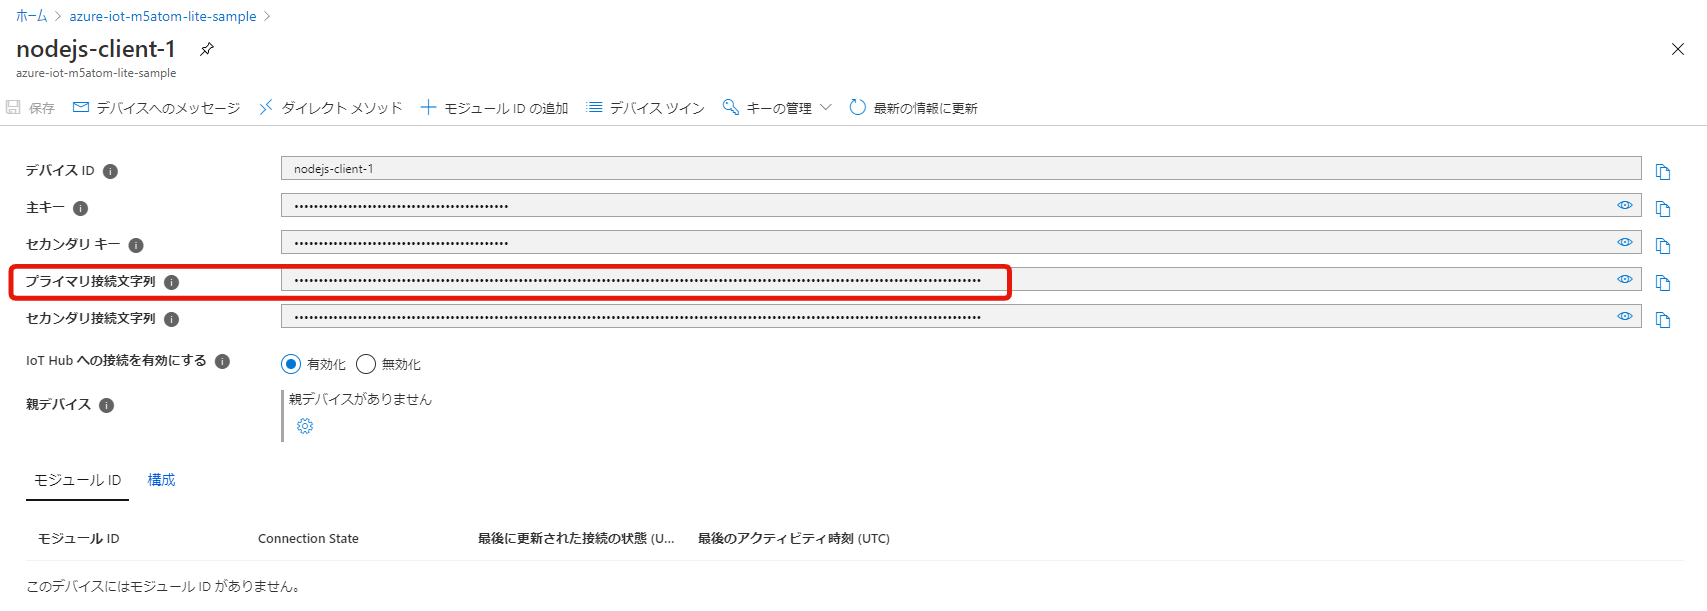
追加できたら、追加したデバイスを選択してプライマリ接続文字列をコピーしておく。
データを送信する
ダウンロードしたサンプルコードから、SimulatedDevice.jsを開き、17 行目あたりのconnectionStringに先程コピーしたプライマリ接続文字列を貼り付ける。
コードはこんな感じになる。
var connectionString = '{Your device connection string here}'; // ←ここに`プライマリ接続文字列`を貼り付ける。

var Mqtt = require('azure-iot-device-mqtt').Mqtt;
var DeviceClient = require('azure-iot-device').Client
var Message = require('azure-iot-device').Message;

var client = DeviceClient.fromConnectionString(connectionString, Mqtt);

setInterval(function(){
  // 送信するデータを生成する。(本当はセンサーで測定した値を入れるがシミュレーションのため乱数を使用)
  var temperature = 20 + (Math.random() * 15);
  var message = new Message(JSON.stringify({
    temperature: temperature,
    humidity: 60 + (Math.random() * 20)
  }));

  message.properties.add('temperatureAlert', (temperature > 30) ? 'true' : 'false');

  console.log('Sending message: ' + message.getData());

  // イベントを送信する
  client.sendEvent(message, function (err) {
    if (err) {
      console.error('send error: ' + err.toString());
    } else {
      console.log('message sent');
    }
  });
}, 1000);
以下のコマンドをターミナルで実行する。
$ node SimulatedDevice.js
データが送信されている。
送信したデータを受信する
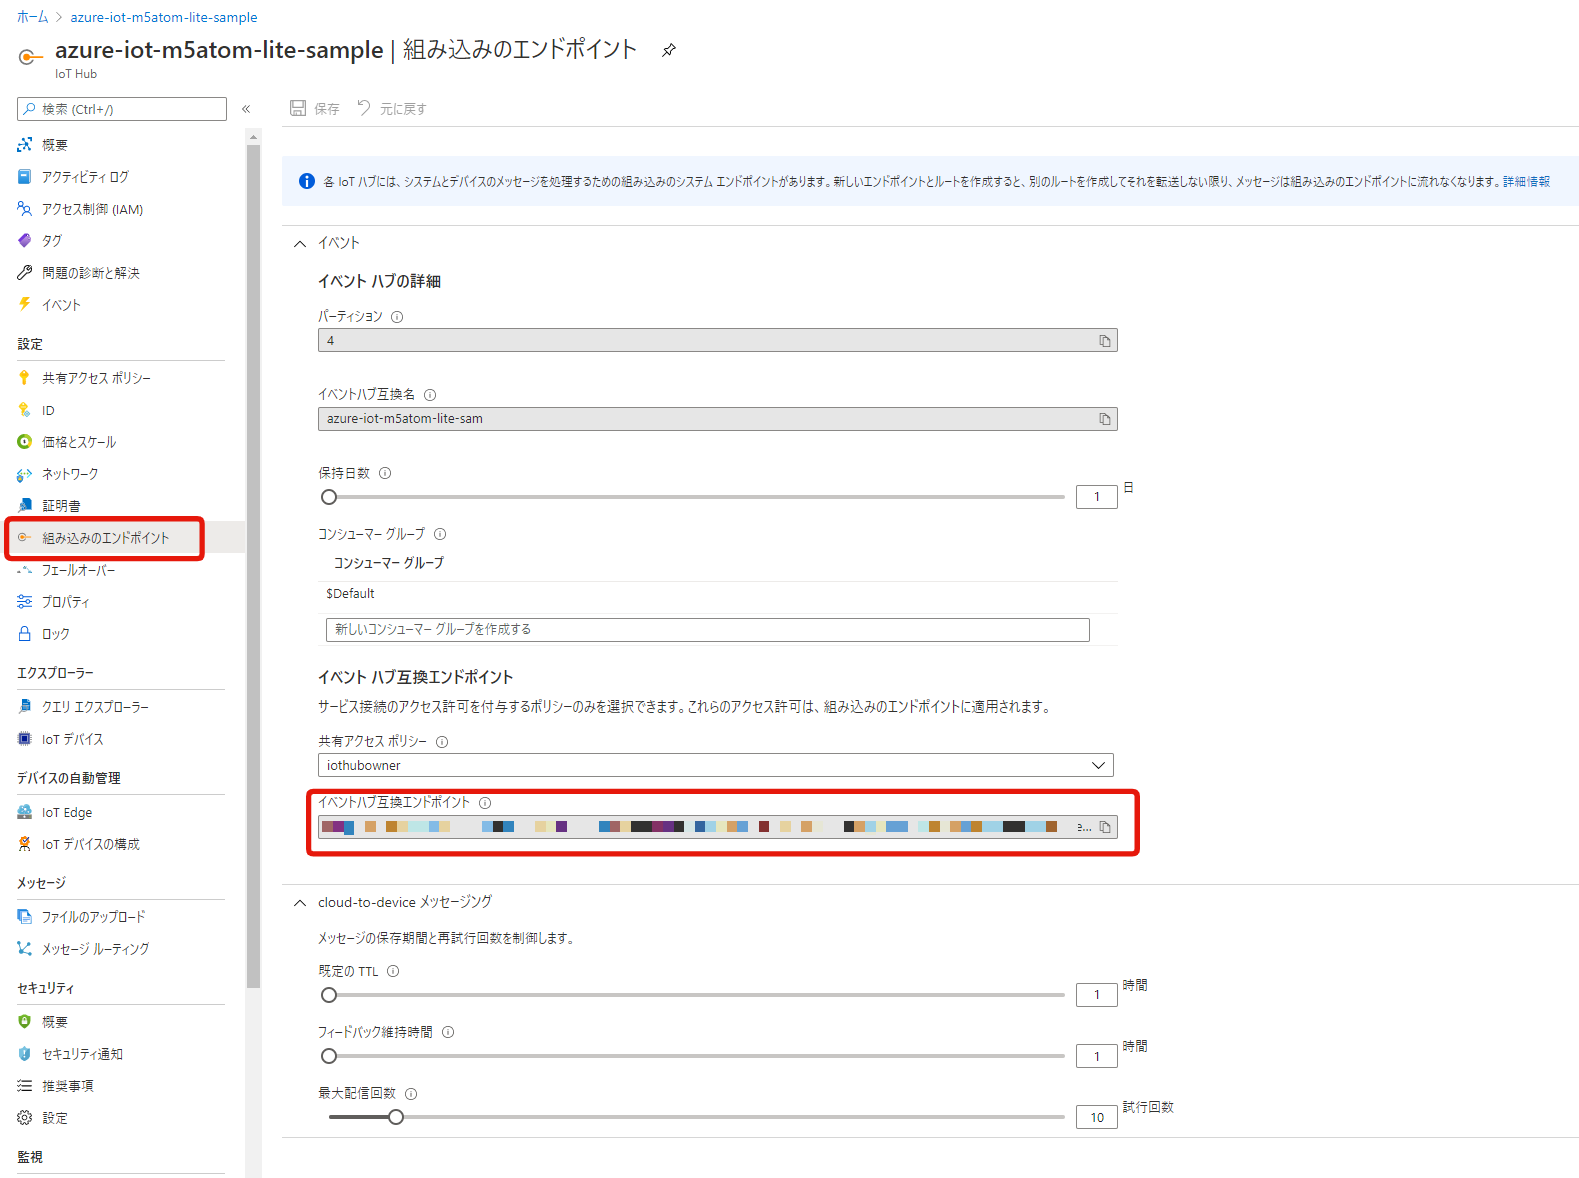
ダウンロードしたサンプルコードから、ReadDeviceToCloudMessages.jsを開き、38 行目あたりのconnectionStringにAzure IoT Hubコンソール > サイドバー > 組み込みのエンドポイント > イベントハブ五感エンドポイントの値を貼り付ける。
(26 行目あたりにeventHubsCompatibleEndpointなどの変数が用意されていますが、無視します。)
コードはこんな感じになる。
const connectionString = 'Endpoint=**********************;SharedAccessKeyName=*****************;EntityPath=********************';

var printError = function (err) {
  console.log(err.message);
};

var printMessages = function (messages) {
  for (const message of messages) {
    console.log("Telemetry received: ");
    console.log(JSON.stringify(message.body));
    console.log("Properties (set by device): ");
    console.log(JSON.stringify(message.properties));
    console.log("System properties (set by IoT Hub): ");
    console.log(JSON.stringify(message.systemProperties));
    console.log("");
  }
};

async function main() {
  console.log("IoT Hub Quickstarts - Read device to cloud messages.");

  const clientOptions = {
    // webSocketOptions: {
    //   webSocket: WebSocket,
    //   webSocketConstructorOptions: {}
    // }
  };

  const consumerClient = new EventHubConsumerClient("$Default", connectionString, clientOptions);

  // イベントハブのストリームからデータを取得する
  consumerClient.subscribe({
    processEvents: printMessages,
    processError: printError,
  });
}

main().catch((error) => {
  console.error("Error running sample:", error);
});
これを実行します。
$ node ReadDeviceToCloudMessages.js
実行すると以下のように表示され、受信待ち状態になります。
IoT Hub Quickstarts - Read device to cloud messages.
この状態で、SimulatedDevice.jsを実行すると、以下のように受信できます。
まとめ
公式のデバイスから IoT ハブに利用統計情報を送信してバックエンド アプリケーションで読み取るを動かしました。
また、Azure CLI を使わずにコンソールから接続文字列を取得しました。
Azure IoT Hub のS1スケールは月に2~3000円ほどかかるので、試し終わったら忘れずに止めておきましょう。
次回は、M5 系のデバイスからデータを送信してみます。