4
2

Delete article

Deleted articles cannot be recovered.

Draft of this article would be also deleted.

Are you sure you want to delete this article?

More than 5 years have passed since last update.

AndroidStudioで端末の画面を録画する

Posted at

はじめに

Androidアプリを開発していくうちに、ここの動作誰かに見て欲しいなーって思ったことはありませんか?
そんな方のために、簡単に端末の画面を録画できる方法を書いていきたいと思います。
Androidアプリの開発環境はほとんどの割合でAndroidStudioだと思われるので、AndroidStudioの機能の中で録画の方法となります。

録画方法

まず端末をパソコンに繋いで、アプリを起動させます。
その後、Lagcatの左側にあるScreen Recordのボタンを押します(画像参照/画像一番下)。

スクリーンショット 2019-10-06 0.29.44.png

押した後はbit rateと解像度(幅と高さ)を指定することができます。
デフォルトではbit rateは4、解像度は端末の状態に合わせられます。
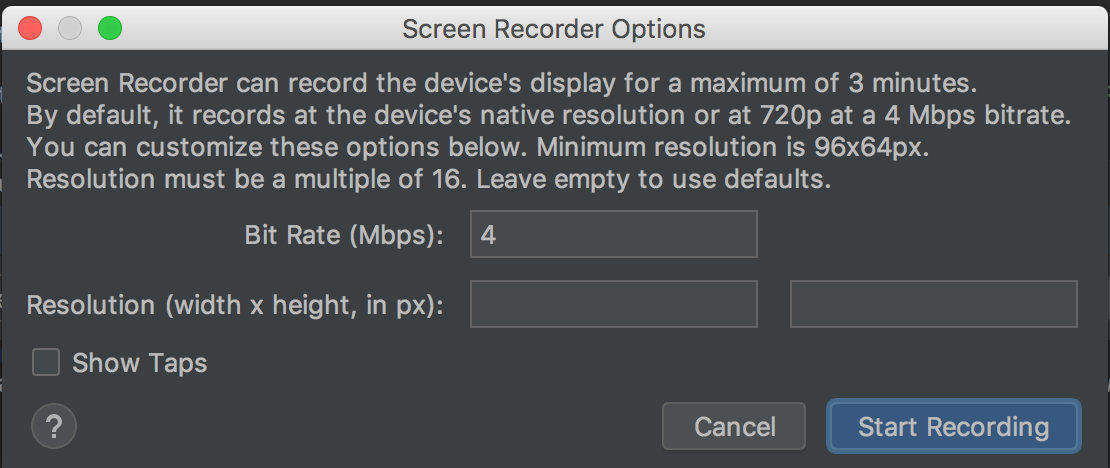
スクリーンショット 2019-10-06 0.30.10.png

ここまで設定し、Start Recordingを押すと録画が開始し、Stop Recordingを押すと録画が終了します。
その後は任意のフォルダに保存し、録画した画面を再生することができるようになっています。

4
2
0

Register as a new user and use Qiita more conveniently

  1. You get articles that match your needs
  2. You can efficiently read back useful information
  3. You can use dark theme
What you can do with signing up
4
2

Delete article

Deleted articles cannot be recovered.

Draft of this article would be also deleted.

Are you sure you want to delete this article?