はじめに
私は家に帰ってきたら、伝言メッセージが届くシステムを作りたいと思っていました。
そして、思いついた1つのアイデアがiBeaconを用いる方法でした。
Beaconに近づいたら、通知が来て伝言が読めるといった感じです。
しかし、Macを持っていないので開発できないことに気づきました。
しかし、また気づきました。__場所を知りたいならGPSを使えばいい__ということに。
作りたいもの
家に帰ってきたら、伝言がメッセージが届くシステム。
用意するもの
RaspberryPi(伝言をおく場所)
iPhone(Pythonista3をインストール済み)
完成イメージ
まず、Aさんが伝言を設定します。
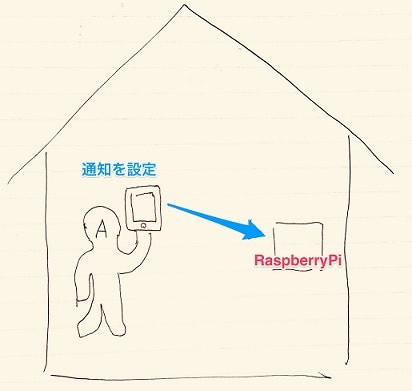
そして、Bさんが家に着くと伝言が届くというイメージです。
作る
iPhone側の処理
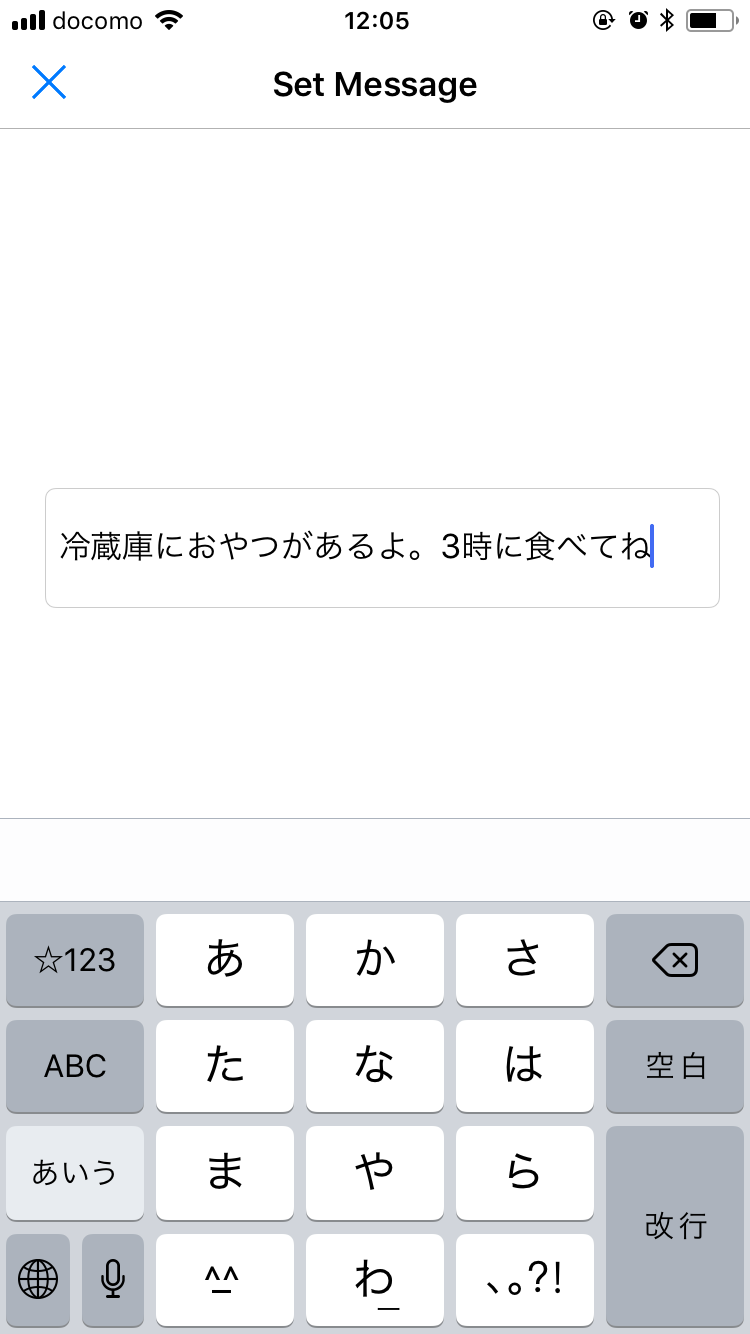
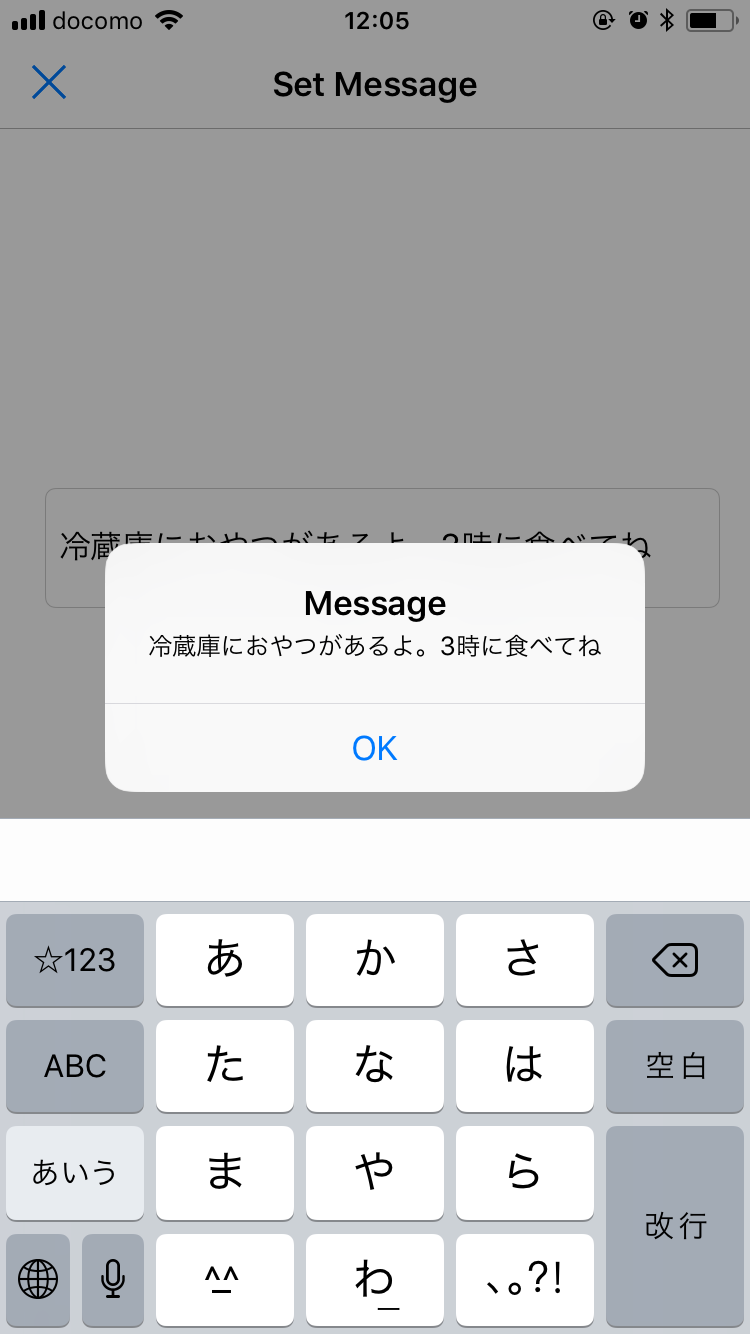
伝言を設定する
設定する側はPythonista3でお手軽に作りました。
UIからメッセージを取得し、HTTP POSTで送信しています。
import requests
import ui
import console

def set_msg(sender):
	payload = {'text': 'set_msg', 'msg': sender.text}
	r = requests.post('http://YOUR_SERVER_ADDRESS/', data=payload)
	console.alert(`Message', sender.text, 'OK', hide_cancel_button=True)

view = ui.View()
view.name = 'Set Message'
view.background_color = 'white'
view.bounds = (0,0,450,600)

msg_field = ui.TextField(frame=(view.width * 0.05, view.height * 0.3, view.width * 0.75, view.height * 0.1), title='input message')
msg_field.action = set_msg

view.add_subview(msg_field)
view.present('sheet')
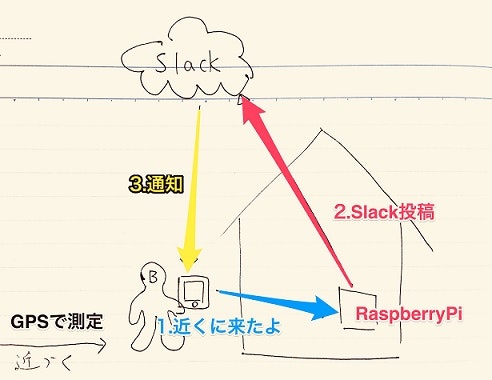
近づいたことを知らせる
これはiPhone搭載のGPSを使用します。こちらもお手軽にPythonista3で作りました。
1分毎に位置を判定し、近づいたときにHTTP POSTを行います。
出かける直前にスクリプトを起動するということを想定しています。
スクリプトを起動した位置が家と仮定しています。
この位置を任意の場所に変更すれば、その地点に到達したときにメッセージを送るということも可能です。
import location
import notification
import requests
import console
from time import sleep

console.set_idle_timer_disabled(True)

geocode=location.get_location()
home_lat = geocode['latitude']
home_lng = geocode['longitude']
print(home_lat)
print(home_lng)

while True:
	sleep(60)
	location.start_updates()
	cur_geocode=location.get_location()
	cur_lat = cur_geocode['latitude']
	cur_lng = cur_geocode['longitude']
	print(cur_lat)
	print(cur_lng)
	if home_lat - 0.0003 < cur_lat and cur_lat < home_lat + 0.0003:
		if home_lng - 0.0003 < cur_lng and cur_lng < home_lng + 0.0003:
			payload = {'text': 'send_msg'}
			requests.post('http://YOUR_SERVER_ADDRESS/', data=payload)

	location.stop_updates()
バックグランド動作を続けるようですが、長時間の稼働は試していません。
RaspberryPi側の処理
伝言を受け取る・送信する
RaspberryPiをWebサーバーにしてPHPで伝言の受け取りと送信処理を行います。
HTTP POSTを契機に各処理を実行します。
伝言はset_msgでテキストに保存し、send_msgでSlack投稿を行います。
一度メッセージを送ると、中身を消して送信されないようにしています。
<?php
function func_set_msg($msg){
    $filename = '/home/pi/work/msg.txt';
    file_put_contents($filename, $msg);
    return;
}

function func_send_msg(){
    exec("python3 /home/pi/python_code/slack_msg.py");
    $filename = '/home/pi/work/msg.txt';
    file_put_contents($filename, '');

    return;
}

if($_POST['text'] == "set_msg"):
    func_set_msg($_POST['msg']);
endif;

if($_POST['text'] == "send_msg"):
    func_send_msg();
endif;
?>
Slack投稿する
Slackerを使用して、テキストのメッセージを投稿するだけです。
from slacker import Slacker
import codecs

token = "set_your_token"
slacker = Slacker(token)
channel_name = "#" + "general"

message = ''

with codecs.open('/home/pi/work/msg.txt','r', 'utf-8') as f:
    message = f.read()

if message != '' :
    slacker.chat.post_message(channel_name, message)
テスト
テストなので、自分で伝言を設定して、自分で受け取ります。
まず、伝言を設定します。
設定できました。
そして出かけます。
家についたがどうかの判定が適当なのでなるべく遠くに行きます。
そして。。。
家に帰ってきました。
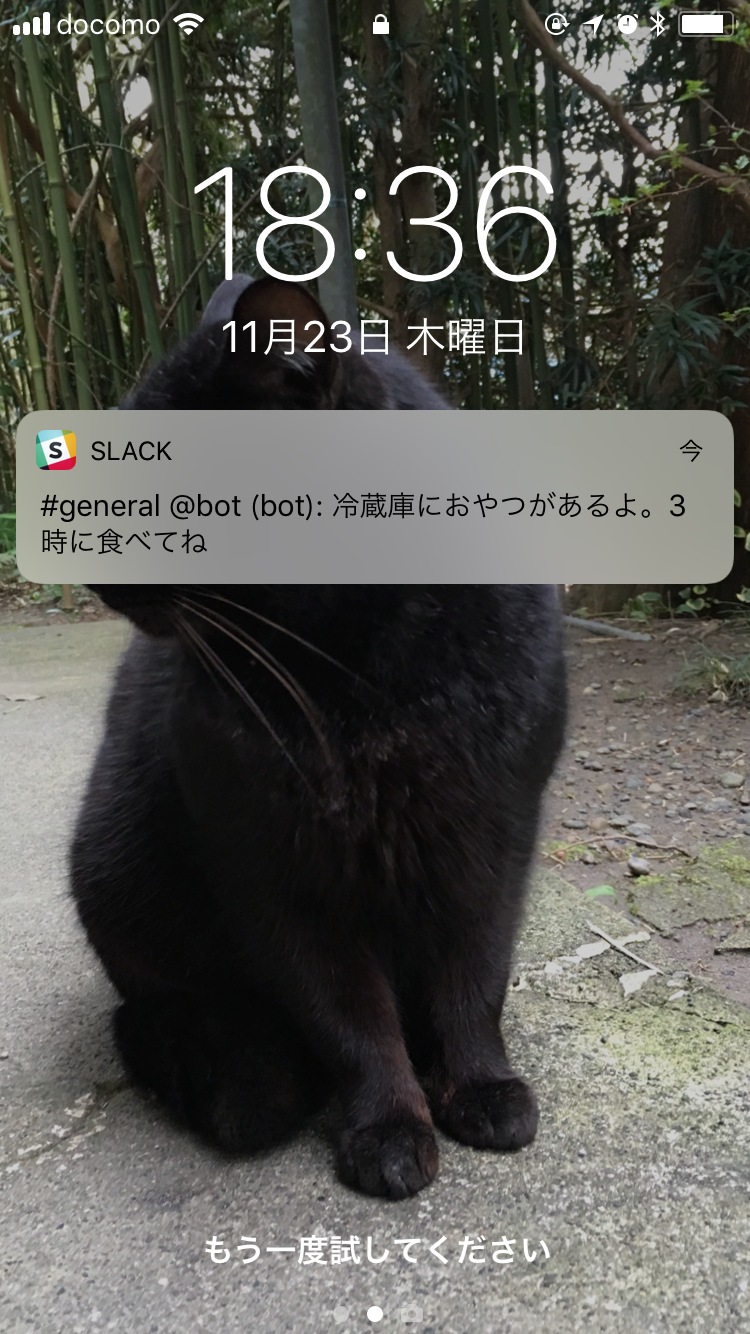
伝言、来ましたね。
最後に
セキュリティ面は考えていません。
完全に自己満足のものです。