RaspberryPiでESP-WROOM-32開発環境構築
安価な開発環境を目指す。
用意したもの
-開発ホスト
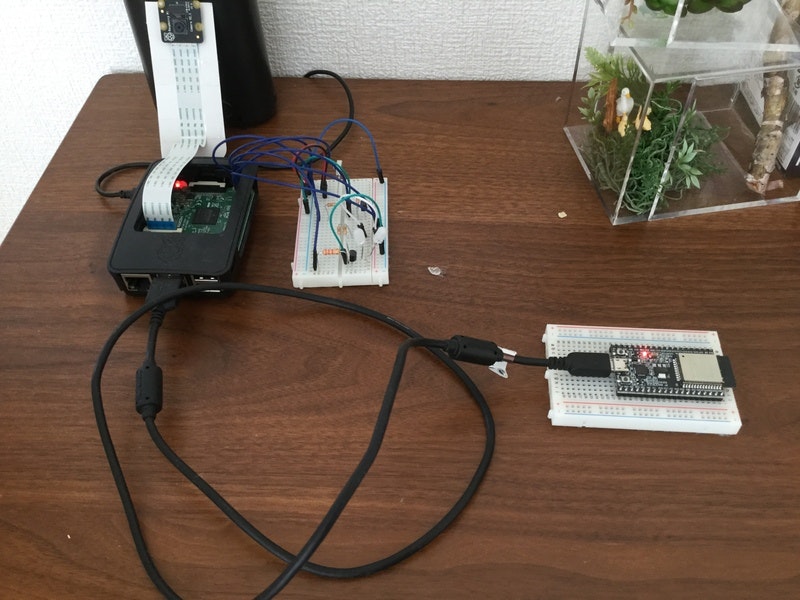
RaspberryPi3
OS:Raspbian
-開発ターゲット
ESP32-DevKitC ESP-WROOM-32開発ボード
RaspberryPiとESP32はUSBケーブルで接続する。
参考サイト
環境構築手順
ESP-IDF Toolchainのインストール
ESP-IDF Get Startedで取得できる32bit版を一度インストールしてみたが、うまくコンパイルできず。
Setup Linux Toolchain from Scratchを参考にソースからのコンパイルに挑戦。
(1)必要なパッケージのインストール
sudo apt-get install git wget make libncurses-dev flex bison gperf python python-serial
(2)Toolchainのコンパイル
コンパイルには数時間がかかるので覚悟しておく。
依存モジュールのインストール
sudo apt-get install gawk gperf grep gettext python python-dev automake bison flex texinfo help2man libtool libtool-bin
crosstool-NGをダウンロードしてビルド
cd ~/esp
git clone -b xtensa-1.22.x https://github.com/espressif/crosstool-NG.git
cd crosstool-NG
./bootstrap && ./configure --enable-local && make install
Toolchainのビルド
./ct-ng xtensa-esp32-elf
./ct-ng build
chmod -R u+w builds/xtensa-esp32-elf
(3)ESP-IDFの取得
cd ~/esp
git clone --recursive https://github.com/espressif/esp-idf.git
(4)ESP-IDFのPATH設定
.basrcに追記しておく。
export IDF_PATH=$HOME/esp/esp-idf
これで開発環境は整った。
サンプルプログラムの実行
環境が正しく構築できたことを確認するため、サンプルにあるHello Worldを実行してみる。
cd ~/esp
cp -r $IDF_PATH/examples/get-started/hello_world .
cd ~/esp/hello_world
make menuconfig
最初にmake menuconfigを実行し、設定をする必要がある。
実行すると次の画面が表示される。
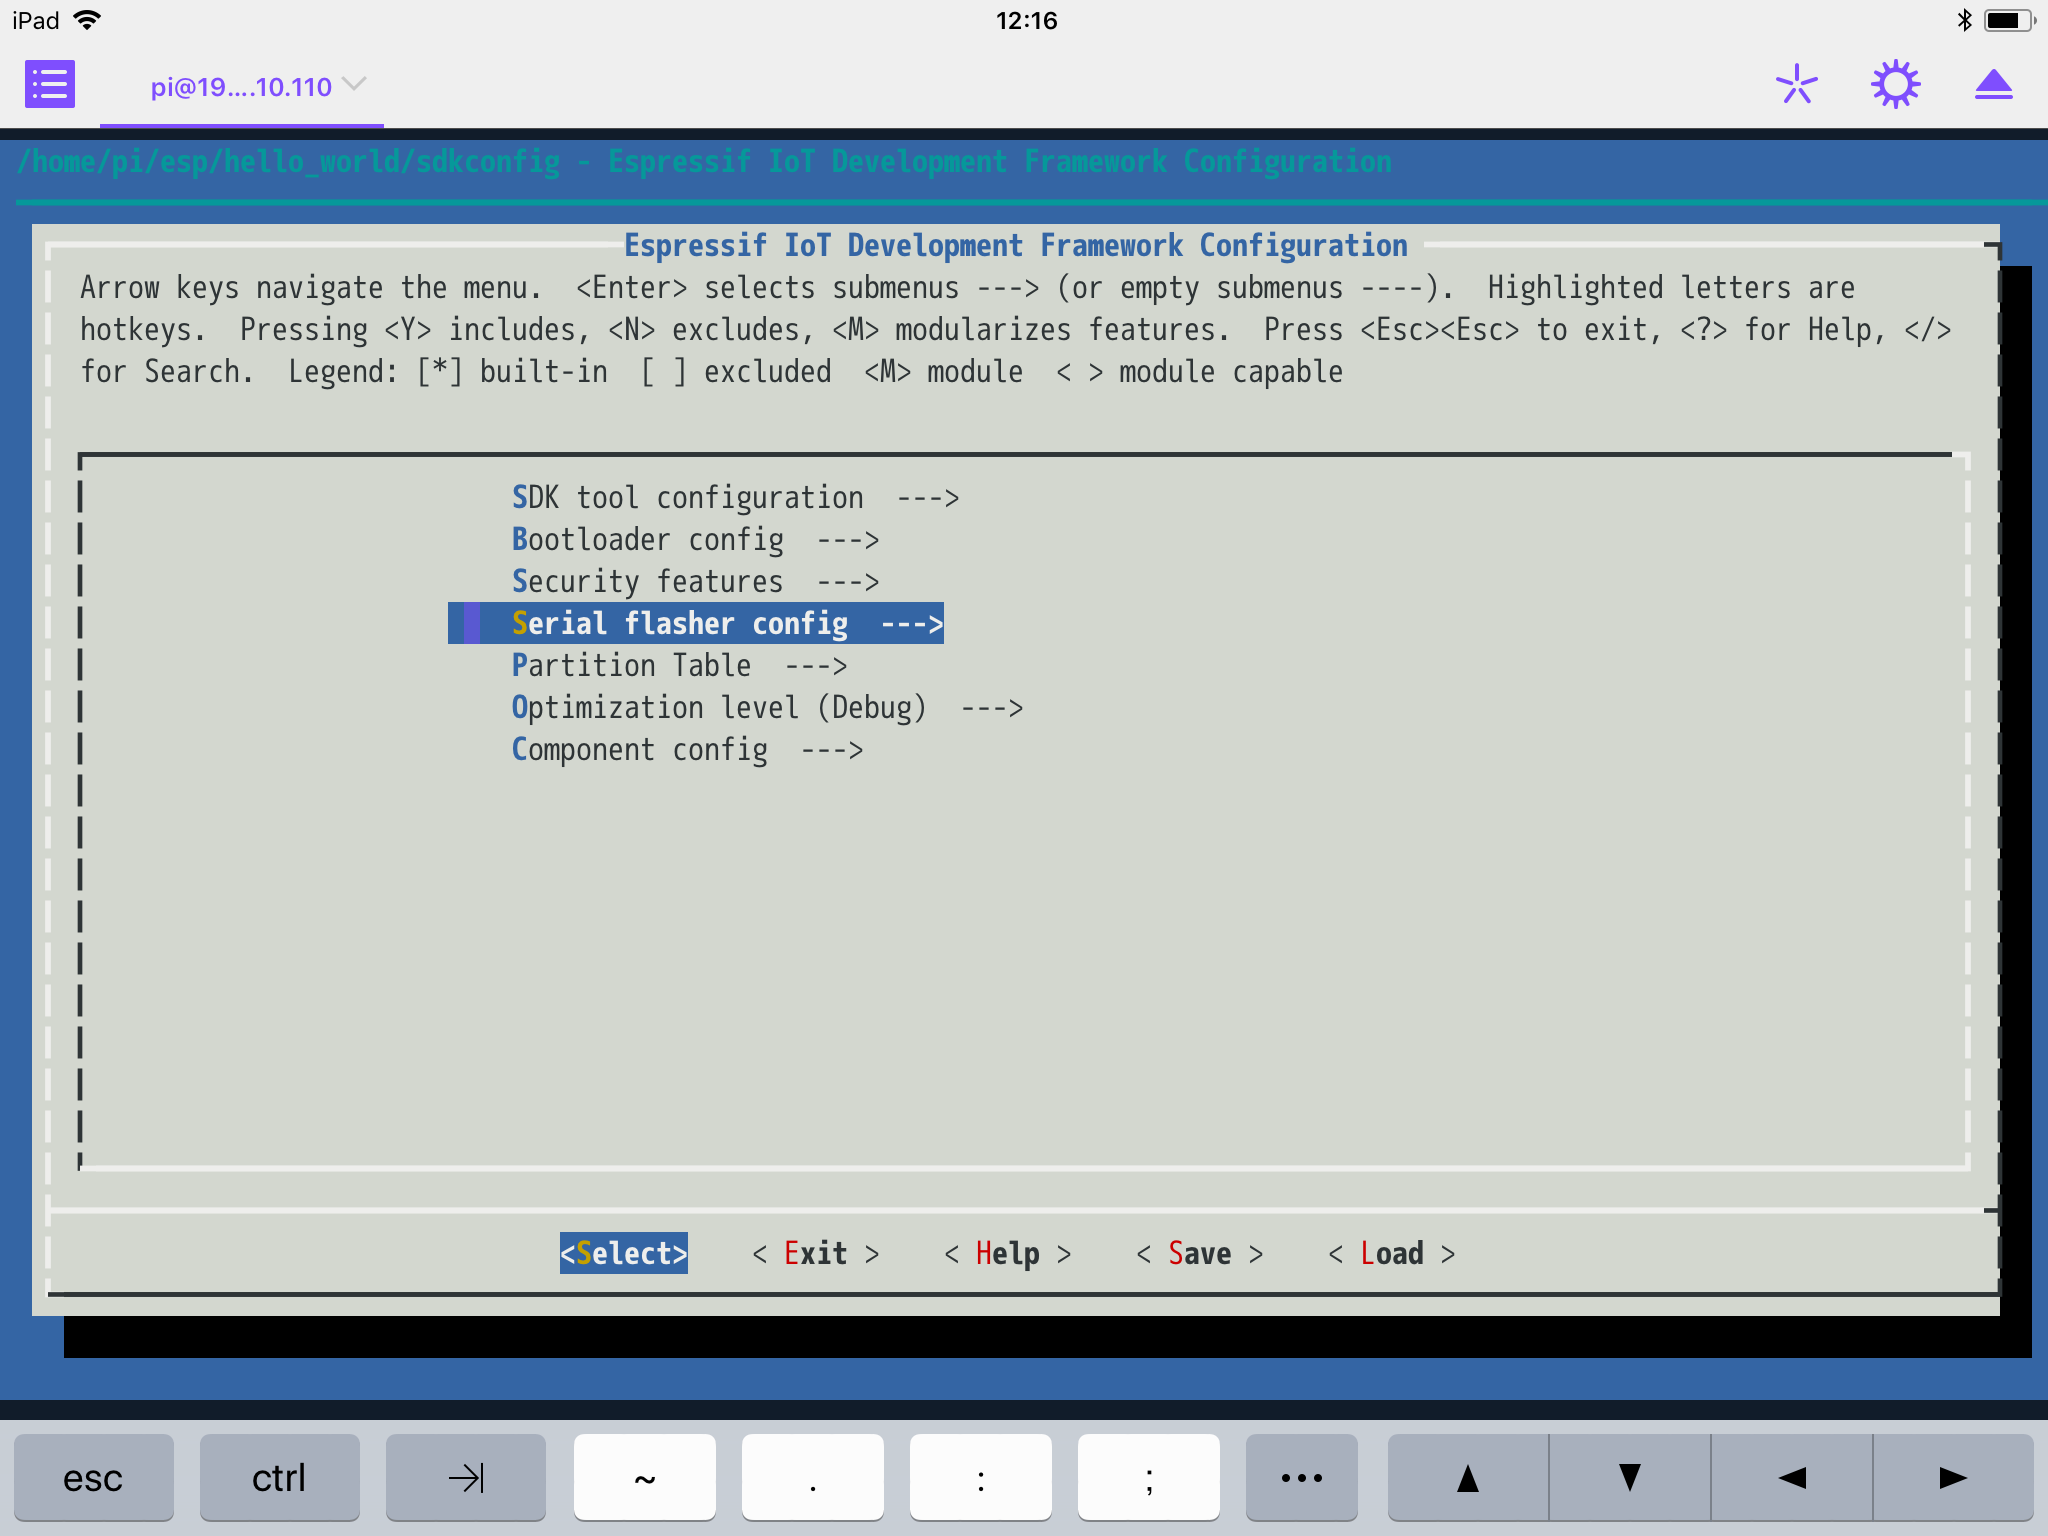
Serial flasher config > Default serial portから接続されているシリアルポートが正しいことを確認する。

私の環境では/dev/ttyUSB0となる。
< Save >で設定を保存。< Exit >で終了する。
設定を終了した後はコンパイルとFlashへの焼き込みを行う。
make flash
完了後にminicomなどで出力を確認してみる。
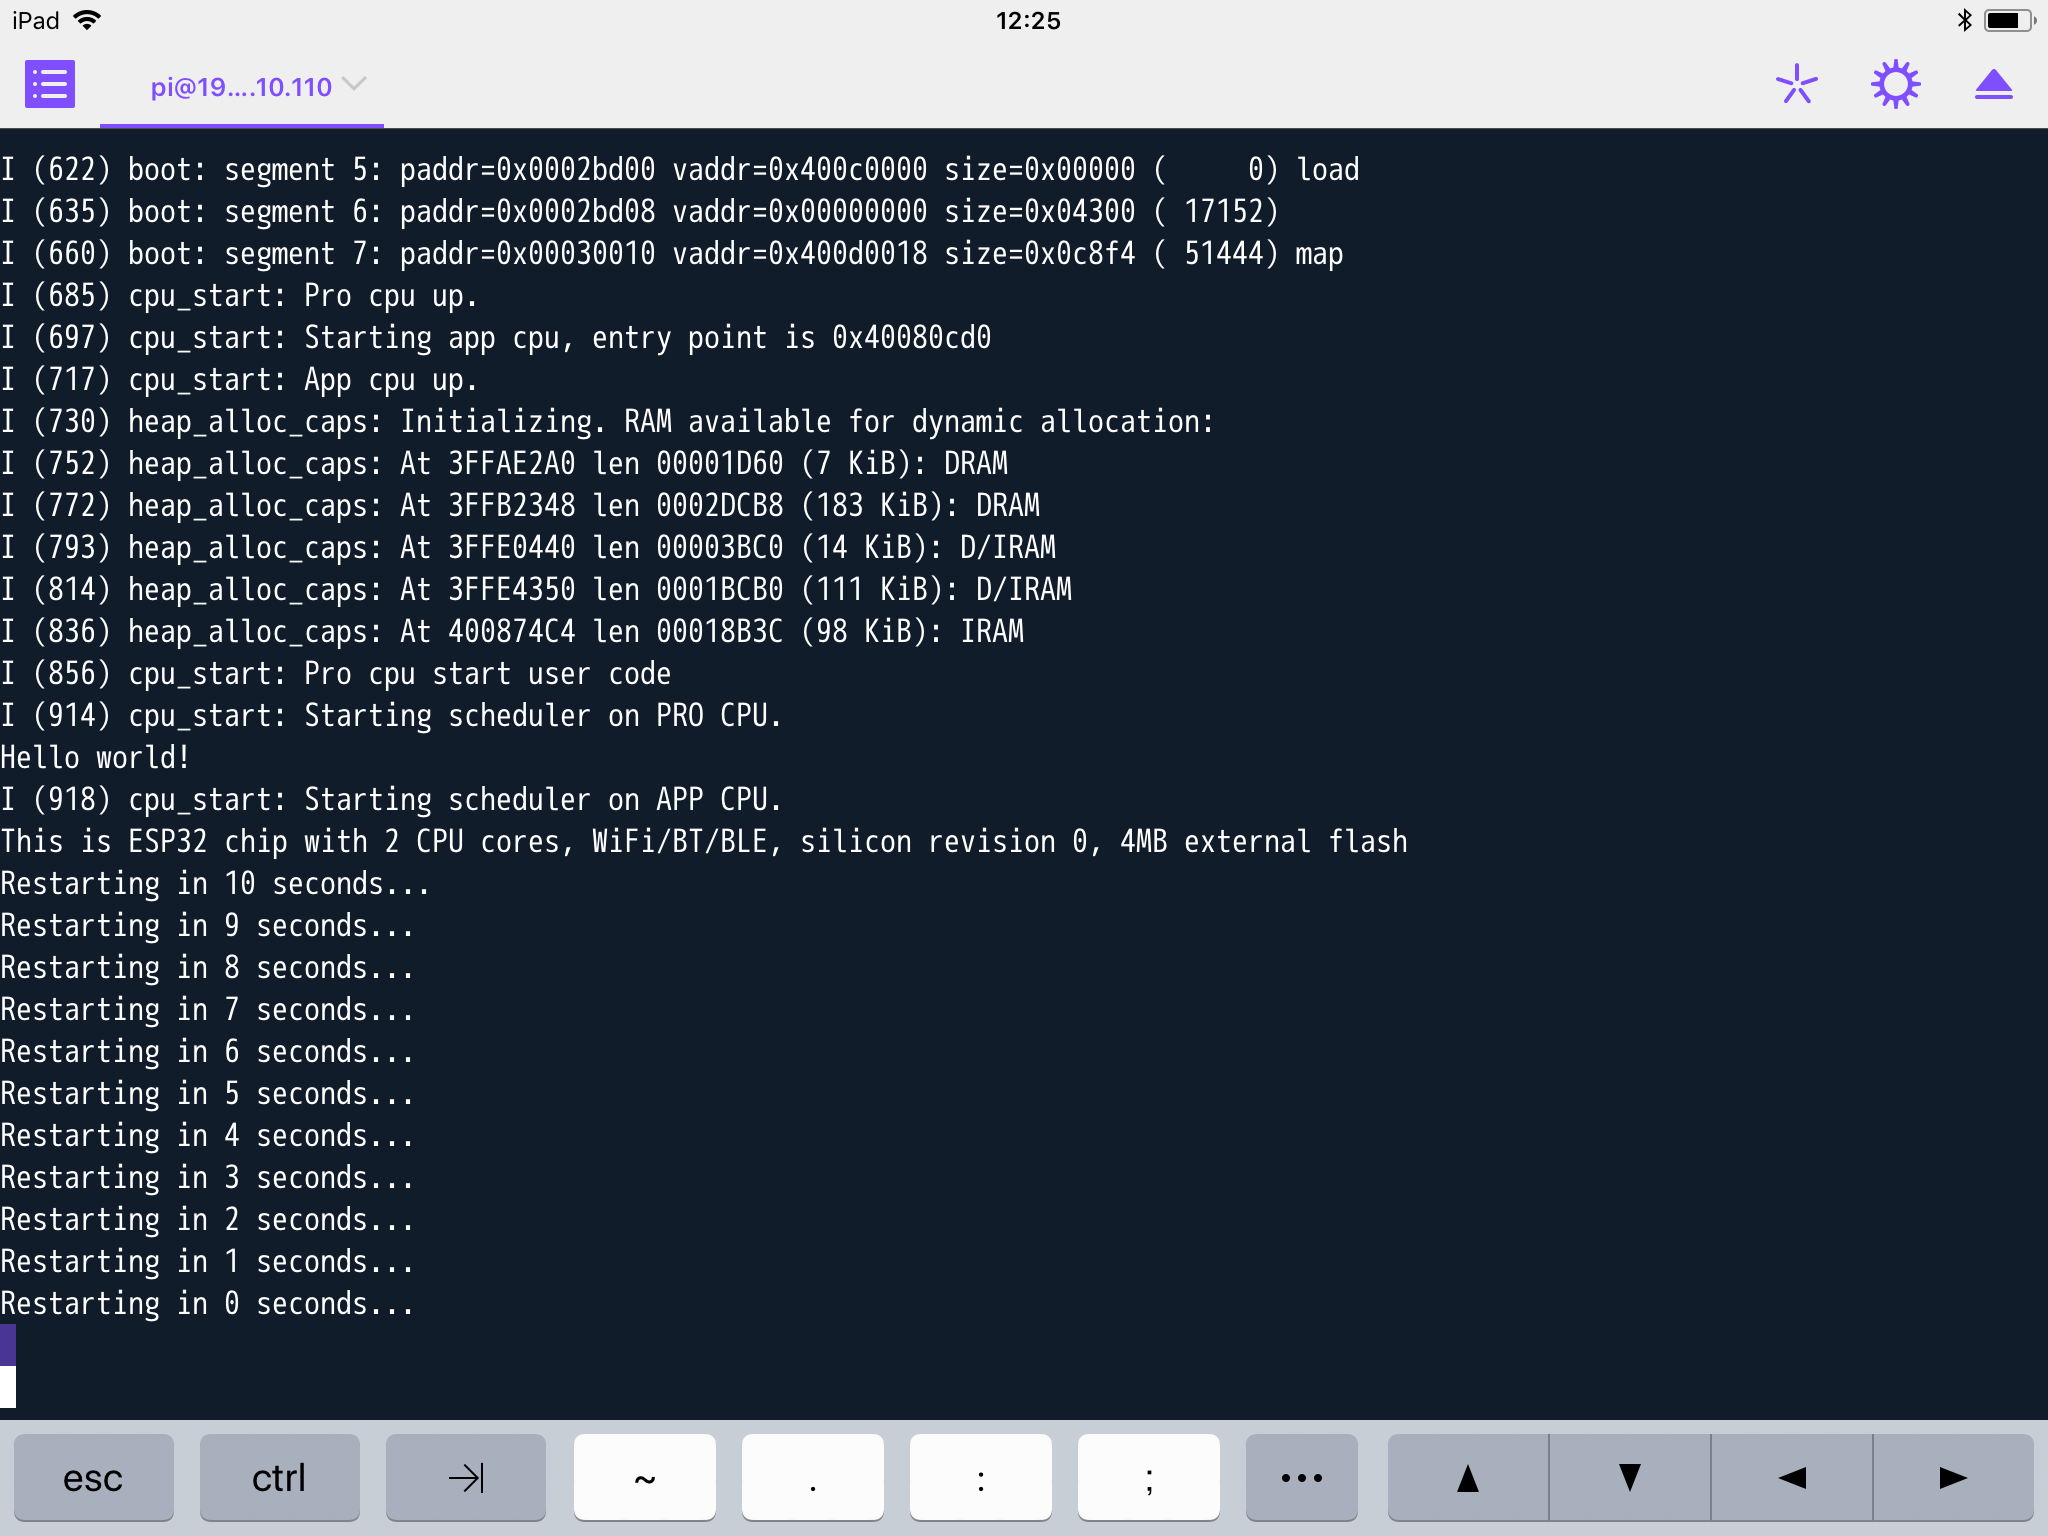
正しくプログラムが動作していることが確認できた。