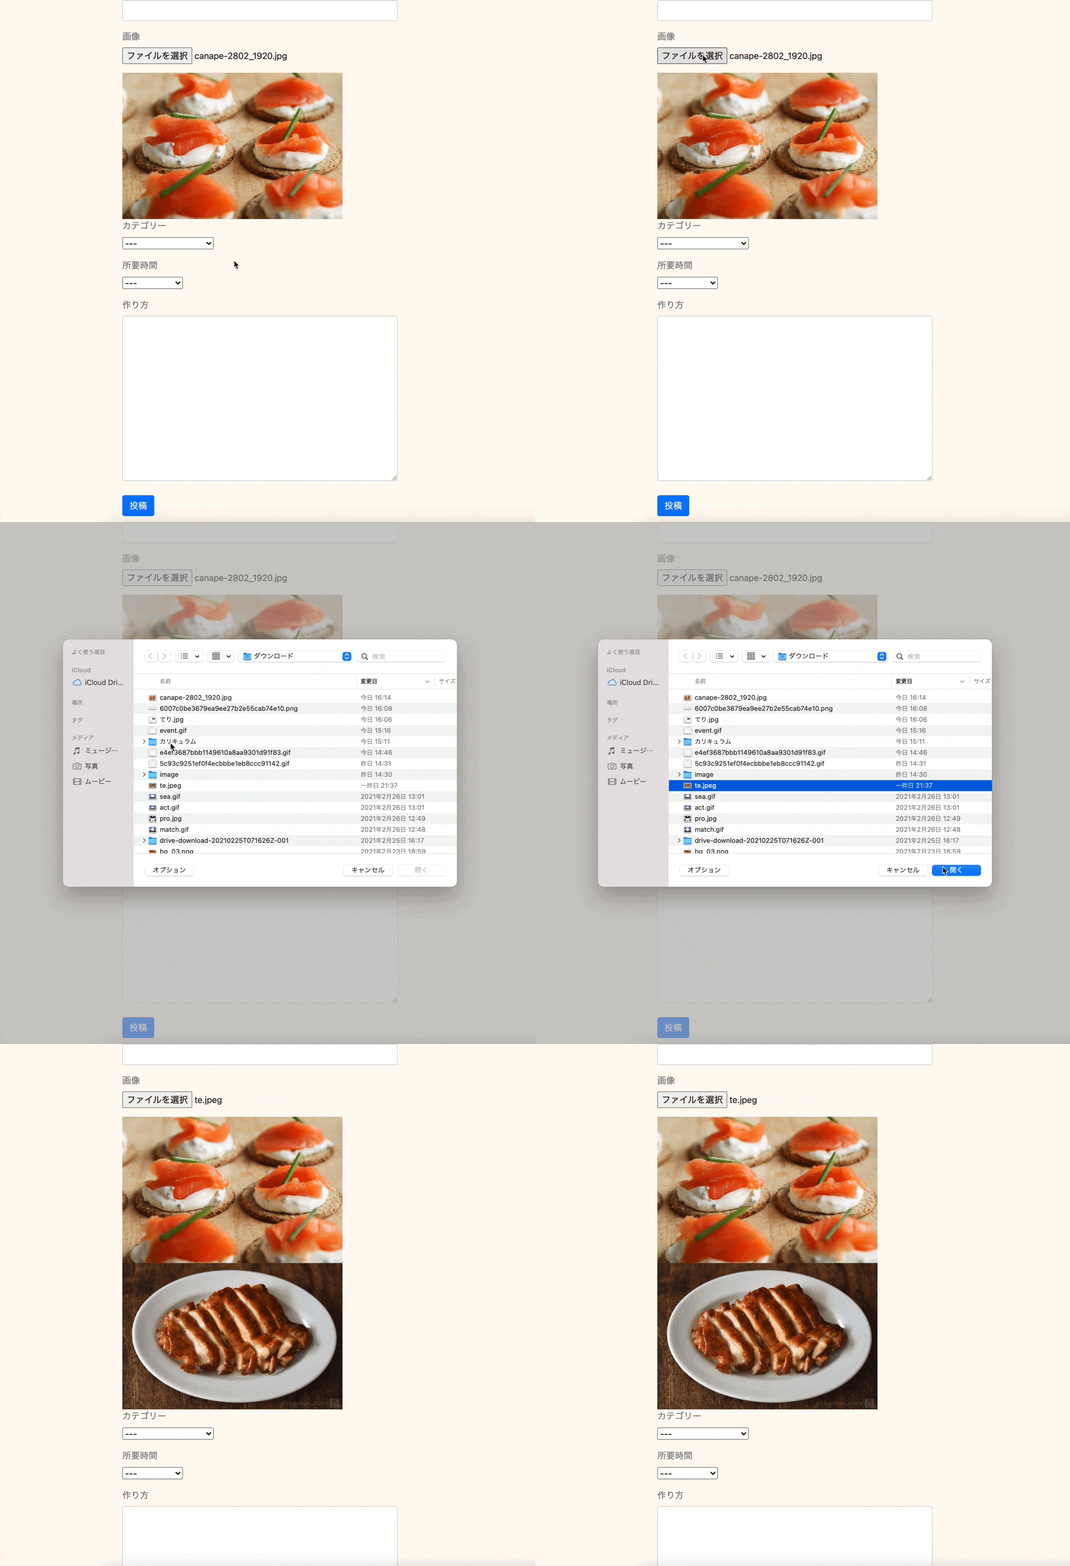
画像を投稿する際に選択した画像がプレビューできる機能を実装していきます。
今回も初心者向けにレシピ投稿アプリを例に作成していきます。
JavaScript初心者にもわかりやすいようにメソッドやイベントについては外部リンクを参照しながら解説していきます。
画像投稿機能実装については前回記事にしておりますので、そちらを参照してください。
完成イメージ
事前準備
Javascriptファイルの作成
まずは、プレビュー機能を実装するためのpreview.jsを作成します。
touch app/javascript/packs/preview.js
ファイルが作成できたらpreview.jsを読み込むための記述をapplication.jsにしていきます。
また、turbolinksはコメントアウトします。
// This file is automatically compiled by Webpack, along with any other files
// present in this directory. You're encouraged to place your actual application logic in
// a relevant structure within app/javascript and only use these pack files to reference
// that code so it'll be compiled.

require("@rails/ujs").start()
// require("turbolinks").start()  // コメントアウト
require("@rails/activestorage").start()
require("channels")
require('./preview')  // 追記

//以下略
画像を表示するスペースの作成
画像を表示する場所をビューファイルに指定します。
<%= form_with model: @recipe, local: true do |f| %>

# 中略
    <div class="form-group">
      <label class="text-secondary">画像</label><br>
      <%= f.file_field :image %>
    </div>

    <div id="new-image"></div>  #追記

# 以下略

<% end %>
Javascriptファイルの編集
preview.jsを新規投稿ページでしか発火しないようにif文を作成します。
if (document.URL.match(/new/)){

}
次にHTMLが最初に読み込まれたときに作動する関数を定義していきます。
**addEventListenerメソッドとDOMContentLoaded**イベントを使います。
addEventListenerの使い方は下記の通りです。
要素.addEventListener(イベント, 関数, オプション);
それでは処理を記述していきます。
if (document.URL.match(/new/)){
  document.addEventListener('DOMContentLoaded', () => {

  });
}
続いて、検証ツールを用いて投稿フォームのファイル選択ボックスのidを確認しましょう。

今回のレシピアプリの場合はid="recipe_image"だったのでこのrecipe_imageを**getElementByIdメソッドで取得していきます。
そして、投稿フォームのファイル選択ボックスに変化(change**)が起こったときに行われる処理を記述していきます。
if (document.URL.match(/new/)){
  document.addEventListener('DOMContentLoaded', () => {
    document.getElementById('recipe_image').addEventListener('change', (e) =>{
      console.log(e);
    });
  });
}
アロー関数の「e」はgetElementByIdで取得した投稿フォームのファイル選択ボックスの中身になります。(eはeventの略)
では、本当に中身が取得できたいるか確かめて見ましょう。
以下のようにコンソールに出力されていれば成功です。

では、取得した情報を定数に格納します。
e.target.files[0]で取得したファイルの情報を定数fileに格納し、**URL.createObjectURL(file)**で取得した情報を文字列に変換し、定数blobに格納します。
そして、blobを引数にcreateImageHTML( )という関数を呼び出します。(createImageHTML( )はこのあと作成します。)
if (document.URL.match(/new/)){
  document.addEventListener('DOMContentLoaded', () => {
    document.getElementById('recipe_image').addEventListener('change', (e) => {

      console.log(e);  //削除

//ここから追記
      const file = e.target.files[0];
      const blob = window.URL.createObjectURL(file);
      createImageHTML(blob);
//ここまで追記
    });
  });
}
それでは、createImageHTML( )を作成しましょう。
まずは、getElementByIdでnew.html.erbに先ほど追加したdiv要素のidのnew-imageを取得します。
if (document.URL.match(/new/)){
  document.addEventListener('DOMContentLoaded', () => {
//ここから追記
    const createImageHTML = (blob) => {
      const imageElement = document.getElementById('new-image');
    };
//ここまで追記

    document.getElementById('recipe_image').addEventListener('change', (e) => {
      const file = e.target.files[0];
      const blob = window.URL.createObjectURL(file);
      createImageHTML(blob);
    });
  });
}
次に**createElementメソッドでHTML要素の「img」を作成し、blobImageに格納します。
そして、setAttribute**でclassとsrcをimgに付与します。
classを付与しているのはCSSを当てるためです。
setAttributeの使い方は以下の通りです。
要素.setAttribute("データ名",データ);
以上のことを踏まえて、記述していきましょう。
if (document.URL.match(/new/)){
  document.addEventListener('DOMContentLoaded', () => {
    const createImageHTML = (blob) => {
      const imageElement = document.getElementById('new-image');
//ここから追記
      const blobImage = document.createElement('img');
      blobImage.setAttribute('class', 'new-img')
      blobImage.setAttribute('src', blob);
//ここまで追記
    };

    document.getElementById('recipe_image').addEventListener('change', (e) => {
      const file = e.target.files[0];
      const blob = window.URL.createObjectURL(file);
      createImageHTML(blob);
    });
  });
}
最後に、**appendChild**メソッドを使ってnew.html.erbに追加したdiv要素の中にimg要素を入れます。
appendChildの使い方は以下の通りです。
親要素.appendChild(追加する子要素);
それでは、preview.jsに追記しましょう。
if (document.URL.match(/new/)){
  document.addEventListener('DOMContentLoaded', () => {
    const createImageHTML = (blob) => {
      const imageElement = document.getElementById('new-image');
      const blobImage = document.createElement('img');
      blobImage.setAttribute('class', 'new-img')
      blobImage.setAttribute('src', blob);

      imageElement.appendChild(blobImage); //追記
    };

 //以下省略
setAttributeで付与したクラス「new-img」にCSSをあてます。
.new-img{
  width: 400px;
  object-fit: cover;
}
実際にビューを確認してみましょう。

画像が表示され以下のようにimg要素にclass属性とsrc属性がセットされていれば成功です。

既存のプレビューを削除しよう
現状だと画像ファイルを選択し直すとどんどん画像がプレビューされていくという問題点があります。

この問題を解決していきましょう。
**querySelector**メソッドを使ってimg要素を取得し、imageContentに格納します。
そして、if文を使いimageContentに値が入っている場合**remove**されます。
(img要素がない、つまりimageContentがnullの場合はif文がfalseとなり、実行されません。)
//中略
    document.getElementById('recipe_image').addEventListener('change', (e) => {
//ここから追記
      const imageContent = document.querySelector('img');
      if (imageContent){
        imageContent.remove();
      }
//ここまで追記

      const file = e.target.files[0];
      const blob = window.URL.createObjectURL(file);
      createImageHTML(blob);
    });
  });
}
それでは確認してみましょう。
以下の通り、画像ファイルを選択し直すと再プレビューされれば成功です。

以下、完成形のコードです。
if (document.URL.match(/new/)){
  document.addEventListener('DOMContentLoaded', () => {
    const createImageHTML = (blob) => {
      const imageElement = document.getElementById('new-image');
      const blobImage = document.createElement('img');
      blobImage.setAttribute('class', 'new-img')
      blobImage.setAttribute('src', blob);

      imageElement.appendChild(blobImage);
    };

    document.getElementById('recipe_image').addEventListener('change', (e) => {
      const imageContent = document.querySelector('img');
      if (imageContent){
        imageContent.remove();
      }

      const file = e.target.files[0];
      const blob = window.URL.createObjectURL(file);
      createImageHTML(blob);
    });
  });
}
