Active Hashを利用して投稿ページにプルダウンメニューを作成します。
超初心者向けにレシピ投稿アプリを例に作成していきます。
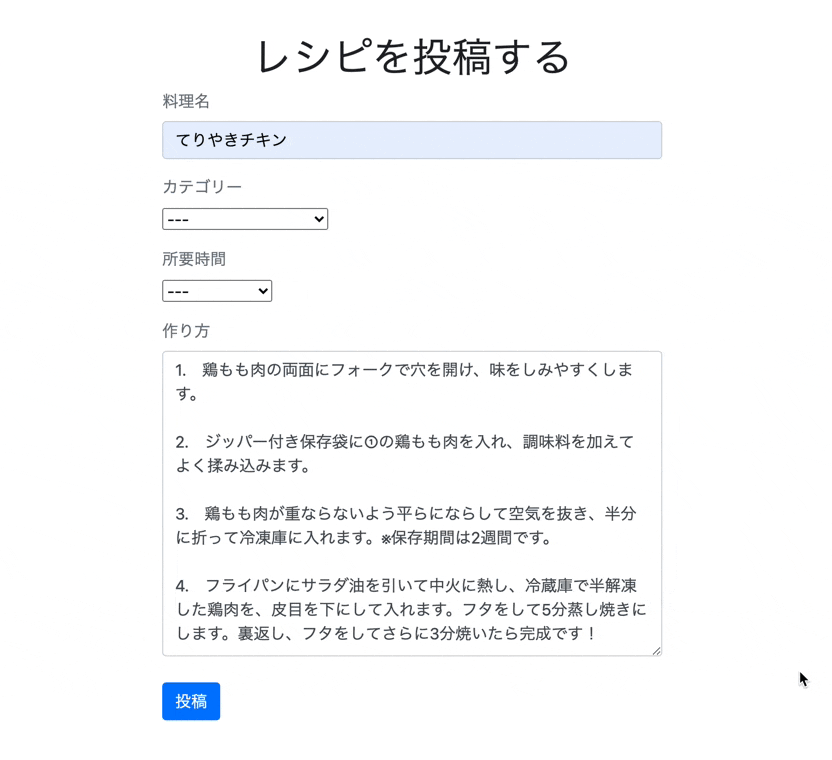
完成イメージ
Active Hashとは
Active Hashとは、「基本的に変更されないデータ」をモデルファイルに直接記述し取り扱うことができるGem。公式ドキュメント
Active Hashの導入
Active Hashのインストール
Gemfileに下記を記述しbundle installします。
gem 'active_hash'
Recipeモデルの作成
今回はレシピ投稿アプリなのでRecipeモデルを作成します。
rails g model recipe
マイグレーションファイルを編集。
今回、Active Hashを利用してカテゴリー(categoty)と所要時間(time_required)を保存するので、integer型の**:モデル名_id**という形で記述します。
このあと作成するCategoryモデルとTimeRequiredモデルのidを外部キーとして管理するためです。
class CreateRecipes < ActiveRecord::Migration[6.0]
  def change
    create_table :recipes do |t|
    #ここから
      t.string :title,          null: false
      t.text :text,             null: false
      t.integer :category_id,      null:false
      t.integer :time_required_id, null: false
    #ここまで
      t.timestamps
    end
  end
end
rails db:migrate
先ほど、integer型で指定したカテゴリーと所要時間の中身を作成していきましょう。
Category、TimeRequiredモデルの作成
モデルファイルの作成
touch app/models/category.rb
Active Hashを用いて作成するモデルはActiveHash::Baseクラスを継承します。
モデルファイルに以下のような形でプルダウンメニューに表示させたいデータをハッシュの中に記述していきましょう。
class Category < ActiveHash::Base
  self.data =[
    {id: 0 , name: '---'},
    {id: 1 , name: 'すし・魚料理'},
    {id: 2 , name: '丼もの・揚げ物'},
    {id: 3 , name: 'ラーメン・麺類'},
    {id: 4 , name: '中華'},
    {id: 5 , name: '焼きもの・粉もの'},
    {id: 6 , name: '洋食・西洋料理'},
    {id: 7 , name: 'イタリアン'},
    {id: 8 , name: 'フレンチ'},
    {id: 9 , name: 'アジア・エスニック'},
    {id: 10 , name: 'お菓子・スイーツ'}
  ]
end
同じ要領でTimeRequiredモデルも作成していきます。
touch app/models/time_required.rb
※モデル名はアッパーキャメルケースで記述します。
class TimeRequired < ActiveHash::Base
  self.data =[
    {id: 0 , name: '---'},
    {id: 1 , name: '10分以内'},
    {id: 2 , name: '10分〜20分'},
    {id: 3 , name: '20分〜30分'},
    {id: 4 , name: '30分〜45分'},
    {id: 5 , name: '45分〜60分'},
    {id: 6 , name: '60分以上'}
  ]
end
アソシエーションの設定
Recipeモデルのアソシエーションの設定
投稿するレシピ(Recipe)はひとつのカテゴリー(Category)と所要時間(TimeRequired)に紐づくのでbelongs_toを設定します。
また、Active Hashを用いて、belongs_toを設定するには、extend ActiveHash::Associations::ActiveRecordExtensionsと記述してモジュールを取り込みます。
class Recipe < ApplicationRecord
  extend ActiveHash::Associations::ActiveRecordExtensions
  belongs_to :category
  belongs_to :time_required
end
Category、TimeRequiredモデルのアソシエーションの設定
カテゴリー(Category)と所要時間(TimeRequired)はたくさんのレシピ(Recipe)に紐付いているのでhas_manyを設定します。
また、Active Hashを用いて、has_manyを設定するには、include ActiveHash::Associationsと記述してモジュールを取り込みます。
class Category < ActiveHash::Base
  self.data =[
    {id: 0 , name: '---'},
    {id: 1 , name: 'すし・魚料理'},
    {id: 2 , name: '丼もの・揚げ物'},
    {id: 3 , name: 'ラーメン・麺類'},
    {id: 4 , name: '中華'},
    {id: 5 , name: '焼きもの・粉もの'},
    {id: 6 , name: '洋食・西洋料理'},
    {id: 7 , name: 'イタリアン'},
    {id: 8 , name: 'フレンチ'},
    {id: 9 , name: 'アジア・エスニック'},
    {id: 10 , name: 'お菓子・スイーツ'}
  ]
# 以下追記
  include ActiveHash::Associations
  has_many :recipes
end
class TimeRequired < ActiveHash::Base
  self.data =[
    {id: 0 , name: '---'},
    {id: 1 , name: '10分以内'},
    {id: 2 , name: '10分〜20分'},
    {id: 3 , name: '20分〜30分'},
    {id: 4 , name: '30分〜45分'},
    {id: 5 , name: '45分〜60分'},
    {id: 6 , name: '60分以上'}
  ]
# 以下追記
  include ActiveHash::Associations
  has_many :recipes
end
バリデーションの設定
presence: true 空データは登録できない
numericality 数値のみを許可する
{ other_than: 0 } numericalityのオプション、0以外を保存
先ほど、Active Hashを用いて作成したモデルのid: 0には'---'とデータが入っていないので0以外を保存するということになります。
class Recipe < ApplicationRecord
  extend ActiveHash::Associations::ActiveRecordExtensions
  belongs_to :category
  belongs_to :time_required

# 以下追記
  validates :title, presence: true
  validates :text, presence: true
  validates :category_id, numericality: { other_than: 0 }
  validates :time_required_id, numericality: { other_than: 0 }
end
ビューの作成
コントローラー、ビューファイルの作成
rails g controller recipes new
コントローラーに以下を記述。
class RecipesController < ApplicationController

  def index
  end

  def new
    @recipe = Recipe.new
  end

  def create
    @recipe = Recipe.new(recipe_params)
    if @recipe.save
      redirect_to root_path
    else
      render :new
    end
  end

  private
  def recipe_params
    params.require(:recipe).permit(:title, :text, :category_id, :time_required_id)
  end
end
ルーティングの設定
Rails.application.routes.draw do
  root to: 'recipes#index'
  resources :recipes, only: [:index, :new, :create]
end
ビューファイルの編集
一部、Bootstrapを使用しております。
Bootstapについての記事も投稿いているのでこちらを参照してくだい
Active Hashで作成したデータを表示させるには**collection_select**というメソッドを使用します。
collection_selectは、下記のような順番で記述します。
<%= form.collection_select(保存するカラム名, オブジェクトの配列, カラムに保存する項目, 選択肢に表示するカラム名, オプション, htmlオプション) %>
先ほど作成したCategoryモデルだと下記のような記述になります。
<%= f.collection_select(:category_id, Category.all, :id, :name, {}, {class:"category"}) %>
第5引数のオプションは先頭に値のない選択肢を表示するinclude_blankなどがあります。
今回はid: 0 に'---'を指定しているので空にしてあります。
第5引数、第6引数についてはRailsドキュメントを参照してください。
それではビューファイルに記述していきましょう。
<div class="recipe-form ">
  <h1 class="text-center">レシピを投稿する</h1>

  <%= form_with model: @recipe, local: true do |f| %>
    <div class="form-group">
      <label class="text-secondary">料理名</label><br />
      <%= f.text_field :title, class: "form-control"%>
    </div>
    <div class="form-group">
      <label class="text-secondary">カテゴリー</label><br />
      <%= f.collection_select(:category_id, Category.all, :id, :name, {}, {class:"category"}) %>
    </div>
    <div class="form-group">
      <label class="text-secondary">所要時間</label><br />
      <%= f.collection_select(:time_required_id, TimeRequired.all, :id, :name, {}, {class:"time"}) %>
    </div>
    <div class="form-group">
      <label class="text-secondary">作り方</label><br />
      <%= f.text_area :text, class: "form-control"%>
    </div>
    <div class="actions">
      <%= f.submit "投稿", class: "btn btn-primary" %>
    </div>
  <% end %>
</div>
最後にCSSを整えます。
.recipe-form{
  width: 500px;
  margin: 0 auto;
  margin-top: 40px;
}
これで完成になります。
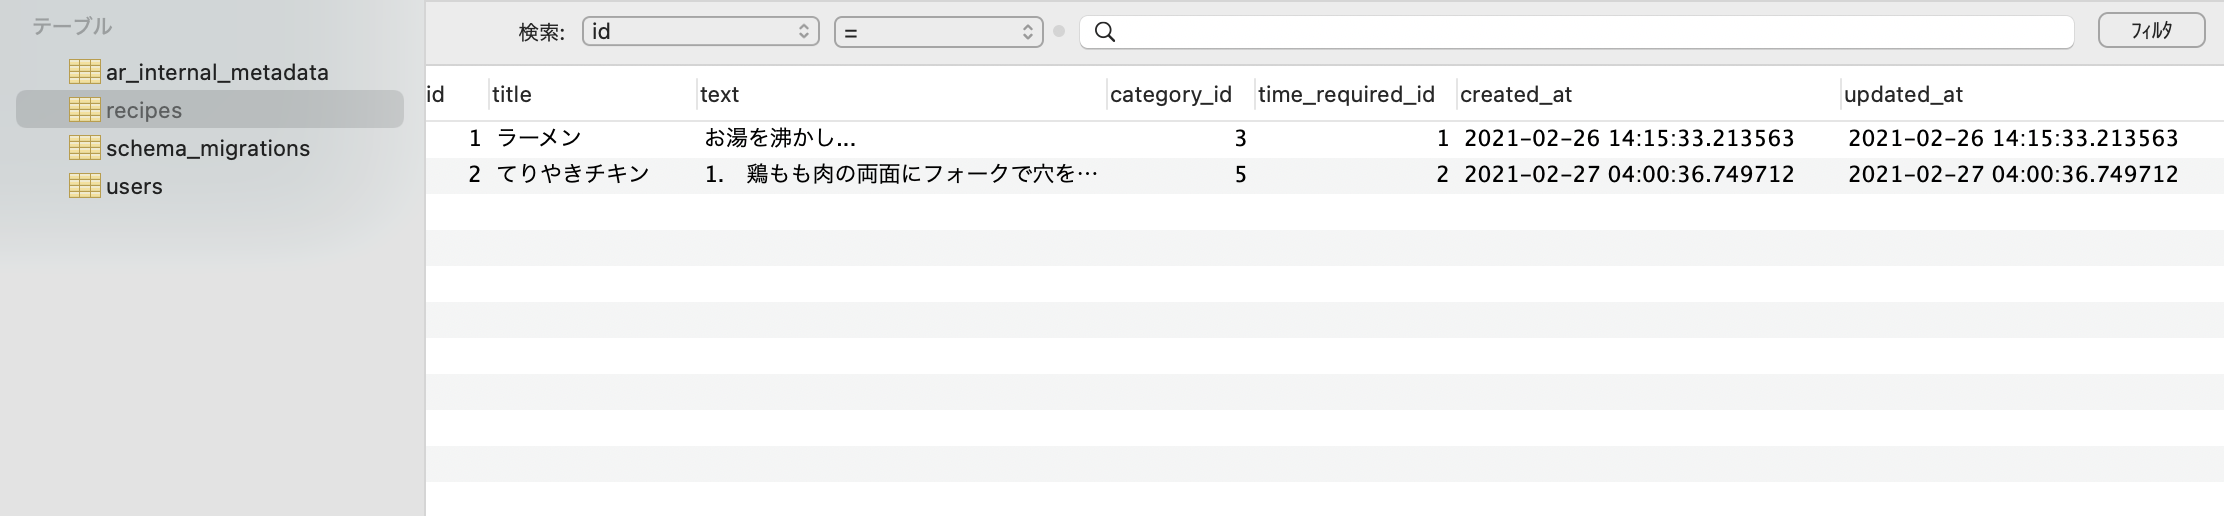
では、実際に投稿できるか確認してみましょう。
しっかり保存されいています。