はじめに
こちらは基本的に公式サイトCUDA on WSLを参照して作成した手順になる。
作成する環境は以下のpytorch公式サイトの互換性マトリックスpytorch2.0に従う。

作成する環境
wsl2:ubuntu 20.04
python:3.8.10
CUDA Toolkit 11.7
pytorch:2.0
既存環境
Windows11
GPU:NVIDIA GeForce RTX 3080 Ti
手順
- ubuntuのインストール(+アンインストール)
- pytorchのインストール
- CUDA toolkitのインストール
1. ubuntuのインストール(+アンインストール)
初めてインストールする方は "#インストール" から始める。
もし、環境がぐちゃぐちゃになったり、上手くいかない場合はアンインストールをどうぞ!
# PowerShell
# 削除
wsl --unregister Ubuntu-20.04

# インストール
wsl --install -d Ubuntu-20.04
2. pytorchのインストール
まずはアップデート
# ubuntu
$ sudo apt update & sudo apt upgrade

$ sudo apt upgrade python3

# pipインストール
$ sudo apt install python3-pip
pytorchのインストールは公式サイトPrevious Pytorch Versionsのインストール手順になる。
# pytorch install
$ sudo pip install torch==2.0.0 torchvision==0.15.1 torchaudio==2.0.1
以下のように出力されればインストール完了
$ python3 -c "import torch; print(torch.__version__, torch.cuda.is_available())"
# 2.0.1+cu117 true
3. CUDA toolkitのインストール
Nvidia driverはwindows11の方にインストールしてある前提で進める。まだの方はこちらから(latest NVIDIA Windows GPU Driver)
CUDA toolkitのインストールは公式サイトCUDA toolkit 11.7(CUDA Toolkit 11.7 Downloads)のインストール手順になる。
# CUDA Toolkit 11.7インストール
$ wget https://developer.download.nvidia.com/compute/cuda/repos/wsl-ubuntu/x86_64/cuda-wsl-ubuntu.pin
$ sudo mv cuda-wsl-ubuntu.pin /etc/apt/preferences.d/cuda-repository-pin-600
$ wget https://developer.download.nvidia.com/compute/cuda/11.7.0/local_installers/cuda-repo-wsl-ubuntu-11-7-local_11.7.0-1_amd64.deb
$ sudo dpkg -i cuda-repo-wsl-ubuntu-11-7-local_11.7.0-1_amd64.deb
$ sudo cp /var/cuda-repo-wsl-ubuntu-11-7-local/cuda-*-keyring.gpg /usr/share/keyrings/
$ sudo apt-get update
$ sudo apt-get -y install cuda

# path設定
$ export PATH=/usr/local/cuda-11.7/bin${PATH:+:${PATH}}
$ export LD_LIBRARY_PATH=/usr/local/cuda-11.7/lib64${LD_LIBRARY_PATH:+:${LD_LIBRARY_PATH}}
$ source ~/.bashrc
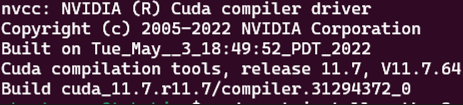
最後に確認作業
# CUDA toolkit確認(以下のような出力があればOK)
$ nvcc -V
おわりに
何回かつまづいたGPUの環境構築でしたので書き留めてみました。少しでも皆さんのためになれたらと思います。最後まで読んでいただき、ありがとうございました。