AutoWare
ThinkStationにAutowareをインストールする。
| CPU | Xeon | |
| Memory | 42GB | |
| GPU | QUADRA K620 | |
| SDD | 2TB | |
| OS | ubuntu18.04 | |
| ROS | Merodic |
Dockerを使ってAutoWareのインストール
There are two ways to run Autoware in a docker image: You can run one of the pre-built docker images from Autoware or modify the Dockerfiles in the repository and build and run your own, custom image.
dockerを使ってAutoWareをインストールする方法は2通りある。
1つはpre-buildされたイメージを使う
もう一つはリポジトリにあるDockerfilesをmodifyしてカスタムイメージを作成する方法。
Note on file locations:
Docker images older than version 1.12.0-beta.1 do not use the new installation method utilizing autoware.ai.repos so all source code and pre-built binaries can be found in the /home/autoware/Autoware/ros folder. Images for 1.12.0-beta.1 and newer will have their source code and pre-built binaries in /home/autoware/Autoware.
ファイルロケーションに関する注意
version 1.12.0-beta.1より古いイメージは新しいインストール方法(autoware.ai.repos)を使わない。
なのですべてのソースコードとpre-buildされたバイナリーは/home/autoware/Autoware/ros フォルダに格納されている。
1.12.0-beta.1より新しいバージョンのこれらは/home/autoware/Autowareに格納されている。
Note on file permissions:
Previously, logging in to one of these docker containers using the run.sh script would attempt to set the permissions of all of the files in the Docker container to be the same as the user running the run.sh script so files could be easily copied back and forth between host and container. However, doing this correctly caused logging in to the containers to take an unacceptable amount of time (>5 minutes). To alleviate this, the containers no longer try to set the permissions and instead use the default autoware user in the containers. As a result, copying files from the container to the host or vice versa may create files with permission problems. To fix this, do the following:
1. Copy the files into the shared folder ($HOME/shared_dir on the host or /home/autoware/shared_dir in the container).
2. In the environment which is the target of the copy (host or container), cd to the shared directory and run sudo chown -R $(id -u):$(id -g) *. This will correctly set all of the files in the shared directory to be owned by the current user.
3. Copy the files out of the shared directory in the target environment (host or container).
ファイルのパーミッションに関する注意
以前は、run.shスクリプトを使用してdocker imageにログインする際にrun.shを実行したユーザと同じ権限をDocker Container内のすべてのファイルに設定していたのでファイルは簡単にホストやコンテナ間でコピーできた。
しかしながら、この方法はコンテナにログインするのに5分以上要した。
ログインにかかる時間を短縮するため、コンテナは権限の設定を行わない代わりにautowareというデフォルトのユーザを使う。
この結果コンテナからファイルをホストにコピーする際にパーミションの問題が発生する。
以下の1から3の手順でこれを解決できる。
1. Copy the files into the shared folder
   ($HOME/shared_dir on the host or /home/autoware/shared_dir in the container).
2. In the environment which is the target of the copy (host or container),
   cd to the shared directory and run sudo chown -R $(id -u):$(id -g) *.
   This will correctly set all of the files in the shared directory to be owned by the current user.
3. Copy the files out of the shared directory in the target environment (host or container).
NVIDIA-DOCKER2のインストール
NOTE
Optional: Install the NVIDIA Docker Runtime
NOTE: If you are using a recent version of Docker (19.03 or later), then you do not need to install the NVIDIA Docker Runtime because GPUs are supported natively in the Docker engine. See the instructions on the Docker Website for enabling this feature.
Docker 19.03以降であれば NVIDIA Docker Runtimeのインストールは必要ないとのことだが、RuntimeをインストールしないとNvidiaのRuntimeがないっていうエラーがでてDockerが起動できなかった。
http://xvideos.hatenablog.com/entry/install-nvidia-docker2
https://qiita.com/TaroNakasendo/items/44c3eecb0c1e0a91fdaf
$ curl -sL https://nvidia.github.io/nvidia-docker/gpgkey | sudo apt-key add -
$ distribution=$(. /etc/os-release;echo $ID$VERSION_ID)
$ curl -sL https://nvidia.github.io/nvidia-docker/$distribution/nvidia-docker.list | sudo tee /etc/apt/sources.list.d/nvidia-docker.list
$ sudo apt update
$ sudo apt install nvidia-docker2 -y
$ sudo pkill -SIGHUP dockerd
アンインストール方法
$ docker volume ls -q -f driver=nvidia-docker | xargs -r -I{} -n1 docker ps -q -a -f volume={} | xargs -r docker rm -f
$ sudo apt-get purge nvidia-docker
Case1 Pre-buildされたイメージを使う
Case 1: Using Pre-built Autoware Docker Images
The pre-built Autoware images include all of the necessary prerequisites for a given release of Autoware. By default, they also contain the Autoware source code for that release and pre-compiled binaries. To run one of these images:
Clone the docker repository and move into the generic docker folder.
$ git clone https://gitlab.com/autowarefoundation/autoware.ai/docker.git
$ cd docker/generic
Use the run.sh script to start and enter the Docker container.
$ ./run.sh
Note 1: By default, the above script will run a Docker image which is pre-compiled, based on Ubuntu 18.04 / ROS Melodic, with CUDA / NVidia Docker support enabled, using the latest official release of Autoware. Several flags can be passed to the ./run.sh script to change this behavior. Run ./run.sh -h to see all available flags.
Note 2: By default, the image will use the latest- Docker tag which will run the most recently-released version of Autoware. To change to an older version of Autoware, use the -t flag with the version (e.g. ./run.sh -t 1.10.0 for v1.10.0).
Case2 カスタムイメージを作成する。
Case 2: Creating a Custom Autoware Docker Image
Clone the docker repository and move into the generic docker folder.
$ git clone https://gitlab.com/autowarefoundation/autoware.ai/docker.git
$ cd docker/generic
Before building the image, you can modify the Dockerfile files in the generic folder to change the generated image. Once you have modified them to your liking, build the docker image using the build.sh script:
$ ./build.sh
Run Autoware
$ cd cd Autoware/
$ source install/setup.bash
$ roslaunch runtime_manager runtime_manager.launch
ROSBAG Demo
まずデータをダウンロードする。
This demo will need the given 3D map and ROSBAG sample data. Please download the following sample data before running the demo.
Download the sample 3D pointcloud/vector map data.
$ wget http://db3.ertl.jp/autoware/sample_data/sample_moriyama_data.tar.gz
Download the sample ROSBAG data (LiDAR: VELODYNE HDL-32E, GNSS: JAVAD GPS RTK Delta 3).
$ wget http://db3.ertl.jp/autoware/sample_data/sample_moriyama_150324.tar.gz
Want more data?
Once the demo goes well, you can visit ROSBAG STORE to get more data. Please also consider your contribution to this data sharing service by uploading your ROSBAG data.
デモがうまく行ったらROSBAG STOREからよりたくさんのデータを得られる。
Demo run
Assumptions
Autoware built from source: the demo data and rosbag have been downloaded into the Downloads folder.
Autoware run from docker image: the demo data and rosbag have been downloaded into the shared_dir folder within the host.
前提条件
Autowareをソースからビルドした場合:
デモデータとrosbagはDownloads folderにダウンロードする。
Autowareをdocker imeageから実行した場合:
デモデータとrosbagはホストのshared_dir folderにダウンロードする。
Using Docker:
$ cd ~
$ mkdir .autoware
$ cd .autoware
$ cp ~/shared_dir/sample_moriyama_* .
$ tar zxfv sample_moriyama_150324.tar.gz
$ tar zxfv sample_moriyama_data.tar.gz
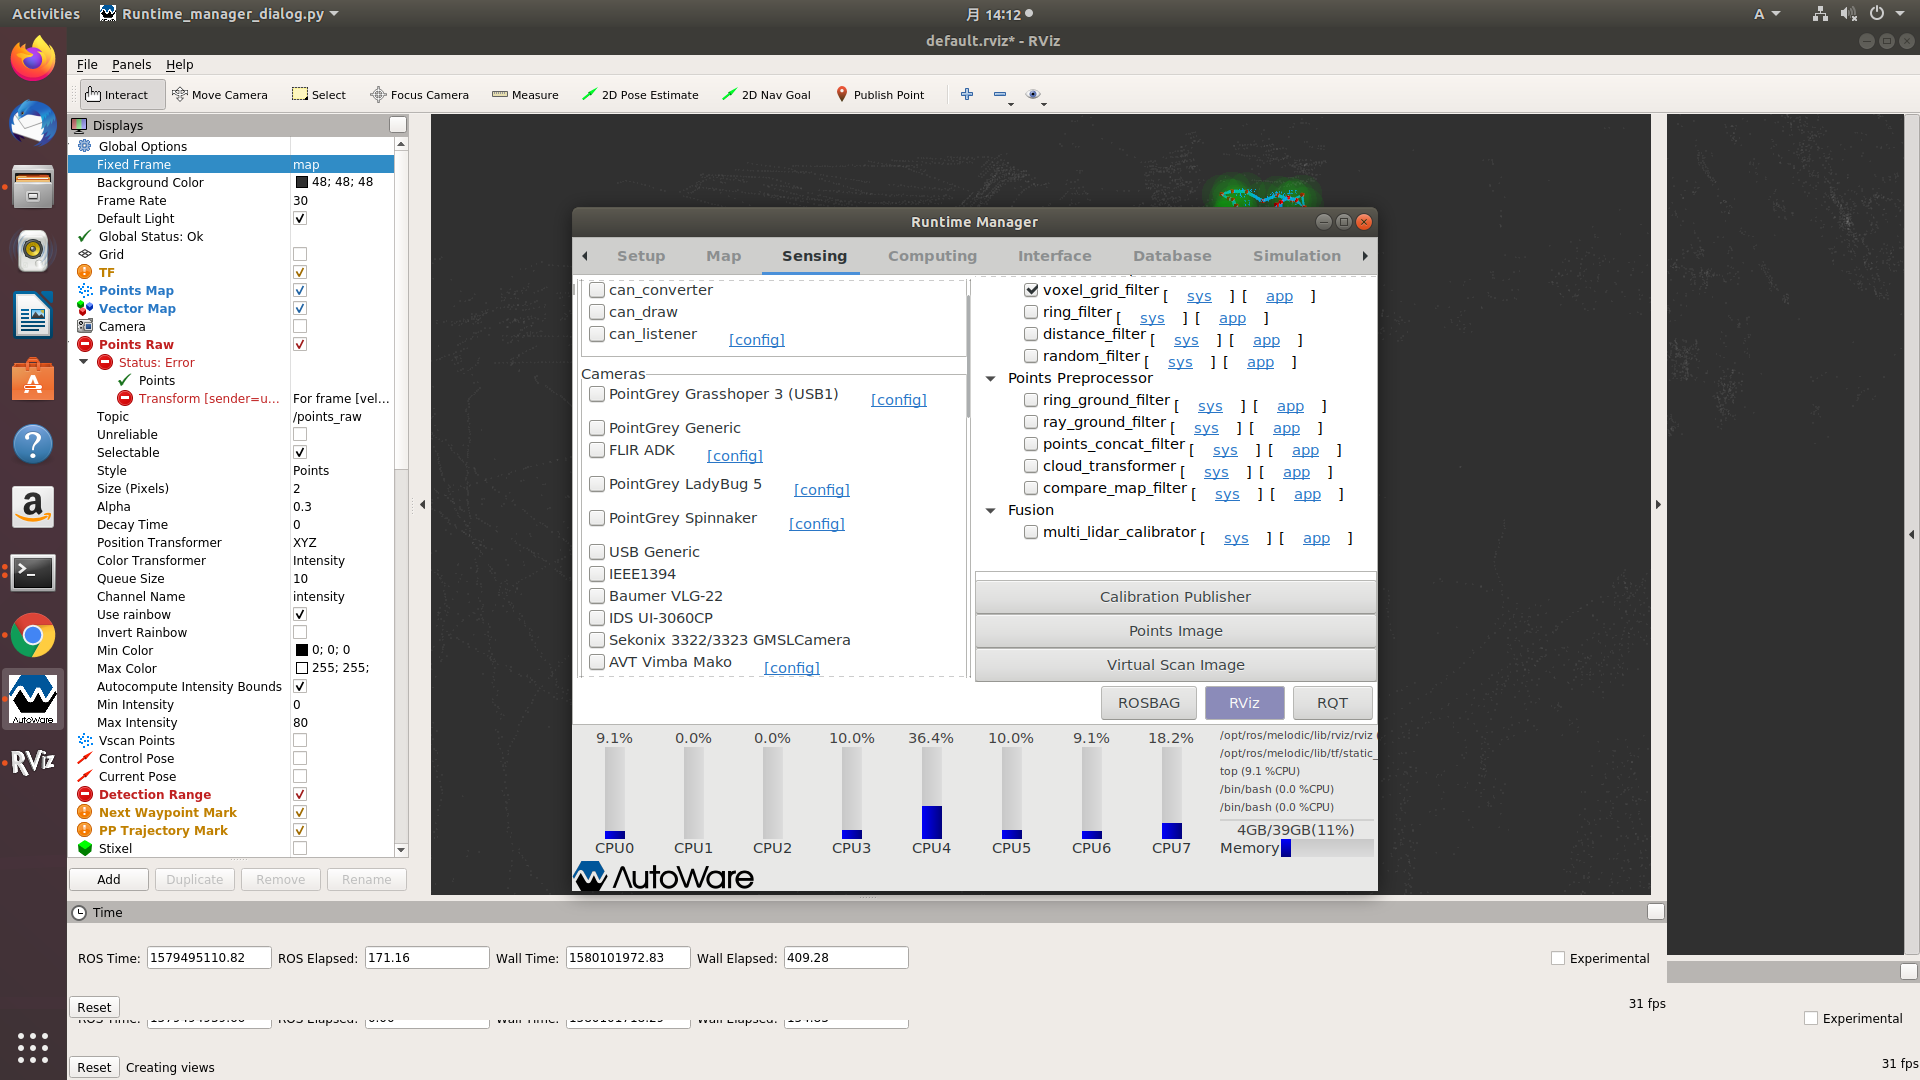
rosbagから地図を作成する。
詳細は「Autoware 自動運転ソフトウェア入門」のP.133
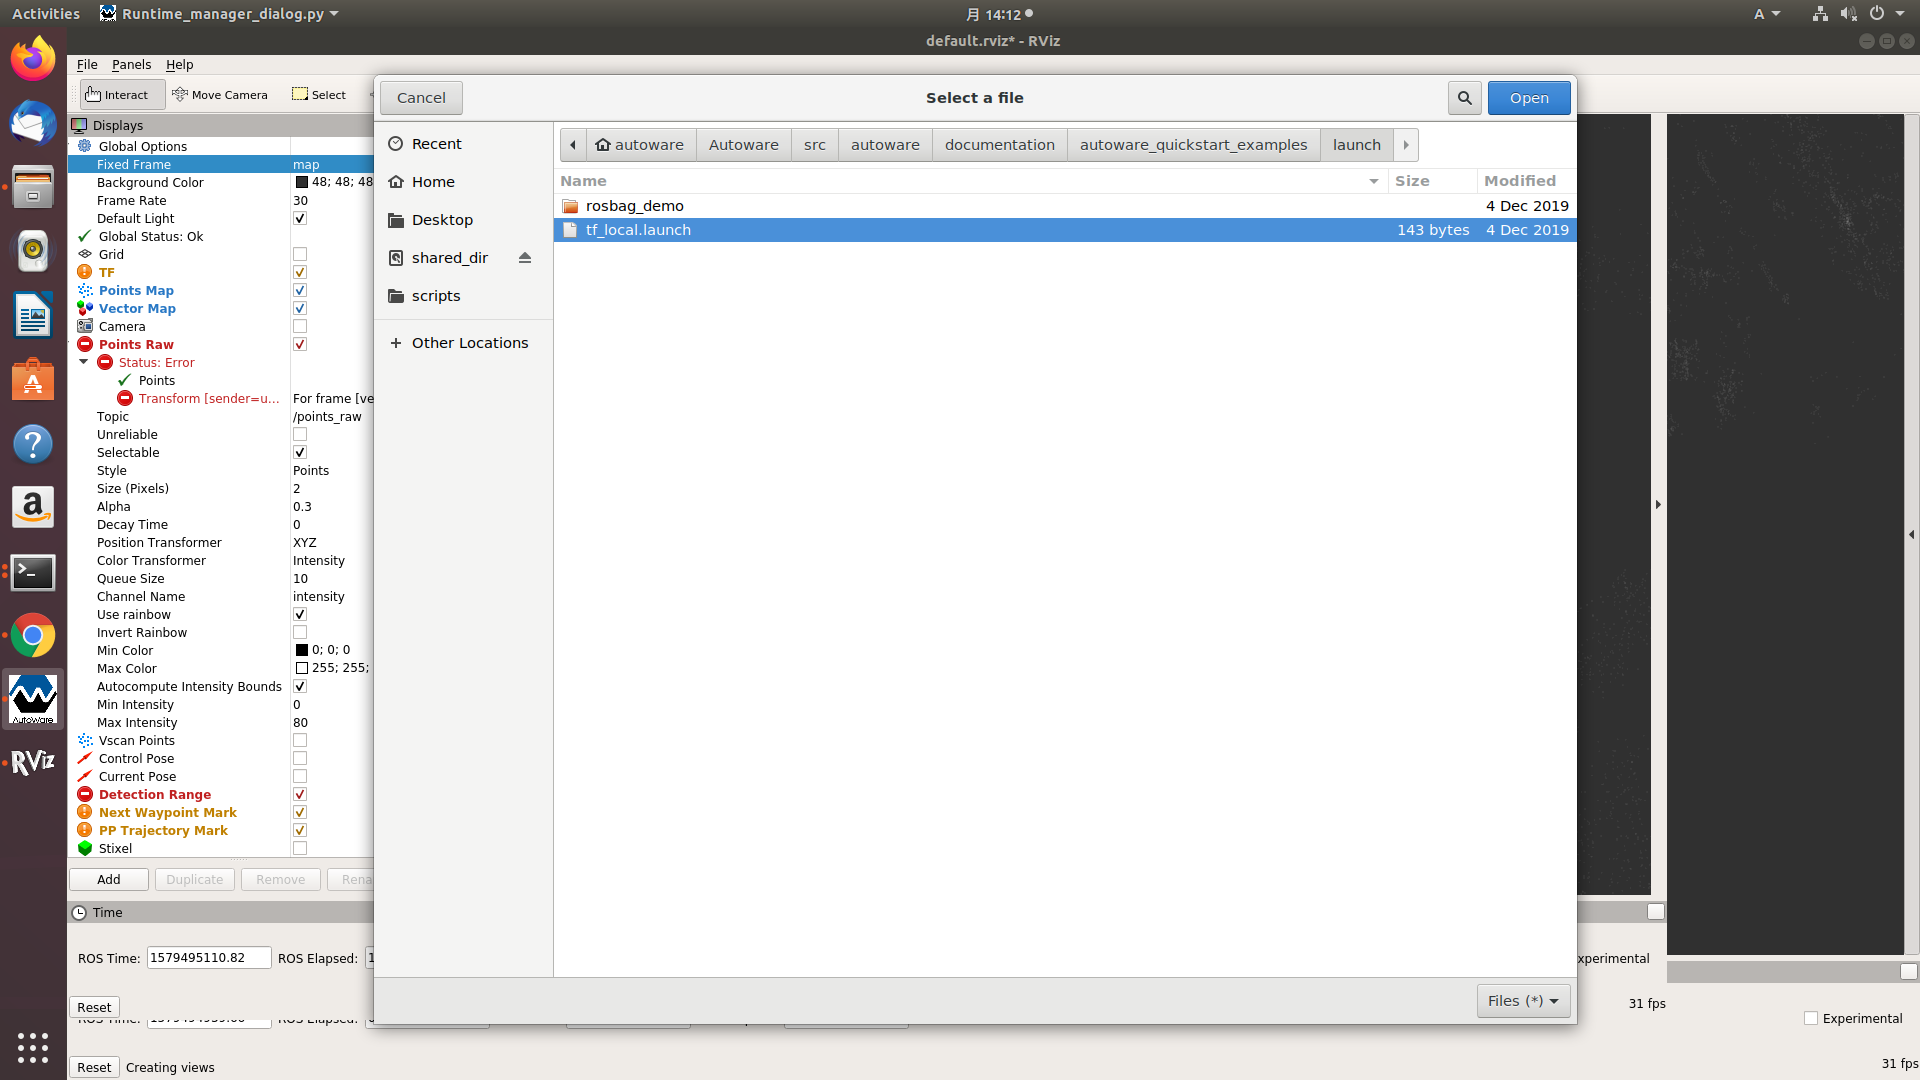
ndt_mapping.rvizはdocker containerには入ってないのでここからダウンロードする。
https://gitlab.com/autowarefoundation/autoware.ai/autoware/blob/master/ros/src/.config/rviz/ndt_mapping.rviz
https://drive.google.com/open?id=1SMd1D6xzHioXLl4JYs2zcR5Sexa7q3Hj
https://drive.google.com/open?id=1gG2v7yKbOF2lxbcYBBIbe1sO2jh1jYk8
RCカーをAutoWareで動かすハンズオン資料
このハンズオンではVelodyne VLP-16を使っている。
https://faboplatform.github.io/AutowareDocs/
エラーでコンテナが起動できない
$ ./run.sh
docker: Error response from daemon: oci runtime error: flag provided but not defined: -console.

$ docker version
Client:
 Version:      1.13.1
 API version:  1.26
 Go version:   go1.6.2
 Git commit:   092cba3
 Built:        Thu Nov  2 06:39:28 2017
 OS/Arch:      linux/arm64

Server:
 Version:      1.13.1
 API version:  1.26 (minimum version 1.12)
 Go version:   go1.6.2
 Git commit:   092cba3
 Built:        Thu Nov  2 06:39:28 2017
 OS/Arch:      linux/arm64
 Experimental: false

$ docker info
Containers: 3
 Running: 0
 Paused: 0
 Stopped: 3
Images: 1
Server Version: 1.13.1
Storage Driver: overlay2
Backing Filesystem: extfs
Supports d_type: true
Native Overlay Diff: true
Logging Driver: json-file
Cgroup Driver: cgroupfs
Plugins:
 Volume: local
 Network: bridge host macvlan null overlay
 Swarm: inactive
Runtimes: runc
Default Runtime: runc
Init Binary: docker-init
containerd version:  (expected: aa8187dbd3b7ad67d8e5e3a15115d3eef43a7ed1)
runc version: N/A (expected: 9df8b306d01f59d3a8029be411de015b7304dd8f)
init version: N/A (expected: 949e6facb77383876aeff8a6944dde66b3089574)
Security Options:
seccomp
Profile: default
Kernel Version: 4.4.38-tegra
Operating System: Ubuntu 16.04 LTS
OSType: linux
Architecture: aarch64
CPUs: 6
Total Memory: 7.662 GiB
Name: tegra-ubuntu
ID: QSYX:QMJB:2AKW:EICV:2EKO:DEFL:7LJS:BMTO:BFQG:Q2KT:72A4:4PZ7
Docker Root Dir: /media/ubuntu/SSD_M2/docker
Debug Mode (client): false
Debug Mode (server): false
Registry: https://index.docker.io/v1/
Experimental: false
Insecure Registries:
 127.0.0.0/8
Live Restore Enabled: false
Dockerをバージョンアップして解決
$ docker -v
Docker version 19.03.5, build 633a0ea
PCに3Dマップを作成する環境を作成する。
【BLAMをインストール】
3Dマップ作成用のPCにBLAMをインストールします。
BLAMのインストール方法はgithubに従ってください。
https://github.com/naisy/blam
簡単に説明すると、
-
apt-get install libtbb-dev libboost-all-dev cmake cpio python-wstool
-
ROS Kinetic
-
Intel MKL
https://qiita.com/f0o0o/items/d79971215fd37c3a5d36
を先にインストールしてから、blamの
sudo apt install libparmetis-dev
Gazebo Simulator
Gazeboを使う場合はGPU関連のissuesがあるらしくGazeboのUpgradeが必要
pgradeはdokcer container内で行う
初回のみWorldのセットアップを行う
$ rosrun vehicle_gazebo_simulation_launcher setup.sh
https://bitbucket.org/DataspeedInc/velodyne_simulator/src/56d11e899ce0a198e7206298b3aaaf8004f3a2c6/gazebo_upgrade.md?fileviewer=file-view-default
https://qiita.com/hakuturu583/items/297adfd8ad0fa54d1a24
経路作成
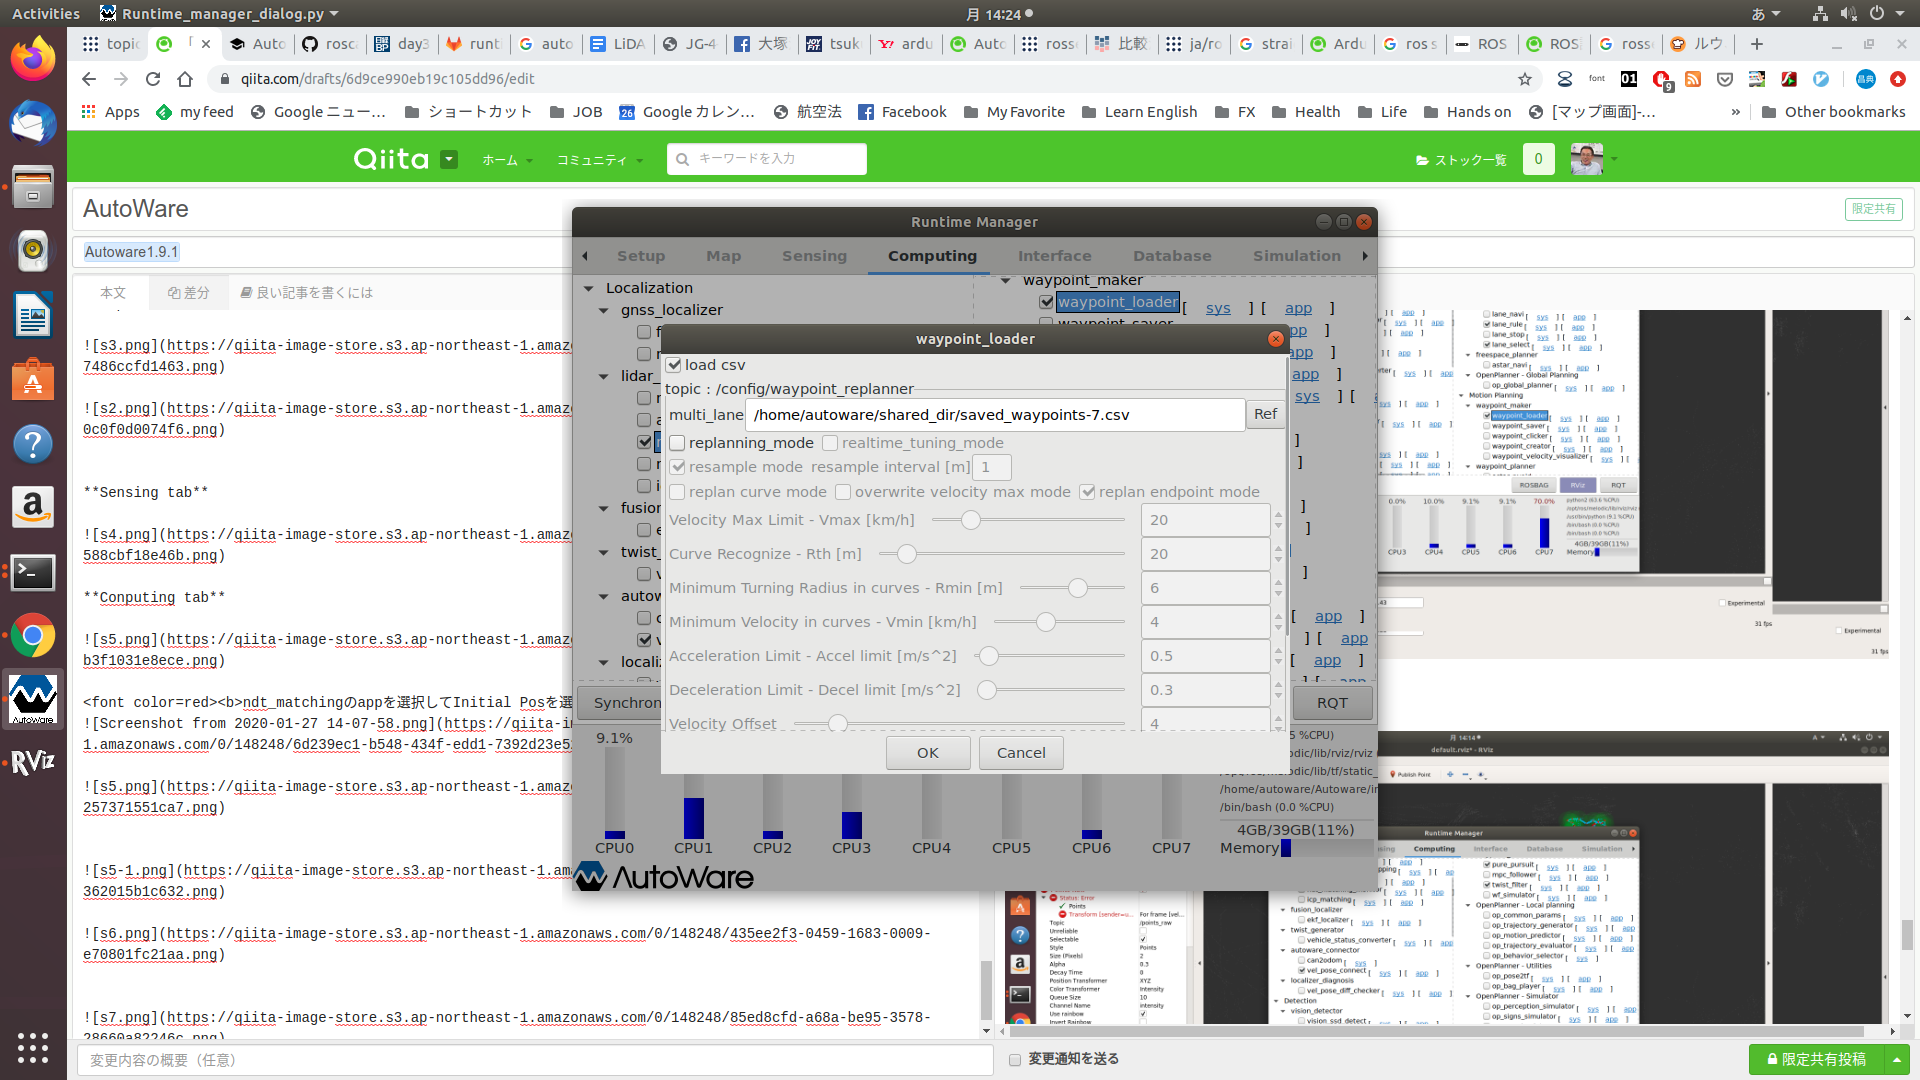
waypointが保存されるcsvファイルは同一名称を指定すると上書きではなくデータ追加モードになるので注意が必要、この時csvのヘッダーも追加されてしまうので経路追従がうまく動かなくなる。
3D MAP作成用データ収集
$ roscore&
$ roslaunch velodyne_pointcloud VLP16_points.launch
$ cd AutowareData/
$ rosrun /rosbag record -O vlp-16.bag /velodyne_points
3D MAP作成
$ rosrun topic_tools relay /velodyne_points /points_raw
走行中に自己位置推定に失敗する時は、
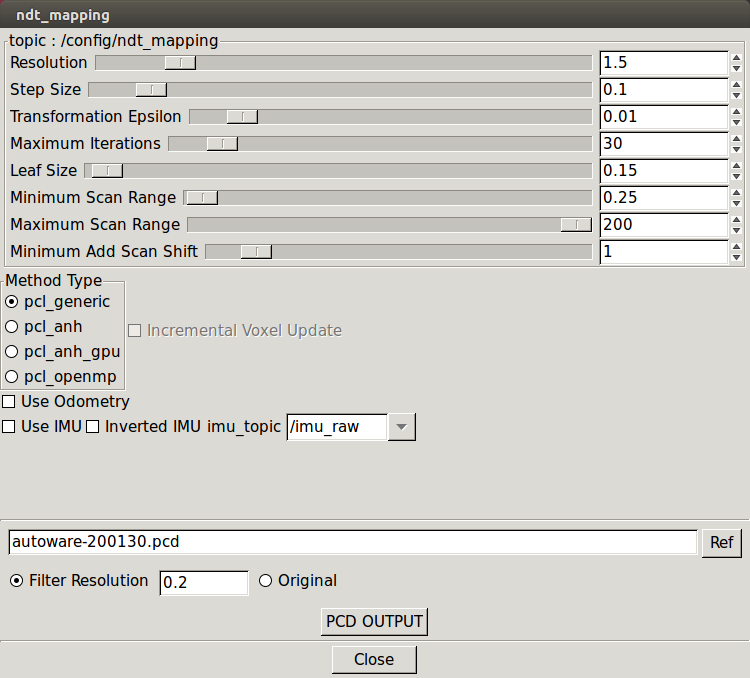
[Computing tab]-->ndt_mappong [app]をクリックしResolutionの値を0.25くらい上下に変更して、
より良い値を探す。
blamを使ったMAP作成
JetsonTX2用のautowareのdockerイメージだとblamを使って作成したMAPでないと自己位置推定がうまくできず、
経路作成ができないのでblamを使ってMAP作成を試みたが以下のエラーでだめ。
[ INFO] [1580264864.539034496]: Processing 1 out of Total 2207
blam_slam_offline: /build/pcl-OilVEB/pcl-
1.8.1+dfsg1/octree/include/pcl/octree/impl/octree_pointcloud.hpp:688: void
pcl::octree::OctreePointCloud<PointT, LeafContainerT, BranchContainerT,
OctreeT>::genOctreeKeyforPoint(const PointT&, pcl::octree::OctreeKey&) const [with PointT =
pcl::PointXYZ; LeafContainerT = pcl::octree::OctreeContainerPointIndices; BranchContainerT =
pcl::octree::OctreeContainerEmpty; OctreeT =
pcl::octree::OctreeBase<pcl::octree::OctreeContainerPointIndices,
pcl::octree::OctreeContainerEmpty>]: Assertion `key_arg.x <= this->max_key_.x' failed.
[blam/blam_slam-1] process has died [pid 5301, exit code -6, cmd
/home/miyamoto/blam/internal/devel/lib/blam_slam/blam_slam_offline __name:=blam_slam __log:=/home/miyamoto/.ros/log/8fd4e418-423e-11ea-9a07-4ccc6a7d4036/blam-blam_slam-1.log].
log file: /home/miyamoto/.ros/log/8fd4e418-423e-11ea-9a07-4ccc6a7d4036/blam-blam_slam-1*.log
all processes on machine have died, roslaunch will exit
shutting down processing monitor...
... shutting down processing monitor complete
done
PointCloudMapper.cc
change

if (!map_octree_->isVoxelOccupiedAtPoint(p)) {

to:

double min_x, min_y, min_z, max_x, max_y, max_z;
map_octree_->getBoundingBox(min_x, min_y, min_z, max_x, max_y, max_z);
bool isInBox = (p.x >= min_x && p.x <= max_x) && (p.y >= min_y && p.y <= max_y) && (p.z >= min_z && p.z <= max_z);

if (!isInBox || !map_octree_->isVoxelOccupiedAtPoint(p)) {

~/blam/internal/src/point_cloud_mapper/src/PointCloudMapper.cc

修正後はこんな感じ
if (map_mutex_.try_lock()) {
    // Iterate over points in the input point cloud, inserting them into the map
    // if there is not already a point in the same voxel.
    for (size_t ii = 0; ii < points->points.size(); ++ii) {
      const pcl::PointXYZ p = points->points[ii];
      double min_x, min_y, min_z, max_x, max_y, max_z;                          // added 20200129
      map_octree_->getBoundingBox(min_x, min_y, min_z, max_x, max_y, max_z);    // added 20200129 from
      bool isInBox = (p.x >= min_x && p.x <= max_x) && (p.y >= min_y && p.y <= max_y) && (p.z >= min_z && p.z <= max_z);  // added 20200129 from
      if (!isInBox || !map_octree_->isVoxelOccupiedAtPoint(p)) {                // added 20200129 from
 //     if (!map_octree_->isVoxelOccupiedAtPoint(p)) {                          // coment out 20200129
       map_octree_->addPointToCloud(p, map_data_);
    incremental_points->push_back(p);
  }
}
https://project.nikkeibp.co.jp/mirai/jusk1906/day3.pdf
https://github.com/autowarefoundation/autoware/issues/1489
狭い場所や室内のMAPを作成する。
[Computing tab]->ndt_mappingの[app]をクリックしminimum Scan rangeを0.25に設定する。
LiDAR
3DLiDARでないとダメ。
2016年10月現在 AutoWareで動作可能なLiDAR
| メーカー | 製品 | 価格 |
|---|---|---|
| Velodyne | HDL-64e | $80,000 |
| Velodyne | HDL-32e | $30,000 |
| Velodyne | VLP-16 | $4,400 |
| Hokuyo | 3D-URG | $5,000 |
What kind of LiDAR are you using?
https://discourse.ros.org/t/which-board-microprocessor-should-i-use-i-want-to-use-ros-kinetic-on-ubuntu-16-04-along-with-packages-like-move-base-laser-scan-matcher-for-indoor-autonomous-navigation/11488
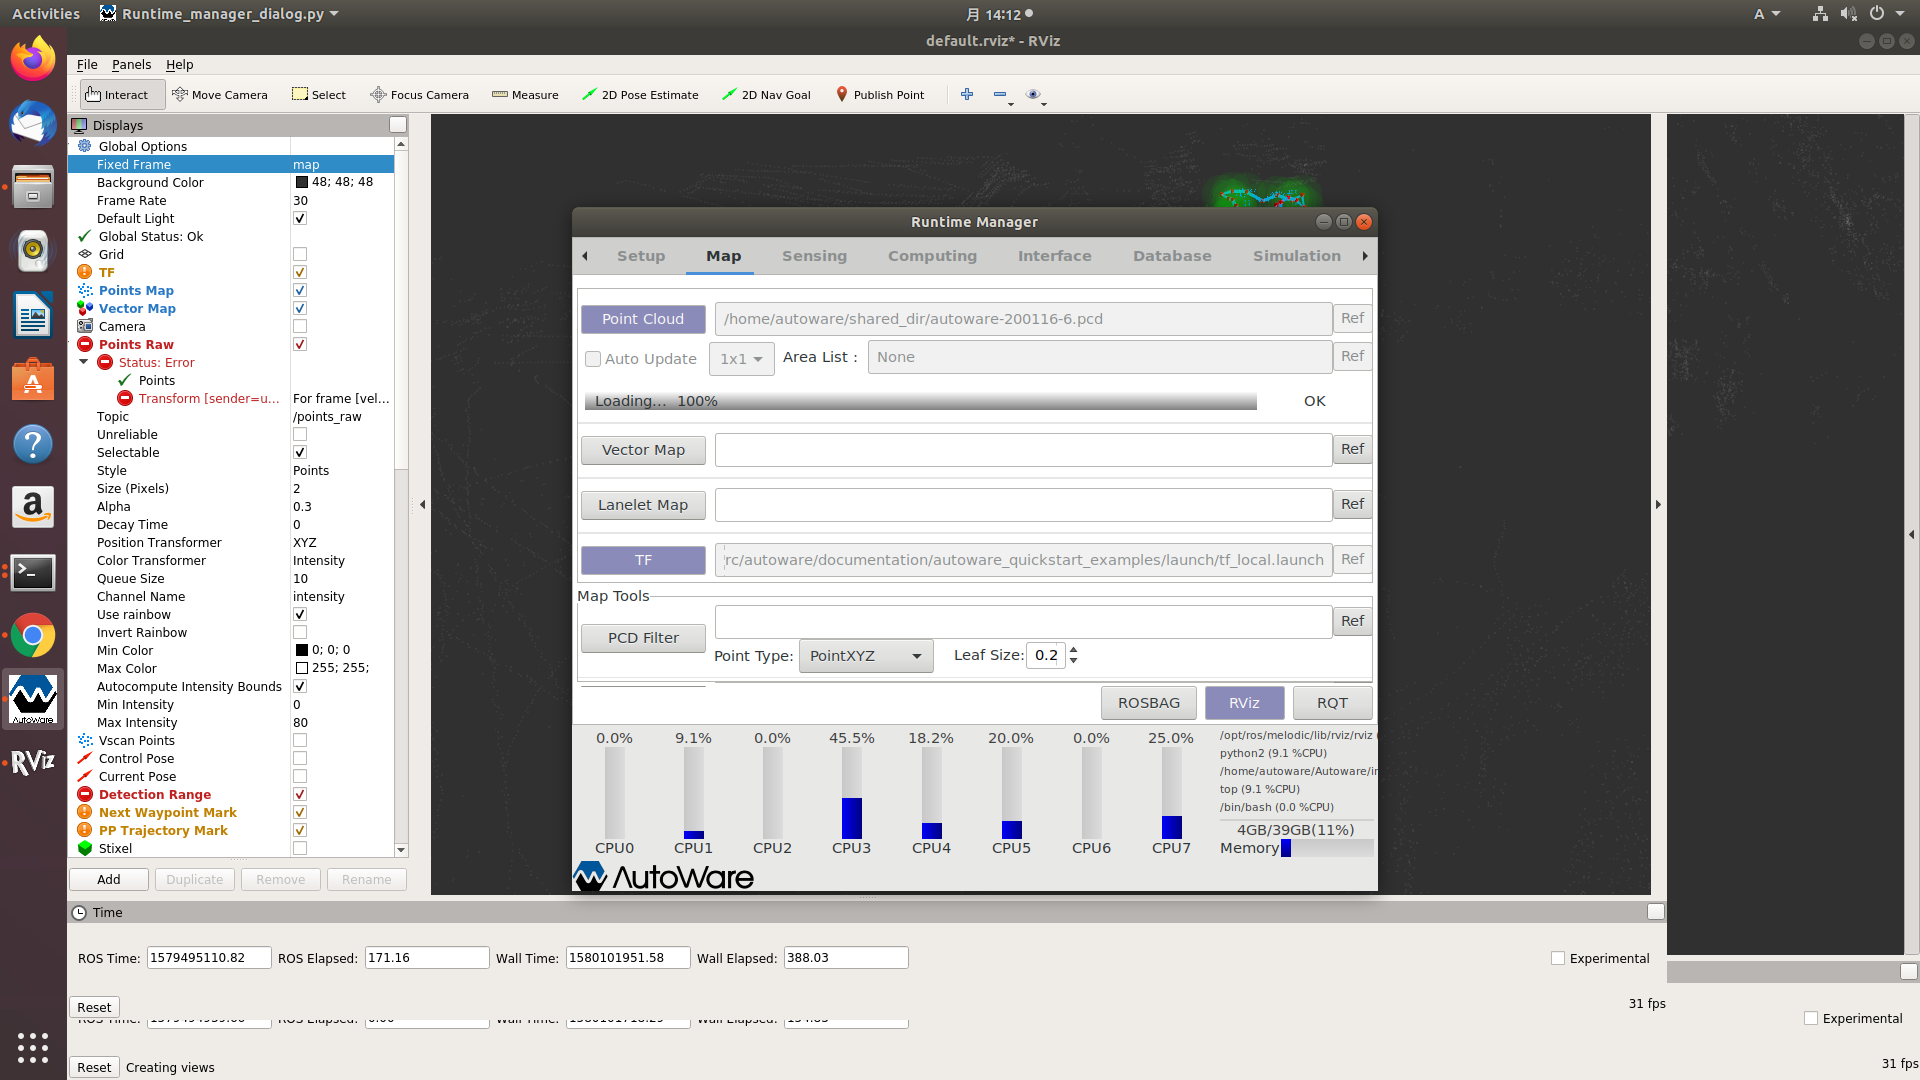
/home/autoware/shared_dir/autoware-200116-6.pcd
/home/autoware/shared_dir/saved_waypoints-6.csv
作成した経路をシュミレーションする。
Setup tab
Map tab
Sensing tab
Conputing tab

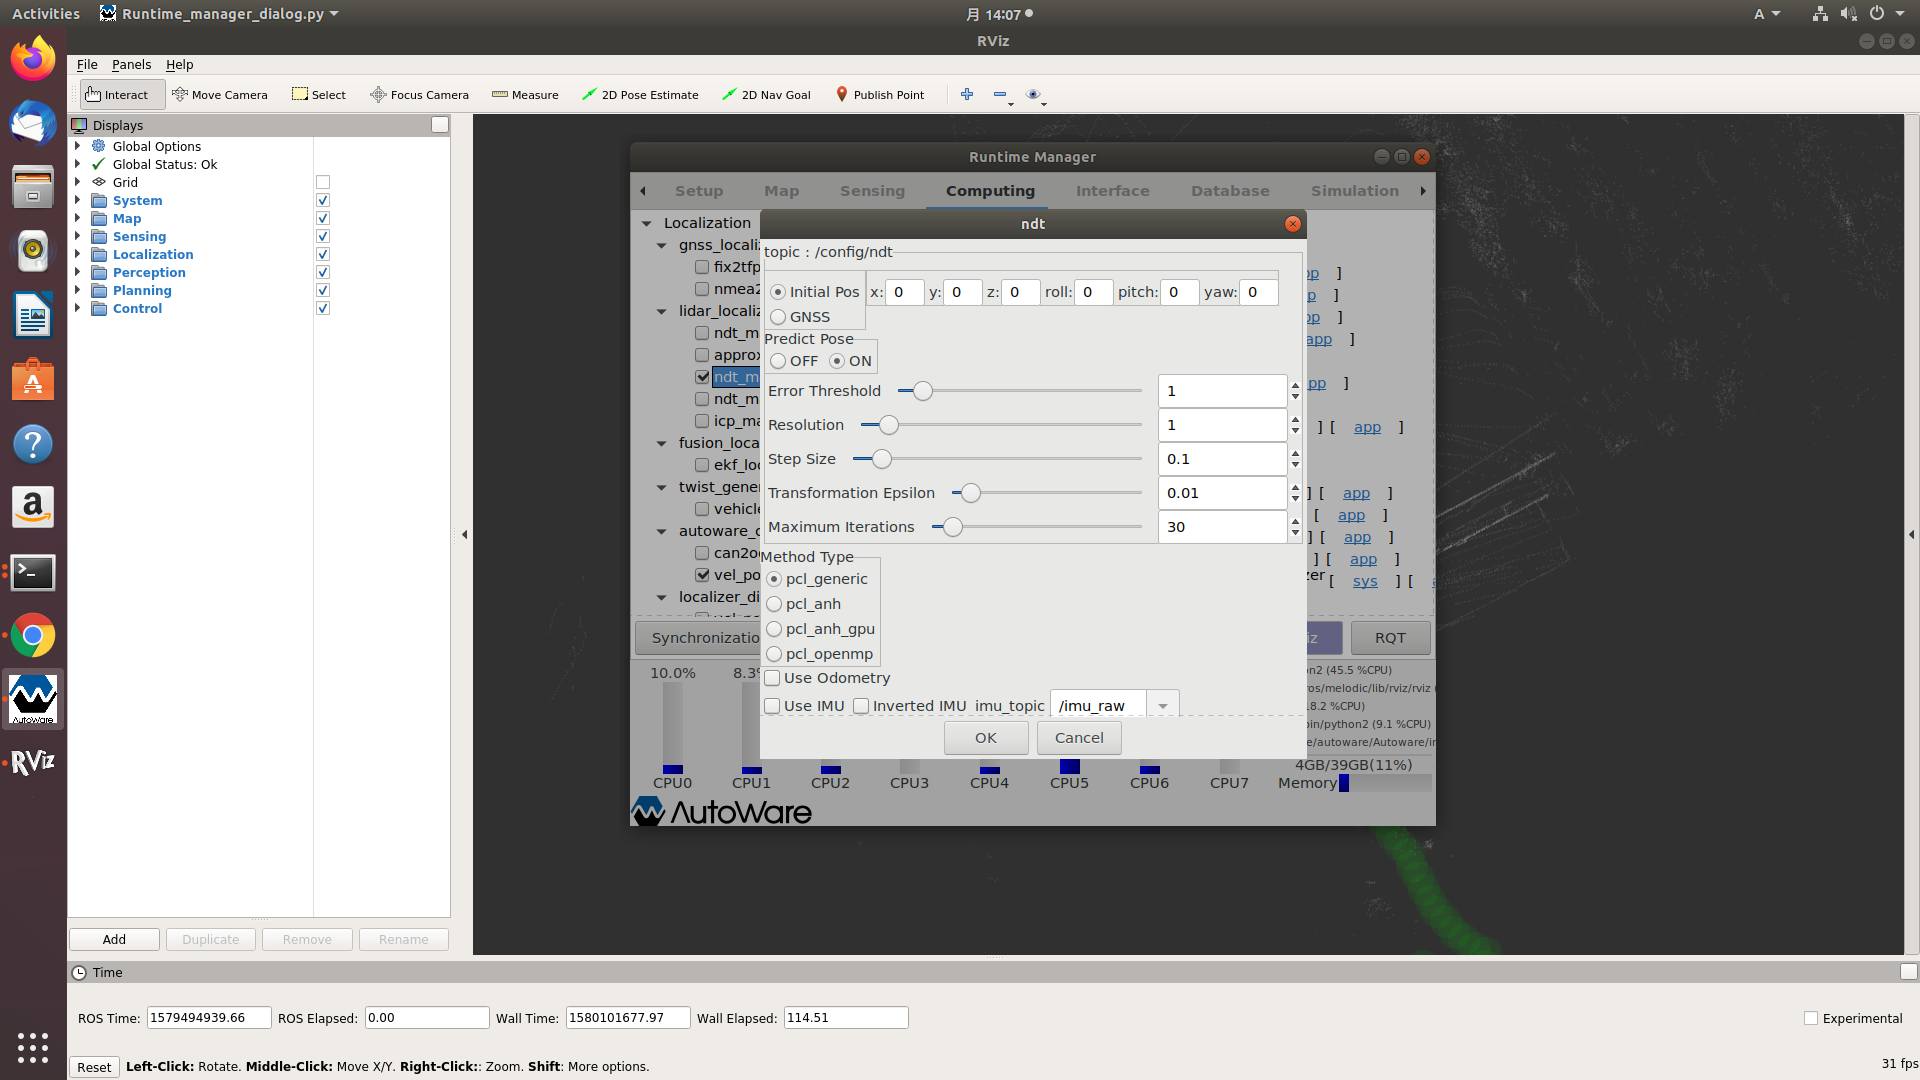
ndt_matchingのappを選択してInitial Posを選択し、zの値を0.5にする。
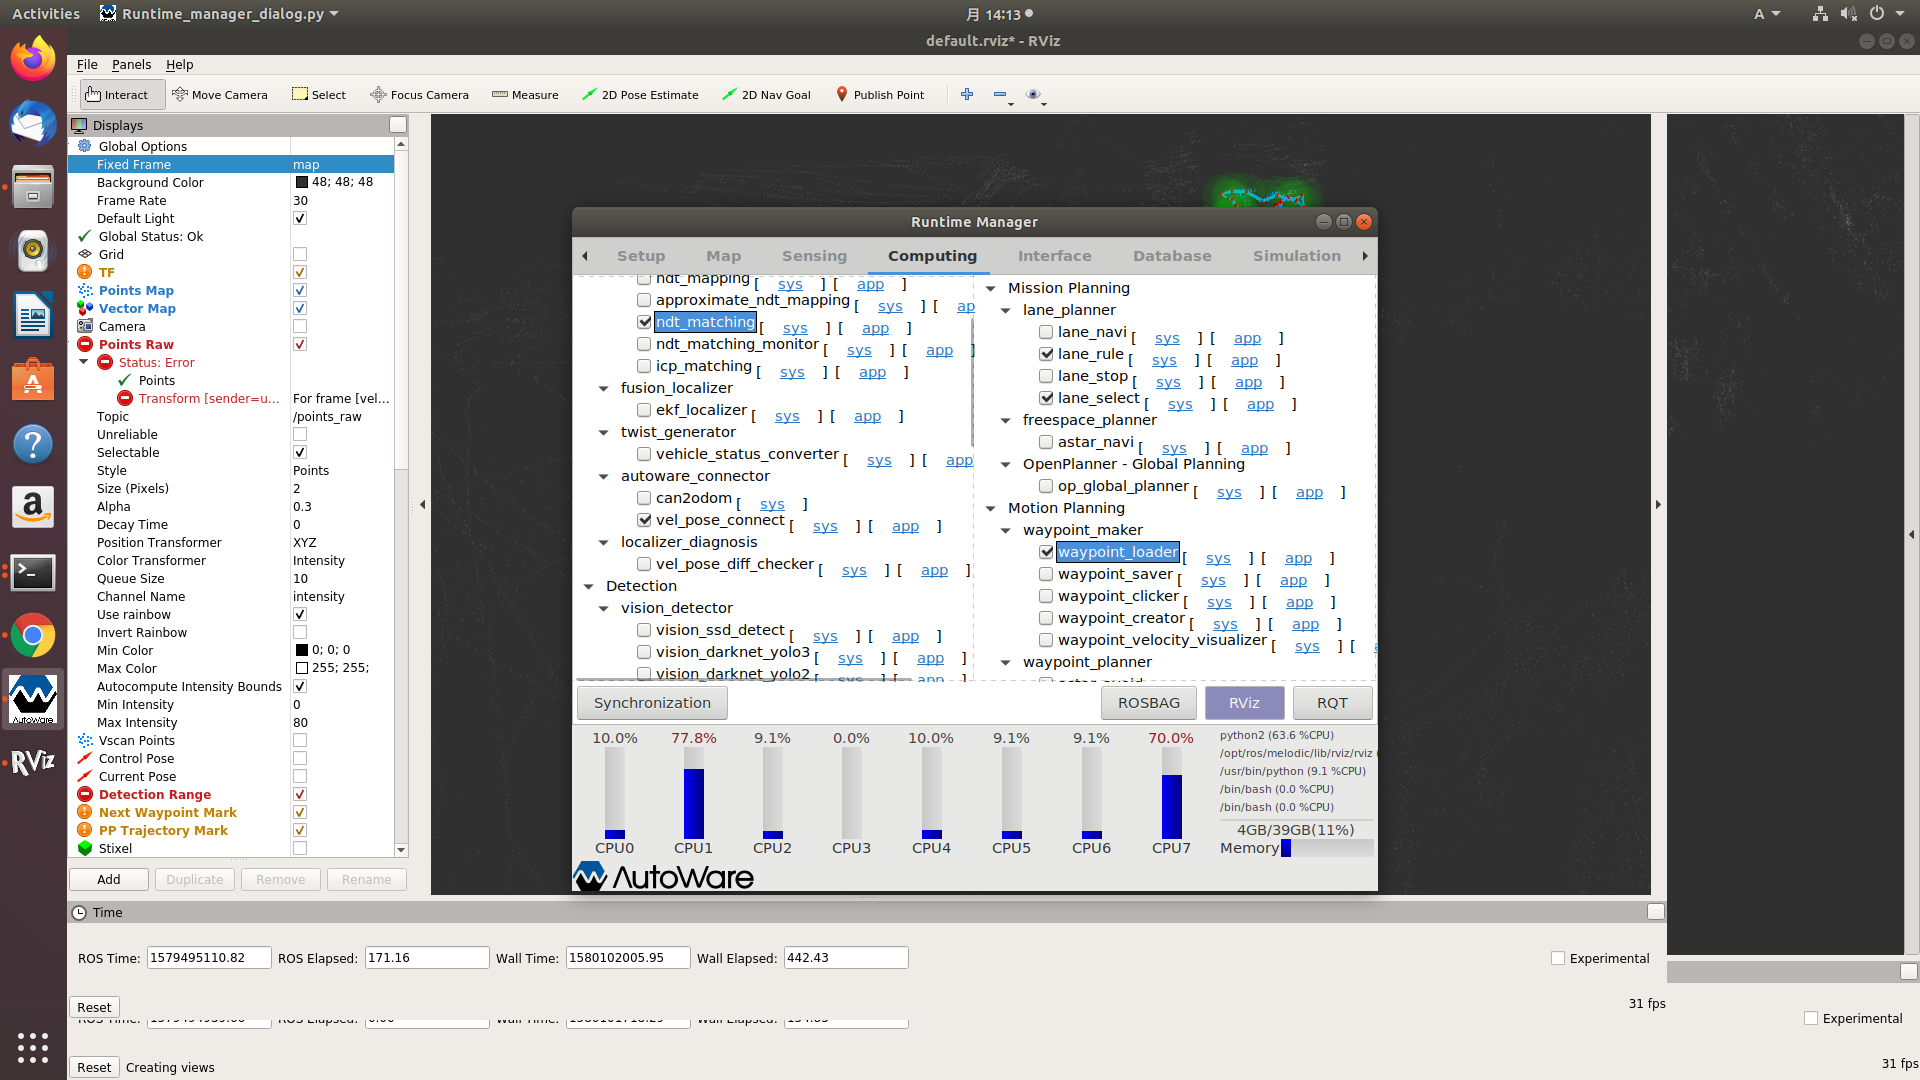

waypoint loaderは作成したwaypointを選択する。