Voxelをやりたい
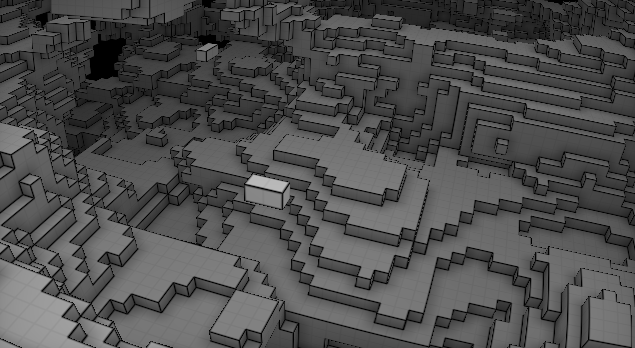
こういう感じのやつ。
https://www.shadertoy.com/view/4dfGzs

けど見た目とは裏腹にコードを見てもよくわからなかったので調べることにした。
使うアルゴリズム
どうやらshadertoyにあがっている多くのvoxelは下記のアルゴリズムを使ってるっぽい。
DDAアルゴリズムを応用させたものらしい。
A Fast Voxel Traversal Algorithm for Ray Tracing
これだけだと理解できなかったのでRay tracingのこの記事のGrid Traverseを参考にした。
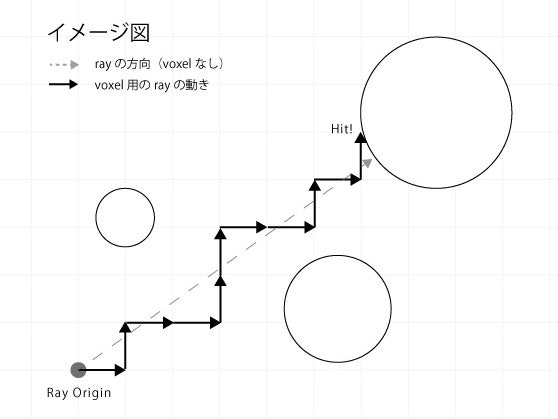
Rayの進み方
voxelを作るためには、世界をグリッド化してrayをグリッド上しか進めないようにする。
※正確さに欠けるイメージ図です。あくまでイメージしやすくするための図。

コード例
vec3 voxelTrace(vec3 ro, vec3 rd){
  const int MAX_RAY_STEPS = 128;
  // ray originをvoxel化。ここからray tracingを始める。
  vec3 voxel = floor(ro);
  // voxel世界でのrayの進む方向
  vec3 rayStep = sign(rd);
  // rayをどの方向に進めるか決めるための比較材料
  vec3 tMax = (voxel - ro) / rd;
  // tMaxに足していく差分
  vec3 tDelta = 1.0 / abs(rd);
  // hitした場合のvoxel位置
  vec3 hitVoxel = voxel;
  // hitしたときのnormal
  vec3 hitNormal;
  // hitしたかどうか
  bool hit = false;
  // voxel用ray全体の長さ
  float hitT = 0.0;

    for(int i=0; i < MAX_RAY_STEPS; i++) {
      // raymarchingと同じ距離関数の組み合わせを用意する。
      float d = mapTheWorld(voxel);
      // hitしたらray tracingをストップ。
      if (d <= 0.0 && !hit) {
        hit = true;
        hitVoxel = voxel;
        break;
      }

      // tMax.x, tMax.y, tMax.zを比較してrayの進む方向を決める。
      if (tMax.x < tMax.y && tMax.x < tMax.z) {
        hitNormal = vec3(-rayStep.x, 0.0, 0.0);
        hitT = tMax.x;
        voxel.x += rayStep.x;
        tMax.x += tDelta.x;
      } else if (tMax.y < tMax.z && tMax.y <= tMax.x) {
        hitNormal = vec3(0.0, -rayStep.y, 0.0);
        hitT = tMax.y;
        voxel.y += rayStep.y;
        tMax.y += tDelta.y;
      } else {
        hitNormal = vec3(0.0, 0.0, -rayStep.z);
        hitT = tMax.z;
        voxel.z += rayStep.z;
        tMax.z += tDelta.z;
      }
   }

   // とりあえずnormalを返す。
   return (hit) ? hitNormal : vec3(1.0);
}

void main(){
  // cameraの処理は省略します
  // roはrayの初期位置
  // rdはrayの方向
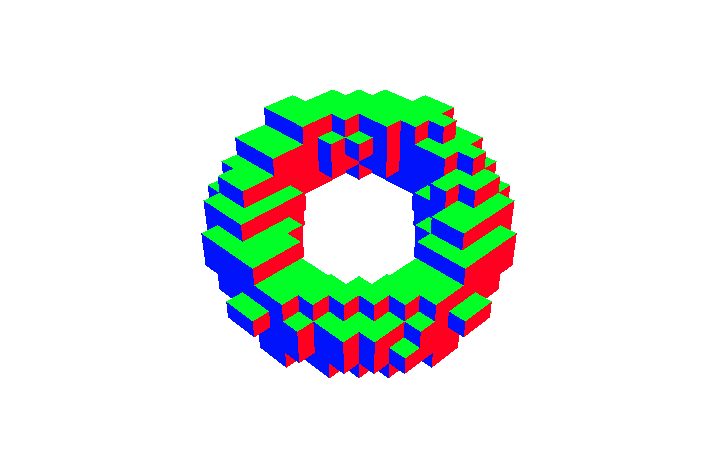
  gl_FragColor = vec4(voxelTrace(ro, rd), 1.0);
}
tMaxの役割
tMaxの役割が分かれば全体的に何をしているかわかりやすいと思うので自分なりに理解したことを解説。
tMaxはrayの進む方向を決める比較材料。
tMax.x, tMax.y, tMax.zを比較して一番小さいものにtDeltaを足していくのをオブジェクトにhitするまで繰り返していく。
これが(たぶん)A Fast Voxel Traversal Algorithm for Ray Tracingで言っていることだと思う。
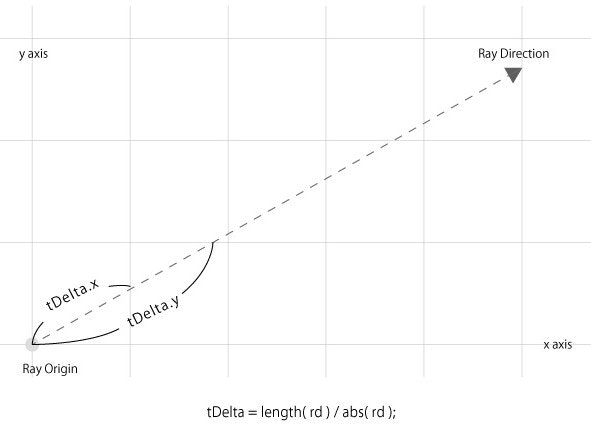
↓tDeltaのイメージ。絶対値をとるのも大きさを比較するため。

今回の例は、tMaxの初期値を( voxel - ro ) / rdにしているけど、カメラワークによって調整する必要があるかもしれない。
気にしなければtMax = tDeltaから初めてもいいと思う。
最後にnormalを使って簡単なlighting
デモ
メインのfragment shader (上部のincludeしている部分)
普通のlightingと同じ方法でできる。
vec3 voxelTrace(vec3 ro, vec3 rd){
  // ....voxelの計算

  vec3 realPos = ro + hitT * rd;

  float lighting = max(0.0, dot(hitNormal, light_position));
  float diffuseIntensity = lighting;
  diffuseIntensity = 0.2 + 0.8 * diffuseIntensity;
  // 個人的好みでグラデーションつけてる
  diffuseIntensity *= (1.0 - (0.41 - realPos.y) * 0.4);
  return (hit) ? mix(shadowColor, cubeColor, diffuseIntensity) : vec3(1.0, 0.9, 0.9);
}
今後の課題
普通にambient occlusionやshadowをやるとvoxelではなくtorusで計算されるためうまいこといかない。
voxelベースで計算する必要があるみたいなのでそれを調べる。

