目的
- 先輩から教わったJavaScript(以降、js)の内容をもとにlaravel6のビューにjsを書いてみる
環境
- ハードウェア環境
| 項目 | 情報 |
|---|---|
| OS | macOS Catalina(10.15.5) |
| ハードウェア | MacBook Pro (13-inch, 2020, Four Thunderbolt 3 ports) |
| プロセッサ | 2 GHz クアッドコアIntel Core i5 |
| メモリ | 32 GB 3733 MHz LPDDR4 |
| グラフィックス | Intel Iris Plus Graphics 1536 MB |
- ソフトウェア環境
| 項目 | 情報 | 備考 |
|---|---|---|
| PHP バージョン | 7.4.8 | Homebrewを用いてこちらの方法で導入→Mac HomebrewでPHPをインストールする |
| Laravel バージョン | 6.X | commposerを用いてこちらの方法で導入→Mac Laravelの環境構築を行う |
| MySQLバージョン | 8.0.19 for osx10.13 on x86_64 | Homwbrewを用いてこちらの方法で導入→Mac HomebrewでMySQLをインストールする |
情報
- 下記の記事をもとにjsの基本を先輩から教わった。
- 教わった内容を体験すべく自分でも実際に手を動かしてみた。
- 動作するjsのソースを自分で書くことができたのでこれを利用してlaravel6のアプリのビューにjsを乗せて動作させてみようと思う。
- 説明で実行するコマンドは特筆しない限り前のコマンドと同様のディレクトリで実行する。
- 筆者は本記事の検証をMacのローカルで実施している。
条件
- 環境に記載したlaravelのローカル開発環境が作成できていること。
準備
- 下記のような記載を各ファイルに施し、準備を行った。
-
ルーティング情報
アプリ名ディレクトリ/routes/web.phpRoute::get('/js_test', 'JsTestController@index')->name('js.test.index'); -
コントローラー
アプリ名ディレクトリ/app/Http/Controllers/JsTestController.php<?php namespace App\Http\Controllers; use Illuminate\Http\Request; class JsTestController extends Controller { public function index() { return view('js.index'); } } -
ビュー
アプリ名ディレクトリ/resources/views/js/index.blade.php<p>これはjsのテストページです。</p>
-
直接jsを記載してみる
-
まずは前回の記事で記載したhtmlのscript要素にjsが記載されているままの状態で正しく表示されるか確認してみる。
-
ビューファイルを開き下記の内容に書き換える。
アプリ名ディレクトリ/resources/views/js/index.blade.php<!DOCTYPE html> <html lang="ja"> <head> <meta charset="UTF-8"> <meta http-equiv="X-UA-Compatible" content="IE=edge"> <meta name="viewport" content="width=device-width, initial-scale=1.0"> <title>JavaScript体験</title> </head> <body> <header></header> <main> <p id="str_1"></p> <p id="str_2"></p> </main> <footer></footer> <script type="text/javascript"> class info { constructor(familyName, firstName, sex, age) { this.name = { familyName: familyName, firstName: firstName, }; this.sex = sex; this.age = age; this.getFullname = () => this.name.familyName + this.name.firstName; } }; /* ウインドウが読み込まれたらこの無名関数(クロージャ)内部の処理を実行する命令 */ window.onload = function() { /* html要素のid値と表示する文字列を紐付ける処理 */ document.getElementById('str_1').innerText = new info('tatibana', 'taki', 'man', 17).getFullname(); document.getElementById('str_2').innerText = new info('miyamizu', 'mituha', 'woman', 20).getFullname(); }; </script> </body> </html> -
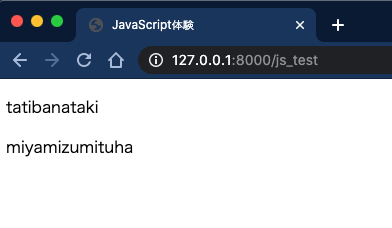
ローカルサーバーを起動してhttp://127.0.0.1:8000/js_testにアクセスし確認したところ下記のように表示された。
-
jsを用いた表示が正常に行われている。
jsの処理を別ファイルに記載してみる
-
次はjsの処理部分を別のファイルに記載してみる。
-
アプリ名ディレクトリで下記コマンドを実行してjsの処理部分を記載するファイルを作成して開く。
$ vi public/js/js_test.js -
下記の内容を開いたファイルに記載する。
アプリ名ディレクトリ/public/js/js_test.jsclass info { constructor(familyName, firstName, sex, age) { this.name = { familyName: familyName, firstName: firstName, }; this.sex = sex; this.age = age; this.getFullname = () => this.name.familyName + this.name.firstName; } }; /* ウインドウが読み込まれたらこの無名関数(クロージャ)内部の処理を実行する命令 */ window.onload = function() { /* html要素のid値と表示する文字列を紐付ける処理 */ document.getElementById('str_1').innerText = new info('tatibana', 'taki', 'man', 17).getFullname(); document.getElementById('str_2').innerText = new info('miyamizu', 'mituha', 'woman', 20).getFullname(); }; -
ビューファイルを開き下記の内容に書き換える。
アプリ名ディレクトリ/resources/views/js/index.blade.php<!DOCTYPE html> <html lang="ja"> <head> <meta charset="UTF-8"> <meta http-equiv="X-UA-Compatible" content="IE=edge"> <meta name="viewport" content="width=device-width, initial-scale=1.0"> <title>JavaScript体験</title> </head> <body> <header></header> <main> <p id="str_1"></p> <p id="str_2"></p> </main> <footer></footer> <script src="{{ asset('/js/js_test.js') }}"> </script> </body> </html> -
ローカルサーバーを起動してhttp://127.0.0.1:8000/js_testにアクセスしスーパーリロード(「command」+「shift」+「r」)を実行し確認したところ下記のように表示された。
-
jsの処理を分割しても同じように表示されたということは分割したjsの処理が正常に読まれている。
コンパイルして表示してみる
-
下記コマンドを実行して一つ前に用意した
アプリ名ディレクトリ/public/jsにある「js_test.js」をアプリ名ディレクトリ/resources/js/直下に移動する。$ mv アプリ名ディレクトリ/public/js/js_test.js アプリ名ディレクトリ/resources/js -
アプリ名ディレクトリ直下にある「webpack.mix.js」を開き下記のように書き換える。
アプリ名ディレクトリ/webpack.mix.jsconst mix = require('laravel-mix'); /* |-------------------------------------------------------------------------- | Mix Asset Management |-------------------------------------------------------------------------- | | Mix provides a clean, fluent API for defining some Webpack build steps | for your Laravel application. By default, we are compiling the Sass | file for the application as well as bundling up all the JS files. | */ mix.js('resources/js/app.js', 'public/js') .js('resources/js/js_test.js', 'public/js') .sass('resources/sass/app.scss', 'public/css'); -
ビューファイルを開き下記の内容に書き換える。
アプリ名ディレクトリ/resources/views/js/index.blade.php<!DOCTYPE html> <html lang="ja"> <head> <meta charset="UTF-8"> <meta http-equiv="X-UA-Compatible" content="IE=edge"> <meta name="viewport" content="width=device-width, initial-scale=1.0"> <title>JavaScript体験</title> </head> <body> <header></header> <main> <p id="str_1"></p> <p id="str_2"></p> </main> <footer></footer> <script src="{{ mix('/js/js_test.js') }}"> </script> </body> </html> -
アプリ名ディレクトリで下記コマンドを実行してコンパイルする。
$ npm run dev -
ローカルサーバーを起動してhttp://127.0.0.1:8000/js_testにアクセスしスーパーリロード(「command」+「shift」+「r」)を実行し確認したところ下記のように表示された。
-
jsの処理を分割してコンパイルしても同じように表示されたということはコンパイルしたjsの処理が正常に読まれている。
-
本当にコンパイルしたあとのディレクトリから見ているか不安になったので
アプリ名ディレクトリ/resources/js/js_test.jsのコードをちょっと書き換えてみる。アプリ名ディレクトリ/resources/js/js_test.jsclass info { constructor(familyName, firstName, sex, age) { this.name = { familyName: familyName, firstName: firstName, }; this.sex = sex; this.age = age; this.getFullname = () => this.name.familyName + this.name.firstName; } }; /* ウインドウが読み込まれたらこの無名関数(クロージャ)内部の処理を実行する命令 */ window.onload = function() { /* html要素のid値と表示する文字列を紐付ける処理 */ document.getElementById('str_1').innerText = new info('立花', '瀧', 'man', 17).getFullname(); document.getElementById('str_2').innerText = new info('miyamizu', 'mituha', 'woman', 20).getFullname(); }; -
アプリ名ディレクトリで下記コマンドを実行してコンパイルする。
$ npm run dev -
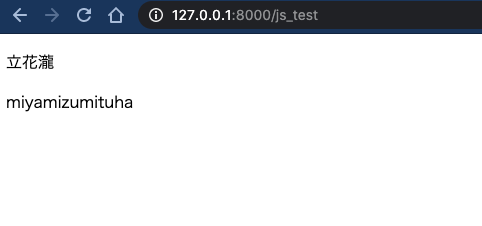
ローカルサーバーを起動してhttp://127.0.0.1:8000/js_testにアクセスしスーパーリロード(「command」+「shift」+「r」)を実行し確認したところ下記のように表示された。
-
修正内容が反映されていたのでしっかり読まれてそうである。

