目的
- Remote Development の導入方法の簡易版を作成しより楽にリモートマシンに接続する方法を書く。
- リモート環境にあるUbuntu18.04に接続する方法を記載する。
- MacからUbuntu18.04に接続する方法を記載する。
実施環境
- OS: macOS High Sierra 10.13.6
- 機種: MacBook Pro (15-inch, Early 2011)
- CPU: Intel(R) Core(TM) i7-2675QM CPU @ 2.20GHz
実施概要
- Visual Studio Code導入
- Remote Developmentを導入
- sshの設定
- 接続テスト
実施詳細
- Visual Studio Code導入
- 下記記事を参考にVisual Studio Codeを導入する。Macの方はインストールする際にMac用のファイルをインストールする。
Mac Visual Studio Code 導入方法 VSCode ダウンロードから日本語化対応まで~画像付き導入解説~←リンク先準備中です。
- 下記記事を参考にVisual Studio Codeを導入する。Macの方はインストールする際にMac用のファイルをインストールする。
- Remote Developmentを導入
- 下記リンク先に飛びInstallをクリックする。
Remote Development - Visual Studio Codeが起動しプラグインがインストールされる。
- 下記リンク先に飛びInstallをクリックする。
- sshの設定
-
ターミナルを開き下記コマンドを実行して
~/.sshにconfigファイルを作成する。# viでconfigファイルを開きたい方 $ vi ~/.ssh/config # nanoでconfigファイルを開きたい方 $ nano ~/.ssh/config -
前述のコマンド実行後にターミナル上でエディタが起動したら下記記載を最終行に追記する。
※記載内容は接続先のPC(Ubuntuマシン)情報に合わせて修正してください。Host 任意のわかりやすい接続先名 HostName IPアドレス User 接続先ユーザ名 # 筆者の環境の例 Host extUbuntu HostName XXX.XXX.XXX.XXX User miriwo -
保存してエディタを閉じる。
-
- 接続テスト
- Visual Studio Codeを起動する。
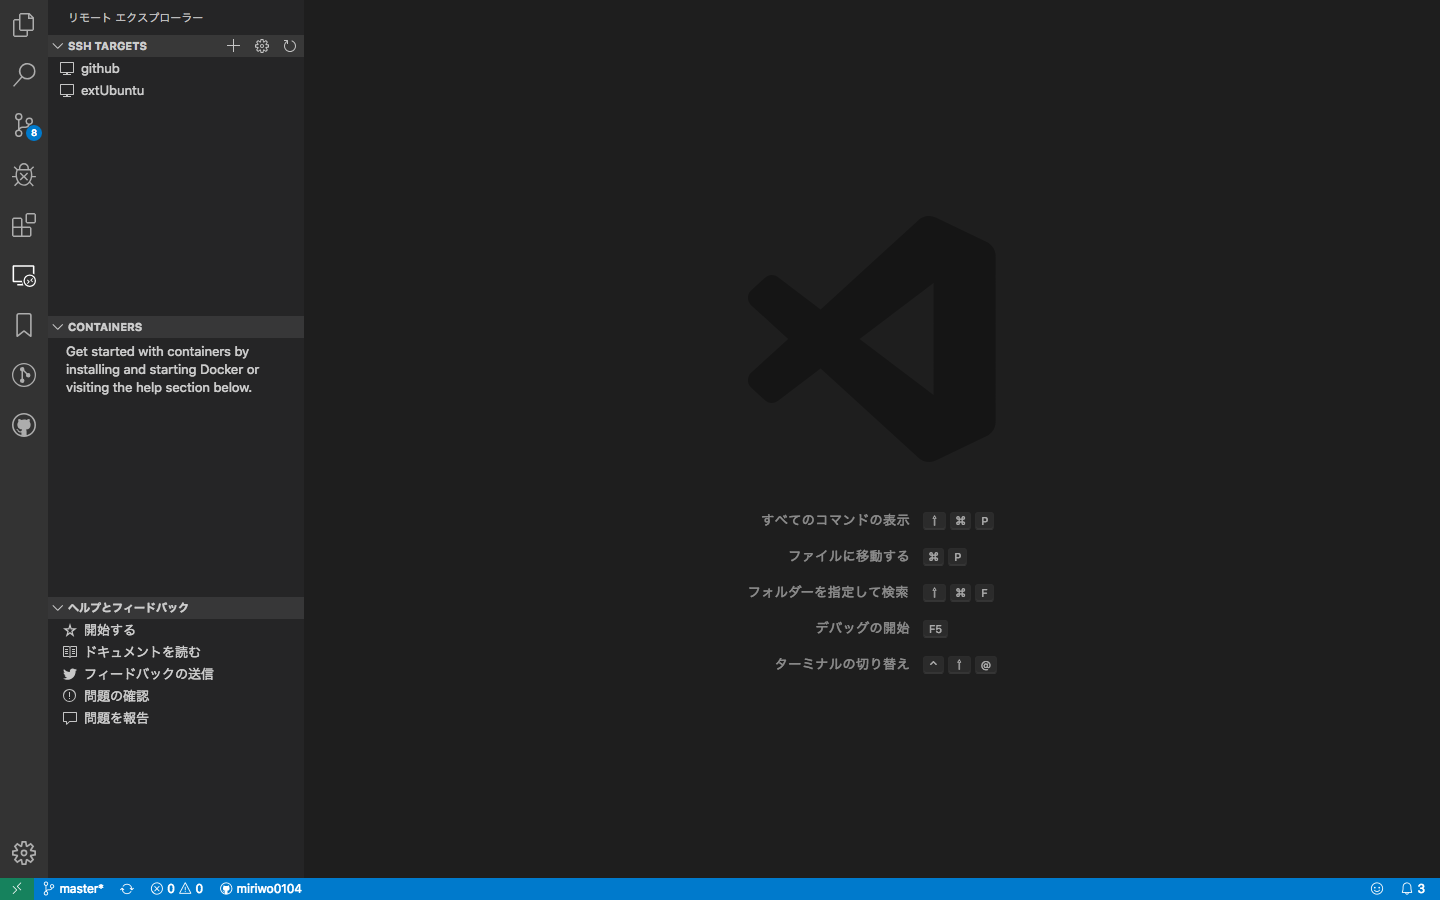
- 正しくsshファイルに設定がなされていると、サイドバーにあるプラグインインストールアイコンのしたのRemote Developmentのアイコンをクリックした時に「SSH TERGET」直下にSSHのHostに記載した接続先名が記載される。(画像のextUbuntuと表示されている部分)

- サイドバーの「SSH TERGET」直下にSSHのHostに記載した接続先名を右クリック。(画像のextUbuntuと表示されている部分)する。
- 「Conect to Host in New Window」をクリックする。
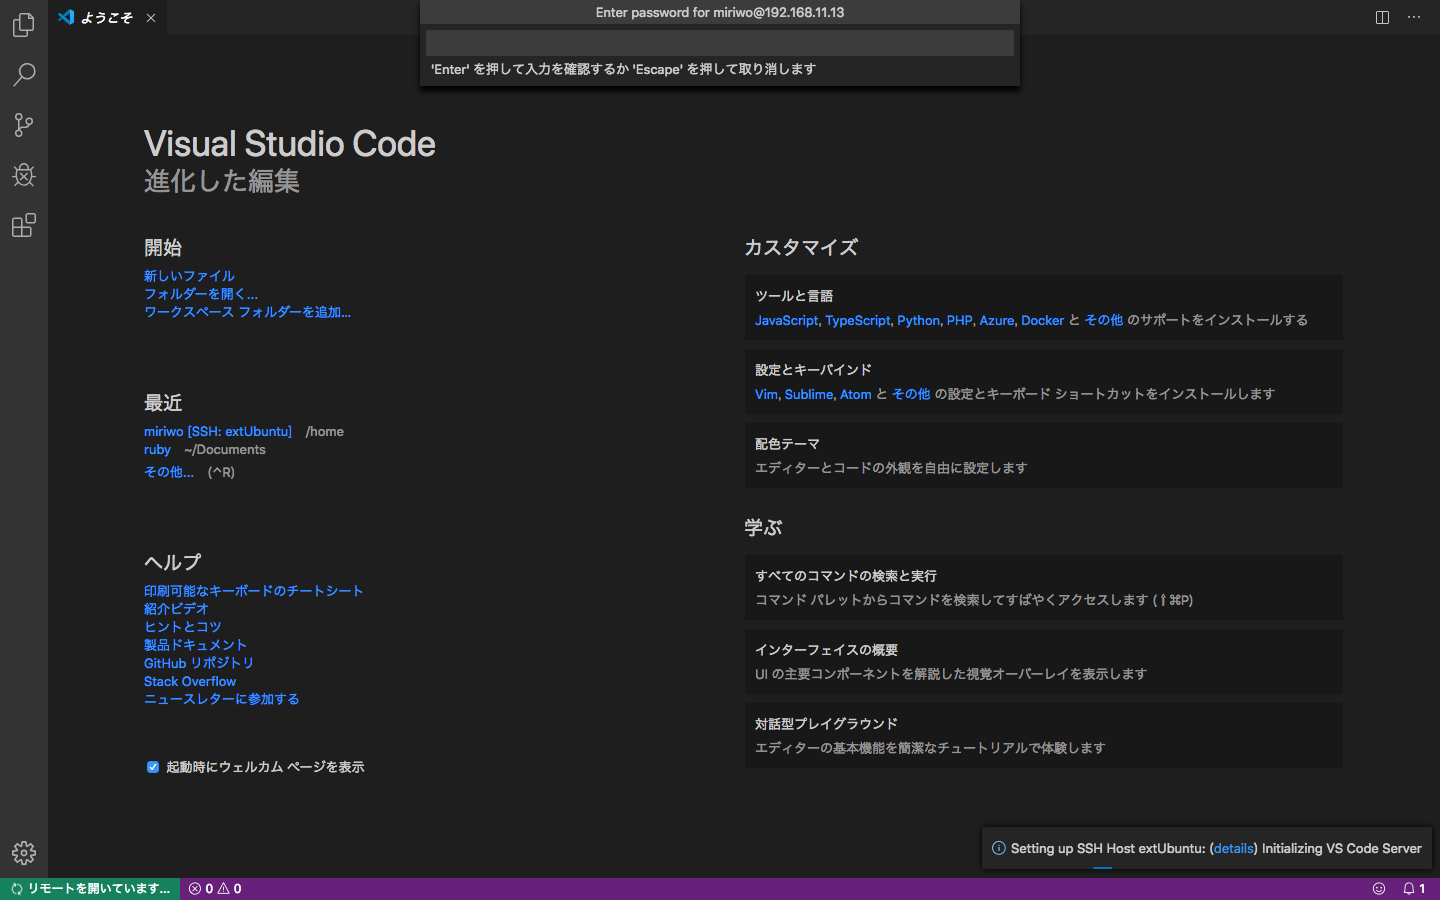
- 新しくVisual Studio Codeが起動して下記の画面になるのでパスワードを入力してEnterを押す。(画面上部にパスワード入力窓が出ている)

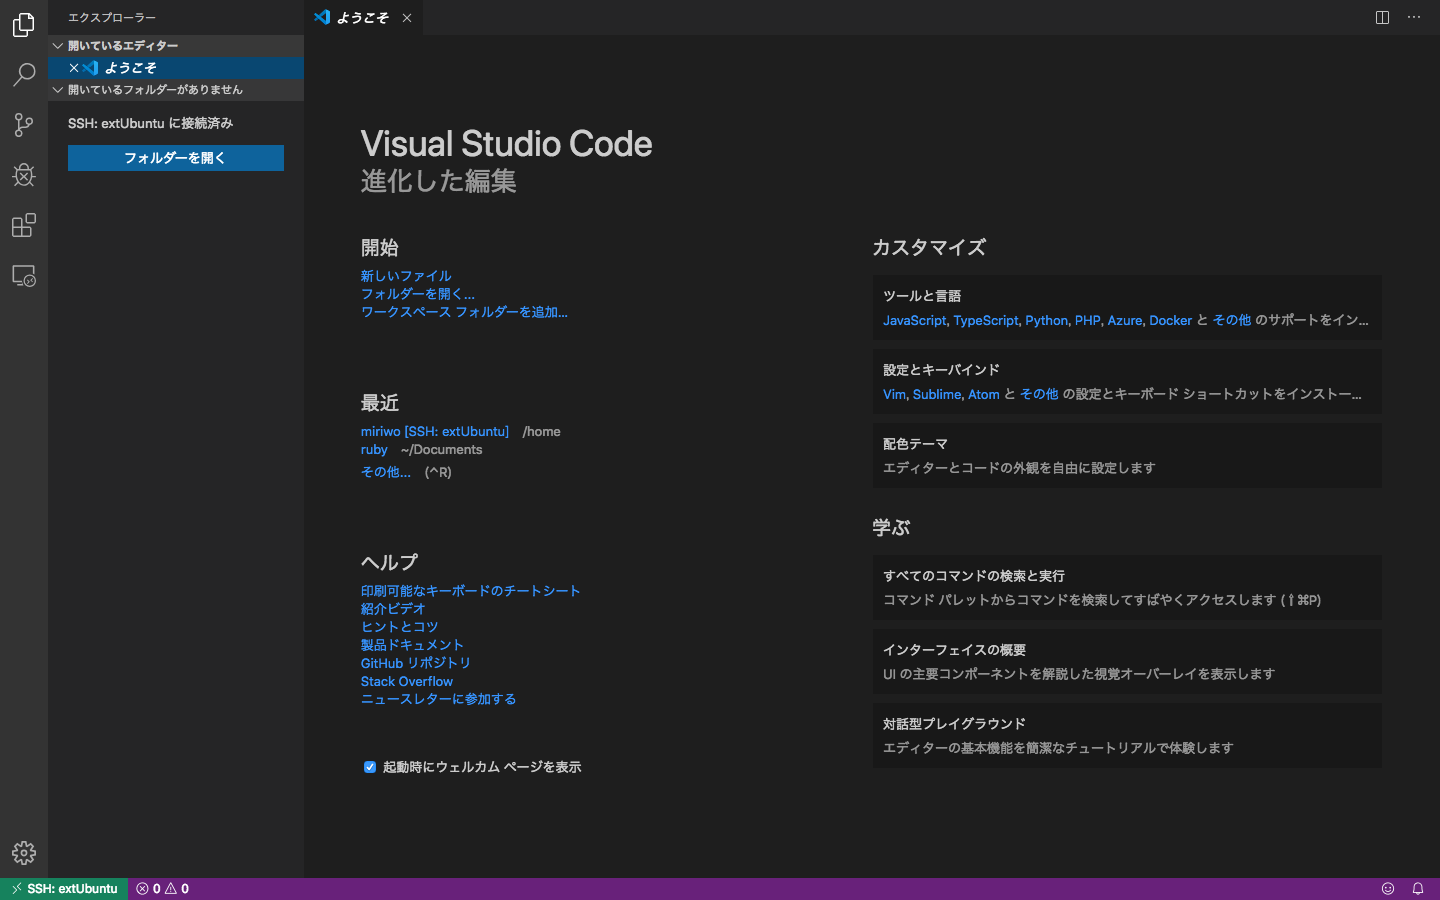
- 少し待ってサイドバーを開いた時に下記画像のように「SSH:SSHで設定した接続名に接続済み」と出れば接続完了である。
