はじめに
だいぶ日が空いてしまいましたが、Railsチュートリアルの第14章のメモだけ残しておきます。
RelationShipモデル
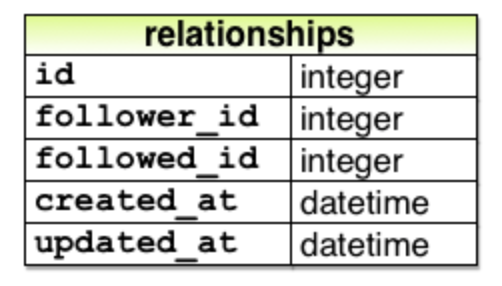
フォローとフォロワーを繋ぐ仕組みを作るために、Userモデル同士を繋げる「relationship」モデルを作成します。
以下のように、フォローしているユーザーIDとフォローされているユーザーIDを持ちます。
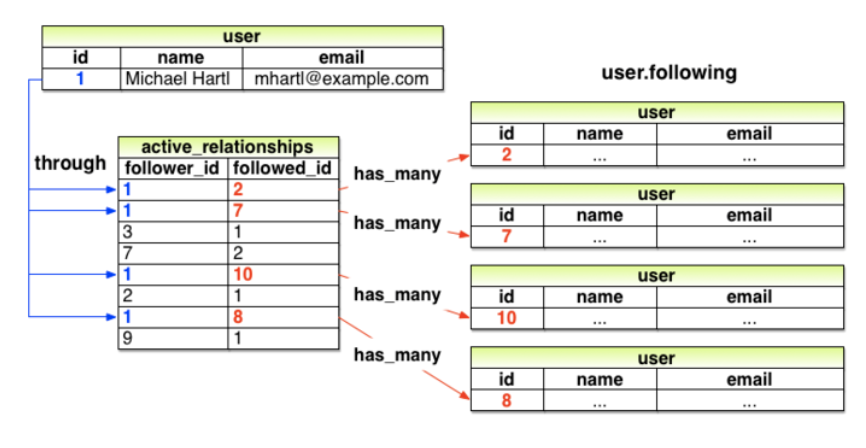
作りたい関係性は、以下のように、relationshipモデルを通してUserモデル同士を繋ぐことです。
フォローしている関係を「active_relationships」、フォローされている関係を「passive_relationships」として、左右非対称の関係を区別します。
上記の関係を示すのに、以前と同様に「has_many」を使いますが、少し記述を追加します。
class User < ApplicationRecord
  has_many :microposts, dependent: :destroy
  has_many :active_relationships, class_name:  "Relationship",
                                  foreign_key: "follower_id",
                                  dependent:   :destroy
  .
  .
  .
end
「active_relationships」と「passive_relationships」はモデル的には同じものを使用するため、そのまま記述した場合、モデルが見つからない状態になってしまいます。
そのため、class_nameでモデルを指定します。
また、relationshipモデルを繋ぐ際のキーになる項目をforeign_keyで指定します。
relationshipモデル自体は以下のように、Userモデル同士を1対1で繋ぎます。
class Relationship < ApplicationRecord
  belongs_to :follower, class_name: "User"
  belongs_to :followed, class_name: "User"
end
これでUserモデル同士の関係性を定義できたため、実際に関係性を利用してUserモデルを繋ぎます。
has_many :followeds, through: :active_relationships
上記のように、「active_relationships」の関係性を通して、followed_idを外部キーにUserモデルを取得する関係を定義します。
しかし、「followeds」という記述が英文法的に不適切なため、以下のように変更します。
has_many :following, through: :active_relationships, source: :followed
sourceで定義することで、「following」は「followed_idの集合」であるとRailsに伝えます。
passive_relationshipsに関しても同様に作成することができます。