Docker + Rails + React
streampack の minsu です。
今年の夏は主に室内で過ごしていましたが、先日帰省した折に中古のカメラを手に入れたので今後はアウトドアな趣味としてお散歩カメラをきめこみたいと考えています。 涼しくなったら、たぶん
目的
フロント: React
バック: Rails
を Docker を利用して構築します。
React + Rails ですが webpacker を利用する方法で行います。
ファイルの用意
まず、Gemfile、Gemfile.lock、Dockerfile、dcocker-compose.ymlを用意します。
source 'https://rubygems.org'
gem 'rails', '5.1.4'
FROM ruby:2.4.1

RUN apt-get update -qq && apt-get install -y mysql-client build-essential nodejs apt-transport-https

RUN curl -sS https://dl.yarnpkg.com/debian/pubkey.gpg | apt-key add -
RUN echo "deb https://dl.yarnpkg.com/debian/ stable main" | tee /etc/apt/sources.list.d/yarn.list
RUN apt-get update && apt-get install -y yarn

RUN mkdir /app
WORKDIR /app
COPY Gemfile /app/Gemfile
COPY Gemfile.lock /app/Gemfile.lock
RUN bundle install
COPY . /app
version: '3'
services:
  app:
    build: .
    command: /bin/sh -c "rm -f /app/tmp/pids/server.pid && bundle exec rails s -p 3000 -b '0.0.0.0'"
    volumes:
      - .:/app
    ports:
      - "3000:3000"
    depends_on:
      - db

  db:
    image: mysql:5.7
    command: mysqld --character-set-server=utf8 --collation-server=utf8_unicode_ci
    environment:
      - MYSQL_ROOT_PASSWORD=root
    volumes:
      - mysql_vol:/var/lib/mysql

volumes:
  mysql_vol:
pid は、開発用WEBサーバを起動するときに tmp/pids/server.pidに書き込まれて終了するときに削除されるのですが、なんらかの要因で削除されずに終了した場合は起動中と判断されて新たにサーバを起動できないのでrm -f /app/tmp/pids/server.pidで起動時に削除します。
rails new
コンテナから rails プロジェクトを作成します。
Gemfileは上書き、DBはMySQLを指定します。
$ docker-compose run app rails new . --force --database=mysql
docker-compose.yml の mysql の rootパスワードを MYSQL_ROOT_PASSWORD=root に設定したので config/database.yml の development に設定を追加しました。
host も同じく指定した db に変更します。
username: root
password: root
host: db
Gemfile に
gem 'webpacker'
gem 'react-rails'
を追加し、 bundle install しなおした後に
$ docker-compose build
次のコマンドを実行します。
$ docker-compose run app rails webpacker:install
$ docker-compose run app rails webpacker:install:react
$ docker-compose run app rails generate react:install
上の2行は rails new のタイミングで --webpack=reactのオプションを追加でも良かったみたいです。
package.json の更新や
app/javascript/packs/配下に application.js、hello_react.jsx が作成されます。
db、 model 作成
適当な model と seeds データを用意して DB を作成後にデータを入れます。
$ docker-compose run app rails g model List title:string desc:string
5.times do
  List.create(
    title: 'title_' + SecureRandom.hex(4),
    desc: 'desc_' + SecureRandom.hex(4)
  )
end
$ docker-compose run app rails db:create
$ docker-compose run app rails db:migrate
作成したモデルを一覧表示させてみます。
controller、view を作成
$ docker-compose run app rails g controller Lists index
  def index
    @lists = List.all
  end
view では javascript_pack_tag と react_component のタグを用いて js を呼び出します。
<%= javascript_pack_tag 'application' %>

<h1>Lists#index</h1>
<%= react_component 'Lists', lists: @lists %>
react component 作成
順番が前後しましたが、 view で呼び出している components を実装します。
$ rails g react:component Lists
のコマンドで app/javascript/components/Lists.js が作成されるので編集します。
import React from "react"
import PropTypes from "prop-types"
export default class Lists extends React.Component {
  constructor(props){
    super(props)
    this.state = {
      lists: []
    };
  }
  componentDidMount(){
    this.setState({
      lists: this.props.lists
    })
  }
  render () {
    return (
      <div>
        <table>
          <thead>
            <tr>
              <th>ID</th>
              <th>Title</th>
              <th>Description</th>
              <th>created_at</th>
              <th>updated_at</th>
            </tr>
          </thead>
          <tbody>
            {this.state.lists.map((list) => {
              return (
                <tr key={list.id}>
                  <td>{list.id}</td>
                  <td>{list.title}</td>
                  <td>{list.desc}</td>
                  <td>{list.created_at}</td>
                  <td>{list.updated_at}</td>
                </tr>
              );
            })}
          </tbody>
        </table>
      </div>
    );
  }
}
動作確認
rails, webpack を立ち上げます。
$ docker-compose up -d
$ docker-compose run app bin/webpack-dev-server
http://localhost:3000/lists/index にアクセスします。
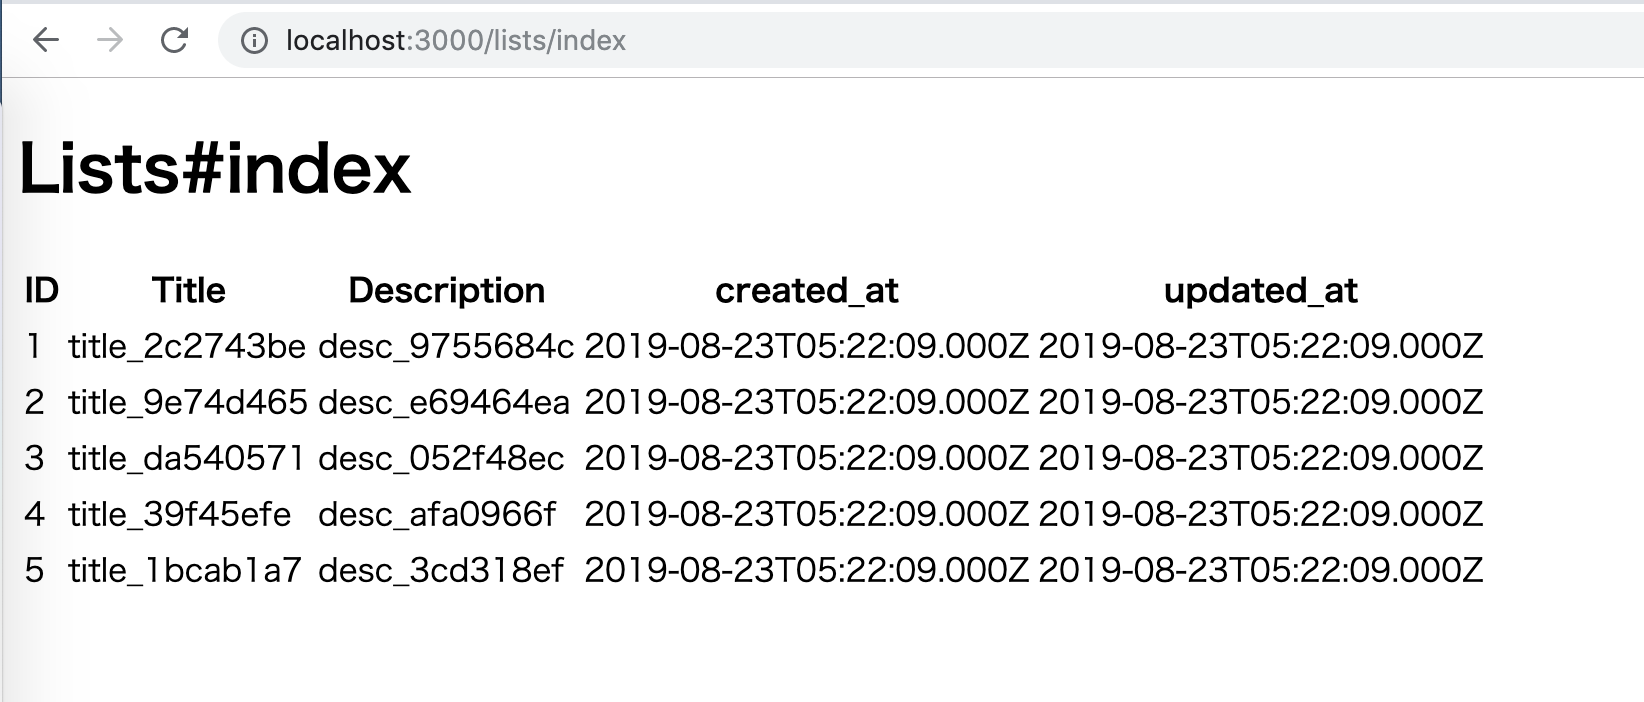
無事に一覧が表示されました。
まとめ
起動と表示確認までを行いました。
この状態では何の機能もないので React での CRUD 操作を実装するまでを追記、または新しく記事にしたいと思います。