「GitHub Copilot chat」が使えるようになったので、Visual Studio 2022で使ってみました。
その手順の説明です。
0. Copilot Chatの承認
GitHub previewsからCopilot chatの[Join the waitlist]をクリックしてウェイトリストに並びます。
許可されると以下のようなメールが来ます。

1. 拡張機能のインストール
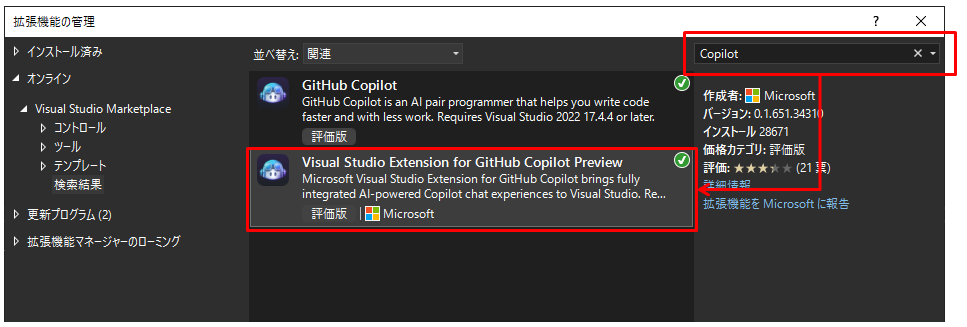
機能を有効化するため[拡張機能] - [拡張機能の管理]でメニューを開いて、「Visual Studio Extension for GitHub Copilot Preview」をインストールします。(右上の検索で「Copilot」と検索すると楽)

2. Visual Studioにサインイン
Visual Studioの右上のボタンからサインインします。

3. GitHubへのサインイン
さらに、GitHubへもサインインが必要です。
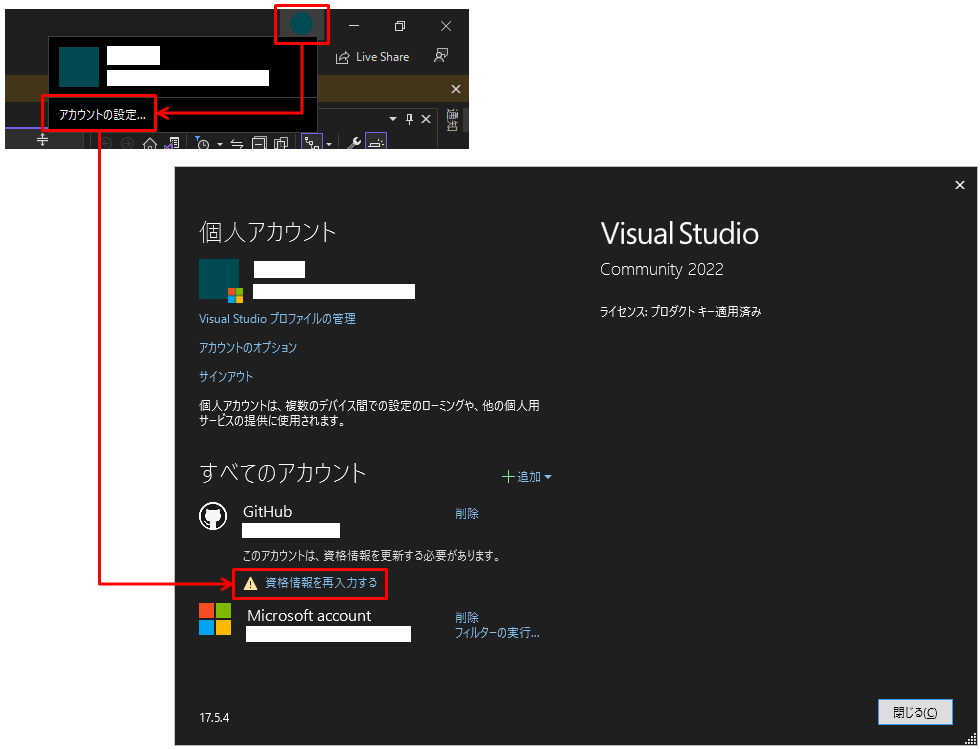
右上のボタンから「アカウントの設定...」でダイアログを表示した後、GitHubの「資格情報を再入力する」からサインインします。

4. GitHub Copilotの確認
これで準備は完了です。
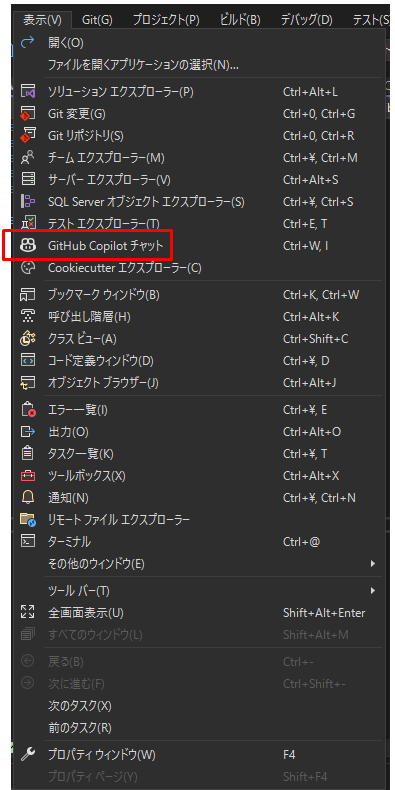
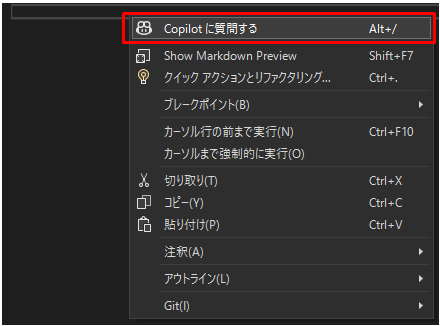
表示に「GitHub Copilotチャット」が表示されたり、エディタ上で右クリックした際のメニューに「Copilotに質問する」が表示されていれば成功です。


5. トラブルシューティング
もし何か問題が発生した場合は、「出力」ウィンドウの「GitHub Copilot chat」を選択して、ログを確認します。

以上、Visual Studio 2022でGitHub Copilot chatを設定して使う方法についての解説でした。
GitHub Copilotは、コーディング作業を大いに助けてくれる優れたツールです。
ぜひこの記事を参考に、設定してみてください。