この記事では二つのWebアプリ(todoとpolls)の作成を同時並行する。
1つ目のアプリ(todo):todoリストのwebアプリ(todoリストの追加、削除、一覧表示だけができる簡単なアプリ)
2つ目のアプリ(polls):投票アプリ(質問を投稿して、その選択肢と投票を行うアプリ)
自分の勉強がてらこの記事を書いているので、間違っている記述があればご連絡していただけるとありがたいです!
1つ目のアプリ作成はこちらを参考にしている(こっちの方が短いけど説明が微妙)
https://paiza.hatenablog.com/entry/2018/02/28/paizacloud_django
2つ目のアプリ作成は公式ドキュメントを参考にしている(こっちの方が長いけど説明が丁寧)
https://docs.djangoproject.com/ja/2.2/
環境構築は公式サイトを見るなりして自分で設定してください。私はMacユーザーで、pip install djangoでインストールできました。
プロジェクトの作成
プロジェクトとは、「データベースの設定やDjango固有のオプション、アプリケーション固有の設定などといった、個々のDjangoインスタンスの設定を集めたもの」である。
プロジェクトを作りたいところに移動して、以下のプロジェクト作成のためのコマンドを入れる。
django-admin startproject 'project_name'
これで’project_name’という名前のプロジェクトが作れる。
今回は公式チュートリアルに倣ってmysiteという名前で作る。
django-admin startproject mysite
これでmysiteというディレクトリが生成される。その中にmanage.pyとmysiteというディレクトリが作成され、mysiteの中には__init__.py settings.py urls.py wsgi.pyが入っている。
ディレクトリの構造
mysite/
    manage.py
    mysite/
        __init__.py
        settings.py
        urls.py
        wsgi.py
作られたそれぞれファイルについての説明は公式サイトの引用
・外側のmysite/ルートディレクトリは、このプロジェクトのただの入れ物です。この名前はDjangoに関係しませんので、好きな名前に変更できます。
・manage.py: Djangoプロジェクトに対する様々な操作を行うためのコマンドラインユーティリティです。詳しくはdjango-adminとmanage.py内のmanage.pyを参照してください。
・内側のmysite/ディレクトリは、このプロジェクトの実際のPythonパッケージです。この名前がPythonパッケージの名前であり、importの際に使用する名前です(例えばimport mysite.urls)。
・mysite/__init__.py: このディレクトリがPythonパッケージであることをPythonに知らせるための空のファイルです。
・mysite/settings.py: Djangoプロジェクトの設定ファイルです。
・mysite/urls.py: DjangoプロジェクトのURL宣言、いうなればDjangoサイトにおける「目次」に相当します。
・mysite/wsgi.py: プロジェクトをサーブするためのWSGI互換Webサーバーとのエントリーポイントです。
サーバーの起動
settings.pyの中のALLOWED_HOSTSを['*']とすることにより、どのホストでも接続可能になる。
これはpaiza cloud(todoアプリのチュートリアル)だけ必要になる。デフォルトではlocalhostのみアクセス可能なため、Macでやる分には変更不要。
一番上のmysiteの中のmanage.pyを動かすことでサーバー起動ができる。コマンドは以下。
python3 manage.py runserver
そうすると
Watching for file changes with StatReloader
Performing system checks...

System check identified no issues (0 silenced).

You have 17 unapplied migration(s). Your project may not work properly until you apply the migrations for app(s): admin, auth, contenttypes, sessions.
Run 'python manage.py migrate' to apply them.

May 30, 2019 - 01:25:12
Django version 2.2.1, using settings 'mysite.settings'
Starting development server at http://127.0.0.1:8000/
Quit the server with CONTROL-C.
と出てくるので、ウェブブラウザで http://127.0.0.1:8000/ にアクセスしてこのロケットの表示が出ればOK

起動することでdb.sqlite3がmanage.pyと同じところに作られ、mysiteの中のmysiteの中に__pycache__というディレクトリが作られる。
mysite/
    db.sqliste3
    manage.py
    mysite/
        __pycache__
        __init__.py
        settings.py
        urls.py
        wsgi.py
アプリの作成
これからWebアプリケーションの作成に入る。
アプリケーション(これから作るtodoリストとか投票アプリ)とプロジェクト(今作ったmysiteのこと)の違いについては公式サイトの引用をどうぞ
プロジェクトとアプリケーションの違いとは何でしょうか?
アプリケーションとは、実際に何らかの処理を行う Web アプリケーションを指します。例えばブログシステムや公開レコードのデータベース、単純な投票アプリといった具合です。プロジェクトとは、あるウェブサイト向けに設定とアプリケーションを集めたものです。一つのプロジェクトには複数のアプリケーションを入れられます。また、一つのアプリケーションは複数のプロジェクトで使えます。
python3 manage.py startapp 'app_name'
これで'app_name'というアプリが作られる。
今回はtodoリストを表示するアプリをtodo、投票アプリをpollsという名前で作成する。
python3 manage.py startapp todo
python3 manage.py startapp polls
これでmysiteの中にtodoというディレクトリとpollsというディレクトリが作成される。今のディレクトリの状況をまとめる。
mysite/
    db.sqliste3
    manage.py
    mysite/
        __pycache__
        __init__.py
        settings.py
        urls.py
        wsgi.py
    todo/
        __init__.py
        admin.py
        apps.py
        migrations/
            __init__.py
        models.py
        tests.py
        views.py
    polls/
        __init__.py
        admin.py
        apps.py
        migrations/
            __init__.py
        models.py
        tests.py
        views.py
当たり前だけど、現時点でtodoの中とpollsの中身は同じ。
ビュー作成
todoの中のviews.pyでは画面出力に関することを書く。
例えばこんな感じ。
from django.http import HttpResponse
def index(request):
    return HttpResponse("Hello world. You're at the todo index.")
pollsではこんな感じ(todoとほぼ同じ)
from django.http import HttpResponse
def index(request):
    return HttpResponse("Hello, world. You're at the polls index.")
このビューを呼ぶために、URLを対応付けする必要がある。そのためにはURLconfが必要。URLconfを作るためにはディレクトリの中にurls.pyというファイルを作る。中身は後述する。今のディレクトリの構造はこんな感じ。
todo/
    __init__.py
    admin.py
    apps.py
    migrations/
        __init__.py
    models.py
    tests.py
    urls.py      <---こいつを追加する
    views.py

polls/
    __init__.py
    admin.py
    apps.py
    migrations/
        __init__.py
    models.py
    tests.py
    urls.py      <---こいつを追加する
    views.py
urls.pyの中身は以下(作るpythonファイルはtodoもpollsも今回は同じ)
from django.urls import path
from . import views #ここで先ほど作ったviews.pyを入れる

urlpatterns = [
    path('', views.index, name='index') # 最初の''はトップページを指す。二つ目の引数は先ほど作ったview.pyのindex関数のこと。三つ目の引数はただの名前づけ。
]
次のステップはルートのURLconfにtodo.urlsモジュールとpolls.urlsモジュールの記述を反映させること。mysiteというプロジェクトにtodoとpollsのURLがあるよってことを教えるイメージ。全体のrouting設定を行うためにmysite以下のurls.pyを編集する。
今はurls.pyが三つあって、アプリ内のurls.py(mysite/todo/urls.pyとmysite/polls/urls.py)とmysite/mysite/urls.pyがあるから注意。(前者はアプリ内のURL管理で、後者はアプリ全体のURL管理という感じ)
urls.pyの中身について、todo版はこっち
from django.contrib import admin
from django.urls import path, include
from django.views.generic import RedirectView

urlpatterns = [
    path('admin/', admin.site.urls), # URLがadmin/なら、管理用画面に飛ぶ
    path('polls/', include('polls.urls')), # URLがpolls/なら、pollsアプリ内のurls.pyを参照する
    path('todo/', include('todo.urls')), # URLがtodo/なら、todoアプリ内のurls.pyを参照する
    path('',RedirectView.as_view(url='/todo/'), ) # URLが''なら(topディレクトリへのアクセス)はtodoに直接飛ぶ(redirectする)ようにしておく
]
include関数の意味については公式サイトの引用を見て
include() 関数は他の URLconf への参照することができます。 Django が include() に遭遇すると、そのポイントまでに一致した URL の部分を切り落とし、次の処理のために残りの文字列をインクルードされた URLconf へ渡します。
include() の背景にある考えは、 URL を簡単にプラグ & プレイ可能にすることです。 polls には独自の URLconf (polls/urls.py) を持っているので、 "/polls/" 、 "/fun_polls/" や、 "/content/polls/" といった、どんなパスルート下にも置けて、どこに置いてもきちんと動作します。
path関数の意味についてはこれも公式サイトの引用を見て
path() 関数は4つの引数を受け取ります。引数のうちrouteとviewの2つは必須で、kwargs、nameの2つは省略可能です。ここで、これらの引数がどのようなものか見てみましょう。
・route
route は URL パターンを含む文字列です。リクエストを処理するとき、Django は urlpatterns のはじめのパターンから開始し、リストを順に下に見ていきます。要求された URL を一致するものを見つけるまで各パターンと比較します。
パターンはGETやPOSTのパラメーター、そしてドメイン名を検索しません。例えば、 https://www.example.com/myapp/ へのリクエストにおいては、URLconfは myapp/ を見ます。 https://www.example.com/myapp/?page=3 へのリクエストにおいても、URLconfは myapp/ を見ます。
・view
Django がマッチする正規表現を見つけると、 Django は指定されたビュー関数を呼び出します。その際は HttpRequest オブジェクトを第一引数に、そしてキーワード引数としてrouteから「キャプチャされた」値を呼び出します。この例はこの後すぐ出てきます。
・kwargs
任意のキーワード引数を辞書として対象のビューに渡せます。この機能はチュートリアルでは使いません。
・name
URL に名前付けをしておけば Django のどこからでも明確に参照でき、とくにテンプレートの中で有効です。この便利な機能のおかげで、プロジェクトのURLにグローバルな変更を加える場合にも1つのファイルを変更するだけで済むようになります。
再びサーバー起動
python3 manage.py runserver
このコマンドを打つとサーバーが起動する。なお「編集して起動して」を毎回やるのが面倒な時は、複数のターミナルを開いて、片方ではずっとサーバー起動させて、もう片方で編集すれば良い。
http://localhost:8000/polls/ にアクセスすると以下のような画面が表示されるはず

画面はめちゃめちゃシンプル
http://localhost:8000/todo/ にアクセスしても上とほぼ同じような画面になるはず(表示の文字がtodoに変わっていればOK)
http://localhost:8000 (つまりトップディレクトリ)にアクセスしてもtodoと同じ画面になるはず。これはトップディレクトリへのアクセスはtodoに飛ぶように設定したから。
データベースの設定
デフォルトの設定では SQLite を使用します。データベースに詳しくなかったり、単に Django を試してみたいだけなら、これが一番簡単な選択です。 SQLite は Python に標準で組み込まれているため、データベースをサポートするために何も追加でインストールする必要がないからです。ただし、本番の環境で使う場合には、頭痛の種となるデータベースの移行作業を避けるため、PostgreSQL などのよりスケーラブルなデータベースを使った方が良いでしょう。
今回は勉強も兼ねてMySQLを用いる。めんどくさい人はデフォルトのSQLiteでもOK。そういう人はこの章は飛ばして「モデル作成」の章へどうぞ。
mySQLでデータベースの作成
todoの方ではmySQLを使うのでその設定を行う。mySQLをインストールしてない人はこちらからどうぞ。今回はmydbという実験用のデータベースを作成する。
mysql -u rootと打つことで、rootユーザーで実行できる
create database 'database_name';でデータベースの作成
例 create database mydb;
show database;でデータベースの一覧を見る
詳しいコマンドはここを参照
https://qiita.com/CyberMergina/items/f889519e6be19c46f5f4
SQL文は最後に;が要るので注意
mySQLにつなぐための設定
settings.pyのDATABASESだけ書き換える
DATABASES = {
    'default': {
        'ENGINE': 'django.db.backends.sqlite3',
        'NAME': os.path.join(BASE_DIR, 'db.sqlite3'),
    }
}
これを
DATABASES = {
    'default': {
        'ENGINE': 'django.db.backends.mysql',
        'NAME': 'mydb',
        'USER': 'root', # user name
        'PASSWORD': '',
        'HOST': '127.0.0.1', # 同じホスト
        'PORT': '3306' # mySQLのデフォルトポート番号
    }
}
にする。
モデル作成
モデルとは何か、ということについては公式からの引用をどうぞ。
モデルは本質的には、データベースのレイアウトと、それに付随するメタデータです。
よくわからない人は実例を見てみましょう。
djangoではテーブルとフィールドをモデルとして記述する。これによりプログラムからテーブルのフィールドを変数のように扱うことが可能。
todoではpost(todoリストの投稿部分)だけを作る
from django.db import models
class Post(models.Model):
    body = models.CharField(max_length=200) # todoリストの名前の長さは200まで
pollsアプリでは、投票と選択肢の二つのモデルを作成する。詳しいことは公式サイトからの引用
これから開発する簡単な poll アプリケーションでは、投票項目 (Question) と選択肢 (Choice) の二つのモデルを作成します。 Poll には質問事項 (question) と公開日 (publication date) の情報があります。 Choice には選択肢のテキストと投票数 (vote) という二つのフィールドがあります。各 Choice は一つの Question に関連づけられています。
from django.db import models

class Question(models.Model):
    question_text = models.CharField(max_length=200) # 質問文
    pub_date = models.DateTimeField('date published') # 公開日

class Choice(models.Model):
    question = models.ForeignKey(Question, on_delete=models.CASCADE) # 質問文の読み込み
    choice_text = models.CharField(max_length=200) # 質問に対する選択肢
    votes = models.IntegerField(default=0) # 投票数
モデルを有効にする
プロジェクトの設定ファイル(settings.py)でこのアプリケーション(todoとかpolls)を読み込んで利用するようにする。プロジェクトに今作ったアプリがインストールされるようにするということ。
mysiteの下のmysiteの下のsettings.pyを変える。
INSTALLED_APPS = [
    'todo.apps.TodoConfig',   #この行を書き加える
    'polls.apps.PollsConfig',   #この行を書き加える
    'django.contrib.admin',
    'django.contrib.auth',
    'django.contrib.contenttypes',
    'django.contrib.sessions',
    'django.contrib.messages',
    'django.contrib.staticfiles',
]
これでモデルができたので、これからmigrationファイルを作る。
djangoではテーブル作成はmigrationファイルを通じて行う。migrationファイルにテーブルの構造を明示的に記述することで、テーブル構造の確認、再作成、変更、ロードバックなどが簡単になり、データベースを管理しやすくなる。
'app_name'という名前のアプリのmigrationをこのコマンドで行う。
python3 manage.py makemigrations 'app_name'
今回は以下の二つを実行する。
python3 manage.py makemigrations todo
python3 manage.py makemigrations polls
このコマンドでDjangoにモデルに変更があったこと(この場合、新しいものの作成)を伝え、そして変更をマイグレーションの形で保存することができる。成功すれば以下の表示が出る。
todoではこんな感じ

pollsではこんな感じ
Migrations for 'polls':
  polls/migrations/0001_initial.py:
    - Create model Choice
    - Create model Question
    - Add field question to choice
これを行うことでtodo以下(polls以下)のmigrationsディレクトリ以下にmigrationファイルが作成されているはず。
todo/
    __init__.py
    admin.py
    apps.py
    migrations/
        __pycache__/     <--- これができてる
        0001_initial.py  <--- これができてる
        __init__.py
    models.py
    tests.py
    urls.py
    views.py

polls/
    __init__.py
    admin.py
    apps.py
    migrations/
        __pycache__/     <--- これができてる
        0001_initial.py  <--- これができてる
        __init__.py
    models.py
    tests.py
    urls.py
    views.py
以下はpaiza cloudでの参考画像

このmigrationファイルを実行してモデルのテーブルをデータベースに作成する。
python3 manage.py migrate
これでphpMyadminなどからデータベースの管理ができるようになる。詳しいことはここでは省略。
以上モデルについてまとめる。公式サイトの引用をどうぞ。
マイグレーションはとても強力なツールであり、プロジェクトの発展に合わせて、モデルを変更し続けていくことができます。データベースやテーブルを削除して作り直す必要はありません - マイグレーションは、データを失うことなしにデータベースをライブでアップグレードするよう特化しています。これらについてはチュートリアルの後の部分でもっと深くカバーしますが、今は、モデルの変更を実施するための3ステップガイドを覚えておいてください:
・モデルを変更する (models.py の中の)
・これらの変更のためのマイグレーションを作成するために python manage.py makemigrations を実行します。
・データベースにこれらの変更を適用するために python manage.py migrate を実行します。
要はmodels.pyを変更した(データベースに格納する変数を増やした、減らした、名前を変更した)時はpython manage.py makemigrationsとpython manage.py migrateをやればデータベースをよしなに変更してくれるということ。
管理ページの作成
python3 manage.py createsuperuser
で管理用のスーパーユーザーが作れる。(管理ユーザーの作成)
はじめにUsername、Email address、passwordを設定する。設定例は以下。
Username : admin
Email : admin@example.com
password : admin
(わかってると思いますが、今は練習用にこういう適当な管理ユーザーを作っているだけで実際にはやらないように。なお、これでやるとpasswordが短いけど良いかみたいな警告が複数出ます。)
アプリケーションで利用できるpost modelを利用できるようにするために、admin.pyを書き換える。これをやらないとadmin上でpollsアプリを変更することができない(PostオブジェクトやQuestionオブジェクトがadminインタフェースを持つということを、adminに伝える必要があるというイメージ)。
todo版はこっち
from django.contrib import admin
from .models import Post

admin.site.register(Post)
polls版はこっち
from django.contrib import admin
from .models import Question

admin.site.register(Question)
サーバーを起動する。
python manage.py runserver
ブラウザを起動して、ローカルドメインの“/admin/”、つまりhttp://127.0.0.1:8000/admin/ にアクセスすると管理画面に行ける
そこでは色々編集ができるが今は割愛。この記事の最後の方で詳しく扱います。
APIで遊ぶ
この章で、Pollsアプリにおいて質問とか選択肢とかを追加します。
python shellを起動する。コマンドは以下。
python manage.py shell
普通のpythonコマンドを使わない理由は以下の公式サイトからの引用をどうぞ。
なぜ単なる “python” コマンドではなく上記のコマンドを使うかというと、 manage.py が DJANGO_SETTINGS_MODULE 環境変数を設定してくれるからです。これにより、 Django に mysite/settings.py ファイルへの import パスが与えられます。
シェル上での実行とその結果。ここでは新しい質問:what's new?を追加し、それを変更してwhat's up?にしている
>>> from polls.models import Choice, Question  # Import the model classes we just wrote.

# No questions are in the system yet.
>>> Question.objects.all()
<QuerySet []>

# Create a new Question.
# Support for time zones is enabled in the default settings file, so
# Django expects a datetime with tzinfo for pub_date. Use timezone.now()
# instead of datetime.datetime.now() and it will do the right thing.
>>> from django.utils import timezone
>>> q = Question(question_text="What's new?", pub_date=timezone.now())

# Save the object into the database. You have to call save() explicitly.
>>> q.save()

# Now it has an ID.
>>> q.id
1

# Access model field values via Python attributes.
>>> q.question_text
"What's new?"
>>> q.pub_date
datetime.datetime(2012, 2, 26, 13, 0, 0, 775217, tzinfo=<UTC>)

# Change values by changing the attributes, then calling save().
>>> q.question_text = "What's up?"
>>> q.save()

# objects.all() displays all the questions in the database.
>>> Question.objects.all()
<QuerySet [<Question: Question object (1)>]>
ここで最後の行の<Question: Question object (1)>は全く意味がわからないので、表現を変える。(polls/models.py ファイル内にある) Question モデルを編集してこれを修正するために__str__() メソッドを Question と Choice の両方に追加する。
from django.db import models

class Question(models.Model):
    # ...ここは変更しない
    def __str__(self): # ここを追加
        return self.question_text

class Choice(models.Model):
    # ...ここは変更しない
    def __str__(self): # ここを追加
        return self.choice_text
またデモ用にwas_published_recentlyメソッドも追加する。
import datetime # ここを追加

from django.db import models
from django.utils import timezone # ここを追加


class Question(models.Model):
    # ...ここは変えない
    def was_published_recently(self): # ここを追加
        return self.pub_date >= timezone.now() - datetime.timedelta(days=1)
        # 実はこの関数にバグが潜んでいるが、今は気にしない
編集が終わったら、shellを起動してまた遊んでみる
python3 manage.py shell
>>> from polls.models import Choice, Question

# Make sure our __str__() addition worked.
>>> Question.objects.all()
<QuerySet [<Question: What's up?>]>

# Django provides a rich database lookup API that's entirely driven by
# keyword arguments.
>>> Question.objects.filter(id=1)
<QuerySet [<Question: What's up?>]>
>>> Question.objects.filter(question_text__startswith='What')
<QuerySet [<Question: What's up?>]>

# Get the question that was published this year.
>>> from django.utils import timezone
>>> current_year = timezone.now().year
>>> Question.objects.get(pub_date__year=current_year)
<Question: What's up?>

# Request an ID that doesn't exist, this will raise an exception.
>>> Question.objects.get(id=2)
Traceback (most recent call last):
    ...
DoesNotExist: Question matching query does not exist.

# Lookup by a primary key is the most common case, so Django provides a
# shortcut for primary-key exact lookups.
# The following is identical to Question.objects.get(id=1).
>>> Question.objects.get(pk=1)
<Question: What's up?>

# Make sure our custom method worked.
>>> q = Question.objects.get(pk=1)
>>> q.was_published_recently()
True

# Give the Question a couple of Choices. The create call constructs a new
# Choice object, does the INSERT statement, adds the choice to the set
# of available choices and returns the new Choice object. Django creates
# a set to hold the "other side" of a ForeignKey relation
# (e.g. a question's choice) which can be accessed via the API.
>>> q = Question.objects.get(pk=1)

# Display any choices from the related object set -- none so far.
>>> q.choice_set.all()
<QuerySet []>

# Create three choices.
>>> q.choice_set.create(choice_text='Not much', votes=0)
<Choice: Not much>
>>> q.choice_set.create(choice_text='The sky', votes=0)
<Choice: The sky>
>>> c = q.choice_set.create(choice_text='Just hacking again', votes=0)

# Choice objects have API access to their related Question objects.
>>> c.question
<Question: What's up?>

# And vice versa: Question objects get access to Choice objects.
>>> q.choice_set.all()
<QuerySet [<Choice: Not much>, <Choice: The sky>, <Choice: Just hacking again>]>
>>> q.choice_set.count()
3

# The API automatically follows relationships as far as you need.
# Use double underscores to separate relationships.
# This works as many levels deep as you want; there's no limit.
# Find all Choices for any question whose pub_date is in this year
# (reusing the 'current_year' variable we created above).
>>> Choice.objects.filter(question__pub_date__year=current_year)
<QuerySet [<Choice: Not much>, <Choice: The sky>, <Choice: Just hacking again>]>

# Let's delete one of the choices. Use delete() for that.
>>> c = q.choice_set.filter(choice_text__startswith='Just hacking')
>>> c.delete()
これでQuestion "What's up?"に、投票先としてNot muchとThe skyができる(Just hacking again は最後に削除している)。以下に参考画像を置いとく。(この時点では以下のようなviewは作って無いのでアクセスしても下記画像のようには見えないので注意。)
アプリのビュー記述
公開用のインターフェイス、ビュー(views.py)についてさらに変更していく。
ビューについての説明は公式サイトの引用をどうぞ
ビューとは、Djangoのアプリケーションにおいて特定の機能を提供するウェブページの「型(type)」であり、各々のテンプレートを持っています。例えばブログアプリケーションなら、以下のようなビューがあるでしょう:
・Blog ホームページ - 最新エントリーをいくつか表示
・エントリー詳細ページ - 1エントリーへのパーマリンク (permalink) ページ
・年ごとのアーカイブページ - 指定された年のエントリーの月を全て表示
・月ごとのアーカイブページ - 指定された月のエントリーの日をすべて表示
・コメント投稿 - エントリーに対するコメントの投稿を受付
Django では、各ページとコンテンツはビューによって提供されます。各ビューは単純に Python 関数 (クラスベースビューの場合はメソッド) として実装されています。 Django はビューを、リクエストされたURLから決定します (正確には、URLのドメイン以降の部分)
todoリストでは、一覧表示(index)、todoの追加(create)、ToDoの削除(delete)の3つの操作を行えるようにする。
from django.shortcuts import render, get_object_or_404
from django.http import HttpResponse, HttpResponseRedirect
from django.urls import reverse
from .models import Post
from .forms import PostForm

def index(request):
    posts = Post.objects.all()
    form = PostForm()
    context = {'posts': posts, 'form': form}
    return render(request, 'todo/index.html', context) # render関数については後述
    # index.htmlに関してはあとで作る

def create(request):
    form = PostForm(request.POST)
    form.save(commit=True)
    return HttpResponseRedirect(reverse('todo:index')) # todo一覧にリダイレクトできる

def delete(request, id=None): # urls.pyで設定したidがここに来る
    post = get_object_or_404(Post, pk=id) # こいつについても後述
    post.delete()
    return HttpResponseRedirect(reverse('todo:index'))
PostFormはまだ無いのであとで作成する。
pollsではindex(目次ページ)の他に、detail(各質問の詳細ページ), results(投票結果のページ)、vote(投票した後のページ)を作成する。
具体的には
・質問 "インデックス" ページ -- 最新の質問をいくつか表示
・質問 "詳細" ページ -- 結果を表示せず、質問テキストと投票フォームを表示
・質問 "結果" ページ -- 特定の質問の結果を表示
・投票ページ -- 特定の質問の選択を投票として受付
という4つのビューを作る
# indexとかは書き換えないで以下を追加

def detail(request, question_id):
    return HttpResponse("You're looking at question %s." % question_id)

def results(request, question_id):
    response = "You're looking at the results of question %s."
    return HttpResponse(response % question_id)

def vote(request, question_id):
    return HttpResponse("You're voting on question %s." % question_id)
URLのルーティング設定
またurls.pyも書き換えて、新しいviewをtodo.urlsモジュール(polls.urlsモジュール)に結びつける
| メソッド | パス名 | 操作 |
|---|---|---|
| GET | /todo | ToDo一覧表示 |
| POST | /todo/create | ToDo追加 |
| POST | /todo/<int:id>/delete | ToDo削除 |
from django.urls import path
from . import views

app_name = 'todo' # これの意味については後でpollsで扱う(URLの名前空間の設定)

urlpatterns = [
    path('', views.index, name='index'), # 最初の''はトップページを指す。views.indexはindex.htmlを指す。
    path('create', views.create, name='create'),
    path('<int:id>/delete', views.delete, name='delete')
    ]
<int:id>と書くことでidの数字をviews.deleteから参照できるようになる
from django.urls import path
from . import views

urlpatterns = [
    # ex: /polls/
    path('', views.index, name='index'),
    # ex: /polls/5/
    path('<int:question_id>/', views.detail, name='detail'),
    # ex: /polls/5/results/
    path('<int:question_id>/results/', views.results, name='results'),
    # ex: /polls/5/vote/
    path('<int:question_id>/vote/', views.vote, name='vote'),
]
この時点でpollsの方はサーバーを起動させればちゃんと動く。例えばhttp://127.0.0.1:8000/polls/1/ とかhttp://127.0.0.1:8000/polls/1/results/ とか。
todoはindex.htmlをまだ作っていないので動かない。
さらなるビューの変更
ここからはpollsのみの変更
各ビューには二つの役割がある:
①一つはリクエストされたページのコンテンツを含む HttpResponse オブジェクトを返すこと
②もう一つは Http404 のような例外の送出をすること
それ以外の処理はユーザ次第。
というわけでそれを調べるためにpollsのviews.pyを書き換える
from django.http import HttpResponse

from .models import Question


def index(request):
    latest_question_list = Question.objects.order_by('-pub_date')[:5]
    output = ', '.join([q.question_text for q in latest_question_list])
    return HttpResponse(output)

# Leave the rest of the views (detail, results, vote) unchanged
ビューの中で、ページのデザインがハードコード(outputのURLの書き方)されているのは問題とのこと。これを改善するためにhtmlテンプレートを作成する。
HTMLテンプレートの作成
はじめにmysite/todoの中(mysite/pollsの中)にtemplatesディレクトリを作成する。Djangoはそこからテンプレートを探すように設計されている。その中にtodoディレクトリ(pollsディレクトリ)を作成してそこにhtmlファイルを作る。
なお、templatesの中にtodo(polls)を作らず、直接htmlを置くのは良くない。理由は公式サイト
作ったテンプレートを polls という別のサブディレクトリを作らずに、直接 polls/templates の中に置いてもいいのではないか、と思うかもしれませんね。しかし、それは実際には悪い考えです。Django は、名前がマッチした最初のテンプレートを使用するので、もし異なるアプリケーションの中に同じ名前のテンプレートがあった場合、Django はそれらを区別することができません。そのため、Djangoに正しいテンプレートを教えてあげる必要がありますが、一番簡単な方法は、それらに 名前空間を与える ことです。アプリケーションと同じ名前をつけたもう一つのディレクトリの中にテンプレートを置いたのは、そういうわけなのです。
まずはbase.htmlを作る。実際に欲しいのはindex.htmlだが、それはbase.htmlを継承して作る。
{% load static %}
<!DOCTYPE html>
<html>
    <head>
        <title>Todo List</title>
        <!-- CSS And JavaScript -->
        <link rel="stylesheet" href="https://fonts.googleapis.com/css?family=Roboto:300,300italic,700,700italic">
        <link rel="stylesheet" href="https://cdnjs.cloudflare.com/ajax/libs/normalize/8.0.1/normalize.css">
        <link rel="stylesheet" href="https://cdnjs.cloudflare.com/ajax/libs/milligram/1.4.1/milligram.css">
    </head>
    <body>
        <div class="container">
            {% block content %} # こう書くことで各ページの内容がここに表示される
            {% endblock %}
        </div>
    </body>
</html>
ここではcssフレームワークを使う。ここからもらいました。
https://milligram.io/#getting-started
またこれをベースにindex.htmlを作成する。
{% extends 'todo/base.html' %} <!-- index.htmlはbase.htmlを継承している -->
{% block content %}
<h1>Todo List</h1> <!-- ここはタイトル -->
{% if error_message %}<p><strong>{{ error_message }}</strong></p>{% endif %}
<form action="{% url 'todo:create' %}" method="post">
{% csrf_token %} <!-- Djangoはcsrfによるセキュリティ対策をするのでこれが要る -->
<!-- Todo Name -->
<div class="form-group">
<label for="todo" class="col-sm-3 control-label">Todo</label>
<div class="col-sm-6">
{{ form.body }}
</div>
</div>
<!-- Add Todo Button -->
<div class="form-group">
<div class="col-sm-offset-3 col-sm-6">
<button type="submit" class="btn btn-default">
<i class="fa fa-plus"></i> Add Todo <!-- Add Todoボタンの名前 -->
</button>
</div>
</div>
</form>
<!-- Current Todos -->
<h2>Current Todos</h2> <!-- ここもタイトル -->
<table class="table table-striped todo-table">
<thead>
<th>Todos</th><th> </th>
</thead>
<tbody>
{% for post in posts %}
<tr>
<!-- Todo Name -->
<td>
<div>{{ post.body }}</div>
</td>
<td>
<form action="{% url 'todo:delete' post.id %}" method="post">
{% csrf_token %}
<button>Delete</button> <!-- 削除ボタンの名前 -->
</form>
</td>
</tr>
{% endfor %}
</tbody>
</table>
{% endblock %}
これでtodoの方はほぼ完成。あとは送信フォーム(PostForm)を作るだけ。
次にpollsの内容に移る。index.htmlを作成する。
{% if latest_question_list %}
    <ul>
    {% for question in latest_question_list %}
        <!-- latest_question_listから一つ一つ取り出して表示 -->
        <li><a href="/polls/{{ question.id }}/">{{ question.question_text }}</a></li>
    {% endfor %}
    </ul>
{% else %}
    <!-- latest_question_listが空の時はこれを表示 -->
    <p>No polls are available.</p>
{% endif %}
質問がある({% if latest_question_list %})なら、質問が入っているリストlatest_question_listからfor文で一つ一つ取り出してその質問内容(question.question_text)を表示してリンク付けするだけ。質問がなければNo polls are available.を表示するというもの。
このテンプレートを使えるようにするためにビューのindex関数も書き換える。
from django.http import HttpResponse
from django.template import loader
from .models import Question

def index(request):
    latest_question_list = Question.objects.order_by('-pub_date')[:5]
    template = loader.get_template('polls/index.html')
    context = {
        'latest_question_list': latest_question_list,
    }
    return HttpResponse(template.render(context, request))
これがよくある書き方ではあるが、もっと綺麗に書くためにrender関数を使う
そもそもレンダリングとは「データ記述言語やデータ構造で記述された抽象的で高次の情報から、コンピュータのプログラムを用いて画像・映像・音声などを生成することをいう。」(Wikipediaから引用)
render関数については公式サイトから引用
テンプレートをロードしてコンテキストに値を入れ、テンプレートをレンダリングした結果を HttpResponse オブジェクトで返す、というイディオムは非常によく使われます。 Django はこのためのショートカットを提供します。
from django.shortcuts import render
from .models import Question

def index(request):
    latest_question_list = Question.objects.order_by('-pub_date')[:5]
    context = {'latest_question_list': latest_question_list}
    return render(request, 'polls/index.html', context) # render関数の利用
全部の view をこのように書き換えてしまえば、 loader や HttpResponse を import する必要はなくなります (detail 、 results 、 vote を引き続きスタブメソッドにするなら、 HttpResponse はそのままにしておいたほうがいいでしょう)。
render() 関数は、第1引数として request オブジェクトを、第2引数としてテンプレート名を、第3引数(任意)として辞書を受け取ります。この関数はテンプレートを指定のコンテキストでレンダリングし、その HttpResponse オブジェクトを返します。
404エラーの送出
引き続き、pollsのみを書き換える。
views.pyのdetail関数を書き換えて、リクエストしたIDを持つ質問が存在しないとき(質問が今は一つしかないので、http://127.0.0.1:8000/polls/1/ ならアクセスできるけど、http://127.0.0.1:8000/polls/2/ にアクセスしようとするなど)にエラーを出すようにする。普通に例外処理を用いて書くなら以下。
from django.http import Http404
from django.shortcuts import render

from .models import Question
# ...indexとかresults、voteはそのまま
def detail(request, question_id):
    try:
        question = Question.objects.get(pk=question_id)
    except Question.DoesNotExist:
        raise Http404("Question does not exist")
    return render(request, 'polls/detail.html', {'question': question})
とりあえず上の例題を動かしたかったら、detail.htmlは以下のようにしておけば大丈夫。
{{ question }}
でも上のviews.pyはもっと綺麗にかける。
get_object_or_404を使えば良い。公式曰く
get() を実行し、オブジェクトが存在しない場合には Http404 を送出することは非常によく使われるイディオムです。
とのこと。
from django.shortcuts import get_object_or_404, render

from .models import Question
# ...indexとかresults、voteはそのまま
def detail(request, question_id):
    question = get_object_or_404(Question, pk=question_id)
    return render(request, 'polls/detail.html', {'question': question})
detailのhtmlテンプレートの作成
detail.htmlをちゃんと書く。
<h1>{{ question.question_text }}</h1>  <!-- 質問を表示 -->
<ul>
{% for choice in question.choice_set.all %}
    <!-- 質問における選択肢を一つ一つ出して表示 -->
    <li>{{ choice.choice_text }}</li>
{% endfor %}
</ul>
やっていることはindex.htmlのように、ある質問(questionオブジェクト)の選択肢(question.choice_set)を全て取り出して表示をするというだけ。
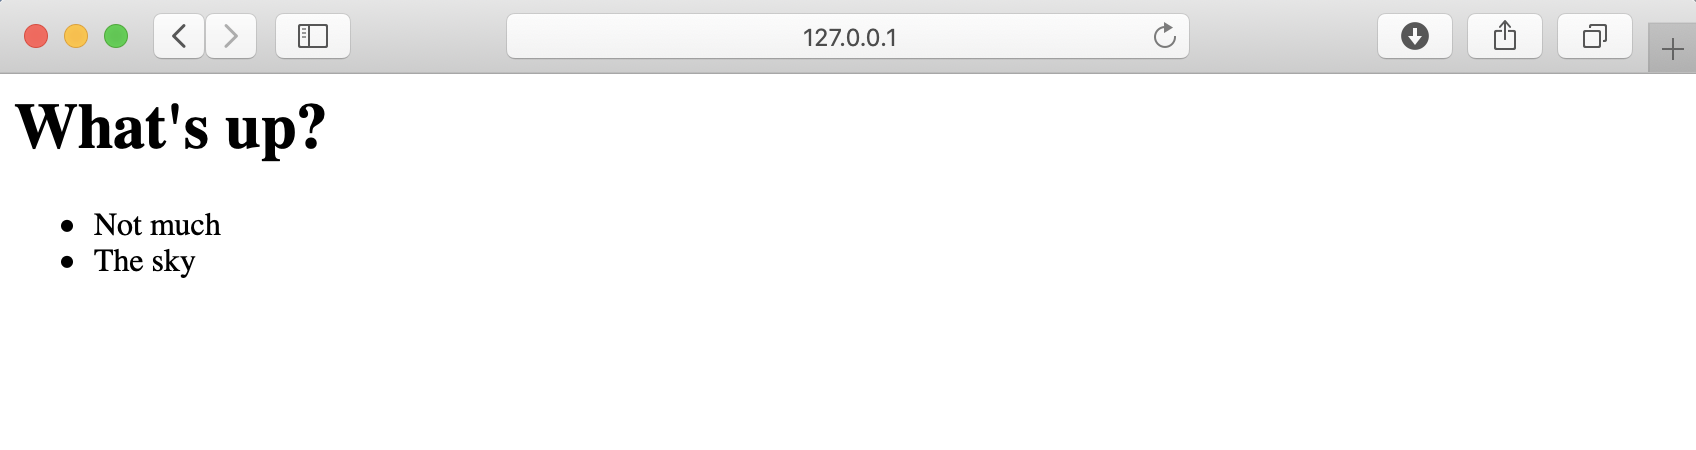
ちゃんと作れていればサーバー起動してhttp://127.0.0.1:8000/polls/1/ に移動するとこうなる。

一番上のWhat's up?がquestion.question_textで、その選択肢(choice.choice_text)として・Not muchと・The skyが表示されている。
テンプレート内のハードコートされたURLの削除(indexのhtmlテンプレートの変更)
さっき書いたindex.htmlではこのような行があった。
<!-- for文の中の一行  -->
<li><a href="/polls/{{ question.id }}/">{{ question.question_text }}</a></li>
この書き方は問題があるらしい。公式によると
このハードコードされた、密結合のアプローチの問題は、プロジェクトにテンプレートが多数ある場合、URLの変更が困難になってしまうことです。
なのでテンプレートタグの{%url%} を使用して、URL設定で定義されている特定のURLパスへの依存をなくすことができる。具体的には以下のように書く。
<!-- for文の中の一行  -->
<li><a href="{% url 'detail' question.id %}">{{ question.question_text }}</a></li>
この'detail'というURL名が機能するのはmysite/polls/urls.pyのpath関数でname引数を定義しているから。このurlsモジュールに指定されたURLの定義の検索をしている。
#他のpathは省略
path('<int:question_id>/', views.detail, name='detail')
URLの名前空間
一つのプロジェクトに複数のアプリがあるとき、DjangoはどうやってこれらのURL名を区別するのか。例えばtodoアプリにもpollsアプリにもindexビューがあるが、Djangoはその二つをどうやって区別しているのか、ということである。
{% url %}テンプレートタグを使用した時、どのアプリのindexビューのURLを作成するのかをDjangoに区別させるためには、URLconfに名前空間(app_name)を追加すれば良い。
from django.urls import path

from . import views

app_name = 'polls' # ここで名前空間の追加
urlpatterns = [
    path('', views.index, name='index'),
    path('<int:question_id>/', views.detail, name='detail'),
    path('<int:question_id>/results/', views.results, name='results'),
    path('<int:question_id>/vote/', views.vote, name='vote'),
]
実はmysite/todo/urls.pyではすでに書いてあるので変更はしなくて良い。
この変更に伴ってindex.htmlも変更する。
<!-- for文の中の一行  -->
<li><a href="{% url 'polls:detail' question.id %}">{{ question.question_text }}</a></li>
これでDjangoはpollsアプリのdetailということがわかる。
モデルフォームクラスの作成
Djangoでは送信フォームを扱うためにモデルフォームクラスを使う。
そのためにforms.pyをmysite/todo/に作成する。
todo版は以下。
from django import forms
from .models import Post

class PostForm(forms.ModelForm):
    class Meta:
        model = Post
        fields = ('body',)
これでtodo版は完成である。サーバーを起動してtodoリストの追加、削除ができていれば問題ない。エラーが出る時はそれをよく読んで間違っている部分を直す。以下の画像のような感じでtodoリストができれば良い。(画像では「銀行振込」と「洗剤買う」の二つをtodoリストに追加している)

これからはずっとpolls版を扱う。
<h1>{{ question.question_text }}</h1>

{% if error_message %}<p><strong>{{ error_message }}</strong></p>{% endif %}

<form action="{% url 'polls:vote' question.id %}" method="post">
{% csrf_token %}
{% for choice in question.choice_set.all %}
    <input type="radio" name="choice" id="choice{{ forloop.counter }}" value="{{ choice.id }}">
    <label for="choice{{ forloop.counter }}">{{ choice.choice_text }}</label><br>
{% endfor %}
<input type="submit" value="Vote">
</form>
今までは投票の選択肢の表示だけだったが、これでラジオボタンが表示されることになる。
次に、mysite/polls/views.pyのvoteも書き換える。
from django.http import HttpResponse, HttpResponseRedirect
from django.shortcuts import get_object_or_404, render
from django.urls import reverse

from .models import Choice, Question
# ...
def vote(request, question_id):
    question = get_object_or_404(Question, pk=question_id)
    try:
        selected_choice = question.choice_set.get(pk=request.POST['choice'])
        # request.POSTは辞書のようなオブジェクトで、キーを指定すると送信したデータにアクセスできる。選択された選択肢IDのIDを文字列で返す。
    except (KeyError, Choice.DoesNotExist): # POSTに'choice'がなければエラーを出す
        # Redisplay the question voting form.
        return render(request, 'polls/detail.html', {
            'question': question,
            'error_message': "You didn't select a choice.",
        })
    else:
        selected_choice.votes += 1
        selected_choice.save()
        # Always return an HttpResponseRedirect after successfully dealing
        # with POST data. This prevents data from being posted twice if a
        # user hits the Back button.
        return HttpResponseRedirect(reverse('polls:results', args=(question.id,)))
ちゃんと投票できたらHttpResponseではなくHttpResponseRedirectを使っているのがポイント。コメントにも書かれているようにブラウザの戻るボタンで二度投票されることを防ぐらしい。
その中でreverse関数を使っているが、これを使うとビュー関数でのURLハードコートを防ぐことができる。今回はreverse()を呼ぶと'/polls/3/results/'というのが返ってくる。この3はquestion.idの値。このURLによってresultsビューを呼び出している。
from django.shortcuts import get_object_or_404, render

# indexとかdetailとか他のは書き換えない
def results(request, question_id):
    question = get_object_or_404(Question, pk=question_id)
    return render(request, 'polls/results.html', {'question': question})
detailとほぼ一緒の関数になる。この冗長さに関しては後で直せるが今はスルー。
mysite/polls/results.htmlを作成する。
<h1>{{ question.question_text }}</h1>

<ul>
{% for choice in question.choice_set.all %}
    <li>{{ choice.choice_text }} -- {{ choice.votes }} vote{{ choice.votes|pluralize }}</li>
{% endfor %}
</ul>

<a href="{% url 'polls:detail' question.id %}">Vote again?</a>
これでサーバーを起動すれば投票できる。

ボタンになっていることがわかるし、voteボタンを押せば投票できるのもわかる。

ビューの冗長さを回避
detailビュー、resultsビュー、indexビューは似ていて冗長である。
参考コード
# importとかvoteは省略

def index(request):
    latest_question_list = Question.objects.order_by('-pub_date')[:5]
    context = {'latest_question_list': latest_question_list}
    return render(request, 'polls/index.html', context)

def detail(request, question_id):
    question = get_object_or_404(Question, pk=question_id)
    return render(request, 'polls/detail.html', {'question': question})

def results(request, question_id):
    question = get_object_or_404(Question, pk=question_id)
    return render(request, 'polls/results.html', {'question': question})
公式の説明によると
これらのビューは基本的な Web開発の一般的なケースを表します。すなわち、 URL を介して渡されたパラメータに従ってデータベースからデータを取り出し、テンプレートをロードして、レンダリングしたテンプレートを返します。これはきわめてよくあることなので、 Django では、汎用ビュー(generic view)というショートカットを提供しています。
汎用ビューとは、よくあるパターンを抽象化して、 Python コードすら書かずにアプリケーションを書き上げられる状態にしたものです。
これらを使って今までのものを変換していく。簡単な3つのステップで変えられる。
・URLconf を変換する。
・古い不要なビューを削除する。
・新しいビューに Djangoの汎用ビューを設定する。
なお、普通にDjangoアプリケーションを作るときは最初から汎用ビューが使えるかどうか判断しておくべき。今回はチュートリアルだから面倒なことをしているので注意。
URLconfの修正
mysite/polls/urls.pyの編集をする
from django.urls import path

from . import views

app_name = 'polls'
urlpatterns = [
    path('', views.IndexView.as_view(), name='index'),
    path('<int:pk>/', views.DetailView.as_view(), name='detail'),
    path('<int:pk>/results/', views.ResultsView.as_view(), name='results'),
    path('<int:question_id>/vote/', views.vote, name='vote'),
]
question_idがpkに変わったことに注意。
古いビュー(views.py)の修正
mysite/polls/views.pyの編集をする。index、detail、resultsを変更する。
from django.http import HttpResponseRedirect
from django.shortcuts import get_object_or_404, render
from django.urls import reverse
from django.views import generic

from .models import Choice, Question


class IndexView(generic.ListView):
    template_name = 'polls/index.html' # テンプレート名の変更
    context_object_name = 'latest_question_list' #  コンテキスト変数名の変更

    def get_queryset(self):
        """Return the last five published questions."""
        return Question.objects.order_by('-pub_date')[:5]


class DetailView(generic.DetailView):
    model = Question
    template_name = 'polls/detail.html' # テンプレート名の変更


class ResultsView(generic.DetailView):
    model = Question
    template_name = 'polls/results.html' # テンプレート名の変更


def vote(request, question_id):
    ... # same as above, no changes needed.
IndexViewではListViewを、DetailViewとResultsViewではDetailViewを使っていることに注意。ListViewは「オブジェクトのリストを表示する」こと、DetailViewは「あるタイプのオブジェクトの詳細を表示する」ことの概念の抽象化をしている。
デフォルトでListView汎用ビューは<app name>/<model name>_list.htmlという名前のテンプレートを使う。ここではpolls/question_detail.htmlであるが、そんなものはないので、template_name = 'polls/index.html'とテンプレート名を指定している。
同様にDetailView汎用ビューも<app name>/<model name>_detail.htmlという名前のテンプレートを使う。ここではpolls/question_detail.htmlであるが、やっぱりそんなものは作ってないのでテンプレート名の変更を行なっている。
以前のviews.pyではquestionやlatest_question_listという変数の入ったコンテキストをテンプレートに渡していた。DetailViewにはquestionという変数が自動で渡されるが、ListViewではquestion_listという名前のコンテキスト変数が自動で渡されてしまう。これを変更するのにcontext_object_nameを変えている('latest_question_list'にしている)ことに注意。
ここでサーバーを起動して動作を確かめる。汎用ビューにしただけなので、動作は特にさっきと変わらないはず。これでアプリ自体は完成!!
自動テストを書く
自動テストとは
自動テストとは何かという疑問に関しては、公式からの引用をどうぞ
テストとは、コードの動作を確認する単純なプログラムです。
テストは異なるレベルで実行されます。あるテストは、小さな機能に対して行われるもの (ある特定のモデルのメソッドは期待通りの値を返すか?) かもしれませんし、別のテストは、ソフトウェア全体の動作に対して行われるもの (サイト上でのユーザの一連の入力に対して、期待通りの結果が表示されるか?) かもしれません。こうしたテストは、前にチュートリアルその2で shell を用いてメソッドの動作を確かめたことや、実際にアプリケーションを実行して値を入力して結果がどうなるのかを確かめるといったことと、何も違いはありません。
自動テストが他と異なる点は、テスト作業がシステムによって実行されることです。一度テストセットを作成すると、それからはアプリに変更を加えるたびに、あなたの意図した通りにコードが動作するか確認できます。手動でテストする時間がかかることはありません。
テストを書く基本方針
これも公式から引用
テストを書くためのアプローチには、さまざまなものがあります。
プログラマの中には、「テスト駆動開発」の原則に従っている人がいます。これは、実際にコードを書く前にテストを書く、という原則です。この原則は直感に反するように感じるかもしれませんが、実際には多くの人がどんなことでも普通にしていることに似ています。つまり、問題をきちんと言葉にしてから、その問題を解決するためのコードを書く、ということです。テスト駆動開発は、ここで言う問題を単に Python のテストケースとして形式化しただけのことです。
テストの初心者の多くは、先にコードを書いてから、その後でテストが必要だと考えるものです。おそらく、もっと早くからいくつかテストを書いておいた方が良いですが、テストを始めるのに遅すぎるということはありません。
バグの発見
ここでpollsアプリのバグを直す。バグはmodels.pyのwas_published_recently関数に潜んでいる。
import datetime # ここを追加

from django.db import models
from django.utils import timezone # ここを追加


class Question(models.Model):
    # ...ここは変えない
    def was_published_recently(self): # ここを追加
        return self.pub_date >= timezone.now() - datetime.timedelta(days=1)
    # この関数にバグが潜んでいる
何がバグなのかは公式の説明をどうぞ。
Question.was_published_recently() のメソッドは Question が昨日以降に作成された場合に True を返すのですが(適切な動作)、 Question の pub_date が未来の日付になっている場合にも True を返してしまいます(不適切な動作)。
これを確認するためにshellを起動する。
python manage.py shell
>>> import datetime
>>> from django.utils import timezone
>>> from polls.models import Question
>>> # create a Question instance with pub_date 30 days in the future
>>> future_question = Question(pub_date=timezone.now() + datetime.timedelta(days=30))
>>> # was it published recently?
>>> future_question.was_published_recently()
True
未来の日付は「最近の日付」には含まれないのに、Trueを返してしまっている。というわけでこれを直す。
テストの作成
バグをあぶり出すためにテストを作成する。アプリケーションのテストを書く場所は、慣習として、アプリケーションの tests.py ファイル内ということになっている。テストシステムがtestで始まる名前のファイルの中から、自動的にテストを見つけてくれるらしい。ということでmysite/polls/の中のtests.pyを変更する。
import datetime

from django.test import TestCase
from django.utils import timezone

from .models import Question


class QuestionModelTests(TestCase):

    def test_was_published_recently_with_future_question(self):
        """
        was_published_recently() returns False for questions whose pub_date
        is in the future.
        """
        time = timezone.now() + datetime.timedelta(days=30) # 30日後の日付にする
        future_question = Question(pub_date=time) # その時間の質問を作る
        self.assertIs(future_question.was_published_recently(), False) # future_question.was_published_recently()がFalseを出さないと警告を出すように設定
テストの実行
テストを実行するにはpython manage.py test 'app_name'というコマンドを実行すれば良いので、今回はpython manage.py test pollsを実行する。
Creating test database for alias 'default'...
System check identified no issues (0 silenced).
F
======================================================================
FAIL: test_was_published_recently_with_future_question (polls.tests.QuestionModelTests)
----------------------------------------------------------------------
Traceback (most recent call last):
  File "/path/to/mysite/polls/tests.py", line 16, in test_was_published_recently_with_future_question
    self.assertIs(future_question.was_published_recently(), False)
AssertionError: True is not False

----------------------------------------------------------------------
Ran 1 test in 0.001s

FAILED (failures=1)
Destroying test database for alias 'default'...
ここで発生していることは以下、公式の引用からどうぞ。
・manage.py test polls は、polls アプリケーション内にあるテストを探します
・django.test.TestCase クラスのサブクラスを発見します
・テストのための特別なデータベースを作成します
・テスト用のメソッドとして、test で始まるメソッドを探します
・test_was_published_recently_with_future_question の中で、pub_date フィールドに今日から30日後の日付を持つ Question インスタンスが作成されます
・そして最後に、 assertIs() メソッドを使うことで、本当に返してほしいのは False だったにもかかわらず、 was_published_recently() が True を返していることを発見します
バグの修正
models.pyを直す。
class Question(models.Model):
    # ...他は変えない
    def was_published_recently(self):
        now = timezone.now()
        return now - datetime.timedelta(days=1) <= self.pub_date <= now
これでもう一度テストを実行する。
python manage.py test polls
Creating test database for alias 'default'...
System check identified no issues (0 silenced).
.
----------------------------------------------------------------------
Ran 1 test in 0.001s

OK
Destroying test database for alias 'default'...
となるはず。
より包括的なテストを作るということで、同じクラスにさらに二つのテストを追加する。
class Question(models.Model):
    # 他は変えない
    def test_was_published_recently_with_old_question(self):
        """
        was_published_recently() returns False for questions whose pub_date
        is older than 1 day.
        """
        time = timezone.now() - datetime.timedelta(days=1, seconds=1) # 1日と1秒前の時間設定
        old_question = Question(pub_date=time)
        self.assertIs(old_question.was_published_recently(), False) # 返して欲しい答えはFalse

    def test_was_published_recently_with_recent_question(self):
        """
        was_published_recently() returns True for questions whose pub_date
        is within the last day.
        """
        time = timezone.now() - datetime.timedelta(hours=23, minutes=59, seconds=59) # 23時間59分59秒前の質問を作る
        recent_question = Question(pub_date=time)
        self.assertIs(recent_question.was_published_recently(), True) # 返して欲しい答えはTrue
これでQuestion.was_published_recently()が過去、現在、そして未来の質問に対して意味のある値を返すことを確認できるようになる。
ビューをテストする
次はビューをテストする。今はpub_dateフィールドが未来の日付であっても、その質問を公開してしまっているのでそれを直す。
先ほどバグを修正した時は、コードを書いてからテストを書いた(テスト駆動開発の例)が、コードとテストを書く順番は逆でも良い。今回はユーザがWebブラウザを通して経験する動作をチェックする。
今回は時間が絡んでくるので、TIME_ZONEをちゃんと設定する。日本の場合、settings.pyのTIME_ZONEを'Asia/Tokyo'に直す。(デフォルトは’UCT’)
# だいぶ下の方
TIME_ZONE = 'Asia/Tokyo'
(追記 タイムゾーンの設定をやらなくても私の環境ではエラーは出なかった)
Djangoテストクライアント
DjangoはビューレベルでのユーザーとのインタラクションをシミュレートすることができるClientを用意している。これをtests.pyやshellでも使うことができる。
テストクライアントを使う場合には、tests.pyでは必要でないけども、shellではやる必要がある二つのことがある。
1番 shell上でテスト環境をセットアップすること
2番 テストクライアントのクラスをインポートすること
まず1番。python manage.py shellでshellを起動する
>>> from django.test.utils import setup_test_environment
>>> setup_test_environment() # これでセットアップ終了
やっていることは公式の引用をどうぞ
setup_test_environment() は、テンプレートのレンダラーをインストールします。
これによって、今までは調査できなかった、レスポンス上のいくつかの属性(たとえば response.context )を調査できるようになります。
次に2番。
>>> from django.test import Client
>>> client = Client() # これでインポート終了
これで準備が完了したので、少しいじってみる
>>> # get a response from '/'
>>> response = client.get('/')
Not Found: /
>>> # we should expect a 404 from that address; if you instead see an
>>> # "Invalid HTTP_HOST header" error and a 400 response, you probably
>>> # omitted the setup_test_environment() call described earlier.
>>> response.status_code
404
>>> # on the other hand we should expect to find something at '/polls/'
>>> # we'll use 'reverse()' rather than a hardcoded URL
>>> from django.urls import reverse
>>> response = client.get(reverse('polls:index'))
>>> response.status_code
200
>>> response.content
b'\n <ul>\n \n <li><a href="/polls/1/">What's up?</a></li>\n \n </ul>\n\n'
>>> response.context['latest_question_list']
<QuerySet [<Question: What's up?>]>
ビューを改良する
まだ公開されていない質問(=pub_dateの日付が未来の質問)が表示されるようになっているので、これを直す。
views.pyのget_queryset()メソッドを修正する。
from django.utils import timezone # これの追加

# 他はいじらない
def get_queryset(self):
    """
    Return the last five published questions (not including those set to be
    published in the future).
    """
    return Question.objects.filter(
        pub_date__lte=timezone.now()
    ).order_by('-pub_date')[:5] # pub_dateがtimezone.now以前のQuestionを含んだクエリセットを返す。
ビューをテストする
これで期待通りの動作をしてくれるのかチェックをする。runserverして自分で過去の質問などを作るという手作業でのチェックはめんどくさいので、tests.pyで作る。
from django.urls import reverse # これを追加する

# 他はいじらない

def create_question(question_text, days): # questionを作る関数を追加
    """
    Create a question with the given `question_text` and published the
    given number of `days` offset to now (negative for questions published
    in the past, positive for questions that have yet to be published).
    """
    time = timezone.now() + datetime.timedelta(days=days)
    return Question.objects.create(question_text=question_text, pub_date=time)


class QuestionIndexViewTests(TestCase): # 追加で作ったテストクラス
    def test_no_questions(self): # 質問が一つもないときにNo polls are available.を表示するかどうか確認するクラス
        """
        If no questions exist, an appropriate message is displayed.
        """
        response = self.client.get(reverse('polls:index'))
        self.assertEqual(response.status_code, 200) # status_codeが200になっているか確認
        self.assertContains(response, "No polls are available.") # No polls are available.が表示されているかを確認
        self.assertQuerysetEqual(response.context['latest_question_list'], []) # latest_question_listが空[]になっているかを確認

    def test_past_question(self):
        """
        Questions with a pub_date in the past are displayed on the
        index page.
        """
        create_question(question_text="Past question.", days=-30)
        response = self.client.get(reverse('polls:index'))
        self.assertQuerysetEqual(
            response.context['latest_question_list'],
            ['<Question: Past question.>']
        )

    def test_future_question(self):
        """
        Questions with a pub_date in the future aren't displayed on
        the index page.
        """
        create_question(question_text="Future question.", days=30)
        response = self.client.get(reverse('polls:index'))
        self.assertContains(response, "No polls are available.")
        self.assertQuerysetEqual(response.context['latest_question_list'], [])

    def test_future_question_and_past_question(self):
        """
        Even if both past and future questions exist, only past questions
        are displayed.
        """
        create_question(question_text="Past question.", days=-30)
        create_question(question_text="Future question.", days=30)
        response = self.client.get(reverse('polls:index'))
        self.assertQuerysetEqual(
            response.context['latest_question_list'],
            ['<Question: Past question.>']
        )

    def test_two_past_questions(self):
        """
        The questions index page may display multiple questions.
        """
        create_question(question_text="Past question 1.", days=-30)
        create_question(question_text="Past question 2.", days=-5)
        response = self.client.get(reverse('polls:index'))
        self.assertQuerysetEqual(
            response.context['latest_question_list'],
            ['<Question: Past question 2.>', '<Question: Past question 1.>']
        )
これでpython manage.py test pollsをやれば、OKが出るはず。
DetailViewのテスト
未来の質問はindexに表示されなくなったが、URLを直接打ち込むと表示されてしまう。こうならないような制約をDetailViewにも追加する。
# IndexViewクラスなどはそのまま

class DetailView(generic.DetailView):
    ...
    def get_queryset(self):
        """
        Excludes any questions that aren't published yet.
        """
        return Question.objects.filter(pub_date__lte=timezone.now())
そして、過去のQuestionが表示されることを確認するテストと、未来のQuestionが表示されないことを確認するテストの二つをtests.pyに追加する
# 他のテストはそのまま

class QuestionDetailViewTests(TestCase):
    def test_future_question(self):
        """
        The detail view of a question with a pub_date in the future
        returns a 404 not found.
        """
        future_question = create_question(question_text='Future question.', days=5)
        url = reverse('polls:detail', args=(future_question.id,))
        response = self.client.get(url)
        self.assertEqual(response.status_code, 404)

    def test_past_question(self):
        """
        The detail view of a question with a pub_date in the past
        displays the question's text.
        """
        past_question = create_question(question_text='Past Question.', days=-5)
        url = reverse('polls:detail', args=(past_question.id,))
        response = self.client.get(url)
        self.assertContains(response, past_question.question_text)
このように考えれば、ResultsViewにも同じようにget_querysetメソッドを追加してテストをする必要があることがわかる。ただ、そのようなテストは今まで作ったものとよく似ており、しかも量も莫大となる。ただ、それで良いとのこと。公式曰く
私たちのテストは、手がつけられないほど成長してしまっているように見えるかもしれません。この割合で行けば、テストコードがアプリケーションのコードよりもすぐに大きくなってしまうでしょう。そして繰り返しは、残りの私たちのコードのエレガントな簡潔さに比べて、美しくありません。
構いません。テストコードが大きくなるのに任せましょう。たいていの場合、あなたはテストを一回書いたら、そのことを忘れて大丈夫です。プログラムを開発し続ける限りずっと、そのテストは便利に機能し続けます
きちんと考えてテストを整理していれば、テストが手に負えなくなることはありません。経験上、良いルールとして次のようなものが挙げられます。
・モデルやビューごとに TestClass を分割する
・テストしたい条件の集まりのそれぞれに対して、異なるテストメソッドを作る
・テストメソッドの名前は、その機能を説明するようなものにする
スタイルシートや画像の追加
pollsディレクトリの中にstaticディレクトリを作成する。Djangoはそこから静的ファイルを呼ぶ。
静的ファイルとは公式の説明をどうぞ
サーバで生成するHTML以外に、Webアプリケーションは一般的に完全なWebページをレンダリングするために、画像、JavaScript、CSSなど必要なファイルを提供する必要があります。Djangoでは、これらのファイルを "静的 (static) ファイル" と呼びます。
この作ったstaticディレクトリのなかに、pollsディレクトリを作って、その中にstyle.cssという名前のファイルを作る。これはtemplatesディレクトリを作って、その中にpollsディレクトリを作りそこにhtmlファイルを作ったのと同じ感じ。
li a {
    color: green;
}
次に、polls/index.htmlの上部に以下のコードを追加する。
{% load static %}

<link rel="stylesheet" type="text/css" href="{% static 'polls/style.css' %}">

<!-- 上部に追加して他はそのまま -->
これでサーバーを起動してhttp://localhost:8000/polls/ に行けば、リンクの色が緑になったことがわかるはず。
参考画像(What's up?が緑になっている)

次に背景画像を追加する。
画像のためのサブディレクトリとして、imageディレクトリをpolls/static/polls/以下に作る。この中にbackground.gifという名前の背景画像を置いておく。この画像は好きなものを自分で用意する。
そのあとスタイルシート(style.css)を変更する。
li a {
    color: green;
}

/* ここのbodyを追加 */
body {
    background: white url("images/background.gif") no-repeat;
}
これでサーバーを起動してhttp://localhost:8000/polls/ に行けば、自分の画像が左上に表示されていることがわかるはず。
adminフォームのカスタマイズ
今管理用画面で、Pollsにアクセスするとこんな感じ

今はChoiceの方はadmin.pyに追加してないのでQuestionsのみの表示。さらにQuestionsにアクセスするとこんな感じ。

作った質問(What's up?)が表示されている
さらに入るとこんな感じ

まずはこれの表示順番を変える
from django.contrib import admin

from .models import Question


class QuestionAdmin(admin.ModelAdmin):
    fields = ['pub_date', 'question_text']

admin.site.register(Question, QuestionAdmin)
これで管理画面を見ると

順番が入れ替わっている(Question textとDate published)のがわかる
またフォームを複数のフィールドセットに分割したい時はこうする
from django.contrib import admin

from .models import Question


class QuestionAdmin(admin.ModelAdmin):
    fieldsets = [
        (None,               {'fields': ['question_text']}),
        ('Date information', {'fields': ['pub_date']}), # Date informationがフィールドセットのタイトル
    ]

admin.site.register(Question, QuestionAdmin)
リレーションを張ったオブジェクトの追加(ChoiceとQuestionsの対応づけ)
Choiceオブジェクトをただ表示させるだけならadmin.pyにChoiceを追加すれば良い。
from django.contrib import admin

from .models import Choice, Question # Choiceを追加


class QuestionAdmin(admin.ModelAdmin):
    fieldsets = [
        (None,               {'fields': ['question_text']}),
        ('Date information', {'fields': ['pub_date']}), # Date informationがフィールドセットのタイトル
    ]

admin.site.register(Question, QuestionAdmin)
admin.site.register(Choice) # この行も追加

これでも良いけど、ChoiceとQuestionsが別々になっていてChoiceオブジェクトをシステムに追加するには効率的でない。Questionオブジェクトを追加する時にChoiceをひと通り追加できるようにする。
from django.contrib import admin

from .models import Choice, Question


class ChoiceInline(admin.StackedInline):
    model = Choice
    extra = 3 # choiceを追加するときの余分のスロット数


class QuestionAdmin(admin.ModelAdmin):
    fieldsets = [
        (None,               {'fields': ['question_text']}),
        ('Date information', {'fields': ['pub_date'], 'classes': ['collapse']}),
    ]
    inlines = [ChoiceInline]

admin.site.register(Question, QuestionAdmin)
What's up?を見るとこんな感じ

Choice: #3から#5までは上で定義したextra = 3の部分に対応する
ただこの表示方法はスペースを取るので変更する。
# 他は変えない
class ChoiceInline(admin.TabularInline): # admin.StackedInline -> admin.TabularInline
    ...

管理サイトの「チェンジリストページ」のカスタマイズ
次にここ(チェンジリストページ)も変える。

Djangoのデフォルトではオブジェクトのstr()を表示する。でもオブジェクトのフィールドの値(question_textとかpub_dateとか)も表示させたいことがあるので、それを表示させるようにする。
class QuestionAdmin(admin.ModelAdmin):
    # 他は変えない
    list_display = ('question_text', 'pub_date', 'was_published_recently') # こいつを追加するだけ
するとこうなる

カラムのヘッダ(QUESTION TEXTとかDATE PUBLISHEDとか)をクリックするとその値に応じて並べ替えができる。しかし、WAS PUBLISHED RECENTLYはそれができない。ここはメソッド名を表示させているだけで、その値もメソッドからの戻り値を文字列表示しているだけだからである。
これを改善するためにmodels.pyを変更する
class Question(models.Model):
    # 他は変えない
    def was_published_recently(self):
        now = timezone.now()
        return now - datetime.timedelta(days=1) <= self.pub_date <= now
    was_published_recently.admin_order_field = 'pub_date'
    was_published_recently.boolean = True
    was_published_recently.short_description = 'Published recently?'
これでwas_published_recentlyがうまく変更できた。
試しに今日の日付でtestという質問を作る。画面左上のADD QUESTION +ボタンから適当に質問を作る。

こんな感じの設定(日付は今日で時間は今の時間にした)にしてSAVEを押せばOK
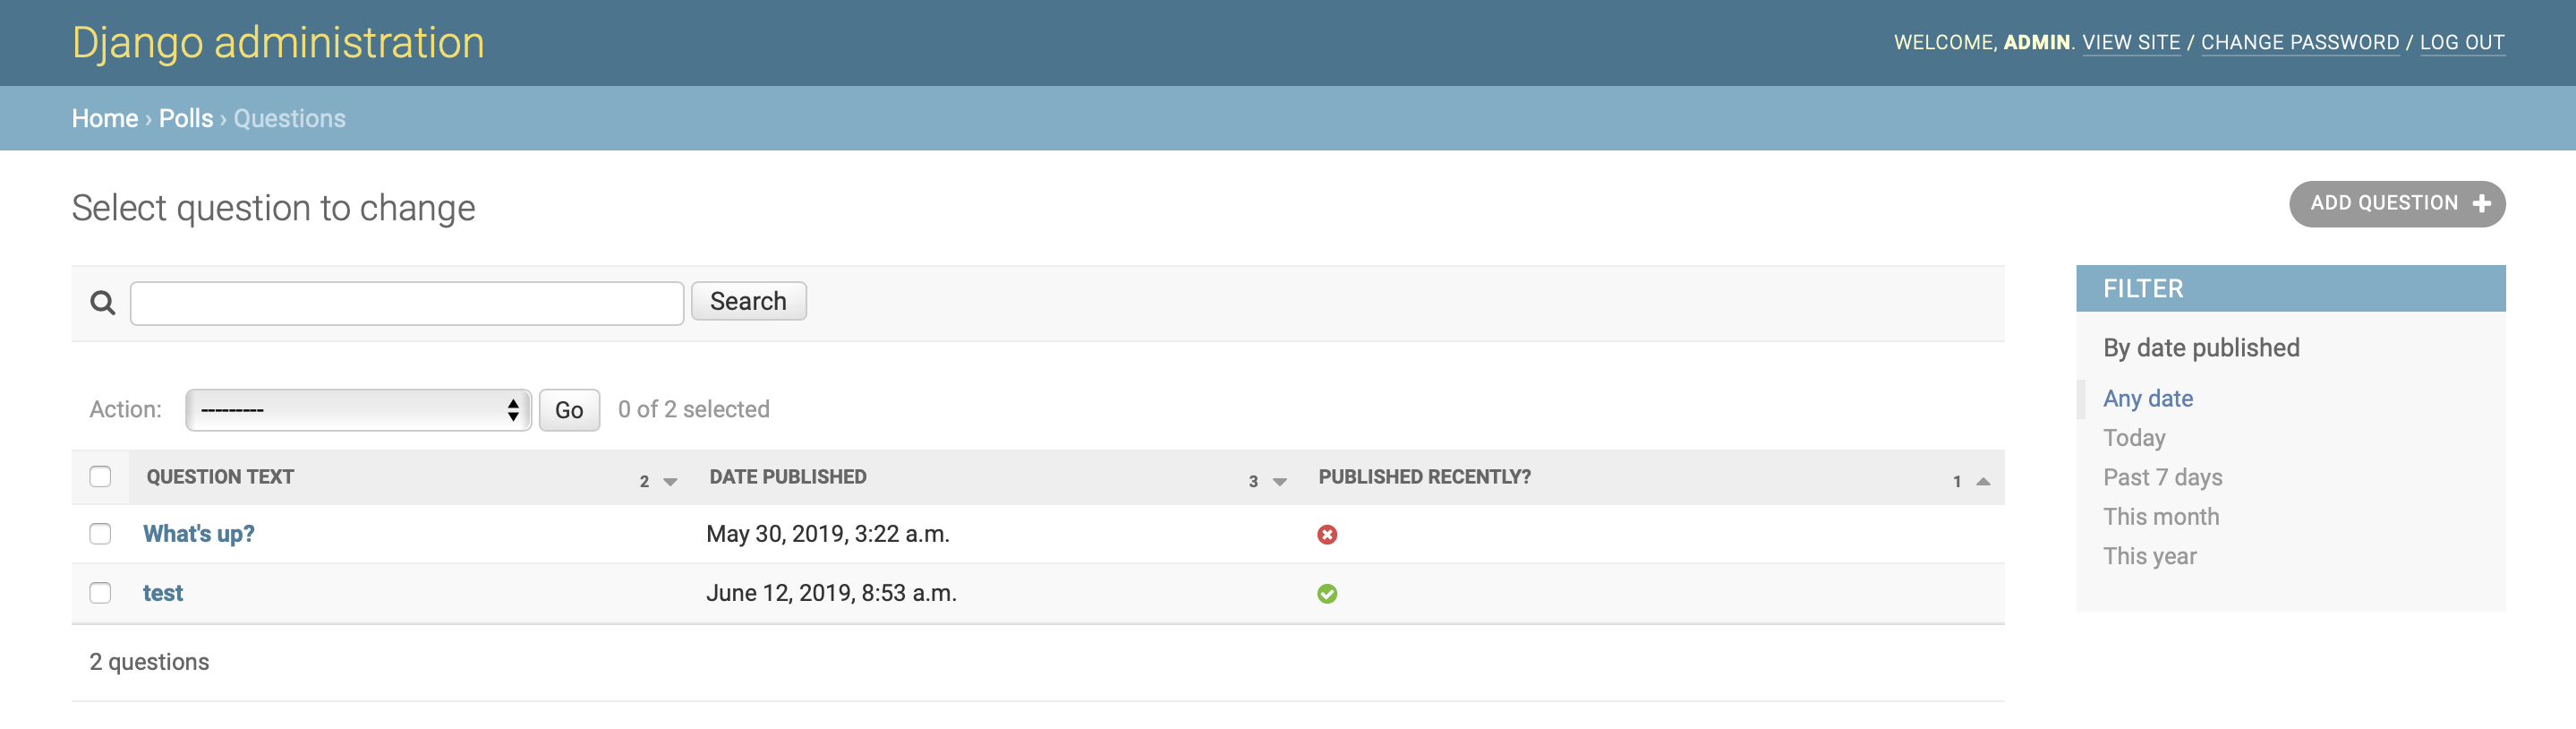
これで管理画面を見るとこんな感じになることがわかる。どのカラムのヘッダでもソートできるようになっている。

次にフィルターを作る。admin.pyを変えるだけ。
class QuestionAdmin(admin.ModelAdmin):
    # 他は変えない
    list_filter = ['pub_date'] # こいつを追加する
次に検索ボックスも作る。これもadmin.pyに書き加えるだけ。
class QuestionAdmin(admin.ModelAdmin):
# 他は変えない
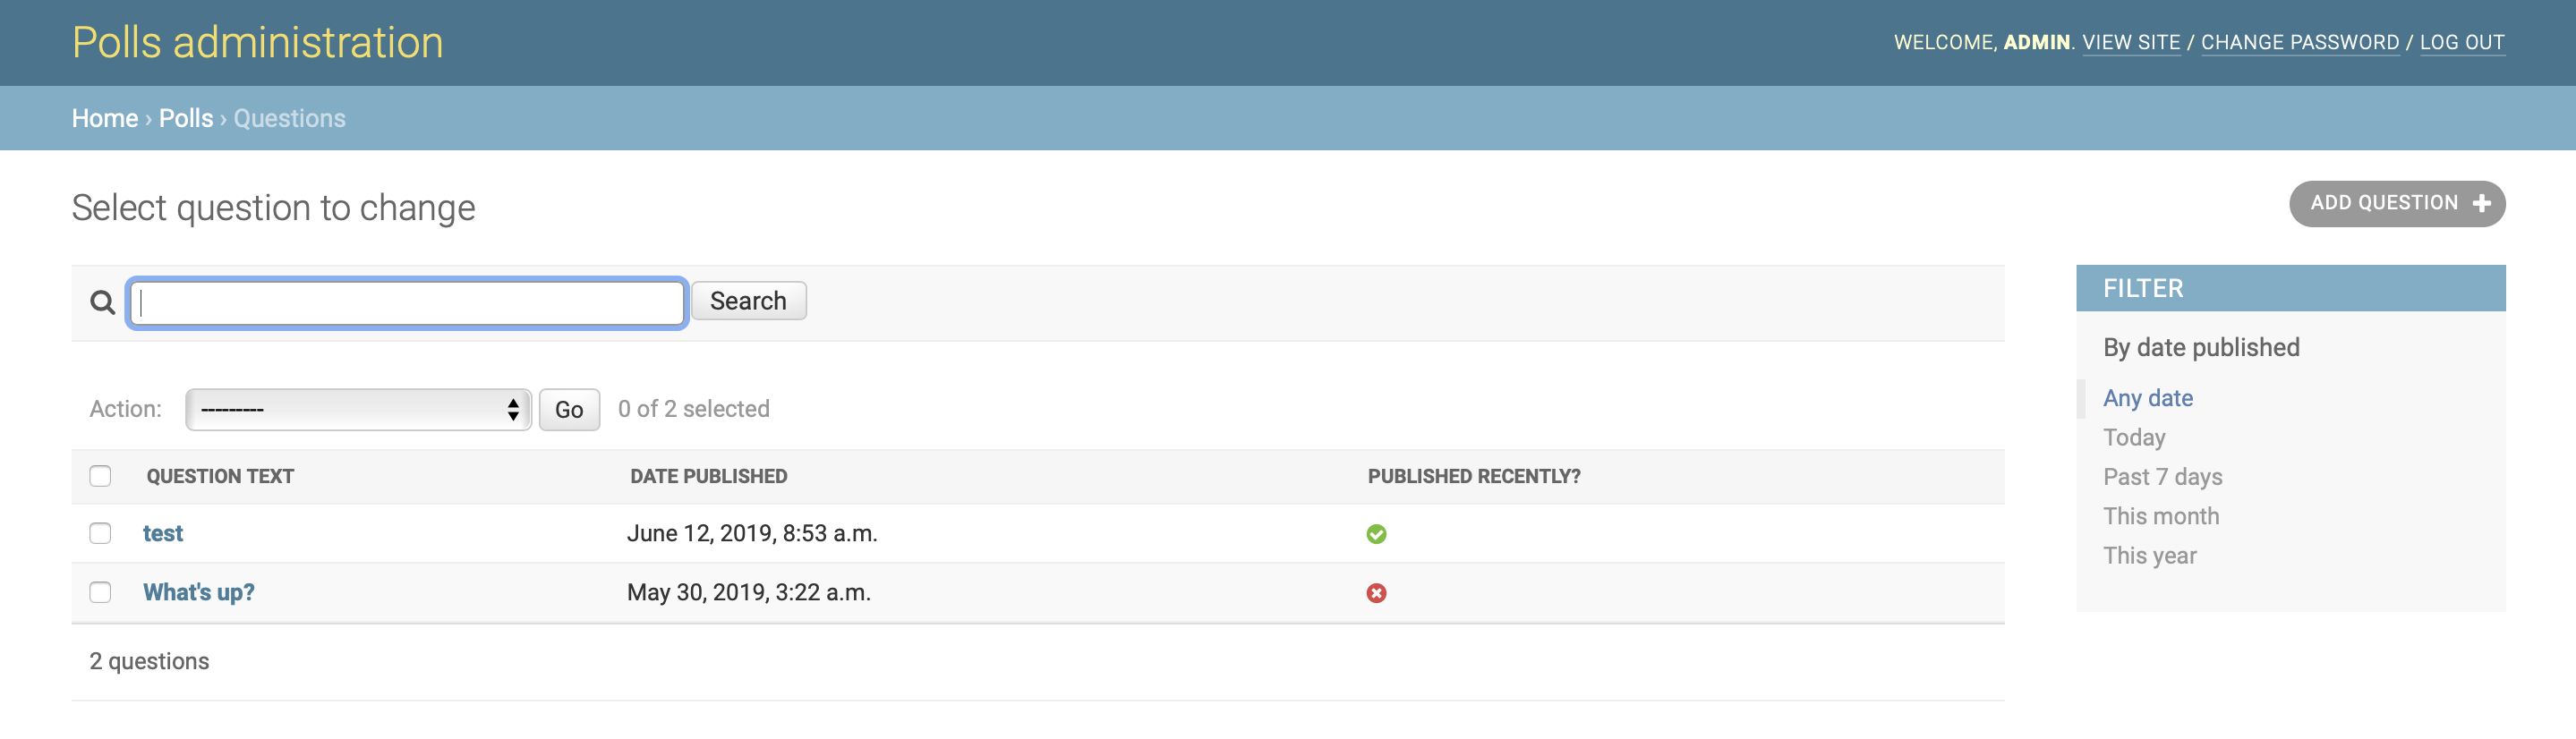
search_fields = ['question_text'] # こいつを追加する
上部に検索ボックスが表示され、右にフィルターができたのが確認できる。
管理サイトのルック・フィールドをカスタマイズする
ルック・フィールとはWikiからの引用をどうぞ。
ルック・アンド・フィール(英: look and feel、LnF)とは、グラフィカルユーザインタフェースにおける色、形状、レイアウト、書体のような要素を含むデザインの側面(ルック)と、ボタン、ボックス、メニューといった動的振る舞い(フィール)からなる。
管理サイト自身も当然Djangoで書かれているので、それを変更してページ上部のDjango administrationをPolls administrationに変更する。
まずはtemplatesディレクトリをプロジェクトディレクトリ(manage.pyが置いてあるディレクトリ)に作成する。また今までと同じようにadminディレクトリをその中に作成しておく。いつもどおり(mysite/templates/admin/~.html)という感じでhtmlファイルを作るイメージ。
次に設定ファイル(mysite/mysite/settings.py)を開いてTEMPLATESのDIRSオプションを変更する。
# 他は変えない

TEMPLATES = [
    {
        'BACKEND': 'django.template.backends.django.DjangoTemplates',
        'DIRS': [os.path.join(BASE_DIR, 'templates')], # ここを直下のtemplatesを読むよう変更する
        'APP_DIRS': True,
        'OPTIONS': {
            'context_processors': [
                'django.template.context_processors.debug',
                'django.template.context_processors.request',
                'django.contrib.auth.context_processors.auth',
                'django.contrib.messages.context_processors.messages',
            ],
        },
    },
]
DIRSとは公式の引用をどうぞ
DIRS は、Django がテンプレートを読み込む時にチェックする、ファイルシステム上のディレクトリのリストです。サーチパスのようなものです。
Django自体のソースコード内にあるデフォルトのDjango adminテンプレートディレクトリ(django/contrib/admin/templates)を探して、admin/base_site.htmlというテンプレートを、新しく作ったディレクトリ(mysite/templates/admin)にコピーする。
Djangoのソースファイルの場所がわからない時はpython -c "import django; print(django.__path__)"を実行する。
パスがわかればcp ~/django/contrib/admin/templates/admin/base_site.html ~/mysite/templates/admin/base_site.htmlでコピーできる。(~は自分のパソコンの環境で変えてください)
コピーしてきたbase_site.htmlを変更する。{{ site_header|default:_('Django administration') }}を好きなサイト名に変えれば良い。今回はPolls Administrationという名前にする。
<!-- 他は変えない -->
{% block branding %}
<h1 id="site-name"><a href="{% url 'admin:index' %}">Polls Administration</a></h1>
{% endblock %}
ページ上部の名前が変わっているのが確認できる。
この名前の変更として、公式からの引用をどうぞ
このようなアプローチを今使ったのは、テンプレートをオーバーライドする方法を示すためです。実際のプロジェクトで今行ったのと同じカスタマイズを行いたい場合には、 django.contrib.admin.AdminSite.site_header 属性を使えば、もっと簡単に設定できます。
最終的なファイル構成はこんな感じ
mysite/
    manage.py
    mysite/
        __init__.py
        settings.py
        urls.py
        wsgi.py
    todo/
        __init__.py
        admin.py
        apps.py
        forms.py
        migrations/
            __init__.py
            0001_initial.py
        models.py
        templates/
            todo/
                base.html
                index.html
        tests.py
        urls.py
        views.py
    polls/
        __init__.py
        admin.py
        apps.py
        migrations/
            __init__.py
            0001_initial.py
        models.py
        static/
            polls/
                images/
                    background.gif
                style.css
        templates/
            polls/
                detail.html
                index.html
                results.html
        tests.py
        urls.py
        views.py
    templates/
        admin/
            base_site.html
これでDjangoのチュートリアルは終了です。より詳しい説明は公式サイトをどうぞ。ご覧いただきありがとうございました。