はじめに
この記事は、前回の「[Rails] deviseで2種類のユーザーアカウントを作成する①」の続きです。
deviseによるログイン機能とそのビューとコントローラーを作成し、実際にブラウザ上でdeviseのビューが確認できたところまで完了しているものとして始めていきます。
それぞれ最低限のカラムしか持たせていません。
2種類のユーザーアカウントから派生したそれぞれのトップページ作成までをゴールとします。
またteacherにだけ投稿機能を持たせます。
先生用Textbookモデルを作成
teacherはtextbookを投稿できるようにします。
まずは先生用のTextbookモデルを作成します。
% rails g model textbook name:string
今回はnameカラムだけ追加しました。。必要があればマイグレーションする前にカラムを追加しましょう。
% rails db:migrate
先生用textbooksコントローラーとビューを作成
コントローラー
% rails g scaffold_controller teachers/textbook --skip-test-framework --skip-assets
teachers/textbookの記述でteachersの配下になります。
ルーティング修正
namespaceを使ってパスを整えます。
Rails.application.routes.draw do
  namespace :teachers do
    resources :textbooks
  end

  devise_for :students, controllers: {
    sessions:      'students/sessions',
    passwords:     'students/passwords',
    registrations: 'students/registrations'
  }
  devise_for :teachers, controllers: {
    sessions:      'teachers/sessions',
    passwords:     'teachers/passwords',
    registrations: 'teachers/registrations'
  }
  root to: 'home#index'
end
先生用レイアウトを追加
先生としてログインした人だけが使うレイアウトを追加します。
'app/views/layouts/teachers/application.html.erb'というファイルを作成します。
そしてapp/views/layouts/application.html.erbの中身をそのままコピペしてください。
<!DOCTYPE html>
<html>
  <head>
    <title>SampleApp</title>
    <%= csrf_meta_tags %>
    <%= csp_meta_tag %>

    <%= stylesheet_link_tag 'application', media: 'all', 'data-turbolinks-track': 'reload' %>
    <%= javascript_pack_tag 'application', 'data-turbolinks-track': 'reload' %>
  </head>

  <body>
    <%= yield %>
  </body>
</html>
さらに下記の記述を加えます。
<!DOCTYPE html>
<html>
  <head>
    <title>SampleApp</title>
    <%= csrf_meta_tags %>
    <%= csp_meta_tag %>

    <%= stylesheet_link_tag 'application', media: 'all', 'data-turbolinks-track': 'reload' %>
    <%= javascript_pack_tag 'application', 'data-turbolinks-track': 'reload' %>
  </head>

  <body>
    <% if teacher_signed_in? %>
      <%= "お疲れ様です! #{current_teacher.email} 先生"%>
      <%= link_to 'SignOut', destroy_teacher_session_path, method: :delete %>
    <% else %>
      <%= link_to 'SignUp', new_teacher_registration_path %>
      <%= link_to 'Sigin', new_teacher_session_path %>
    <% end %>
    <%= yield %>
  </body>
</html>
先生用のapplication_controllerを追加
application_controllerはすべてのcontrollerの元となっている親みたいなものです。
ですからapplication_controllerの記述はその配下のすべてのcontrollerに反映されます。
ここではその仕組みを利用したいものの、teachers配下とstudents配下の区別はしたいです。
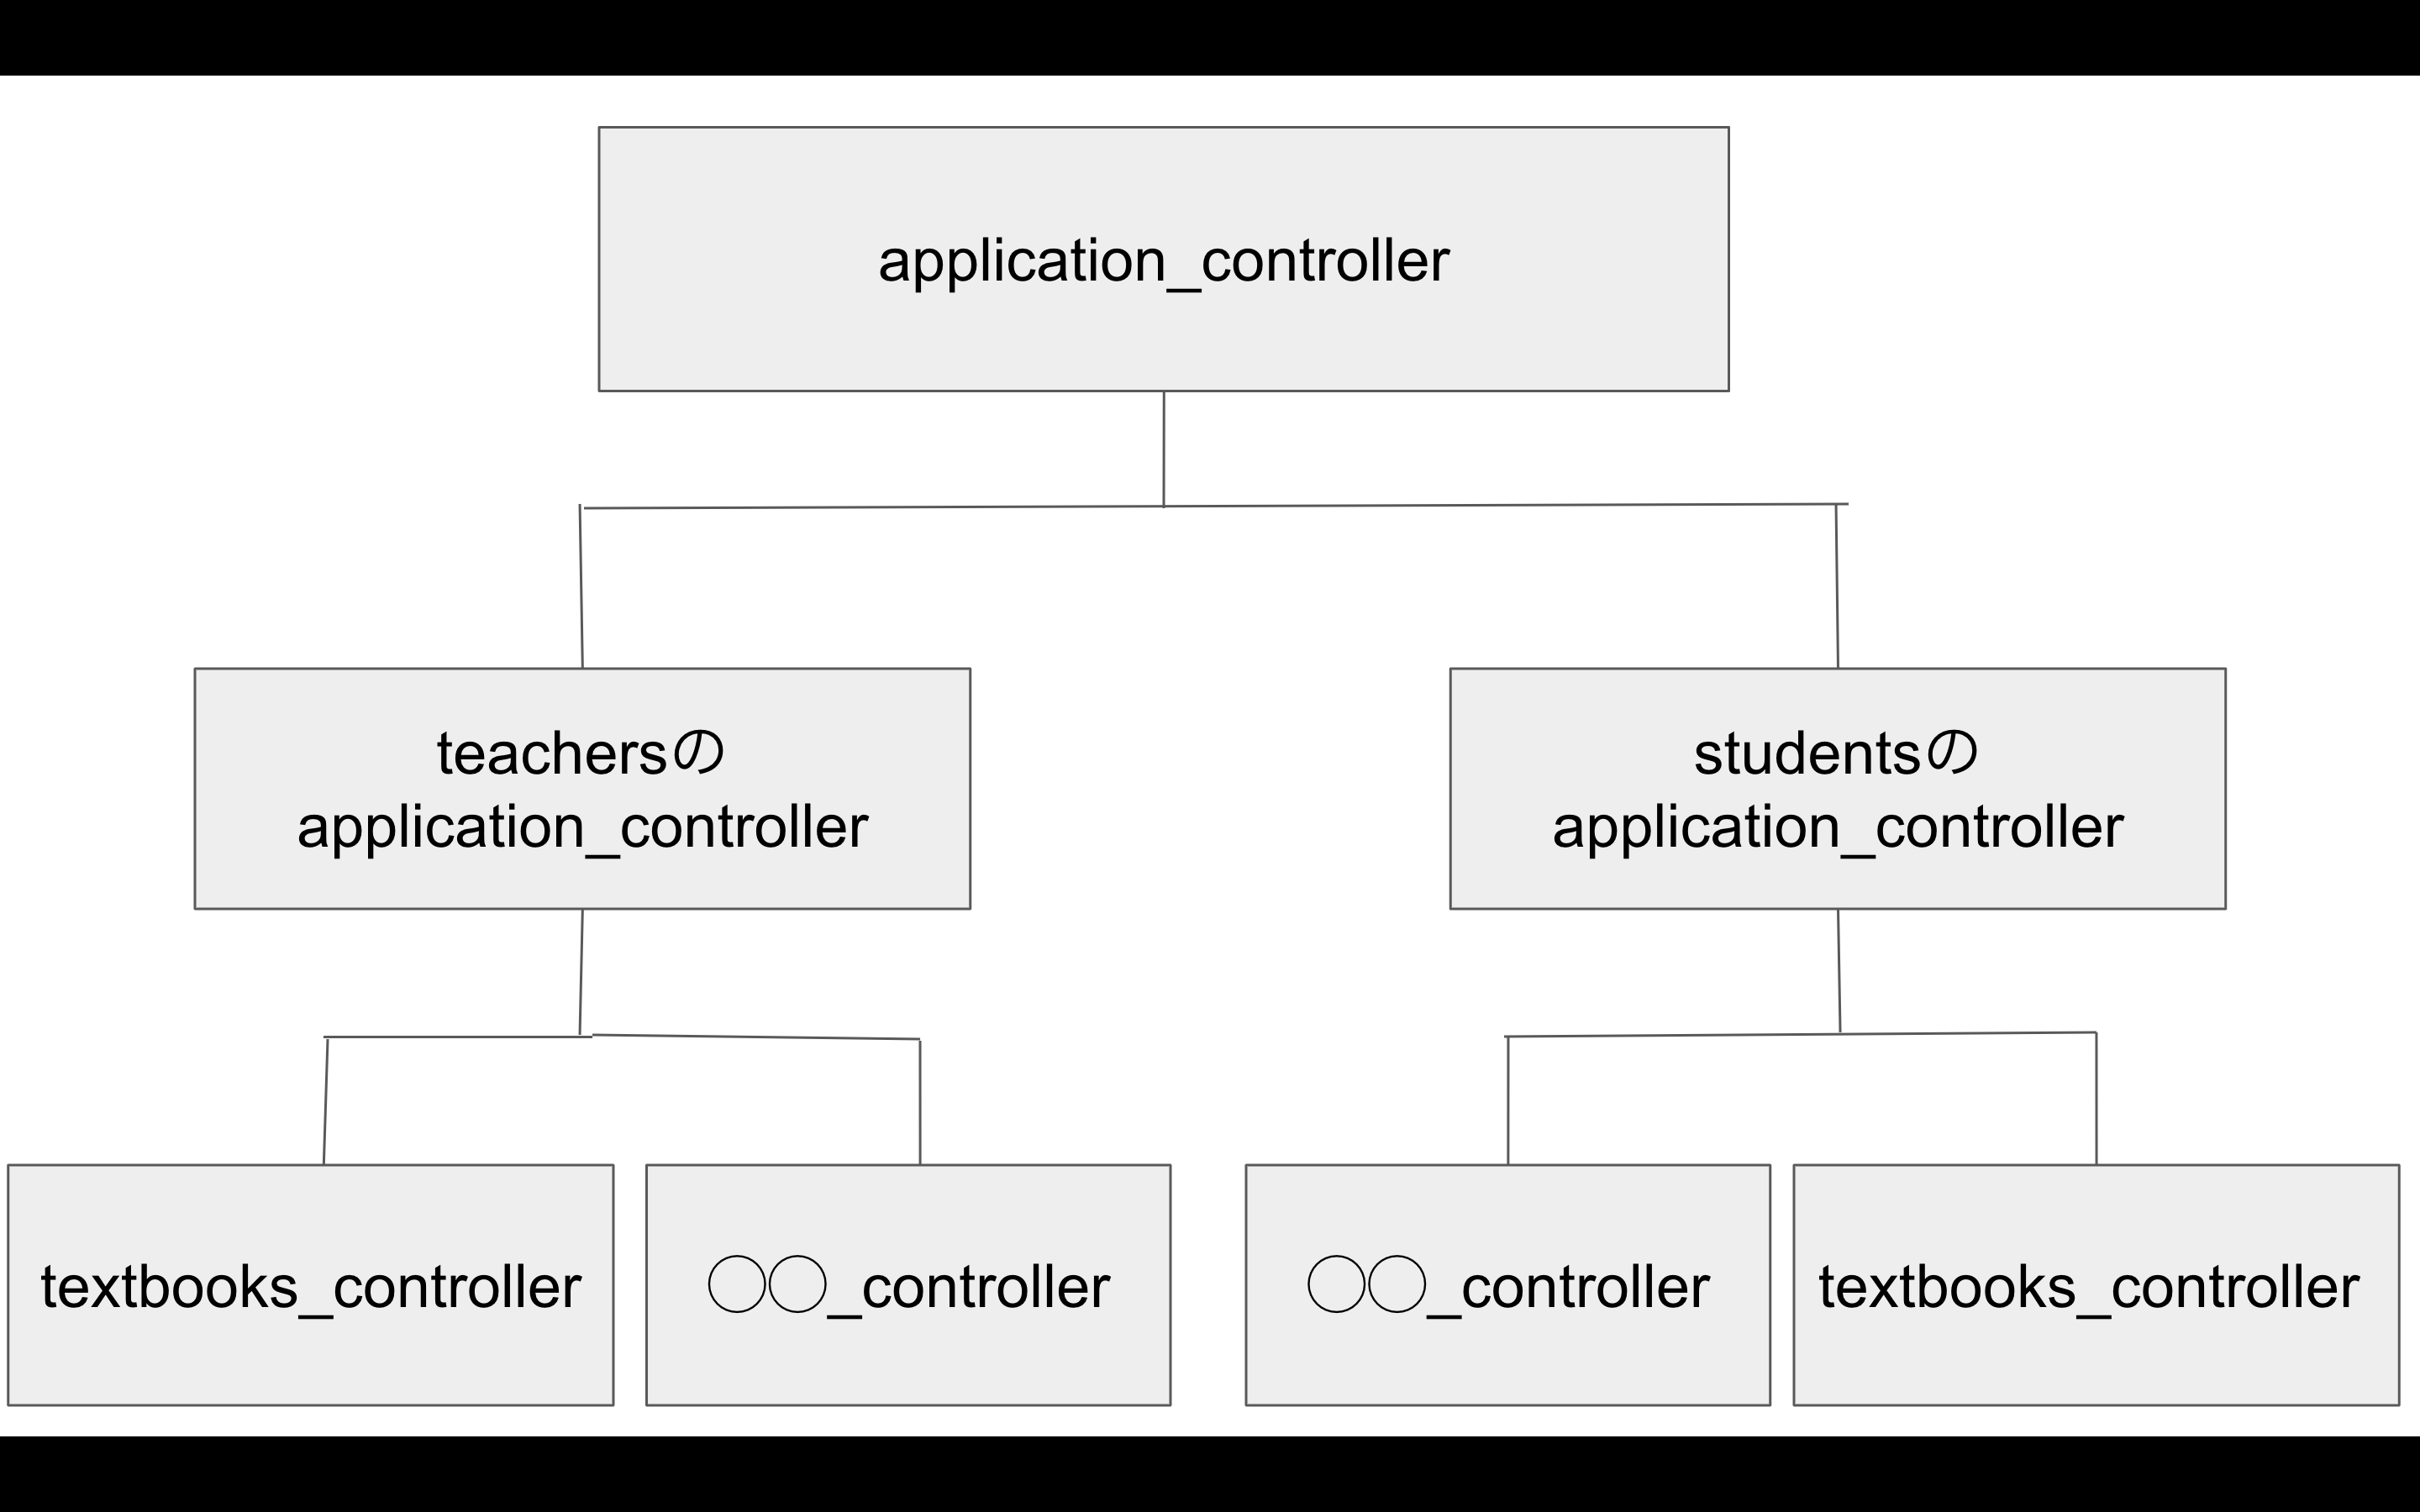
だったらteachersとstudentsの中にそれぞれのapplication_controllerを作成し、それをそれぞれの継承元とするのです。
私の中のイメージはこんな感じです。
間違ってたら教えて欲しいです
これが通常なんですが↓
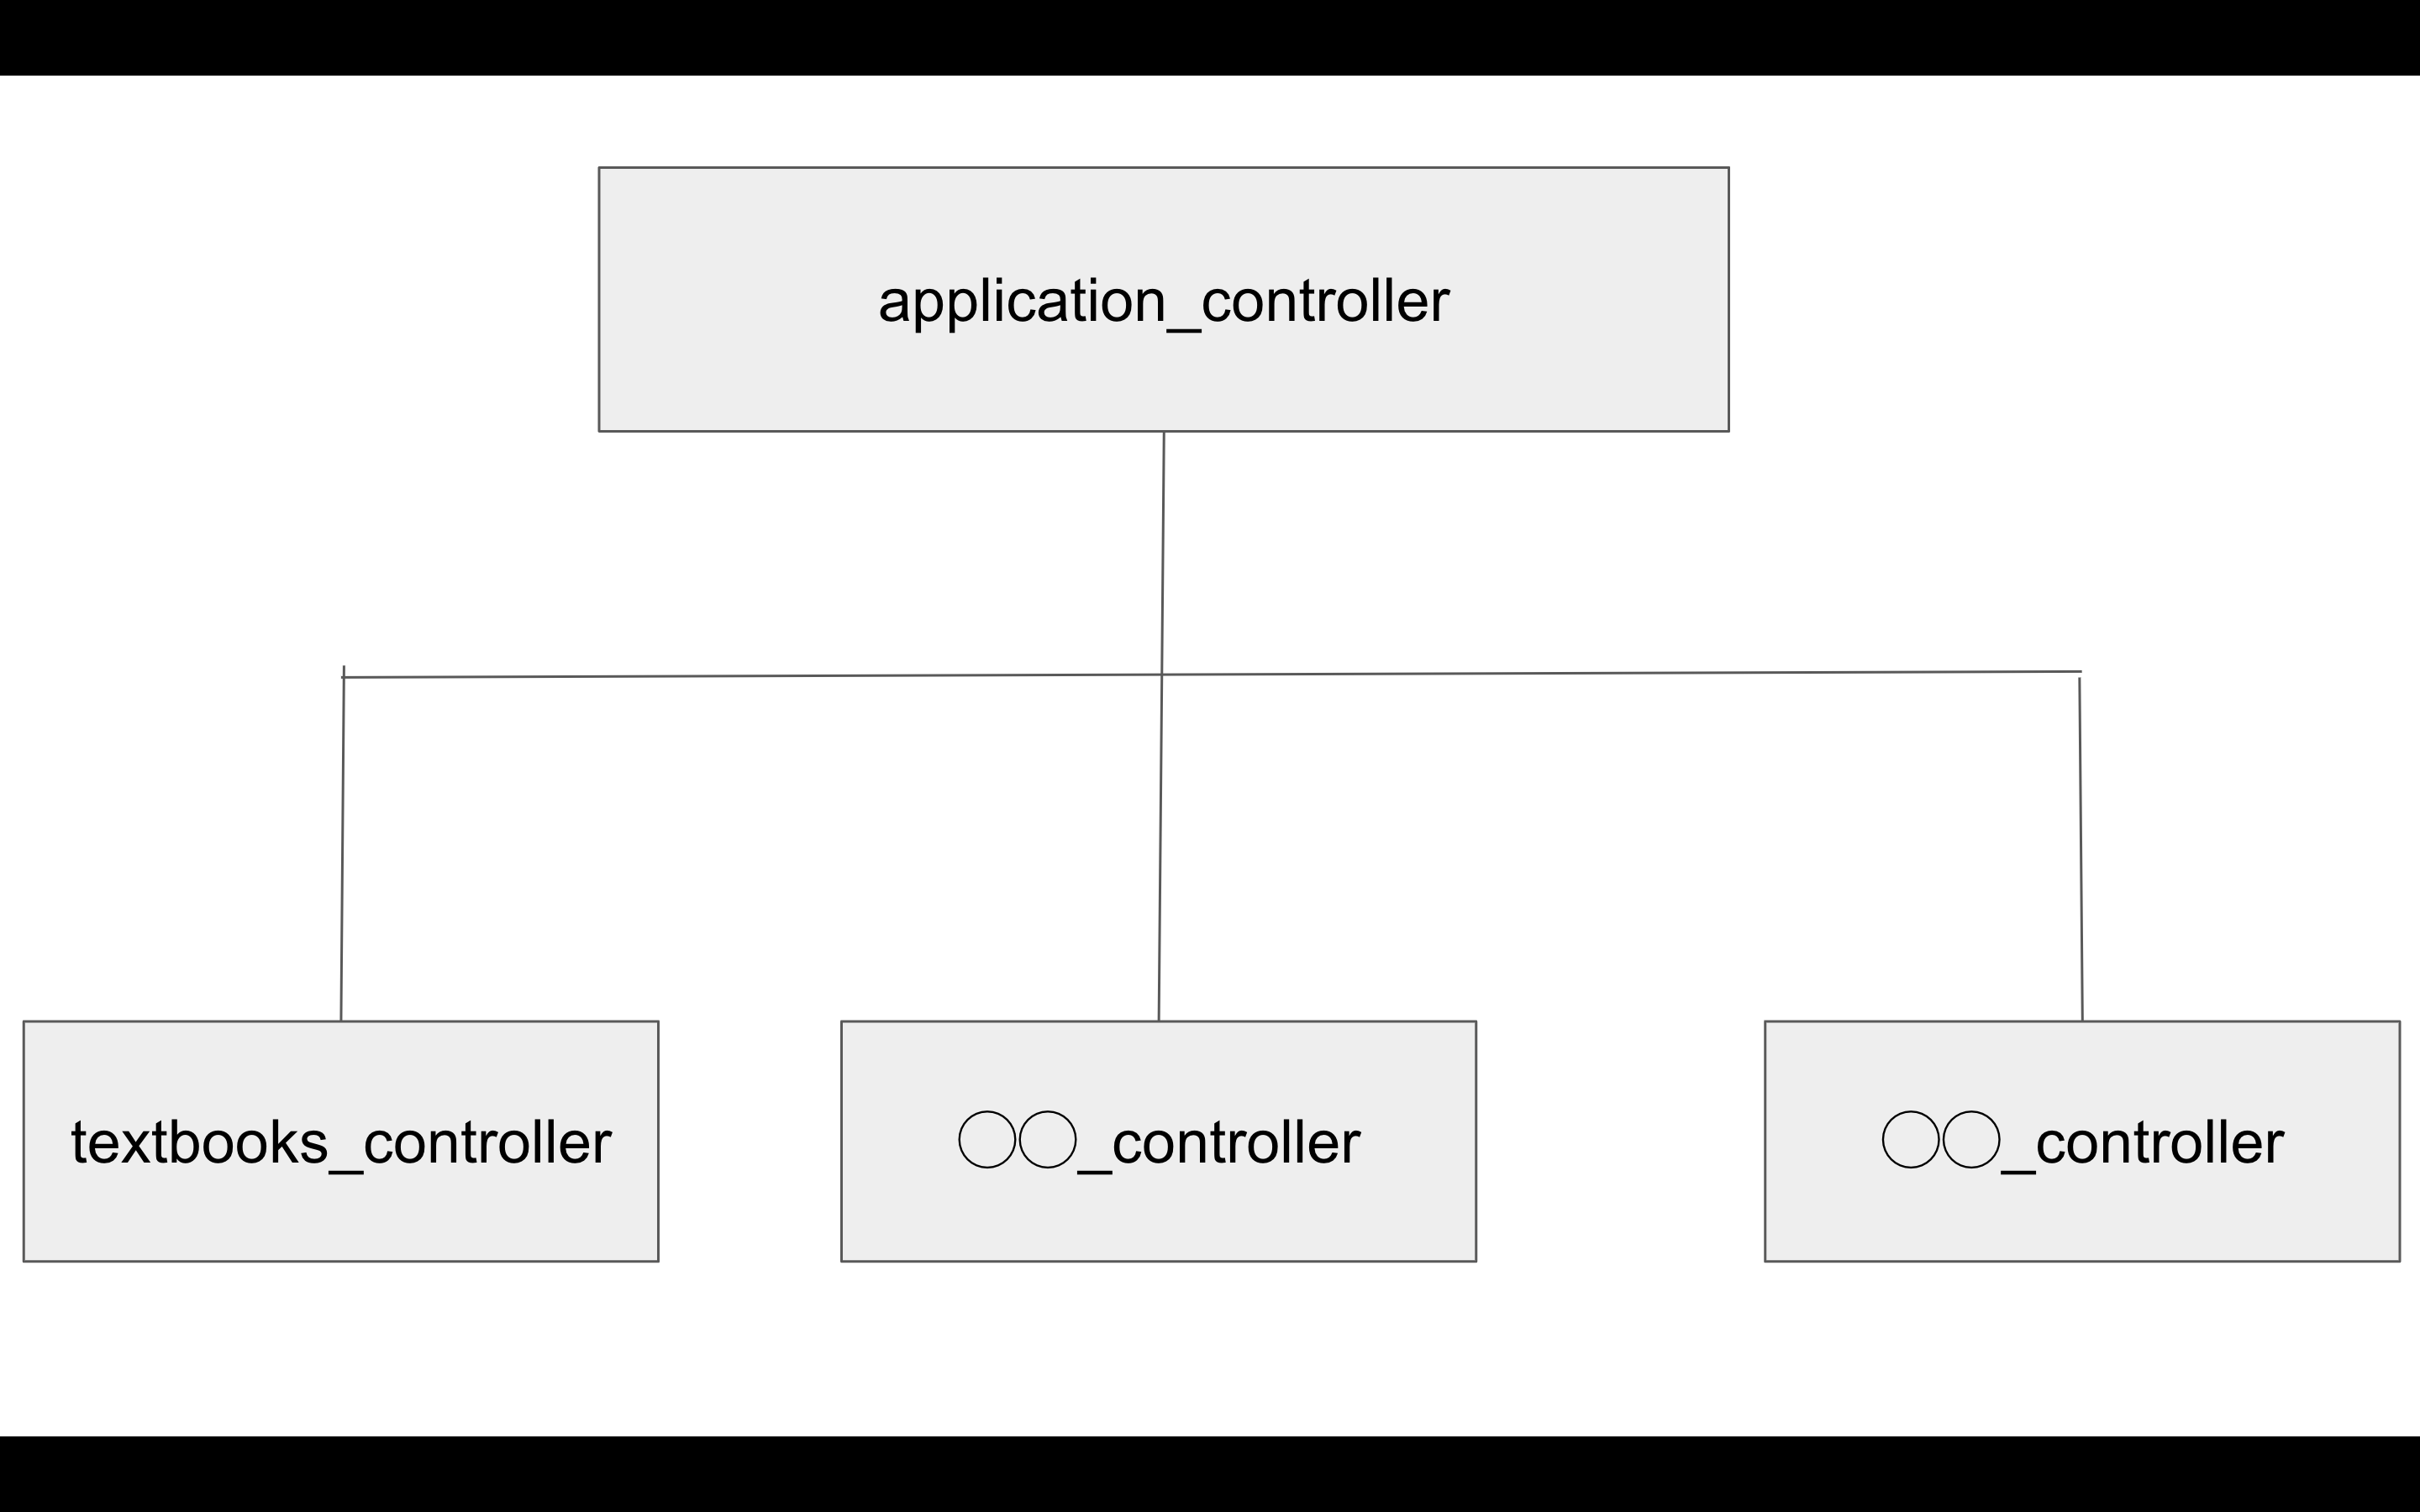
こんな感じにするイメージ↓
早速teachersのapplication_controller.rbを作成します。
% rails g controller teachers/application_controller
下記の記述を加えます
class Teachers::ApplicationController < ApplicationController
  layout 'teacher/application'
  before_action :authenticate_teacher!
end
上記の記述はapp/controllers/teachers 配下に作成されているコントローラーはすべて
app/views/layouts/teachers/application.html.erbをレイアウトに使うようにし、teacherで認証されるようにしています。
先生用textbooksコントローラーを修正
先生用textbooksコントローラーの一行目を下記のように書き換えます。
class Teachers::TextbookController < Teachers::ApplicationController
end
これで先生用のtextbooksコントローラーはapp/controllers/teachers/application_controllerを継承します。
先生用textbookコントローラーの中身はrails g scaffold_controller コマンドで作成したので自動でいろいろな記述をしてくれていますが、いくつか修正が必要です。
モデルを記述している箇所が
Teachers::Textbookのようになっているので下記のように直しましょう。
# 例
  def index
    @teachers_textbooks = Textbook.all
  end
続いて、createアクションとupdateアクションのif文の中のredirect_toの後を変更
# createアクションの場合
def create
    @teachers_textbook = Textbook.new(teachers_textbook_params)

    respond_to do |format|
      if @teachers_textbook.save
        format.html { redirect_to [:teachers, @teachers_textbook], notice: "Textbook was successfully created." }
        format.json { render :show, status: :created, location: @teachers_textbook }
      else
        format.html { render :new, status: :unprocessable_entity }
        format.json { render json: @teachers_textbook.errors, status: :unprocessable_entity }
      end
    end
  end
そしてストロングパラメーターも変えます。デフォルトでfetchという記述が書いてありますが、使い方がイマイチよく理解できていないため、私の書き慣れた方法で書き直します。
# 中略
  def teachers_textbook_params
    params.require(:textbook).permit(:name)
  end
先生用textbookのビューを修正
自動で作成されているビューの記述を変更する。
<p id="notice"><%= notice %></p>

<h1>Teachers Textbooks</h1>

<table>
  <thead>
    <tr>
      <th colspan="3"></th>
    </tr>
  </thead>

  <tbody>
    <% @teachers_textbooks.each do |teachers_textbook| %>
      <tr>
        <td><%= link_to 'Show', teachers_textbook %></td>
        <td><%= link_to 'Edit', edit_teachers_textbook_path(teachers_textbook) %></td>
        <td><%= link_to 'Destroy', teachers_textbook, method: :delete, data: { confirm: 'Are you sure?' } %></td>
      </tr>
    <% end %>
  </tbody>
</table>

<br>

<%= link_to 'New Teachers Textbook', new_teachers_textbook_path %>
<p id="notice"><%= notice %></p>

<h1>Teachers Textbooks</h1>

<table>
  <thead>
    <tr>
      <th>Name</th>
      <th colspan="3"></th>
    </tr>
  </thead>

  <tbody>
    <% @teachers_textbooks.each do |teachers_textbook| %>
      <tr>
        <td><%= teachers_textbook.name %></td>
        <td><%= link_to 'Show', [:teachers, teachers_textbook] %></td>
        <td><%= link_to 'Edit', edit_teachers_textbook_path(teachers_textbook) %></td>
        <td><%= link_to 'Destroy', [:teachers, teachers_textbook], method: :delete, data: { confirm: 'Are you sure?' } %></td>
      </tr>
    <% end %>
  </tbody>
</table>

<br>

<%= link_to 'New Teachers Textbook', new_teachers_textbook_path %>
続いて、app/views/teachers/_form.html.erbの一行目のform_withの内容を修正し、:nameの入力フォームも作成しましょう。
<%= form_with(model: [:teachers, @teachers_textbook], local: true) do |form| %>
  <% if teachers_textbook.errors.any? %>
    <div id="error_explanation">
      <h2><%= pluralize(teachers_textbook.errors.count, "error") %> prohibited this teachers_textbook from being saved:</h2>

      <ul>
        <% teachers_textbook.errors.full_messages.each do |message| %>
          <li><%= message %></li>
        <% end %>
      </ul>
    </div>
  <% end %>

    <%= form.label :name, "名前" %>
    <%= form.text_field :name %>

  <div class="actions">
    <%= form.submit %>
  </div>
<% end %>
localhost:3000/teachers/foodsにアクセスし、localhost:3000/teachers/sign_inにリダイレクトされればOKです。
生徒用のTextbooksコントローラーとビュー作成
ほとんど、先生用で行ったことをstudentで置き換えるだけです。
同じように、studentsのtextbooksコントローラーを作成します。
% rails g scaffold_controller students/textbook --skip-test-framework --skip-assets
ルーティングでnamespaceを使ってtextbooksをstudentsの配下にも置いてあげます。
Rails.application.routes.draw do
  namespace :teachers do
    resources :textbooks
  end

  namespace :students do
    resources :textbooks
  end

  devise_for :students, controllers: {
    sessions:      'students/sessions',
    passwords:     'students/passwords',
    registrations: 'students/registrations'
  }
  devise_for :teachers, controllers: {
    sessions:      'teachers/sessions',
    passwords:     'teachers/passwords',
    registrations: 'teachers/registrations'
  }
  root to: 'home#index'
end
次にteacher同様、student専用のレイアウトを作ります。app/views/layouts/students/application.html.erbを作成し、下記の記述をします。
<!DOCTYPE html>
<html>
  <head>
    <title>SampleApp</title>
    <%= csrf_meta_tags %>
    <%= csp_meta_tag %>

    <%= stylesheet_link_tag 'application', media: 'all', 'data-turbolinks-track': 'reload' %>
    <%= javascript_pack_tag 'application', 'data-turbolinks-track': 'reload' %>
  </head>

  <body>
    <% if student_signed_in? %>
      <%= "お疲れ様です! #{current_student.email} さん"%>
      <%= link_to 'SignOut', destroy_student_session_path, method: :delete %>
    <% else %>
      <%= link_to 'SignUp', new_student_registration_path %>
      <%= link_to 'Signin', new_student_session_path %>
    <% end %>
    <%= yield %>
  </body>
</html>
studentsのapplication_controllerを作成します。
% rails g controller students/application_controller
そして、students配下のコントローラーはapp/views/layouts/students/application.html.erbをレイアウトに使う記述とstudentじゃなかったら弾く記述を書きます。
class Students::ApplicationController < ApplicationController
  layout 'students/application'
  before_action :autenthicate_student!
end
studentsのtextbookのコントローラーの参照する親のコントローラーをstudentsのapplication_controllerに変更します。(1行目)
モデルの記述を修正します。
studentsは投稿機能は使えないのでindexとshowだけにします。
class Students::TextbooksController < Students::ApplicationController
  before_action :set_students_textbook, only: [:show]

  def index
    @students_textbooks = Textbook.all
  end

  def show
  end

  private

    def set_students_textbook
      @students_textbook = Textbook.find(params[:id])
    end
end
生徒用textbookのビューを修正
先生の同じように修正するが、show以外のリンクは必要ないので削除します。
また、Showのリンクのパスも変更しています。
<p id="notice"><%= notice %></p>

<h1>Students Textbooks</h1>

<table>
  <thead>
    <tr>
      <th> Name </th>
      <th colspan="3"></th>
    </tr>
  </thead>

  <tbody>
    <% @students_textbooks.each do |students_textbook| %>
      <tr>
        <td><%= students_textbook.name %></td>
        <td><%= link_to 'Show', [:students, students_textbook] %></td>
      </tr>
    <% end %>
  </tbody>
</table>
scaffold_controllerのコマンドによって自動生成された以下のファイルは生徒の方では不要なので削除する。
・app/view/students/textbook/edit.html.erb
・app/view/students/textbook/new.html.erb
・app/view/students/textbook/_form.html.erb
ここまでできたらlocalhost:3000/students/textbooksをブラウザで確認
localhost:3000/students/sign_inへリダイレクトされれば成功です。
Home#indexから分岐させる
Homeのindexが現在rootに設定されています。このページから生徒と先生を分岐させるため、それぞれのログインページへ遷移できるようにリンクを作ります。
<h1>Home#index</h1>
<p>Find me in app/views/home/index.html.erb</p>

<p><%= link_to '先生はこちら', teachers_textbooks_path %></p>
<p><%= link_to '生徒はこちら', students_textbooks_path %></p>
はじめはsign upで新規登録しましょう。
ここで先生側の新規登録方法ですが、コンソールから行います。
% rails c

irb(main):001:0> Teacher.new({email:"example@example.com",password:"*******"}).save
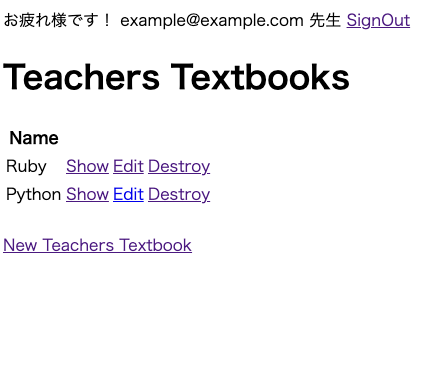
先生の方でログインしいくつか適当に投稿するとこんな感じになります。
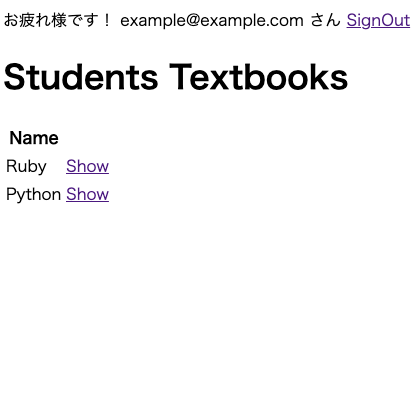
また、生徒側から見るとこんな感じです
以上で完了です。
最後に
2種類のユーザーを作ることで、それぞれの見せ方を変えたり、片方だけに何かの機能を付与したり、いろいろ想像が膨らみます。
改めてこうして文字に起こして説明していると自分でも結構理解せずにたまたまうまくいっていたりした箇所もいくつかあったので、これからも新しく学んだことは、文字に起こして整理して、自分が本当に理解できているのか確認しながら自分のものにしていきたいと思います。