Optunaなど、ハイパーパラメータチューニングのモジュールが出てきていますが、最近登場したKeras用ハイパーチューニングモジュールKeras Tunerを試してみたいと思います。
基本的には、ここの和訳になります。
条件
Keras Tunerを動作させるには、以下のモジュールが必要です。
- Python 3.6以上
- TensorFlow 2.0以上
使用するKerasも、tf.kerasになります。
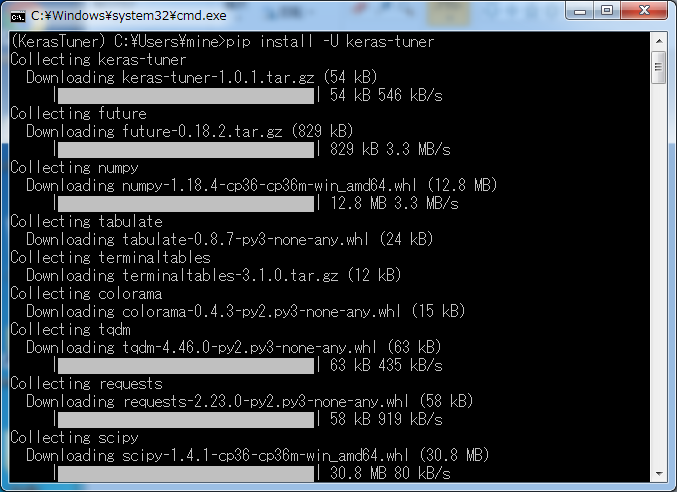
インストール
pipでインストールできます。
pip install -U keras-tuner
ちなみに、AutoKerasをインストールしてあれば、すでにKeras Tunerもインストールされています。
(AutoKerasはKeras Tunerでパラメータチューニングを行っています)
なお、ソースからインストールすることも可能です。
簡単なサンプル
まず、簡単なサンプルを例にして、使い方を見ていきます。
from tensorflow import keras
from tensorflow.keras import layers

from kerastuner.tuners import RandomSearch

(x, y), (val_x, val_y) = keras.datasets.mnist.load_data()
x = x.astype('float32') / 255.
val_x = val_x.astype('float32') / 255.

x = x[:10000]
y = y[:10000]

def build_model(hp):
    model = keras.Sequential()
    model.add(layers.Flatten(input_shape=(28, 28)))
    for i in range(hp.Int('num_layers', 2, 20)):
        model.add(layers.Dense(units=hp.Int('units_' + str(i), 32, 512, 32),
                               activation='relu'))
    model.add(layers.Dense(10, activation='softmax'))
    model.compile(
        optimizer=keras.optimizers.Adam(
            hp.Choice('learning_rate', [1e-2, 1e-3, 1e-4])),
        loss='sparse_categorical_crossentropy',
        metrics=['accuracy'])
    return model

tuner = RandomSearch(
    build_model,
    objective='val_accuracy',
    max_trials=5,
    executions_per_trial=3,
    directory='test_dir',
    project_name='helloworld')

tuner.search_space_summary()

tuner.search(x=x,
             y=y,
             epochs=3,
             validation_data=(val_x, val_y))

tuner.results_summary()
使用するデータセットは、おなじみのMNISTです。
インポート
「Keras Tuner」を使用するには、「RandomSearch」をインポートします。
モデルの構築
まず、モデル構築用の関数を用意します。
引数として、ハイパーパラメータ変数「hp」を用意します。
値の調整方法として、この例では2つ示しています。
- 値の範囲
- hp.Int(名称, 開始, 終了, 刻み)
- 刻みのデフォルト値は1
- 指定した値
- hp.Choice(名称, [値のリスト])
探索アルゴリズム
探索アルゴリズムとしてランダムサーチ(RandomSearch)を行うインスタンスを生成しています。そのほかにハイパーバンド(Hyperband)も指定できます。
from kerastuner.tuners import Hyperband

tuner = Hyperband(
    hypermodel,
    objective='val_accuracy',
    max_epochs=40,
    directory='my_dir',
    project_name='helloworld')
ここで、先ほどのモデル構築用の関数を設定するとともに、試行回数(max_trials)や試行ごとのモデル数(executions_per_trial)も設定します。
結果は「test_dir/helloworld」ディレクトリに保存されます。

search_space_summary()で検索空間の内容を表示します。
[Search space summary]
 |-Default search space size: 4
 > num_layers (Int)
 |-default: None
 |-max_value: 20
 |-min_value: 2
 |-sampling: None
 |-step: 1
 > units_0 (Int)
 |-default: None
 |-max_value: 512
 |-min_value: 32
 |-sampling: None
 |-step: 32
 > units_1 (Int)
 |-default: None
 |-max_value: 512
 |-min_value: 32
 |-sampling: None
 |-step: 32
 > learning_rate (Choice)
 |-default: 0.01
 |-ordered: True
 |-values: [0.01, 0.001, 0.0001]
この例では、それぞれのパラメータごとの値が表示されています。
検索
search()で最適なパラメータを検索します。
引数は、いわゆる「fit()」と同じになります。
結果はresults_summary()で表示されます。
[Results summary]
 |-Results in test_dir\helloworld
 |-Showing 10 best trials
 |-Objective(name='val_accuracy', direction='max')
[Trial summary]
 |-Trial ID: 5dae177f590b1ff7f9a549cda6ae9567
 |-Score: 0.9282999634742737
 |-Best step: 0
 > Hyperparameters:
 |-learning_rate: 0.0001
 |-num_layers: 10
 |-units_0: 256
 |-units_1: 352
 |-units_10: 416
 |-units_11: 448
 |-units_12: 480
 |-units_13: 128
 |-units_14: 64
 |-units_15: 32
 |-units_16: 512
 |-units_17: 256
 |-units_18: 96
 |-units_19: 64
 |-units_2: 480
 |-units_3: 320
 |-units_4: 64
 |-units_5: 512
 |-units_6: 320
 |-units_7: 512
 |-units_8: 320
 |-units_9: 64
[Trial summary]
 |-Trial ID: 496aa846dabfafb3c67270e3ce810234
 |-Score: 0.9157333374023438
 |-Best step: 0
 > Hyperparameters:
 |-learning_rate: 0.01
 |-num_layers: 3
 |-units_0: 64
 |-units_1: 416
 |-units_2: 32
[Trial summary]
 |-Trial ID: c516cbd03faf4aa32cf8182ab34eb114
 |-Score: 0.8071333765983582
 |-Best step: 0
 > Hyperparameters:
 |-learning_rate: 0.0001
 |-num_layers: 18
 |-units_0: 160
 |-units_1: 384
 |-units_10: 32
 |-units_11: 32
 |-units_12: 32
 |-units_13: 32
 |-units_14: 32
 |-units_15: 32
 |-units_16: 32
 |-units_17: 32
 |-units_2: 320
 |-units_3: 512
 |-units_4: 416
 |-units_5: 416
 |-units_6: 96
 |-units_7: 128
 |-units_8: 160
 |-units_9: 32
[Trial summary]
 |-Trial ID: 81260e9782e1bc81da957360c6322371
 |-Score: 0.7860667109489441
 |-Best step: 0
 > Hyperparameters:
 |-learning_rate: 0.01
 |-num_layers: 9
 |-units_0: 64
 |-units_1: 512
 |-units_2: 224
 |-units_3: 32
 |-units_4: 32
 |-units_5: 32
 |-units_6: 32
 |-units_7: 32
 |-units_8: 32
[Trial summary]
 |-Trial ID: eb9da62f11d1bb75b11b9d05c79ae7ec
 |-Score: 0.11349999904632568
 |-Best step: 0
 > Hyperparameters:
 |-learning_rate: 0.01
 |-num_layers: 20
 |-units_0: 224
 |-units_1: 288
 |-units_10: 32
 |-units_11: 64
 |-units_12: 448
 |-units_13: 64
 |-units_14: 512
 |-units_15: 96
 |-units_16: 256
 |-units_17: 64
 |-units_18: 32
 |-units_19: 32
 |-units_2: 352
 |-units_3: 480
 |-units_4: 128
 |-units_5: 160
 |-units_6: 224
 |-units_7: 480
 |-units_8: 224
 |-units_9: 352
この例では、試行5回分表示されています。
(成績の良い順)
モデルとして取得したい場合は、
models = tuner.get_best_models(num_models=2)
のようにtuner.get_best_models()を使います。
クラスの派生
モデルの構築を、関数ではなくクラスで定義することもできます。
その際には、HyperModelクラスから派生させることになります。
実装が必要な関数はbuild()だけです。
from tensorflow import keras
from tensorflow.keras import layers

from kerastuner.tuners import RandomSearch
from kerastuner import HyperModel

class MyHyperModel(HyperModel):

    def __init__(self, num_classes):
        self.num_classes = num_classes

    def build(self, hp):
        model = keras.Sequential()
        for i in range(hp.Int('num_layers', 2, 20)):
            model.add(layers.Dense(units=hp.Int('units_' + str(i), 32, 512, 32),
                               activation='relu'))
        model.add(layers.Dense(self.num_classes, activation='softmax'))
        model.compile(
            optimizer=keras.optimizers.Adam(
                hp.Choice('learning_rate',
                          values=[1e-2, 1e-3, 1e-4])),
            loss='sparse_categorical_crossentropy',
            metrics=['accuracy'])
        return model

hypermodel = MyHyperModel(num_classes=10)

tuner = RandomSearch(
    hypermodel,
    objective='val_accuracy',
    max_trials=10,
    directory='my_dir',
    project_name='helloworld')

tuner.search(x, y,
             epochs=5,
             validation_data=(val_x, val_y))
なお、このとき調整する値にデフォルト値を指定することができます。
hp.Int('units',
       min_value=32,
       max_value=512,
       step=32,
       default=128)
組み込みモデル
すでに、ResNetとXceptionのモデルは用意されています。
from kerastuner.applications import HyperResNet

hypermodel = HyperResNet(input_shape=(128, 128, 3), num_classes=10)
from kerastuner.applications import HyperXception

hypermodel = HyperXception(input_shape=(128, 128, 3), num_classes=10)
なお、組み込みモデルで調整するパラメータを変更したい場合は、以下のように名前を指定したハイパーパラメータを用意し、探索アルゴリズムのインスタンス生成時に設定します。
その際、tune_new_entriesをFalseにします。
from kerastuner.applications import HyperXception
from kerastuner import HyperParameters
from kerastuner.tuners import Hyperband

hypermodel = HyperXception(input_shape=(128, 128, 3), num_classes=10)

hp = HyperParameters()
hp.Choice('learning_rate', values=[1e-2, 1e-3, 1e-4])

tuner = Hyperband(
    hypermodel,
    hyperparameters=hp,
    tune_new_entries=False,
    objective='val_accuracy',
    max_epochs=40,
    directory='my_dir',
    project_name='helloworld')

tuner.search(x, y,
             validation_data=(val_x, val_y))
反対に調整したくないときは、固定値を設定できます。
fixed()で値を指定するとともに、tune_new_entries=Trueを設定します。
hypermodel = HyperXception(input_shape=(128, 128, 3), num_classes=10)

hp = HyperParameters()
hp.Fixed('learning_rate', value=1e-4)

tuner = Hyperband(
    hypermodel,
    hyperparameters=hp,
    tune_new_entries=True,
    objective='val_accuracy',
    max_epochs=40,
    directory='my_dir',
    project_name='helloworld')

tuner.search(x, y,
             validation_data=(val_x, val_y))
さらに、変数「optimizer」「loss」「metrics」は、直接変更することが可能です。
hypermodel = HyperXception(input_shape=(128, 128, 3), num_classes=10)

tuner = Hyperband(
    hypermodel,
    optimizer=keras.optimizers.Adam(1e-3),
    loss='mse',
    metrics=[keras.metrics.Precision(name='precision'),
             keras.metrics.Recall(name='recall')],
    objective='val_precision',
    max_epochs=40,
    directory='my_dir',
    project_name='helloworld')

tuner.search(x, y,
             validation_data=(val_x, val_y))
そのほかの機能
他にも、以下のような機能が用意されています。
-
分散チューニング
- パラメータ調整を並列して実行
-
チューナーのカスタマイズ
- GANや強化学習への対応
- モデル構築関数の外(前処理、データ拡張、テスト時間拡張)に使用
※ここでは詳細は省略します
まとめ
Kerasでちょっとパラメータチューニングしたいときには使えるかと思います。
参考URL