はじめに
前回、ハードウェアシリアルでつなぐことができなかったのでPWMでデータを取得したが、今回はソフトウェアシリアルで取得するようにしてみました。
ただし焦点がぼやけるので、AWS IoTへの接続部分は消しました。
なぜハードウェアシリアルでつなぐことができなかったの?
ESP32-WROVER-Eには、ハードウェアシリアルが1つしかなく、PCとのやり取りで使用しているため、センサーとのやり取りには使えません。
なぜソフトウェアシリアルを使わなかったの?
私の注意力不足です。
[mhz19_uart]のソースの以下の部分を見て、ソフトウェアシリアルを使っているものだと勘違いしていました。
MHZ19_uart.cpp
# ifdef ARDUINO_ARCH_ESP32
	HardwareSerial hserial(_serialno);
	hserial.begin(9600, SERIAL_8N1, _rx_pin, _tx_pin);
# else
	SoftwareSerial hserial(_rx_pin, _tx_pin);
	hserial.begin(9600);
# endif
よく見るまでもなく、上のハードウェアシリアルの方が動いていました。
また、強制的にソフトウェアシリアルを呼んで試してみたときには、Outputできないポートを指定していました。

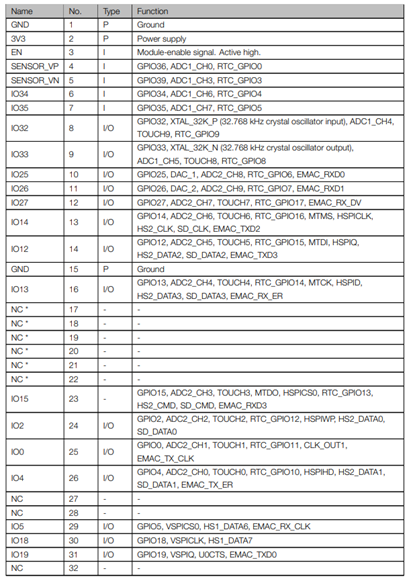
この「IO34」「IO35」で試していたのですが、こちらもよく見るまでもなく、どちらもTypeが「I」でした。
ソースコード
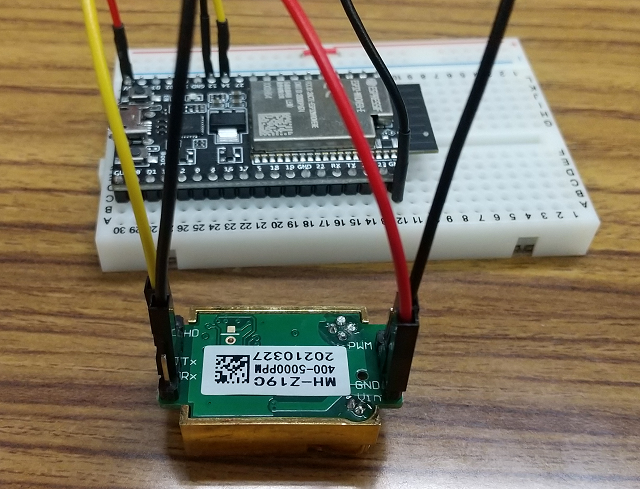
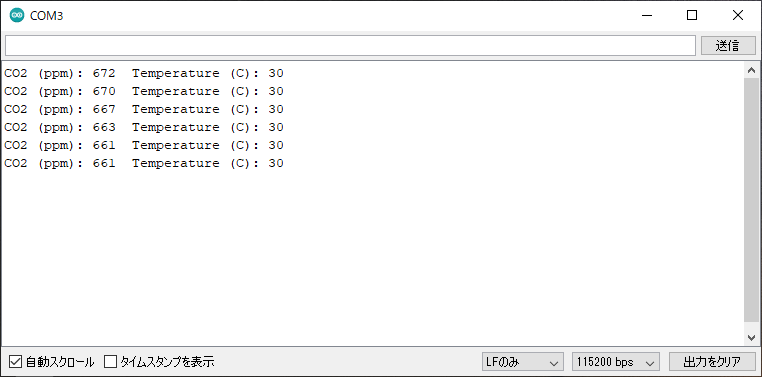
結局、「IO14」「IO12」を使用して、以下のようなソースにしてみたところ、問題なく動作しました。

今回はMH-Z19用のライブラリとしてこちらを使用しました。
co2.ino
# include <MHZ19.h>
# include <SoftwareSerial.h>

// MH-Z19C
MHZ19 myMHZ19;
const int rx_pin = 14; //Serial rx pin no
const int tx_pin = 12; //Serial tx pin no
SoftwareSerial mySerial(rx_pin, tx_pin);

void setup(){
  Serial.begin(115200);
  delay(100);

  mySerial.begin(9600);
  myMHZ19.begin(mySerial);
  Serial.println("Callibrating...");
  myMHZ19.autoCalibration(false);
}

void loop(){
  int CO2 = myMHZ19.getCO2();
  int8_t Temp = myMHZ19.getTemperature();

  Serial.println("CO2 (ppm): " + String(CO2) + "\tTemperature (C): " + String(Temp));

  delay(1000*5); // 5sec
}
まとめ
もっと落ち着け、俺。
