やりたいこと
やりたいことはシンプルです。
Teams通話の転送先を、出勤時に「通話グループまたは代理人」に設定し、退勤時は「ボイスメール」に戻す、というもの。
実際にはアカウント毎に各チーム分、この操作が必要になるため、それが毎日となると負担も大きいわけです。

要は留守電なので、下の動画で解説してる方法でも実現できそうですが、Teams(というかマイクロソフト製品全般)にそこまで詳しくない上に、マイクロソフトのパートナー会社に聞くこともできず、よく分かりません。
Teamsの設定をコマンドで行うなら、PowerShellから Connect-MicrosoftTeams で接続しゴニョゴニョするのが定番と思うのですが、転送先に相当するオブジェクト/プロパティが見つからないのです。探し方が悪いだけかも。
ちまちま調べるより、サーバで書いちゃった方が早そうなので、Python/Flaskベースで「Teams留守電切替アプリ」を作ってみました。
実装
サインイン
Teamsはデスクトップ版もありますが、SeleniumでWeb版Teamsにサインインします。
driver.get('https://teams.microsoft.com')
WebDriverWait(driver, 10).until(EC.presence_of_all_elements_located)
driver.implicitly_wait(30)
driver.find_element_by_id('i0116').send_keys(user_id)  # ユーザID
driver.find_element_by_id('idSIButton9').click()       # 次へ
driver.find_element_by_id('i0118').send_keys(passwd)   # パスワード
time.sleep(3)
driver.find_element_by_id('idSIButton9').click()       # サインイン
2要素認証
2要素認証が必須のアカウントでは pyotp でワンタイムパスワードを生成します。
import pyotp

totp = pyotp.TOTP(secret_key)
driver.find_element_by_id('idTxtBx_SAOTCC_OTC').send_keys(totp.now())  # コード
driver.find_element_by_id('idSubmit_SAOTCC_Continue').click()  # 検証
エラー時の再試行
もしこんな画面になったら、再試行をクリックさせます。

oops_btn = driver.find_elements_by_class_name('oops-button')
if len(oops_btn) > 0:
	driver.execute_script('arguments[0].click()', oops_btn[0])
通話設定画面
通話設定の画面を出します。
driver.find_element_by_id('settings-menu-button').click()  # 設定
driver.switch_to.active_element.send_keys(Keys.ENTER)
driver.find_element_by_xpath('//*[@id="options-dialog-focus-default"]/div/span[text()="通話"]').click()  # 通話
driver.find_element_by_id('immediate-dropdown-btn').click()  # 転送先ドロップダウン
入力に応じて転送先を切り替えます。
if voice_flag:
	driver.find_element_by_xpath('/html/body/ul/li/a[text()="ボイス メール"]').click()  # 転送先をボイスメールに設定
	print('Switch to enable voice mail')
else:
	driver.find_element_by_xpath('/html/body/ul/li/a[text()="' + forward + '"]').click()  # 転送先を通話グループ/代理人に設定
	print('Switch to disable voice mail')
例外処理
何か異常があれば、スクリーンショットを取り、スタックトレースの文字情報を重ね合わせた上でフロントエンドに返します。
再試行するか手動で操作するかは、ユーザがWebアプリケーションから応答します。
画像の加工は opencv-python で行いました。
import cv2
import traceback

except Exception as e:
	driver.save_screenshot(screenshot_file)
	img = cv2.imread(screenshot_file)
	exc = traceback.format_exc()
	for i, line in enumerate(exc.split('\n')):
		cv2.putText(img, line, (10, 100 + i * 20), cv2.FONT_HERSHEY_SIMPLEX, 0.5, (0, 160, 240), 1, cv2.LINE_AA)
	cv2.imwrite(screenshot_file, img)
	print(exc)
成功/失敗を判定し、いらすとやで拾った透過画像をマスク処理してスクリーンショットと合成します。
画像の合成は、こちらの記事を参考にさせていただきました。
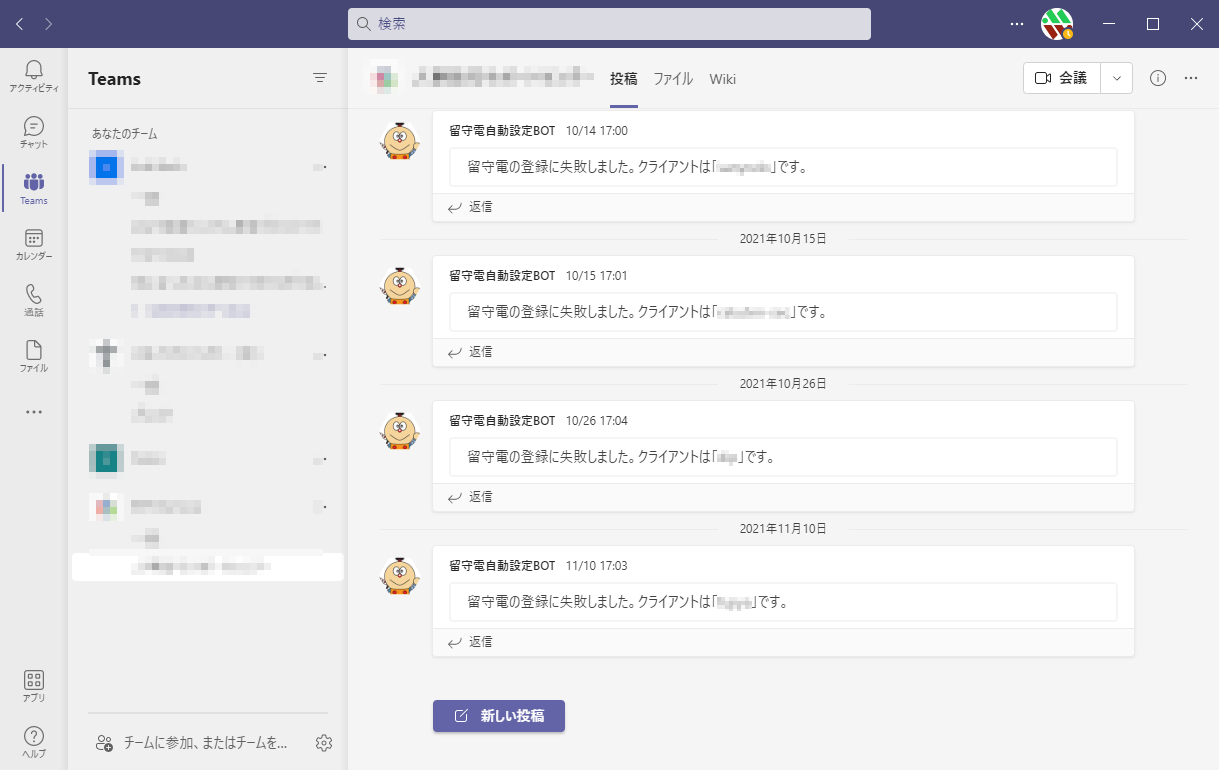
失敗の通知
Incoming Webhook でWebフックを作成し、curlコマンドで通知しました。
FLAG=$1
while read CLIENT; do
	if /usr/local/bin/foo.py $CLIENT $FLAG; then
		echo "$CLIENT($FLAG) Success."
	else
		if [ $FLAG -eq 0 ]; then
			TEXT="留守電の解除に失敗しました。クライアントは「$CLIENT」です。"
		else
			TEXT="留守電の登録に失敗しました。クライアントは「$CLIENT」です。"
		fi
		curl -X POST -d '{"text":"'$TEXT'"}' https://foo.webhook.office.com/webhookb2/XXXXXX
	fi
done <<EOF
foo
bar
baz
qux
quux
corge
grault
EOF