はじめに
OpenID Connect使ってみたくて、Go製の OAuth2.0 / OpenID Connect Provider実装である ory/hydra を使ってみたメモです。
基本的に公式ドキュメントのチュートリアル+αの補足説明レベルですが、現時点で日本語情報がほぼゼロなので、誰かの参考にでもなれば。なんか間違いがあればご指摘下さい。
ちなみにこの記事では、OAuth2.0とかOpenID Connectのプロトコルの説明は特にしないので、用語が分からない人は、適宜ググって下さい。
ory/hydraとは
ory/hydraはGo製の OAuth2.0 / OpenID Connect Core 1.0 Provider (OP) 実装です。
同じような領域では、他には coreos/dex があるようです。
dexもあとで試してみようと思ってるけど、dexと比較してhydraは Identity Provider (IdP) の部分を持っておらず、リダイレクトで既存のIdPと連携するのが特徴。(2017/10/03追記: dexも使ってみた。dexもv2からIdPを持っていないようです。 coreos/dex使ってみた )
これが何がうれしいかというと、既存のサービスでID/passwordでのログインできる仕組みが既にある場合に、独自のユーザ管理を強制することなく、既存のサービスに後からOAuth2.0 / OpenID Connectのフローを組み込めるようになるというわけです。
というわけでhydraを使ってみたよ。
やってみた
公式ドキュメントは以下にあります。わりと丁寧。
最初の方に「5 Minute Tutorial」というのがあるので、最初はこれをやってみてもいいんだけど、あんまりオススメしない。
最小限の手間で試せるようにdocker-composeでよしなにやりすぎてくれていて、簡単すぎてイメージが掴めずよく分からないです。
以下の「Install, Configure and Run ORY Hydra」のところの方が、1つずつ順番に説明しながら動かしていくので、こっちのが具体的なイメージがつかみやすくてオススメです。
https://ory.gitbooks.io/hydra/content/install.html#install-configure-and-run-ory-hydra
ちなみにどっちもやってることは同じでAuthorization Code Flowのデモです。
環境
検証の使った手元の環境は以下です。
[hydra@master]$ git rev-parse HEAD
f4176a6f61b06aeb320cca7938f788fbfb42add8

[hydra@master]$ docker run -it --rm --entrypoint hydra oryd/hydra:latest version
Version:    dev-master
Git Hash:   undefined
Build Time: 2017-09-22 08:09:36.714389879 +0000 UTC

[hydra@master]$ docker version
Client:
 Version:      17.05.0-ce
 API version:  1.29
 Go version:   go1.8.1
 Git commit:   89658be
 Built:
 OS/Arch:      darwin/amd64

Server:
 Version:      17.05.0-ce
 API version:  1.29 (minimum version 1.12)
 Go version:   go1.7.5
 Git commit:   89658be
 Built:        Thu May  4 21:43:09 2017
 OS/Arch:      linux/amd64
 Experimental: false
hydraのバージョン番号が出てないけど、これ書いてる時点でhydraの最新のリリースバージョンは0.9.12です。
PostgreSQLの起動
hydraはデータストアとしてMemoryとPostgreSQLとMySQLが使えます。
ここでは検証用にPostgreSQLをDockerで立てます。
[hydra@master]$ docker run \
>   --name ory-hydra-example--postgres \
>   -e POSTGRES_USER=hydra \
>   -e POSTGRES_PASSWORD=secret \
>   -e POSTGRES_DB=hydra \
>   -d postgres:9.6
ce6409b25dd8347b3c99bae582cf9c5d42d2e3be95cc98036b4e5436fcbdb64f
hydraのインストール
hydraのインストールといっても公式のDockerのイメージを使います。
[hydra@master]$ docker pull oryd/hydra:latest
ちなみにDockerを使わない場合は、Go製のツールなので、単にリリースペースからバイナリをダウンロードしてきてパスを通すだけで使えるようです。
hydraの起動時にいくつか環境変数の設定が必要です。
[hydra@master]$ export SYSTEM_SECRET=this_needs_to_be_the_same_always_and_also_very_$3cuR3-._
SYSTEM_SECRETはDBにセンシティブな値を保管するときに暗号化するのに使われます。
指定しないと自動で生成されて出力に表示されるようですが、2回目以降も同じキーを指定しないと復号化できなくなるので注意して下さい。
[hydra@master]$ export DATABASE_URL="postgres://hydra:secret@postgres:5432/hydra?sslmode=disable"
DATABASE_URLはDBの場所を指定します。
ちなみにMySQLを使う場合は、parseTime=trueオプションを付けないとタイムスタンプがうまく保存されないらしいです。詳しくは hydra help host に指定可能な環境変数の一覧があるので、こちらを参照。
[hydra@master]$ docker run -it --rm --entrypoint hydra oryd/hydra:latest help host
Starts all HTTP/2 APIs and connects to a database backend.

This command exposes a variety of controls via environment variables. You can
set environments using "export KEY=VALUE" (Linux/macOS) or "set KEY=VALUE" (Windows). On Linux,
you can also set environments by prepending key value pairs: "KEY=VALUE KEY2=VALUE2 hydra"

All possible controls are listed below. The host process additionally exposes a few flags, which are listed below
the controls section.

CORE CONTROLS
=============

- DATABASE_URL: A URL to a persistent backend. Hydra supports various backends:
  - Memory: If DATABASE_URL is "memory", data will be written to memory and is lost when you restart this instance.
        Example: DATABASE_URL=memory

  - Postgres: If DATABASE_URL is a DSN starting with postgres:// PostgreSQL will be used as storage backend.
        Example: DATABASE_URL=postgres://user:password@host:123/database

        If PostgreSQL is not serving TLS, append ?sslmode=disable to the url:
        DATABASE_URL=postgres://user:password@host:123/database?sslmode=disable

  - MySQL: If DATABASE_URL is a DSN starting with mysql:// MySQL will be used as storage backend.
        Example: DATABASE_URL=mysql://user:password@tcp(host:123)/database?parseTime=true

        Be aware that the ?parseTime=true parameter is mandatory, or timestamps will not work.

- SYSTEM_SECRET: A secret that is at least 16 characters long. If none is provided, one will be generated. They key
        is used to encrypt sensitive data using AES-GCM (256 bit) and validate HMAC signatures.
        Example: SYSTEM_SECRET=jf89-jgklAS9gk3rkAF90dfsk

- COOKIE_SECRET: A secret that is used to encrypt cookie sessions. Defaults to SYSTEM_SECRET. It is recommended to use
        a separate secret in production.
        Example: COOKIE_SECRET=fjah8uFhgjSiuf-AS

- FORCE_ROOT_CLIENT_CREDENTIALS: On first start up, Hydra generates a root client with random id and secret. Use
        this environment variable in the form of "FORCE_ROOT_CLIENT_CREDENTIALS=id:secret" to set
        the client id and secret yourself.
        Example: FORCE_ROOT_CLIENT_CREDENTIALS=admin:kf0AKfm12fas3F-.f

- PORT: The port hydra should listen on.
        Defaults to PORT=4444

- HOST: The host interface hydra should listen on. Leave empty to listen on all interfaces.
        Example: HOST=localhost

- BCRYPT_COST: Set the bcrypt hashing cost. This is a trade off between
        security and performance. Range is 4 =< x =< 31.
        Defaults to BCRYPT_COST=10

- LOG_LEVEL: Set the log level, supports "panic", "fatal", "error", "warn", "info" and "debug". Defaults to "info".
        Example: LOG_LEVEL=panic

- LOG_FORMAT: Leave empty for text based log format, or set to "json" for JSON formatting.
        Example: LOG_FORMAT="json"

- DISABLE_TELEMETRY: Set to "1" to disable telemetry collection and sharing - for more information please
        visit https://ory.gitbooks.io/hydra/content/telemetry.html
        Example: DISABLE_TELEMETRY="1"


OAUTH2 CONTROLS
===============

- CONSENT_URL: The uri of the consent endpoint.
        Example: CONSENT_URL=https://id.myapp.com/consent

- ISSUER: Issuer is the public URL of your Hydra installation. It is used for OAuth2 and OpenID Connect and must be
        specified and using HTTPS protocol, unless --dangerous-force-http is set.
        Example: ISSUER=https://hydra.myapp.com/

- AUTH_CODE_LIFESPAN: Lifespan of OAuth2 authorize codes. Valid time units are "ns", "us" (or "µs"), "ms", "s", "m", "h".
        Defaults to AUTH_CODE_LIFESPAN=10m

- ID_TOKEN_LIFESPAN: Lifespan of OpenID Connect ID Tokens. Valid time units are "ns", "us" (or "µs"), "ms", "s", "m", "h".
        Defaults to ID_TOKEN_LIFESPAN=1h

- ACCESS_TOKEN_LIFESPAN: Lifespan of OAuth2 access tokens. Valid time units are "ns", "us" (or "µs"), "ms", "s", "m", "h".
        Defaults to ACCESS_TOKEN_LIFESPAN=1h

- CHALLENGE_TOKEN_LIFESPAN: Lifespan of OAuth2 consent tokens. Valid time units are "ns", "us" (or "µs"), "ms", "s", "m", "h".
        Defaults to CHALLENGE_TOKEN_LIFESPAN=10m


HTTPS CONTROLS
==============

- HTTPS_ALLOW_TERMINATION_FROM: Whitelist one or multiple CIDR address ranges and allow them to terminate TLS connections.
        Be aware that the X-Forwarded-Proto header must be set and must never be modifiable by anyone but
        your proxy / gateway / load balancer. Supports ipv4 and ipv6.
        Hydra serves http instead of https when this option is set.
        Example: HTTPS_ALLOW_TERMINATION_FROM=127.0.0.1/32,192.168.178.0/24,2620:0:2d0:200::7/32

- HTTPS_TLS_CERT_PATH: The path to the TLS certificate (pem encoded).
        Example: HTTPS_TLS_CERT_PATH=~/cert.pem

- HTTPS_TLS_KEY_PATH: The path to the TLS private key (pem encoded).
        Example: HTTPS_TLS_KEY_PATH=~/key.pem

- HTTPS_TLS_CERT: A pem encoded TLS certificate passed as string. Can be used instead of HTTPS_TLS_CERT_PATH.
        Example: HTTPS_TLS_CERT="-----BEGIN CERTIFICATE-----\nMIIDZTCCAk2gAwIBAgIEV5xOtDANBgkqhkiG9w0BAQ0FADA0MTIwMAYDVQQDDClP..."

- HTTPS_TLS_KEY: A pem encoded TLS key passed as string. Can be used instead of HTTPS_TLS_KEY_PATH.
        Example: HTTPS_TLS_KEY="-----BEGIN ENCRYPTED PRIVATE KEY-----\nMIIFDjBABgkqhkiG9w0BBQ0wMzAbBgkqhkiG9w0BBQwwDg..."


DEBUG CONTROLS
==============

- PROFILING: Set "PROFILING=cpu" to enable cpu profiling and "PROFILING=memory" to enable memory profiling.
        It is not possible to do both at the same time.
        Example: PROFILING=cpu

Usage:
  hydra host [flags]

Flags:
      --dangerous-auto-logon         Stores the root credentials in ~/.hydra.yml. Do not use in production.
      --dangerous-force-http         Disable HTTP/2 over TLS (HTTPS) and serve HTTP instead. Never use this in production.
      --disable-telemetry            Disable telemetry collection and sharing - for more information please visit https://ory.gitbooks.io/hydra/content/telemetry.html
  -h, --help                         help for host
      --https-tls-cert-path string   Path to the certificate file for HTTP/2 over TLS (https). You can set HTTPS_TLS_CERT_PATH or HTTPS_TLS_CERT instead.
      --https-tls-key-path string    Path to the key file for HTTP/2 over TLS (https). You can set HTTPS_TLS_KEY_PATH or HTTPS_TLS_KEY instead.

Global Flags:
      --config string     config file (default is $HOME/.hydra.yaml)
      --skip-tls-verify   foolishly accept TLS certificates signed by unkown certificate authorities
[hydra@master]$
環境変数をセットしたらDBのマイグレーションをしておきましょう。必要なテーブルが作られます。
[hydra@master]$ docker run --link ory-hydra-example--postgres:postgres -it --entrypoint hydra oryd/hydra:latest migrate sql $DATABASE_URL
Applying `ladon` SQL migrations...
Applied 3 `ladon` SQL migrations.
Applying `client` SQL migrations...
Applied 1 `client` SQL migrations.
Applying `oauth2` SQL migrations...
Applied 1 `oauth2` SQL migrations.
Applying `jwk` SQL migrations...
Applied 1 `jwk` SQL migrations.
Applying `group` SQL migrations...
Applied 1 `group` SQL migrations.
Migration successful! Applied a total of 7 SQL migrations.
Migration successful!
準備できたらhydraのサーバを起動します。
[hydra@master]$ docker run -d \
>   --name ory-hydra-example--hydra \
>   --link ory-hydra-example--postgres:postgres \
>   -p 9000:4444 \
>   -e SYSTEM_SECRET=$SYSTEM_SECRET \
>   -e DATABASE_URL=$DATABASE_URL \
>   -e ISSUER=https://localhost:9000/ \
>   -e CONSENT_URL=http://localhost:9020/consent \
>   -e FORCE_ROOT_CLIENT_CREDENTIALS=admin:demo-password \
>   oryd/hydra:latest
76957913ab052a2a04eba9b20c575637c1b1c9d3d64e1f670c0f2bc5cc262726
このあともポート番号がいくつかでてきてややこしいですが、外部に公開しているポートの役割は以下のとおりです。
- 9000: Authorization Server (OP) => hydraのサーバプロセス
- 9010: Consumer App (RP) => サードパーティのアプリケーション
- 9020: Consent App (Idp) => 既存サービスのログイン/同意画面
あとFORCE_ROOT_CLIENT_CREDENTIALSは管理者用のID/パスワードです。
これも指定しないと自動で生成されるようですが、デモでは分かりやすく簡単な文字列に設定されてます。
ログを見ると、他にも初回の初期化処理で自動生成されているものがいくつかあります。
[hydra@master]$ docker logs ory-hydra-example--hydra
time="2017-09-22T06:15:07Z" level=info msg="Connecting with postgres://*:*@postgres:5432/hydra?sslmode=disable"
time="2017-09-22T06:15:07Z" level=info msg="Connected to SQL!"
time="2017-09-22T06:15:07Z" level=info msg="Key pair for signing hydra.openid.id-token is missing. Creating new one."
time="2017-09-22T06:15:11Z" level=info msg="Setting up telemetry - for more information please visit https://ory.gitbooks.io/hydra/content/telemetry.html"
time="2017-09-22T06:15:11Z" level=info msg="Key pair for signing hydra.consent.response is missing. Creating new one."
time="2017-09-22T06:15:15Z" level=info msg="Key pair for signing hydra.consent.challenge is missing. Creating new one."
time="2017-09-22T06:15:16Z" level=warning msg="No clients were found. Creating a temporary root client..."
time="2017-09-22T06:15:16Z" level=info msg="Temporary root client created."
time="2017-09-22T06:15:16Z" level=warning msg="No TLS Key / Certificate for HTTPS found. Generating self-signed certificate."
time="2017-09-22T06:15:16Z" level=info msg="Setting up http server on :4444"
id_tokenや同意などの署名に使う鍵のようです。
ちなみにこの鍵は後述のポリシー設定で明示的に許可することでHTTPSでgetして署名の検証に使ったりできます。
hydraの設定
同意画面と連携したりするのにいつか初期設定が必要です。
hydraのイメージでシェルを立ち上げて、hydraコマンドで作業します。
hydraの操作はAPIで操作できるようになってますが、hydraコマンドでCLIからも操作できます。
ちなみにWebのAPIはあるのに、管理画面のUIはなさそうなので、基本CLIで作業します。
hydra connectで接続先のhydraサーバを指定します。
若干補足ですが、ここで9010ポートを公開しているのは、デモの構成上の都合で、あとの方で、このシェルでデモ用のConsumer Appのサーバプロセスを起動するからです。
[hydra@master]$ docker run -p 9010:4445 --link ory-hydra-example--hydra:hydra -it --entrypoint "/bin/sh" oryd/hydra:latest
/go/src/github.com/ory/hydra # hydra connect
To keep the current value, press enter.
Cluster URL []: https://hydra:4444
Client ID []: admin
Client Secret [empty]: demo-password
INFO[0027] Persisting config in file /root/.hydra.yml
Done.
/go/src/github.com/ory/hydra #
試しに hydra token client でアクセストークンを発行してみます。
検証用のhydraはSSLが自己証明書なので --skip-tls-verify が必要です。
/go/src/github.com/ory/hydra # hydra token client --skip-tls-verify
OlM2gPzCTf5RE0kkkxJf0Kff6p_Ye8UrFPP2wcFyj5I.uwWhsGucrn5Uv5saNhudcIyEgUaqZgF0PNmqCzjQE_o
hydra token validate でトークンの検証ができます。
トークン発行時に何も指定しないとadmin用のキーが作られるようです。
/go/src/github.com/ory/hydra # hydra token validate --skip-tls-verify $(hydra token client --skip-tls-verify)
{
        "active": true,
        "scope": "hydra",
        "client_id": "admin",
        "sub": "admin",
        "exp": 1506064929,
        "iat": 1506061329,
        "aud": "admin",
        "iss": "https://localhost:9000"
}
/go/src/github.com/ory/hydra #
同意画面の設定
次に同意画面のConsent App用のクライアントを登録します。
若干ややこしいのですが、全体としてはAuthorization Code Flowのデモなんだけど、
Consent App自体もClient Credentials Flowでhydraが自動生成した、
署名用のキーをgetできるようにhydraの組み込みの hydra.keys.get のスコープを許可しています。
/go/src/github.com/ory/hydra # hydra clients create --skip-tls-verify \
>   --id consent-app \
>   --secret consent-secret \
>   --name "Consent App Client" \
>   --grant-types client_credentials \
>   --response-types token \
>   --allowed-scopes hydra.keys.get
You should not provide secrets using command line flags. The secret might leak to bash history and similar systems.
Client ID: consent-app
Client Secret: consent-secret
次に署名用のキーをgetできるようにhydraのアクセスポリシーを作成します。
このアクセスポリシーという概念はOAuth2のscopeとは関係のないhydraの独自機能であることに注意して下さい。
hydraが内部的に持っているデータは、このポリシーを調整することで、外から取得可能です。
hydra以外のリソースのアクセス制御にも使うことを想定しているっぽいですが、どう使うのがよいのかはイマイチよく分からないです。
/go/src/github.com/ory/hydra # hydra policies create --skip-tls-verify \
>   --actions get \
>   --description "Allow consent-app to access the cryptographic keys for signing and validating the consent challenge
and response" \
>   --allow \
>   --id consent-app-policy \
>   --resources rn:hydra:keys:hydra.consent.challenge:public,rn:hydra:keys:hydra.consent.response:private \
>   --subjects consent-app
Created policy consent-app-policy.
もう1枚ターミナルを開いて、デモ用の同意画面用のサーバを起動します。
このアプリはNode.js製ですが、Goのものもあるっぽいです。
[hydra@master]$ docker run -d \
>   --name ory-hydra-example--consent \
>   --link ory-hydra-example--hydra:hydra \
>   -p 9020:3000 \
>   -e HYDRA_CLIENT_ID=consent-app \
>   -e HYDRA_CLIENT_SECRET=consent-secret \
>   -e HYDRA_URL=https://hydra:4444 \
>   -e NODE_TLS_REJECT_UNAUTHORIZED=0 \
>   oryd/hydra-consent-app-express:latest
ログを確認するとNode.jsのサーバが起動してるっぽいです。
[hydra@master]$ docker logs ory-hydra-example--consent
npm info it worked if it ends with ok
npm info using npm@3.8.6
npm info using node@v6.1.0
npm info lifecycle hydra-consent-app-express@0.0.1~prestart: hydra-consent-app-express@0.0.1
npm info lifecycle hydra-consent-app-express@0.0.1~start: hydra-consent-app-express@0.0.1

> hydra-consent-app-express@0.0.1 start /usr/src/app
> node ./bin/www
Consumer Appの設定
hydraのシェルに戻り、Consumer App用の設定を行います。
これがリソースを利用したいサードパーティ製のアプリに相当します。
新規クライアントを登録します。
/go/src/github.com/ory/hydra # hydra clients create --skip-tls-verify \
>   --id some-consumer \
>   --secret consumer-secret \
>   --grant-types authorization_code,refresh_token,client_credentials,implicit \
>   --response-types token,code,id_token \
>   --allowed-scopes openid,offline,hydra.clients \
>   --callbacks http://localhost:9010/callback
You should not provide secrets using command line flags. The secret might leak to bash history and similar systems.
Client ID: some-consumer
Client Secret: consumer-secret
/go/src/github.com/ory/hydra #
hydraのポリシーを調整して、OpenID ConnetのIDトークンを検証できるように、公開鍵だけanyに許可します。
/go/src/github.com/ory/hydra # hydra policies create --skip-tls-verify \
>   --actions get \
>   --description "Allow everyone to read the OpenID Connect ID Token public key" \
>   --allow \
>   --id openid-id_token-policy \
>   --resources rn:hydra:keys:hydra.openid.id-token:public \
>   --subjects "<.*>"
Created policy openid-id_token-policy.
Authorization Code Flowやってみる
もろもろ準備できたので、ついにAuthorization Code Flowをやってみる。
Cosumer用のデモのWebアプリが別途あるのかと思いきや、hydraにはCosumer用のテストのためのヘルパーコマンド hydra token user なるものがあり、このコマンドは、Authorization ServerへのリダイレクトURLの生成し、認証完了のコールバックを受け取るWebサーバを立ち上げてくれます。なのでデモの最初の方にhydraの作業シェルを立ち上げた時に9010番ポートを公開してたのです。なんてわかりづらい。
もう一度おさらいしておきましょう。現在ポート番号はこのようになっています。
- 9000: Authorization Server (OP) => hydraのサーバプロセス
- 9010: Consumer App (RP) => サードパーティのアプリケーション
- 9020: Consent App (Idp) => 既存サービスのログイン/同意画面
Consumer App を起動します。
/go/src/github.com/ory/hydra # hydra token user --skip-tls-verify \
>   --auth-url https://localhost:9000/oauth2/auth \
>   --token-url https://hydra:4444/oauth2/token \
>   --id some-consumer \
>   --secret consumer-secret \
>   --scopes openid,offline,hydra.clients \
>   --redirect http://localhost:9010/callback
Setting up callback listener on http://localhost:4445/callback
Press ctrl + c on Linux / Windows or cmd + c on OSX to end the process.
If your browser does not open automatically, navigate to:

        https://localhost:9000/oauth2/auth?client_id=some-consumer&redirect_uri=http%3A%2F%2Flocalhost%3A9010%2Fcallback&response_type=code&scope=openid+offline+hydra.clients&state=kjjpkrhactaclrciherfioeb&nonce=vtvphtlbvrpvaxsjnwpgunis
認証用のURLが発行されました。
これをブラウザで開けばよいんですが、手元の環境の都合で、Dockerを動かすのに、Mac + dinghyの組み合わせを使っている場合には注意が必要です。dinghyの場合は、localhostはVirtualBoxのVMを指してしまうので、そのままだと、ブラウザからlocalhostで直接アクセスできません。
もう1枚シェルを開いてポートフォワードします。(※この手順はDocker for Macや直接Linux上でDockerを起動している場合には不要です。Mac + dinghyでDockerを動かしている場合のみ必要です。)
[hydra@master]$ sudo bash -c "$(dinghy env); ssh docker@$(dinghy ip) -i $DOCKER_CERT_PATH/id_rsa -L 9000:localhost:9000 -L 9010:localhost:9010 -L 9020:localhost:9020"
ちなみにこのコマンドの意味は別記事にまとめていますので、興味ある人は以下を参照して下さい。
dinghyでもSSHポートフォワードして https://localhost でアクセスできるようにする
よし。今度こそ準備できたので、ブラウザを開いて、先ほどの認証のURLにアクセスしよう。
認証のURLは9000番ポートなのでhydraのAuthorization Serverです。
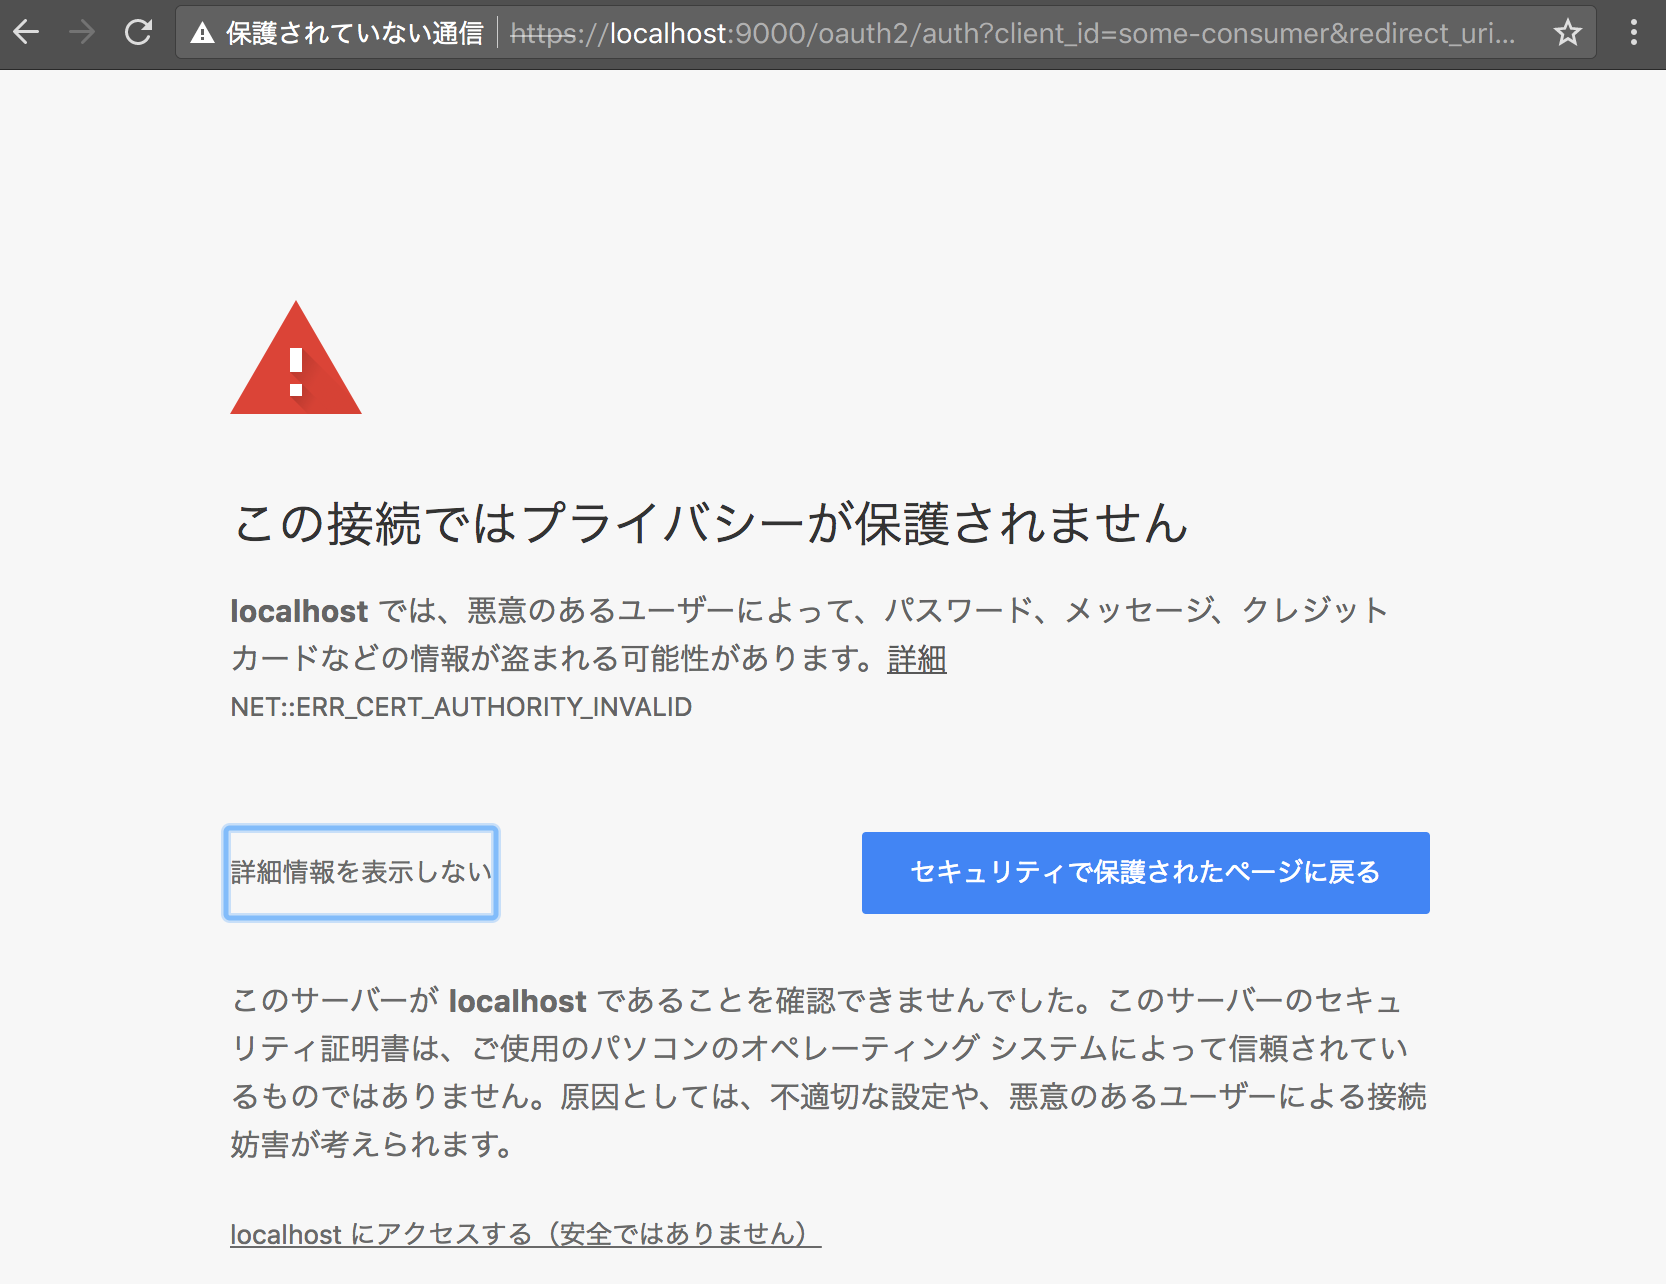
デモではhttpsのSSLに自己証明書を使っているので、警告が出ますが、無視して進みます。
スクショのフォーカスが変なところに当たってますが、「localhostにアクセスする(安全ではありません)」で進みます。
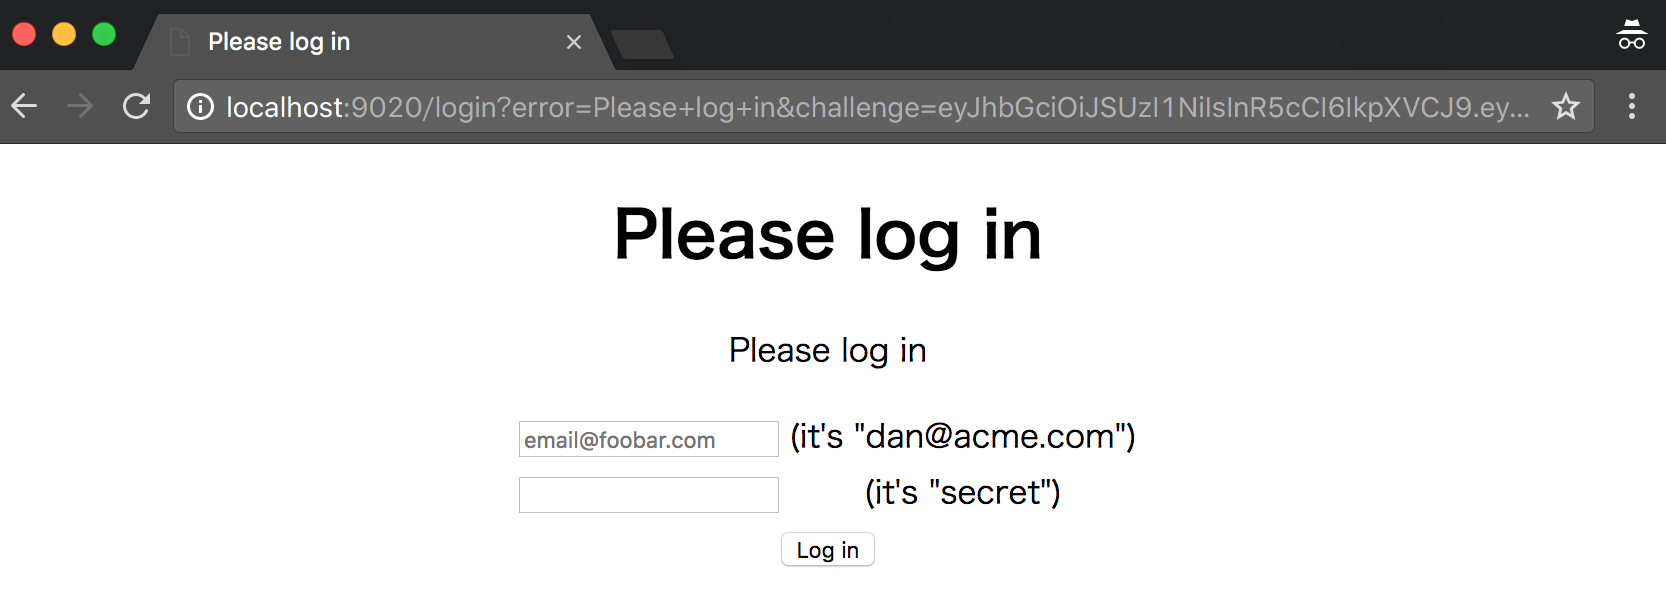
ログイン画面にリダレクトされました。9020番は同意画面ですが、ログインセッションがないので、ログイン画面が出てます。
画面に表示されているデモ用のユーザとパスワードを入力してログインしてみます。
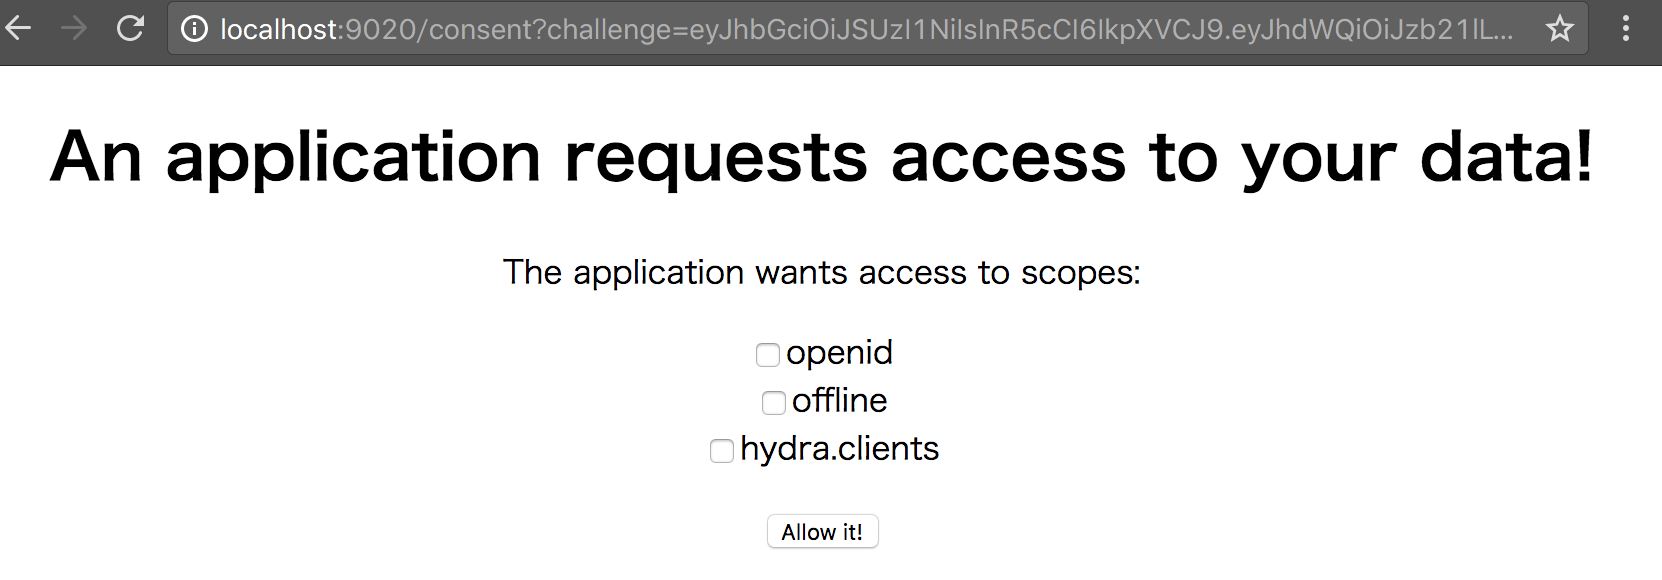
ログインすると同意画面が出てきた。
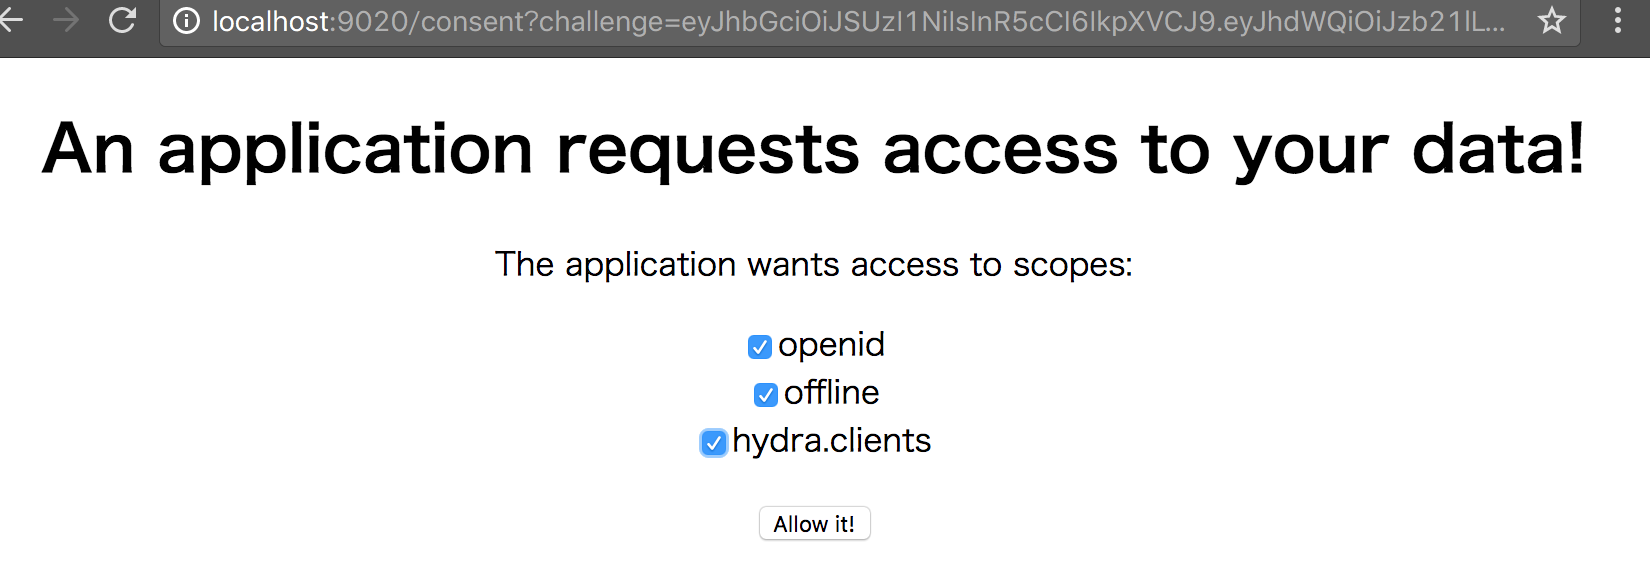
すべてのスコープにチェックを入れて、同意します。
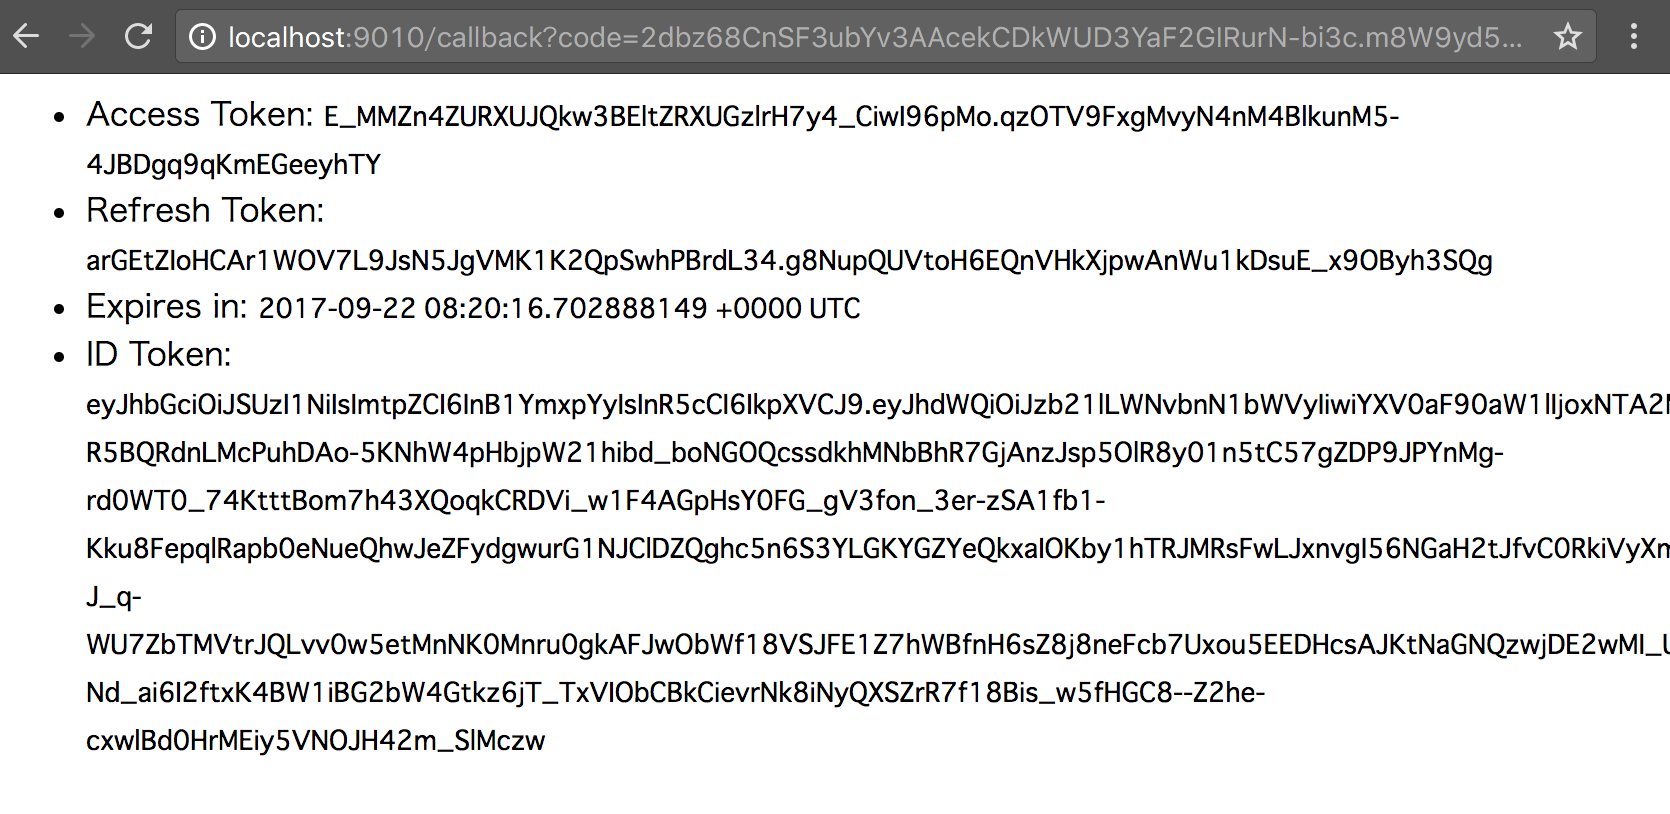
同意するとコールバック先の9010番のConsumerに画面が飛ばされて、アクセストークンがやIDトークンが表示されています。
このとき、Consumerを起動したターミナルにも以下のように表示されてました。
Access Token:
        E_MMZn4ZURXUJQkw3BEltZRXUGzlrH7y4_CiwI96pMo.qzOTV9FxgMvyN4nM4BlkunM5-4JBDgq9qKmEGeeyhTY
Refresh Token:
        arGEtZIoHCAr1WOV7L9JsN5JgVMK1K2QpSwhPBrdL34.g8NupQUVtoH6EQnVHkXjpwAnWu1kDsuE_x9OByh3SQg

Expires in:
        2017-09-22 08:20:16.702888149 +0000 UTC

ID Token:
        eyJhbGciOiJSUzI1NiIsImtpZCI6InB1YmxpYyIsInR5cCI6IkpXVCJ9.eyJhdWQiOiJzb21lLWNvbnN1bWVyIiwiYXV0aF90aW1lIjoxNTA2MDY0ODE3LCJleHAiOjE1MDYwNjg0MTcsImlhdCI6MTUwNjA2NDgxNywiaXNzIjoiaHR0cHM6Ly9sb2NhbGhvc3Q6OTAwMCIsIm5vbmNlIjoidnR2cGh0bGJ2cnB2YXhzam53cGd1bmlzIiwic3ViIjoidXNlcjoxMjM0NTpkYW5kZWFuIn0.NbxRlbnvS5QJPUCf2o0l1TVsPQxAHQgHYmugtNBNXCkd5o_FYy8B8OzyYq_3uvE4jonxdTqIYwAud3Wad7_v7vAmVLr6h4C_WfX2-R5BQRdnLMcPuhDAo-5KNhW4pHbjpW21hibd_boNGOQcssdkhMNbBhR7GjAnzJsp5OlR8y01n5tC57gZDP9JPYnMg-rd0WT0_74KtttBom7h43XQoqkCRDVi_w1F4AGpHsY0FG_gV3fon_3er-zSA1fb1-Kku8FepqlRapb0eNueQhwJeZFydgwurG1NJClDZQghc5n6S3YLGKYGZYeQkxaIOKby1hTRJMRsFwLJxnvgI56NGaH2tJfvC0RkiVyXmk31t1o71nwXGzzdn7msmMwsS00g7PqvWBiOpAbK2Pcs6qv0bS1A4-J_q-WU7ZbTMVtrJQLvv0w5etMnNK0Mnru0gkAFJwObWf18VSJFE1Z7hWBfnH6sZ8j8neFcb7Uxou5EEDHcsAJKtNaGNQzwjDE2wMI_UceomwAimKmidRA_VwiutuwWzhAmSXOhJ2mG8Z4QnEd_FQ1FHO9dEw2n03m4zS-Nd_ai6I2ftxK4BW1iBG2bW4Gtkz6jT_TxVIObCBkCievrNk8iNyQXSZrR7f18Bis_w5fHGC8--Z2he-cxwlBd0HrMEiy5VNOJH42m_SlMczw
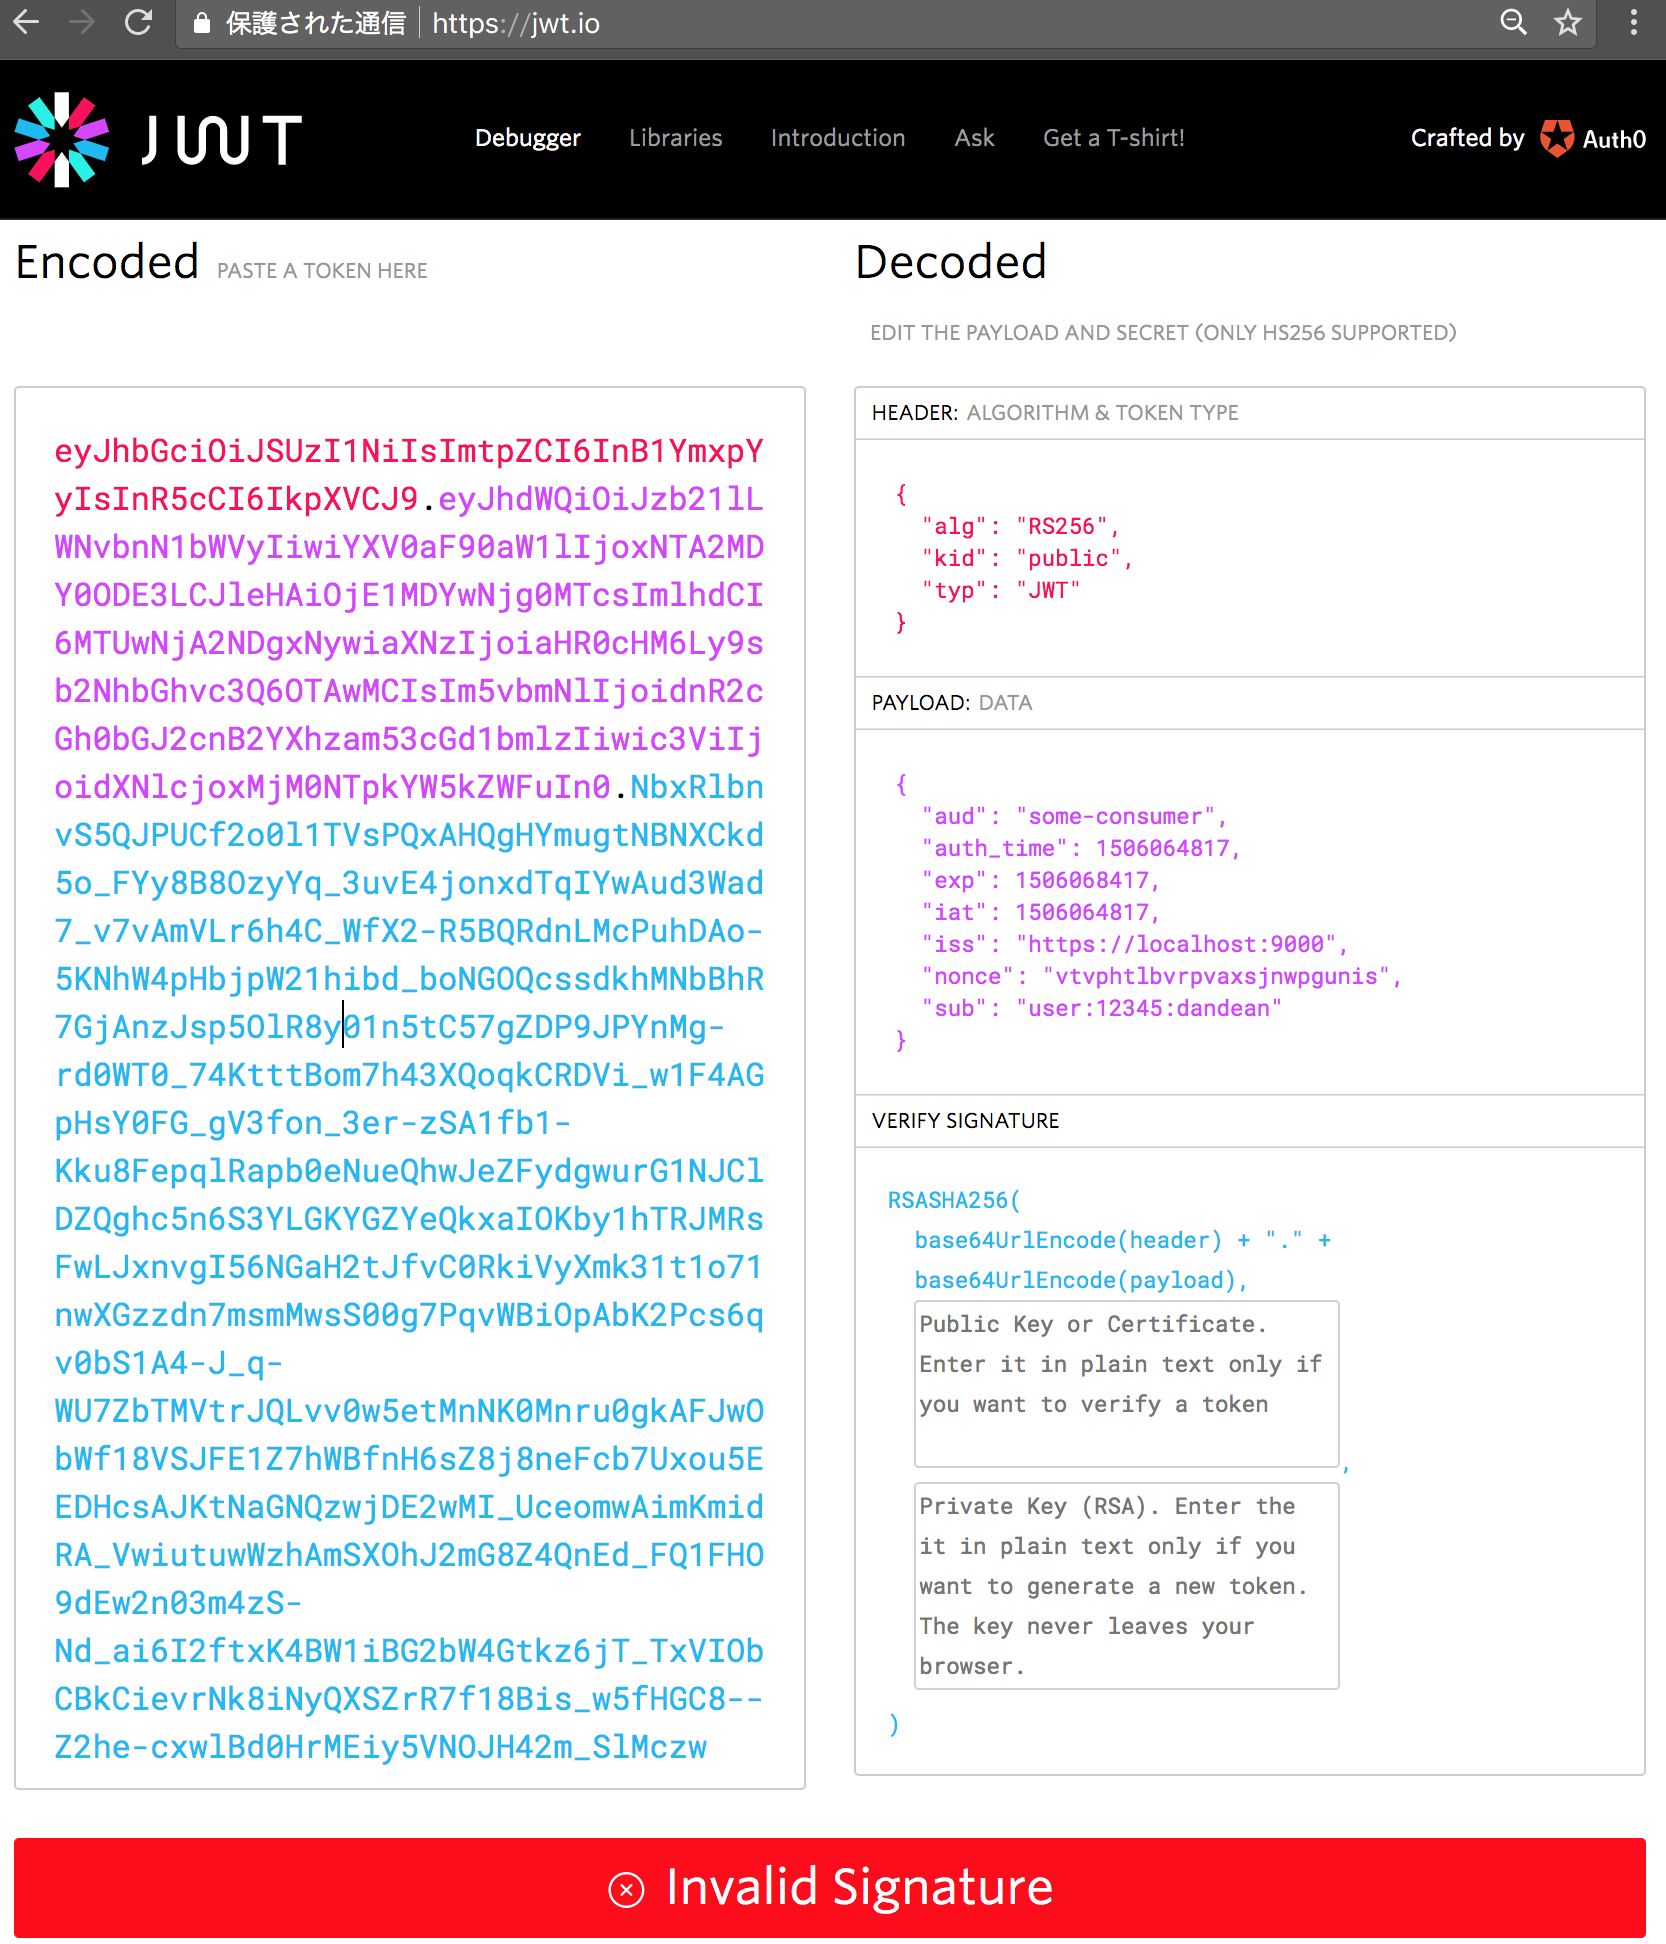
IDトークンはJWT形式なのでデコードしてみます。手頃なコマンドラインツールが分からなかったのでオンラインのjwt.ioを使う。
PAYLOADのsubにユーザ名が入ってますね。
署名検証するのにはpublicキーをgetする必要があるのだけど、一旦あとで考えよう。
IDトークンの署名を検証するコマンドが分からないので、とりあえずさっき覚えたAccess Tokenを検証してみるとこんなかんじ。(これは内部的にはRFC7662のOAuth 2.0 Token Introspectionにアクセスしているよう。)
※ちなみに以下では上記で発行されたアクセストークンと検証したタイミングで時間が空いてしまい、有効期限が切れたので、トークンは再発行したものを使っており、上記のAccess Tokenと一致しません。expのところにUNIXTIMEで表示されてますが、有効期限はデフォルトで1時間のようです。
/go/src/github.com/ory/hydra # hydra token validate --skip-tls-verify Tu2fkeRujR53LCvPZfZled78LHfNha3z-M_FqHJUdhw.f1nEN
-p2yJfUrUND52NOWpK5C49KYsUMCRdaRdxbDEk
{
        "active": true,
        "scope": "openid offline hydra.clients",
        "client_id": "some-consumer",
        "sub": "user:12345:dandean",
        "exp": 1506078651,
        "iat": 1506075051,
        "aud": "some-consumer",
        "iss": "https://localhost:9000"
}
あと画面上ではよくわかんないけど、実装コードみたらちゃんとCodeをTokenに交換してたので、Authorization Code Flowができたー。わーい。
所感
- hydraのデモ動かしてみてAuthorization Code Flowができた。ただプロトコルの登場人物とデモでの位置付けの整理が若干分かりづらいとは思った。
- 同意画面のところが外出されていて、既存のサービスに組み込めそうなのはよい。デモで用意されてたところのコードに相当する部分は各自で書く必要があるので、そのへんの実装イメージは別途要確認。
- 署名用の鍵とかをよしなに生成してくれたり、それをAPIでgetできたりするのはべんり。
- WebのUIないけどAPIあるので管理画面作ろうと思えば作れなくもない。クライアント登録するのにWebでポチポチしたい気持ちはなくはない。エンドユーザが自分でアプリケーション登録したいとかの要件がなければ、さしあたりCLIだけでも生きていけそう。
- hydraのポリシー設定がIPアドレス制限かけたりとかもできそうで、うまく使えると便利そうなんだけど、実際に使う場合にどう設計すればよいかよく分からん。OAuth2のscopeとの関連とかどうするのとか。。。
- OAuth2.0 / OpenID Connectだけであればこれで十分そう。SAML連携もしたいとか誰かエライ人が言い出さなければ。
- 比較のためdexも試してみたい。

