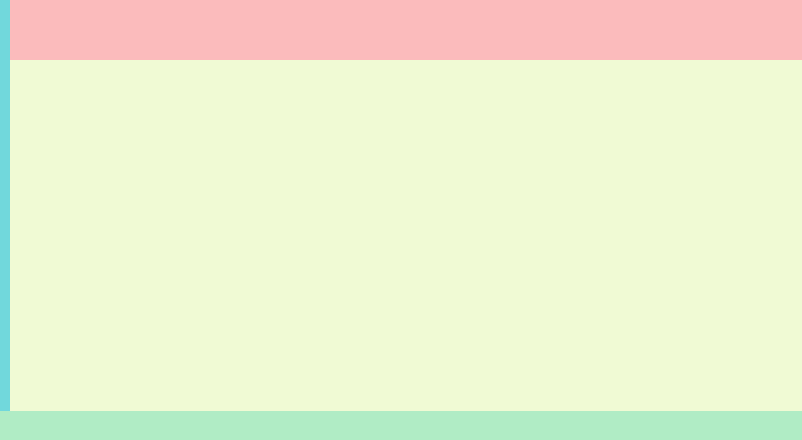
前置き
最近はあまりないデザインかもしれないが、左メニュー、ヘッダー、フッターを固定したデザインで、
デザイナーの意向により、スクロールバーの表示エリアが指定されていたので、position: fixed;を使って実装していた。
IEやEdgeでは、スクロールするとかなりガタガタしていて、使用状況としても、IEユーザーが多かったので、Flexboxを使った書き方に変えました。そのメモです。
Flexboxは、IEでも基本的に問題なく使えますが、
ひとつだけ左寄せ(右寄せ)したいときに使える、margin-right: auto;(margin-left: auto;)はIEでは使えないので、flex: 1;などを使って工夫が必要です。
実装方法
作りたいもの
コード
  <div class="layout_outer">
    <div class="layout_top">
      <div class="layout_left"></div>
      <div class="layout_right">
        <div class="layout_right_top"></div>
        <div class="layout_right_bottom"></div>
      </div>
    </div>
    <div class="layout_bottom"></div>
  </div>
 .layout_outer{
    display: flex;
    flex-direction: column;
    width: 100%;
    height: 100vh;
  }
  .layout_top{
    flex: 1;
    overflow: hidden;
    display: flex;
  }
  .layout_left{
    width: 240px;
  }
  .layout_right{
    flex: 1;
    overflow: hidden;
    display: flex;
    flex-direction: column;
  }
  .layout_right_top{
    height: 60px;
  }
  .layout_right_bottom{
    flex: 1;
    overflow: hidden;
  }
  .layout_bottom{
    height: 30px;
  }
解説
ポイントは、flex-direction: column;とflex: 1;をうまく使うことです。
display: flex;で、左右に分割できるのは、よく知られていると思いますが、
flex-direction: column;で、上下に分割できます。
子要素にflex: 1;をつけることによって、その子要素は残りのエリアを埋めてくれます。
overflow: hidden;やoverflow: auto;を組み合わせるとエリアを超えた内容があってもピッタリ合わせてくれます。
IEでは、marginやpaddingを0にしても、スクロールできるようになってしまうので、htmlタグにoverflow: hidden;する必要があります。
手順①
  <div class="layout_outer">
    <div class="layout_top"></div>
    <div class="layout_bottom"></div>
  </div>
 .layout_outer{
    display: flex;
    flex-direction: column;
    width: 100%;
    height: 100vh;
  }
  .layout_top{
    flex: 1;
    overflow: hidden;
    display: flex;
  }
  .layout_bottom{
    height: 30px;
  }
手順②
  <div class="layout_outer">
    <div class="layout_top">
      <div class="layout_left"></div>
      <div class="layout_right"></div>
    </div>
    <div class="layout_bottom"></div>
  </div>
  .layout_left{
    width: 240px;
  }
  .layout_right{
    flex: 1;
    overflow: hidden;
    display: flex;
    flex-direction: column;
  }
手順③
  <div class="layout_outer">
    <div class="layout_top">
      <div class="layout_left"></div>
      <div class="layout_right">
        <div class="layout_right_top"></div>
        <div class="layout_right_bottom"></div>
      </div>
    </div>
    <div class="layout_bottom"></div>
  </div>
  .layout_right_top{
    height: 60px;
  }
  .layout_right_bottom{
    flex: 1;
    overflow: hidden;
  }
おまけ①
layout_right_bottomのエリアでもさらにヘッダー、フッター固定が必要な場合

  <div class="layout_outer">
    <div class="layout_top">
      <div class="layout_left"></div>
      <div class="layout_right">
        <div class="layout_right_top"></div>
        <div class="layout_right_bottom">
          <div class="layout_right_bottom_top"></div>
          <div class="layout_right_bottom_center"></div>
          <div class="layout_right_bottom_bottom"></div>
        </div>
      </div>
    </div>
    <div class="layout_bottom"></div>
  </div>
  .layout_right_bottom{
    display: flex;
    flex-direction: column;
  }
  .layout_right_bottom_top{
    height: 40px;
  }
  .layout_right_bottom_center{
    flex: 1;
    overflow: auto;
  }
  .layout_right_bottom_bottom{
    height: 40px;
  }
おまけ②
左メニューを閉じたり幅を狭くする場合
classを追加する方法は割愛しますが、transitionを設定しておけば簡単にアニメーションできます

  .close .layout_left{
    width: 10px;
  }
  .layout_left,
  .layout_right{
    transition: 0.3s;
  }


