はじめに
この記事はWebアプリケーションのエンドトゥーエンドのテストを行うためのツールであるNightWatchについてのメモになります。
https://nightwatchjs.org/
この記事は随時更新され、更新時にストックされているユーザに通知する想定です。
NightWatchはSeleniumを基盤として作られており、Node.jsでブラウザを操作してエンドトゥーエンドのテストを行うツールです。
なお、vue-cliでプロジェクトを作成するとe2eのテストとしてインストールされています。
本記事での実行環境は以下のようになります。
OS:MacOS Catalina 10.15.6
Node.js:v14.10.1
Java:openjdk 14.0.1
ChromeとFireFoxをインストール済み
簡単なサンプルの実行
npm init -y

# nightwatchのインストール
# nightwatch.conf.jsが作成される。
npm install nightwatch --save-dev

# ChromeのSeleniumドライバーのインストール
npm install chromedriver --save-dev

# FireFoxのSeleniumドライバーのインストール
npm install geckodriver --save-dev

# seleniumserverのインストール
npm install selenium-server --save-dev

# FireFoxが起動してブラウザの操作を行う
npx nightwatch node_modules/nightwatch/examples/tests/ecosia.js
ecosia.jsの内容は以下の通りです。
describe('Ecosia.org Demo', function() {

  before(browser => browser.url('https://www.ecosia.org/'));

  test('Demo test ecosia.org', function (browser) {
    browser
      .waitForElementVisible('body')
      .assert.titleContains('Ecosia')
      .assert.visible('input[type=search]')
      .setValue('input[type=search]', 'nightwatch')
      .assert.visible('button[type=submit]')
      .click('button[type=submit]')
      .assert.containsText('.mainline-results', 'Nightwatch.js')
  });

  after(browser => browser.end());
});
設定ファイル
nightwatchはデフォルトではカレントディレクトリのnightwatch.jsonまたはnightwatch.conf.jsを設定ファイルとして動作します。両方のファイルが存在する場合は、nightwatch.conf.jsを優先して使用します。
また、nightwatchを実行した際に、nightwatch.jsonまたはnightwatch.conf.jsが存在しない場合、nightwatch.conf.jsが作成されます。
特定の設定ファイルを指定して動作させる場合は以下の--configオプションを使用して起動します。
npx nightwatch --config nightwatch.json node_modules/nightwatch/examples/tests/ecosia.js
nightwatch.jsonの記述例
以下の設定ファイルはchromeでテストを動かすnightwatch.jsonの設定例です。
{
  "webdriver" : {
    "start_process": true,
    "server_path": "node_modules/.bin/chromedriver",
    "port": 9515
  },

  "test_settings" : {
    "default" : {
      "desiredCapabilities": {
        "browserName": "chrome"
      }
    }
  }
}
nightwatch.conf.jsの記述例
以下の設定ファイルはfirefoxでテストを動かすnightwatch.conf.jsの設定例です。
module.exports = {
  webdriver: {
    start_process: true,
    port: 4444,
    server_path: require('geckodriver').path,
  },
  test_settings: {
    default: {
      launch_url: 'https://nightwatchjs.org',
      desiredCapabilities : {
        browserName : 'firefox'
      }
    }
  }
};
よく使用する設定
| 名前 | タイプ | デフォルト | 解説 |
|---|---|---|---|
| src_folders | Stringの配列 | なし | テストが配置されているフォルダーの配列。指定したフォルダのサブフォルダ中のファイルも実行されます。指定されていない場合は、テストソースをテストランナーの 2番目の引数としてインラインで渡す必要があります。 |
VSCodeでデバッグする方法
(1).vscode/launch.jsonを以下のように作成します。
 {
     "version": "0.0.1",
     "configurations": [
         {
         "type": "node",
         "request": "attach",
         "name": "Attach to Process",
         "port": 9229
         }
     ]
 }
(2)ターミナルで以下のコマンドを実行する
node --inspect-brk ./node_modules/nightwatch/bin/runner.js sample.js
(3)VSCodeでAttachボタンを押下してデバッグを実行する
コマンド
コマンドキュー
公式の解説
https://github.com/nightwatchjs/nightwatch/wiki/Understanding-the-Command-Queue
Nightwatchがテストを実行すると、そのコマンドはコマンドキューと呼ばれるリストで処理されます。 コマンドキューのコマンドは非同期実行で実行されており、先入先出法(FIFO)でコマンドが実行されます。
コマンドAPIは以下のサンプルコードのように、テストケースに渡されたbrowserやclientといったオブジェクトを介してアクセス可能になっています。
module.exports = {
  'Demo test ecosia.org' : function(browser) {
    browser
      .url('https://www.ecosia.org/')
      .waitForElementVisible('body')
      .assert.titleContains('Ecosia')
      .assert.visible('input[type=search]')
      .setValue('input[type=search]', 'nightwatch')
      .assert.visible('button[type=submit]')
      .click('button[type=submit]')
      .assert.containsText('.mainline-results', 'Nightwatch.js')
      .end();
  }
};
このコードを実行した時点では、Seleniumのclickなど処理を実行するのではなく、コマンドキューにコマンドを追加します。
nightwatchのコマンドは1つまたは複数のSeleniumのリクエストをラップしたものとなります。このSeleniumのリクエストは非同期で順番に実行されていきます。
ほぼすべてのネイティブのNightwatchコマンドは、コマンドがコマンドキュー内で実行された際のコールバック関数をサポートしています。
例えばclickコマンドは以下のようにコールバックを記述することができます。
browser.click('button', function (result) {
  // コマンドキュー中のクリックコマンドが終了した場合に
  // seleniumのclick操作の応答を引数としてコールバックが実行されます。
});
コールバックの主な目的は、テストの実行中にテストからデータをキャプチャできるようにすることです。
例えば、以下の例ではgetValueにコールバックを指定して、取得した値をコンソールに出力しています。
module.exports = {
  'Demo test ecosia.org' : function(browser) {
    browser
      .url('https://www.ecosia.org/')
      .waitForElementVisible('body')
      .assert.titleContains('Ecosia')
      .assert.visible('input[type=search]')
      .setValue('input[type=search]', 'nightwatch')
      .getValue('input[type=search]', function(result) {
        console.log(result);
      })
      .assert.visible('button[type=submit]')
      .click('button[type=submit]')
      .assert.containsText('.mainline-results', 'Nightwatch.js')
      .end();
  }
};
また、このコールバック内でコマンドキューにコマンドを追加した場合、実行したコマンドの後に新しいコマンドが追加されることになります。以下の例では、clickをした後に5000ms処理を停止します。
module.exports = {
  'Demo test ecosia.org' : function(browser) {
    browser
      .url('https://www.ecosia.org/')
      .waitForElementVisible('body')
      .assert.titleContains('Ecosia')
      .assert.visible('input[type=search]')
      .setValue('input[type=search]', 'nightwatch')
      .assert.visible('button[type=submit]')
      .click('button[type=submit]',function(result) {
        browser.pause(5000);
      })
      .assert.containsText('.mainline-results', 'Nightwatch.js')
      .end();
  }
};
コマンドのコールバックで取得した値を、別のコマンドの引数として利用するにはどうしたらいいでしょうか?
例えば、以下のコードは期待通りに動作しません。
var text;
browser
  .getValue('#input', function (result) {
    text = result.value;
  })
  .setValue('#output', text); // WRONG: text is undefined
これを正しく動作させるにはgetValueのコールバック中にsetValueコマンドを実行する必要があります。
var text;
browser.getValue('#input', function (result) {
  text = result.value;
  browser.setValue('#output', text); // RIGHT
});
Protocol Element Commands
Protocol Element CommandsはWebElementIDをパラメータとして動作する低レベルのコマンドです。これらのコマンドは通常、カスタムコマンドやカスタムアサーションを作成するのに利用します。
WebElementIDの取得方法
nightwatchでweb elementi idを取得するにはelementコマンドまたはelementsコマンドを使用します。
module.exports = {
  'Demo test ecosia.org' : function(browser) {
    browser
      .url('https://www.ecosia.org/')
      .element('css selector', 'div', (result)=> {
        console.log('element', result);
      })
      .elements('css selector', 'div', (result)=> {
        console.log(result);
        result.value.forEach(elem=>{
          const key = Object.keys(elem)[0];
          const ElementIDvalue = elem[key];
          console.log(key, ElementIDvalue);
          browser.elementIdAttribute(ElementIDvalue, 'class', function(attr) {
            console.log(attr.value);
          });
        });
      })
      .end();
  }
};
第一引数にはロケーターストラテジーの種類を以下のいづれかから選択します。
- css selector
- link text
- partial link text
- tag name
- xpath
第二引数にはロケーターストラテジーにあった要素を絞り込むための値を指定します。
第三引数はコールバック関数になります。
elemntコマンドとelementsコマンドの違いは結果の値になります。elementコマンドの場合は条件に合うどれか一つの要素のWebElementIDのみが取得できますが、elementsコマンドの場合は条件にあう全てのWebElementIDが取得できます。
{
  value: {
    'element-6066-11e4-a52e-4f735466cecf': '8b24022d-1455-de40-bf78-3135a6883dfa'
  }
}
{
  value: [
    {
      'element-6066-11e4-a52e-4f735466cecf': '8b24022d-1455-de40-bf78-3135a6883dfa'
    },
    {
      'element-6066-11e4-a52e-4f735466cecf': '625db85e-9d09-cb45-b93d-ed5c1c9e7b0c'
    },
    {
      'element-6066-11e4-a52e-4f735466cecf': 'f27f778d-3a93-e64c-b5a2-dfeff18cc026'
    },
    // 略
  ]
}
Protocol Element Commandsはここで取得したWebElementIDを使用する必要があります。
Protocol Element Commandsの種類
| 名称 | 説明 |
|---|---|
| elementIdAttribute | 要素の属性を取得します |
| elementIdClear | 要素を表示するようにスクロール後、要素の値をクリアします |
| elementIdClick | 要素を表示するようにスクロール後、要素をクリックします |
| elementIdCssProperty | 指定された要素の指定されたCSSプロパティを取得します。 |
| elementIdDisplayed | 指定された要素が現在表示されているか確認します。 |
| elementIdEnabled | 要素が有効になっているか確認する |
| elementIdLocation | ページの左上を(0,0)とした場合の要素の位置を取得する。 |
| elementIdLocationInView | 要素がスクロールされていて表示されている場合に画面上の位置を取得する |
| elementIdName | 指定された要素のタグ名を取得する |
| elementIdSelected | option,radio,checkboxの場合に指定された要素が選択中か調べる |
| elementIdSize | 要素のサイズを取得する |
| elementIdText | 要素の表示中のテキストを取得する |
| elementIdValue | スクロールしてフォームの要素に値を入力するかまたは現在の値を取得します |
| submit | FORMまたはFORMの子要素を指定してsubmitを行います |
elementIdValueのサンプルコード
module.exports = {
  'Demo test ecosia.org' : function(browser) {
    browser
      .url('https://www.ecosia.org/')
      .element('xpath', '//input[contains(@type, "search")]', (elem)=> {
        const key = Object.keys(elem.value)[0];
        const elemId = elem.value[key];
        browser.elementIdValue(elemId, 'nightwatch', (x)=> {
          browser.elementIdValue(elemId, (v)=> {
            console.log(v);
          });
        });
      })
      .end();
  }
};
このコードはwebdriverによって挙動が変わります。
Chromeの場合elementIdValueは以下の値を返します。
{
  sessionId: '1d1752ad633221dbc083acd93574b7a2',
  status: 0,
  value: 'nightwatch'
}
Firefox(geckodriver 1.20.0)の場合は以下の値を返します。
{ value: '' }
なお、Firefoxの場合でもgetValueを使用した場合はnightwathが取得できます。
getValueとelementIdValueの取得の違い
WebDriverに対して発行しているコマンドが異なるため挙動が異なります。
getValueの場合
/element/${id}/property/value
elementIdValueの場合
/element/${id}/attribute/value
修正案1
elementIdValue実行時に呼び出す関数を書き換えます。
ただし、Firefoxの当該事象だけを直すだけなら以下の修正で直るが影響範囲が不明です。
module.exports = class Session extends ProtocolAction {
  command(webElementId, value, callback) {
    ProtocolAction.validateElementId(webElementId, 'elementIdValue');

    if (arguments.length === 1 || typeof arguments[1] == 'function') {
      callback = arguments[1] || function (r) {return r};
      // 以下のように修正
      //return this.transportActions.getElementAttribute(webElementId, 'value', callback);
      return this.transportActions.getElementProperty(webElementId, 'value', callback);
    }

    return this.transportActions.setElementValue(webElementId, value, callback);
  }
};
修正案2
valueの取得を行う際にelementIdValueを使用しないでelementIdProperty関数を使用します。
ただし、当該関数はアンドキュメントの関数です。
          browser.elementIdProperty(elemId, 'value', (v)=> {
            console.log(v);
          });
カスタムコマンド
nightwatchでは独自のカスタムコマンドを作成することができます。
https://nightwatchjs.org/guide/extending-nightwatch/custom-commands.html
単純な例
まず設定ファイルにカスタムコマンドを配置するフォルダを指定します。
以下の例ではcommandsというフォルダに配置します。
module.exports = {
  // 略
  custom_commands_path:  'commands',
  // 略
}
次にカスタムコマンドをcommandsフォルダに作成します。以下の例ではmycmdというコマンドを作成します。このコマンドはpauseコマンドと同じで操作の待機を行います。
module.exports = class CustomPause {
  command(ms, cb) {
    // If we don't pass the milliseconds, the client will
    // be suspended indefinitely
    if (!ms) {
      return;
    }

    const returnValue = {
      value: 'something'
    };

    return new Promise((resolve) => {
      setTimeout(() => {
        // if we have a callback, call it right before the complete event
        if (cb) {
          cb.call(this.api);
        }

        resolve(returnValue);
      }, ms);
    });
  }
}
カスタムコマンドは以下のように利用します。
module.exports = {
  'Demo test ecosia.org' : function(browser) {
    browser
      .url('https://www.ecosia.org/')
      .waitForElementVisible('body')
      .assert.titleContains('Ecosia')
      .assert.visible('input[type=search]')
      .setValue('input[type=search]', 'nightwatch')
      .assert.visible('button[type=submit]')
      .mycmd(5000) // カスタムコマンド
      .click('button[type=submit]')
      .assert.containsText('.mainline-results', 'Nightwatch.js')
      .end();
  }
};
既存のコマンドを組み合わせたカスタムコマンド
カスタムコマンドはthis.apiを経由してbrowserオブジェクトにアクセスできます。これを利用して既存のコマンドを組み合わせたカスタムコマンドを作成できます。
module.exports = class CustomSearch {
  command(term, cb) {
    const returnValue = {
      value: 'something'
    };

    return new Promise((resolve) => {
      this.api.url('https://www.ecosia.org/')
              .waitForElementVisible('input[type=search]')
              .setValue('input[type=search]', term)
              .click('button[type=submit]', ()=> {
                if (cb) {
                  cb.call(this.api);
                }
                resolve(returnValue);
              })
    });
  }
}
カスタムコマンドの使用例は以下のようになります。
module.exports = {
  'Demo test ecosia.org' : function(browser) {
    browser
      .mysearch('nightwatch')
      .assert.containsText('.mainline-results', 'Nightwatch.js')
      .end();
  }
};
ページオブジェクトの利用
SeleniumでE2Eテストを行う場合、ページの操作をまとめるページオブジェクトパターンがよく利用されます。
https://www.selenium.dev/documentation/ja/guidelines_and_recommendations/page_object_models/
nightwatchでもページオブジェクトを利用するための機能が提供されています。
https://nightwatchjs.org/guide/working-with-page-objects/
単純な例
まず設定ファイルにページオブジェクトを配置するためのフォルダをpage_objects_pathを利用して指定します。
//略
  page_objects_path: 'pageobjects',
//略
次に指定したフォルダにページオブジェクトを格納します。この例ではpageobjects/ecosiaPage.jsを作成します。
var customCommands = {
  search: function(term) {
    return this.setValue('@searchText', term)
      .click('@searchButton')
  }
};

module.exports = {
  url: 'https://www.ecosia.org/',
  commands: [customCommands],
  elements: {
    searchText: {
      selector: 'input[type=search]'
    },
    searchButton: {
      selector: 'button[type=submit]'
    }
  }
};
ページオブジェクトではelementsで指定したserchText,serchButtonのセレクタに@を付与してアクセスすることができます。
このページオブジェクトを利用したテストコードは以下のようになります。
module.exports = {
  'pageobject test' : function(browser) {
     const targetPage = browser.page.ecosiaPage()
     targetPage.navigate()
      .waitForElementVisible('@searchText')
      .search('nightwatch')
     browser
      .assert.containsText('.mainline-results', 'Nightwatch.js')
      .end();
  }
};
リモートの環境でテストする
リモートのseleniumでテストするための設定と手順
(1)設定ファイルを以下のように設定する
module.exports = {
  src_folders: ['tests'],

  webdriver: {
    // ローカルのwebdriverを起動しないようにする
    "start_process" : false
  },

  test_settings: {
    default: {
      desiredCapabilities: {
        browserName : 'chrome',
        chromeOptions : {
          w3c : false
        }
      },
      // リモートのwebdriverのipとportを指定する
      selenium_port :4444,
      selenium_host : "192.168.0.18"
    }
  }
};
(2)ブラウザを動作させたい端末でseleniumserverを起動する。
java -jar selenium-server-standalone-3.141.59.jar
*この例ではchromedriverとselenium-serverを同じフォルダに格納している。
(3)nightwatchでテストを開始する。
自己認証をしているサーバーにアクセスする場合の設定
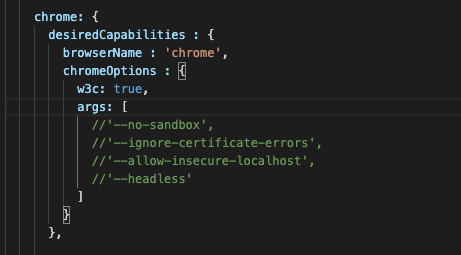
chromeの場合、起動オプションに「-ignore-certificate-errors」を付与すると自己認証のエラーページをスキップできる
// 略
    seleniumC: {
      desiredCapabilities: {
        browserName : 'chrome',
        chromeOptions : {
          w3c : false,
          args : [
            '--use-fake-ui-for-media-stream',
            '--use-fake-device-for-media-stream',
            '--no-sandbox',
            '-ignore-certificate-errors'
          ]
        }
      },
// 略
チャットプログラムのようなアプリのテスト
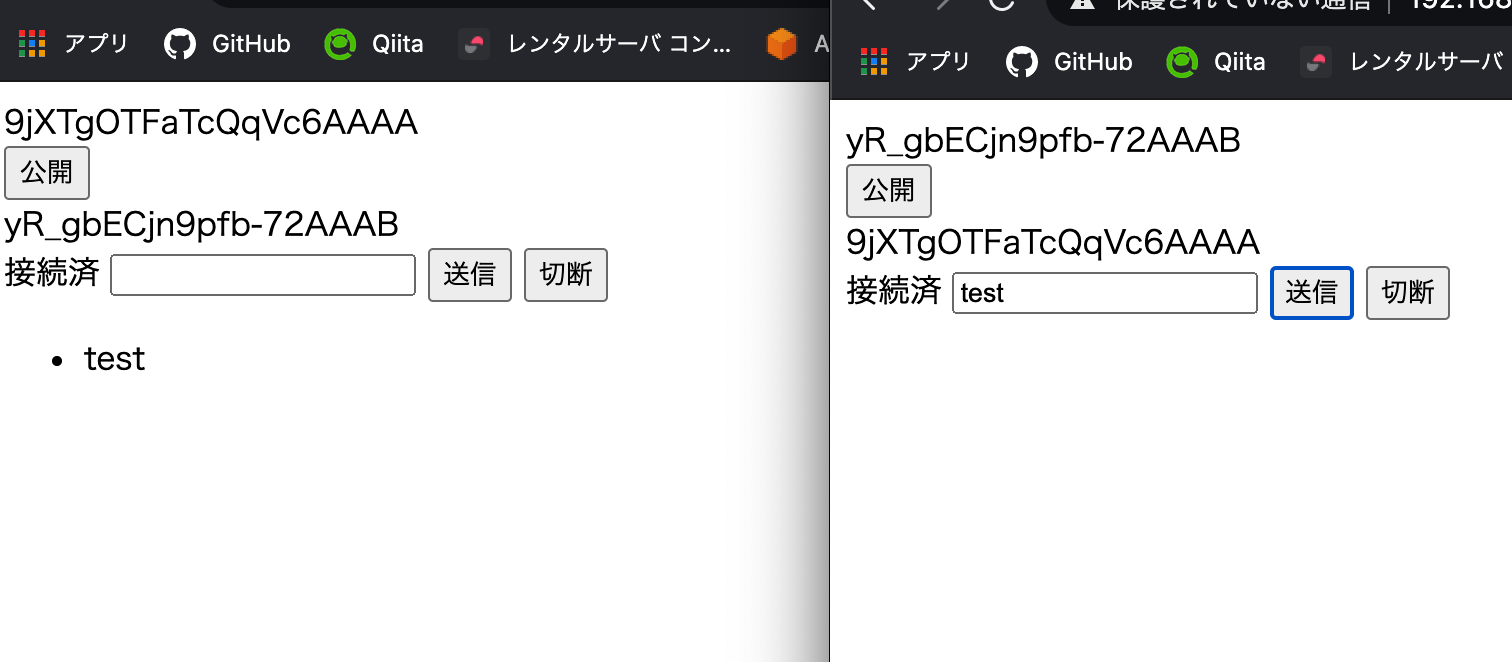
以下のチャットアプリをテストする例を考えてみます。
https://github.com/mima3/webrtc_sample/tree/master/webrtc02

複数のseleniumを起動する環境の作成
まず複数のseleniumを起動するための環境を作成します。
docker run --name seleniumA -d -p 14444:4444 -p 15900:5900 -v /dev/shm:/dev/shm selenium/standalone-chrome-debug

docker run --name seleniumB -d -p 24444:4444 -p 25900:5900 -v /dev/shm:/dev/shm selenium/standalone-chrome-debug
macosの場合、作成したseleniumの環境にはFinder→移動→サーバーへ接続で接続が可能です。
接続先:vnc://localhost:15900
パスワード:secret
nightwatchで複数のseleniumを同時に操作する方法
seleniumでテストコードを記述した場合と違って、nightwatchのテストコード中からseleniumを操作するためのbrowserオブジェクトを複数操作することはできません。
その代わり、nightwatchでは複数の環境で同時に同じテストを動かすということが可能です。
まず、設定ファイルのtest_settingsに作成したdocker中のseleniumAとseleniumBへの接続情報を記載します。
  test_settings: {
    seleniumA: {
      desiredCapabilities: {
        browserName : 'chrome',
        chromeOptions : {
          w3c : false
        }
      },
      // リモートのwebdriverのipとportを指定する
      selenium_port :14444,
      selenium_host : "localhost"
    },
    seleniumB: {
      desiredCapabilities: {
        browserName : 'chrome',
        chromeOptions : {
          w3c : false
        }
      },
      // リモートのwebdriverのipとportを指定する
      selenium_port :24444,
      selenium_host : "localhost"
    }
  }

// 略
設定ファイルを更新後、以下のように-eコマンドで実行したい環境を複数指定することで同じテストを同時に複数の環境で動かすことができます。
npx nightwatch tests/webrtc.js -e seleniumA,seleniumB
複数環境を指定して起動した場合は以下のようにnightwatchは環境ごとに子プロセスを作成して動作します。
+npx nightwatch tests/webrtc.js -e seleniumA,seleniumB
  |--- nightwatch tests/webrtc.js --env seleniumA --parallel-mode
  \--- nightwatch tests/webrtc.js --env seleniumB --parallel-mode
そのため、「process.env.__NIGHTWATCH_ENV」を使用して、現在のプロセスで動作している環境を取得して、環境ごとに処理を記述することでチャットプログラムのテストコードを記載することができます。
以下のコードはそのサンプルコードとなります。
module.exports = {
  'WebRTC' : function(browser) {
    const seleniumA = process.env.__NIGHTWATCH_ENV === 'seleniumA';
    browser
      .url('http://192.168.10.239:3000/')
      .waitForElementVisible('xpath', '//button[contains(.,"公開")]')
      .pause(10000)  // 全ての環境が起動するまで待機する。
    if(seleniumA) {
      browser.click('xpath', '//button[contains(.,"公開")]')
             .waitForElementVisible('xpath', '//button[contains(.,"送信")]')
             .waitForElementVisible('xpath', '//ul/li[contains(.,"テスト入力B")]')
             .setValue('xpath', '//input', 'テスト入力A')
             .click('xpath', '//button[contains(.,"送信")]')
             .pause(5000)
    } else {
      browser.waitForElementVisible('xpath', '//button[contains(.,"offer")]')
             .click('xpath', '//button[contains(.,"offer")]')
             .waitForElementVisible('xpath', '//button[contains(.,"送信")]')
             .waitForElementVisible('xpath', '//input')
             .setValue('xpath', '//input', 'テスト入力B')
             .click('xpath', '//button[contains(.,"送信")]')
             .waitForElementVisible('xpath', '//ul/li[contains(.,"テスト入力A")]')
             .pause(5000)
    }
    browser
      .end();
  }
};
さて、このプログラムでは複数の環境でブラウザが起動するというケースをpauseで待機していますが、本来であれば、プロセス間通信とかを利用して待ち合わせを行った方が望ましいでしょう。
以下のテストコードは上記のテストコードを発展させて、node-ipcを使用してプロセス間通信を行い環境間のタイミングを考慮しながらテストを行うためのサンプルコードになっています。
トラブルシュート
Selenium Gridを使うケースでうまく行かない。
問題
以下のようなSeleniumGridを使うDockerでwaitForElementVisible等が失敗する。
https://github.com/elgalu/docker-selenium
全く同じなのにFireFox80は動作したがChrome85では動作しない
経緯
どうも、JsonWireProtocolだとfindElementで要素が取得できてもresult.statusに値が入っていなくてエラーになる。
https://github.com/nightwatchjs/nightwatch/blob/master/lib/transport/jsonwire.js#L54
以下のコードでWebdriverProtocolを作成するルートになると正常に動作する
https://github.com/nightwatchjs/nightwatch/blob/dae6f9ddfcb9cbf0c7b32944a110f6ed8ecbc84c/lib/transport/transport.js#L311
Safariで複数インスタンスを起動すると動きません。
Safariの仕様です。
Safariの場合、Chromeと同じノリで複数インスタンスを起動してテストはできません。
https://developer.apple.com/documentation/webkit/about_webdriver_for_safari
SafariでwaitForVisibleが動きません。
まず、Mac+Safari12+ではwaitForVisibleが使用しているdisplayedを許可していません。
https://github.com/nightwatchjs/nightwatch/issues/2308
https://developer.apple.com/documentation/webkit/macos_webdriver_commands_for_safari_12_and_later
最新のコードでは以下の様に修正されていますが、これはhidden属性のみをみているので、sizeやdisplay:noneは考慮していません。
対応
MacのSafariを動かしたい場合だけなら以下の様なパッチでいけます。
多分、iosではgetElementPropertyあたりが動かないと思います。
https://github.com/nightwatchjs/nightwatch/issues/2308
class WaitForDisplayed extends WaitForElement {
  protocolAction() {
    if (this.api.capabilities) {
      const {browserName} = this.api.capabilities;
      if (browserName.toLowerCase() === BrowserName.SAFARI) {
        /*
        return this.executeProtocolAction('getElementProperty', ['hidden']).then(result => ({
          value: result.value === false
        }));
        */
        const self = this
        return this.executeProtocolAction('getElementProperty', ['hidden']).then(async (result) => {
          if (result.value) {
            return {
              value: false
            }
          }
          const displayResult = await self.executeProtocolAction('getElementCSSValue', ['display'])
          if (displayResult && displayResult.value === 'none') {
            return {
              value: false
            }
          }
          const sizeResult = await self.executeProtocolAction('getElementSize')
          if (sizeResult.value.error) {
            console.warn('サイズ取得時にerror発生したので要素は破棄されたとみなす。' + sizeResult.value.error)
            return {
              value: false
            }
          }
          if (sizeResult && (sizeResult.value.width === 0 || sizeResult.value.height === 0 )) {
            return {
              value: false
            }
          }
          return {
            value: true
          }
        })
      }
    }

    return this.executeProtocolAction('isElementDisplayed');
  }
remoteのchromeに接続すると起動オプションが渡らない場合がある
問題
RemoteのChromeに以下の様な設定で起動オプションを渡しても渡っていない様な挙動をする
// 略
    remoteMacChrome:
      webdriver: {
        default_path_prefix: "/wd/hub",
        use_legacy_jsonwire: false,
        start_process : false,
        host:"192.168.0.18",
        port: 4444,
      },
      desiredCapabilities: {
        browserName: 'chrome',
        javascriptEnabled : true,
        acceptSslCerts : true,
        'chromeOptions': {
          w3c: true,
          args: [
            '--use-fake-ui-for-media-stream',
            '--use-fake-device-for-media-stream',
            '--no-sandbox',
            '--ignore-certificate-errors',
            '--auto-select-desktop-capture-source=Entire',
            '--enable-usermedia-screen-capturing',
          ]
        }
      }
    },
対応
goog:chromeOptionsを使用してみます。
    remoteMacChrome: {
      webdriver: {
        default_path_prefix: "/wd/hub",
        use_legacy_jsonwire: false,
        start_process : false,
        host:"192.168.0.18",
        port: 4444,
      },
      desiredCapabilities: {
        browserName: 'chrome',
        javascriptEnabled : true,
        acceptSslCerts : true,
        'goog:chromeOptions': {
          w3c: true,
          args: [
            '--use-fake-ui-for-media-stream',
            '--use-fake-device-for-media-stream',
            '--no-sandbox',
            '--ignore-certificate-errors',
            '--auto-select-desktop-capture-source=Entire',
            '--enable-usermedia-screen-capturing',
          ]
        }
      }
    }
経緯
https://github.com/webdriverio/webdriverio/issues/2645
https://github.com/SeleniumHQ/docker-selenium/issues/674
DeviceFarmのChromeに引数が渡らない。
問題
DeviceFarmにChromeの引数を渡しても正常に受け付けてくれない。
対応
いくつかの引数はDeviceFarm側で禁止しています。
https://docs.aws.amazon.com/devicefarm/latest/testgrid/techref-support.html
それ以外の引数が正常に渡らない場合は、以下の様にalwaysMatchの配下に記述してみましょう。
    default: {
      desiredCapabilities: {
        alwaysMatch: {
          browserVersion: 'latest',
          browserName : 'chrome',

          'goog:chromeOptions': {
             args:[
               '--no-sandbox',
               '--disable-gpu',
               '--window-size=300,400',
               '--use-fake-ui-for-media-stream',
               '--use-fake-device-for-media-stream',
               '--no-sandbox',
               '--ignore-certificate-errors',
               '--auto-select-desktop-capture-source=Entire',
               '--enable-usermedia-screen-capturing',
             ]
          }

        }
      }
selenium-webdriverでは動くけど、nightwatchでは動作しないことがある
問題
selenium-webdriverでは動くけど、nightwatchでは動作しないことがある
対応
実はnightwatchはselenium-webdriverのコードを使わずに、独自のコードでremoteのdriverと通信しているので、同じ設定をしたつもりでも、微妙に違う内容が送信されているケースがあります。
nightwatchを実行して期待通り動作しなかった場合は、一度、selenium-webdriverで実装してみて違いをみてみるといいでしょう。
前述のDeviceFarmの問題の際は、以下にログを入れて動作を比較・検証しました。
https://github.com/nightwatchjs/nightwatch/blob/master/lib/http/request.js#L225
https://github.com/SeleniumHQ/selenium/blob/trunk/javascript/webdriver/http/http.js#L114
その他参考
run test in two different browser tabs or windows
https://groups.google.com/g/nightwatchjs/c/GAL0CfPLrMU
HOW TO EXECUTE TESTS IN MULTIPLE BROWSERS PARALLELY WITH NIGHTWATCH JS
https://testersdock.com/execute-parallel-tests-nightwatchjs/
Testing WebRTC Apps with Nightwatch
http://v09.nightwatchjs.org/blog/


