総括
基本的には「入れたら動く」なので大きな面倒なく使い始められると思う。
ただ指紋リーダーが生かせないのは残念。
準備
Windows側で「ディスクの管理」を使い半分の空き領域を作っておく
(半分にしたのは適当)
BIOS設定でThunderboltのAssist Modeを有効にしておく
BIOS設定でSecure Bootを無効にしておく
インストール中の選択
「UbuntuをWindows Boot Manager とは別にインストール」
空けておいた領域にインストールされる。パーティションはおまかせになる。
手動で設定した方が良かったかな?
インストール後
Gnome Tweaksのインストール
ソフトウェアセンターからインストール
Papirusアイコンテーマのインストール
見た目をかっこよくする。
PapirusDevelopmentTeam/papirus-icon-theme: Papirus icon theme for Linux
sudo add-apt-repository ppa:papirus/papirus
sudo apt update
sudo apt install papirus-icon-theme
Suru++アイコンテーマ
https://github.com/gusbemacbe/suru-plus
https://github.com/gusbemacbe/suru-plus/wiki/Installing-the-stable-version-with-CLI
Materiaテーマのインストール
見た目をかっこよくする。
nana-4/materia-theme: A Material Design theme for GNOME/GTK+ based desktop environments
sudo apt install materia-gtk-theme
Qogirテーマ
Fcitx
USキーボードで、簡単に左右Altで日本語入力を切り替えたい。
sudo apt install fcitx-mozc
入力メソッド設定からFcitxを有効化
Fcitx 設定 > 全体の設定 > 入力メソッドのオンオフ を Lalt Raltに設定
Gnome Shell Extension
Firefoxでアクセスしてブラウザアドオンを入れるだけでは不十分で、コネクタが必要
sudo apt install -y chrome-gnome-shell
入れたextension
- Alternatetab
- Freon
- lm-sensorsのインストールが必要
$ sudo apt install lm-sensors$ sudo sensors-detect
- Hide Activities Button
- 検索すると複数出てくるが、番号の若い方にした
- Hide Top Bar
- System-monitor
S3スリープ有効化
BIOSを1.30以上に更新してConfig -> Power -> Sleep State - Set to "Linux"
フタを開くとスリープ解除にも対応
出典
Lenovo ThinkPad X1 Carbon (Gen 6) - ArchWiki
Windows Helloのような顔認証ログインをする
boltgolt/howdy: Windows Hello™ style authentication for Linux
セキュリティ的には割とゆるゆるなので自己責任で使ってね、とある。
Synergy
マウス・キーボード共有
Win/Mac/Linuxどれでもウェルカムのすごいやつ
sudo apt install synergy quicksynergy
CapsLockをCtrlにする
CtrlはCtrlのまま
gsettings set org.gnome.desktop.input-sources xkb-options "['ctrl:nocaps']"
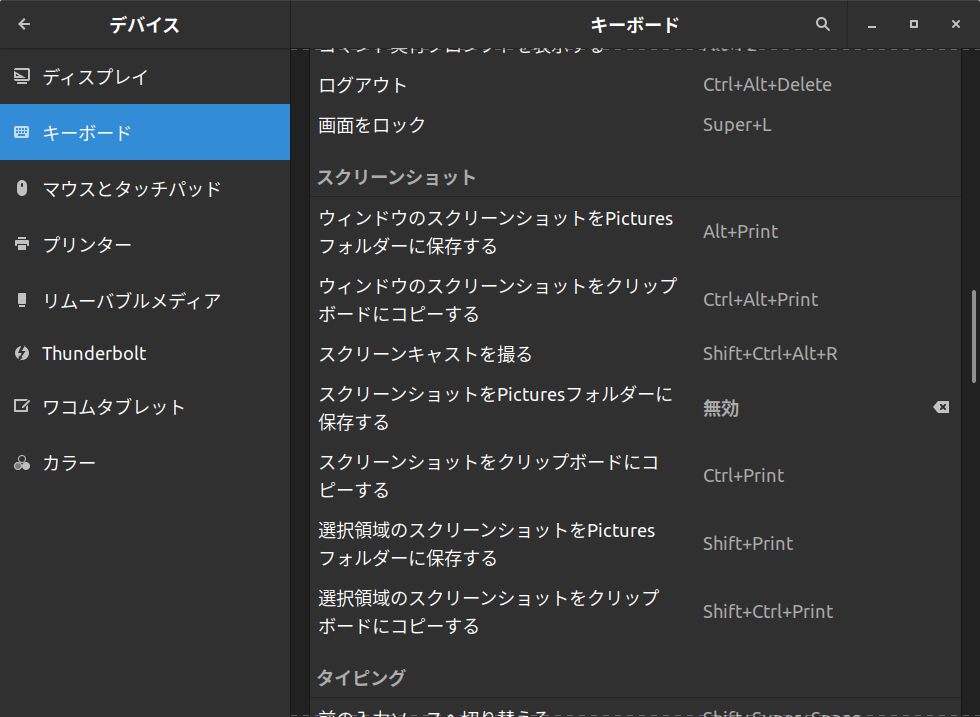
スクリーンショット誤爆防止
右AltとCtrlの間にPrtScがあり、よく誤爆するので無効化
設定>デバイス>キーボード>スクリーンショットをPicturesフォルダーに保存する
を無効化
Git
sudo apt install git
ターミナルでのブランチ名表示設定 ~/.bashrcに追記
source /etc/bash_completion.d/git-prompt
GIT_PS1_SHOWDIRTYSTATE=true
GIT_PS1_SHOWUNTRACKEDFILES=true
GIT_PS1_SHOWSTASHSTATE=true
GIT_PS1_SHOWUPSTREAM=auto
export PS1='\[\033[1;32m\]\u\[\033[00m\]:\[\033[1;34m\]\w\[\033[1;31m\]$(__git_ps1)\[\033[00m\] \$ '
Visual Studio Code
https://snapcraft.io/vscode
snapでインストールする。
telemetry.enableTelemetryをfalseに設定してデータ収集をオプトアウトする。
ワークスペース内にファイルが多すぎて追跡できないよ~と言われたときの対処
Vim
sudo apt install vim-gtk
Vivaldi
公式サイトからインストール
https://vivaldi.com
ターミナル
Hyper™
[Terminus](https$ echo "source /usr/share/zsh-syntax-highlighting/zsh-syntax-highlighting.zsh" >> ~/.zshrc
://eugeny.github.io/terminus/)
一周回って標準のでもいい気もする。
zshに変更
sudo apt install zsh powerline fonts-powerline \
zsh-syntax-highlighting
chsh -s /bin/zsh
# zsh-syntax-highlighting 有効化
echo "source /usr/share/zsh-syntax-highlighting/zsh-syntax-highlighting.zsh" >> ~/.zshrc
Oh My Zsh
sh -c \
"$(curl -fsSL https://raw.githubusercontent.com/robbyrussell/oh-my-zsh/master/tools/install.sh)"
Powerlevel10k
git clone \
https://github.com/romkatv/powerlevel10k.git $ZSH_CUSTOM/themes/powerlevel10k
.zshrcに追記
ZSH_THEME=powerlevel10k/powerlevel10k
POWERLEVEL9K_PROMPT_ON_NEWLINE=true