はじめに
この記事は、
の続きの記事である。
まず、背面カメラで取得した画像をリアルタイムで画面に表示させるところから始めようと思う。
カメラ画像の表示
プロパティ・リストの設定
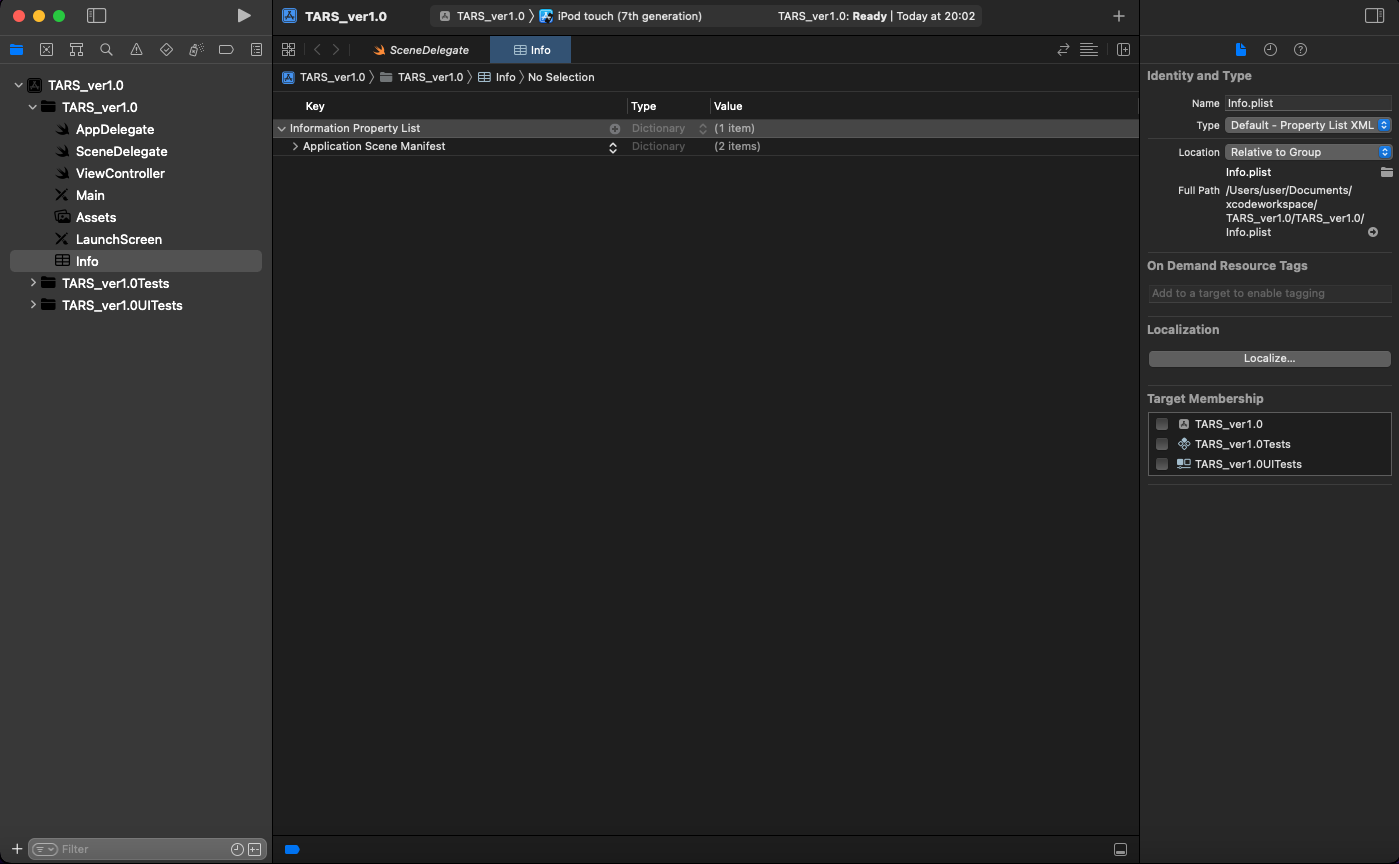
TARS_ver1.0/TARS_ver1.0直下にある「info」をクリックする。
「Information Property List」のプラスマークをクリックすると、プルダウンが表示される。

「Privacy-Camera Usage Description」をクリックする。
アプリからカメラを起動しようとした際、使用許可のポップアップが表示されるようになる。
この設定をしてないとカメラを使用することができない。
ファイル作成とリネーム
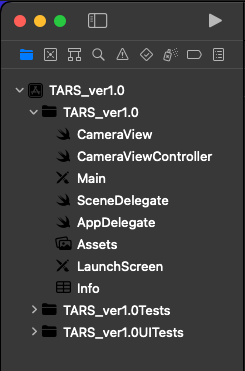
「TARS_var1.0/TARS_ver1.0」直下に「CameraView.swift」を作成する。
「ViewController.swift」を「CameraViewController.swift」にファイル名を変更する。
「ViewController」はファイル名を変更しなくてもよいが、変更したほうが役割がわかりやすいため今回変更する。
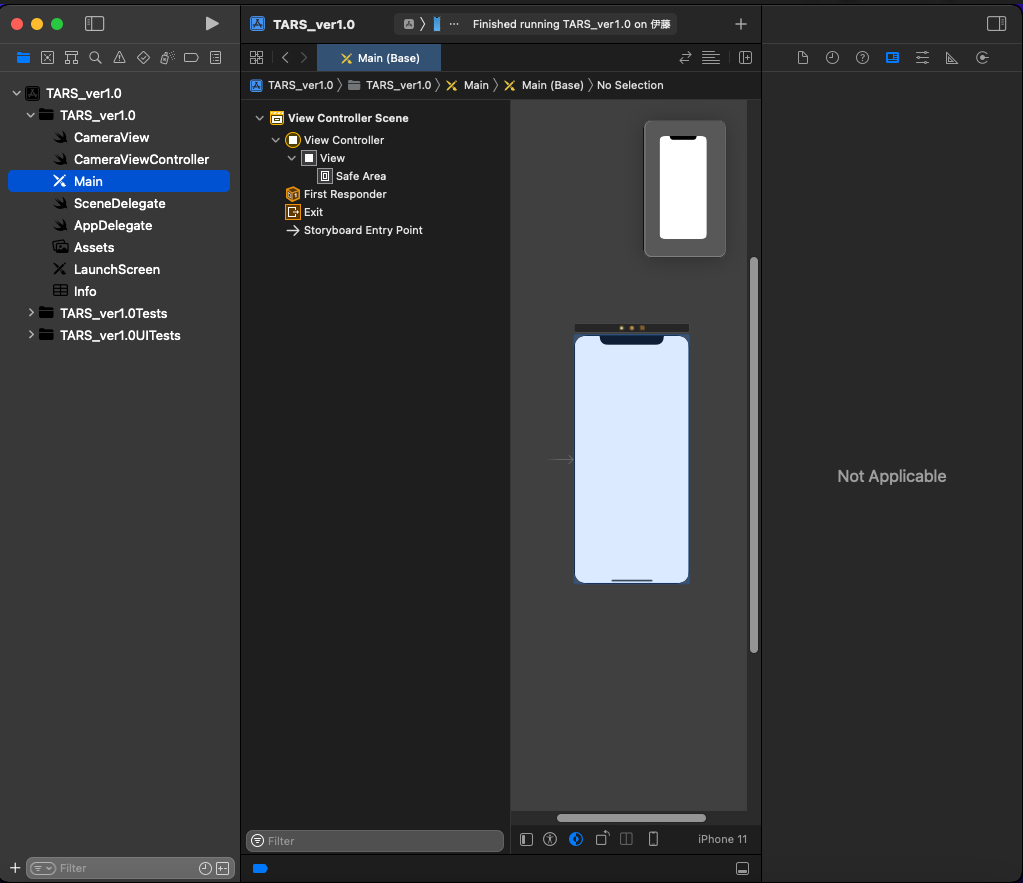
「Main.storybord」をクリックする。
- 真ん中のアイコンがあるエリアの、「View Controller」をクリックする。
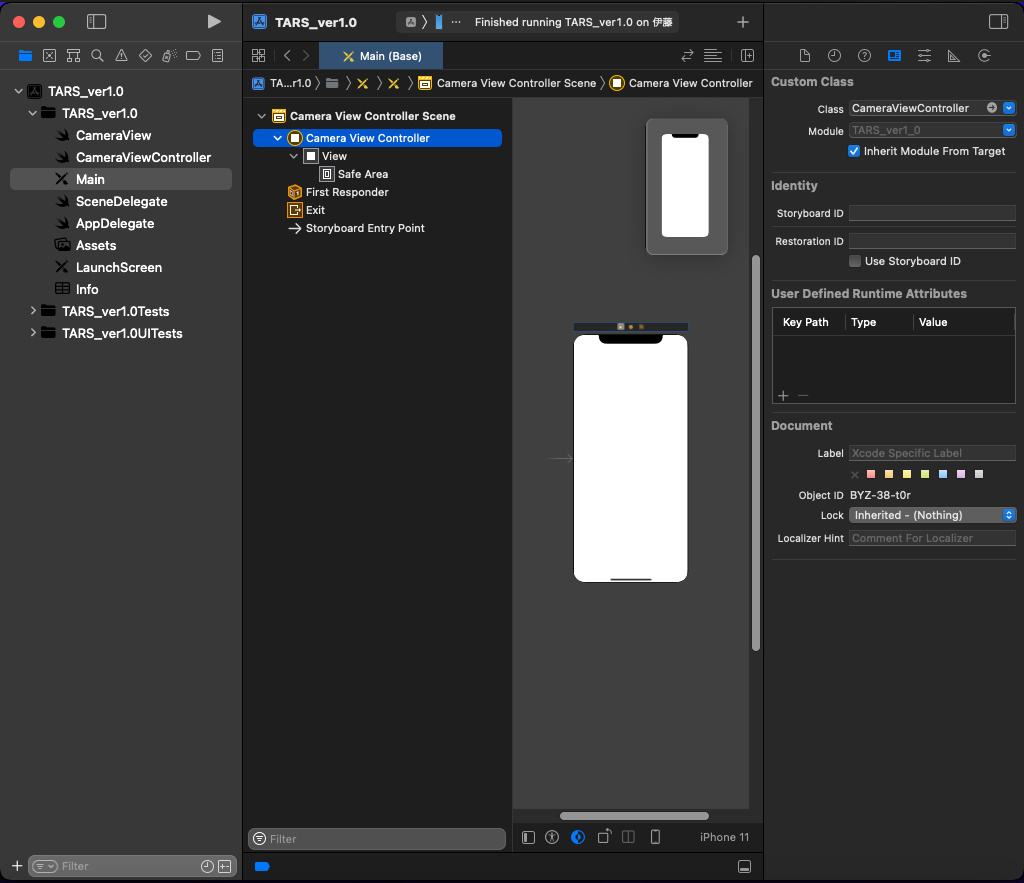
- 右側のエリアにある「Custom Class」の「class」の「View Controller」を「CameraViewController」に変更する。
- 「Inherit Module From Target」のチェックボックスにチェックを入れる。
- 真ん中のアイコンがあるエリアの「View」を「CameraView」に変更する。(補足:Shiftキーを押しながらクリックすると名前の変更ができる)
- 画面右側のエリアの「Custom Class」の「class」に「CameraView」と入力する。
- 「Inherit Module From Target」のチェックボックスにチェックを入れる。
「Cusatom Class」にswiftファイル名を入力すると、画面とswiftファイルが紐づく。
CameraView.swiftの編集
このクラスは、カメラから得られた画像データを表示するためのレイヤーを扱う。その他、別途表示させたい処理もここで行う。
「CameraView.swift」を開く。
以下を入力する。
import UIKit
import AVFoundation

class CameraView: UIView{
    //previewLayerの初期化
    var previewLayer: AVCaptureVideoPreviewLayer{
        return layer as! AVCaptureVideoPreviewLayer
    }
    //レイヤーの上書きし、返す
    override class var layerClass: AnyClass{
        return AVCaptureVideoPreviewLayer.self
    }
}
「AVCaptureVideoPreviewLayer」はキャプチャセッションの標準的な定義をあらかじめセットした構造体。
「layerClass」はレイヤークラスを返す。
このクラスを「override」することで利用するレイヤークラスを指定できる。
CameraViewController.swiftの編集
まず、音声や動画などのメディアを作成・再生・編集するためのフレームワークである「AVFoundation」をインポートする。
「ViewController」を「CameraViewController」に変更する。
そして、映像を記録編集するために映像フレームアクセスするためのクラスである「AVCaptureVideoDataOutput」のプロトコルを適合させるために「AVCaptureVideoDataOutputSampleBufferDelegate」「UIViewController」の後ろに追加する。
import UIKit
import AVFoundation

class CameraViewController: UIViewController, AVCaptureVideoDataOutputSampleBufferDelegate {

    override func viewDidLoad() {
        super.viewDidLoad()
    }
}
作成した「CameraView」クラス、アプリのメインスレッドやバックグラウンドスレッドでタスクの連続実行や同時実行を管理する「DispatchQueue」クラス、キャプチャーの動作を設定し入力デバイスから出力へのデータの流れを調整する、「AVCaptureSession」クラスのインスタンスを生成する。
import UIKit
import AVFoundation

class CameraViewController: UIViewController, AVCaptureVideoDataOutputSampleBufferDelegate {
    private var cameraView: CameraView {view as! CameraView}
    private let videoDataOutputQueue = DispatchQueue(label: "CameraFeedDataOutput", qos: .userInteractive)
    private var cameraFeedSession: AVCaptureSession?

    override func viewDidLoad() {
        super.viewDidLoad()
    }
}
カメラのセットアップをするためのオブジェクトを作る。
    func setupAVSession() throws{
    }
ハードウェアのプロパティを設定する。
    func setupAVSession() throws{
        guard let videoDevice = AVCaptureDevice.default(.builtInUltraWideCamera, for: .video, position: .back)else{
            throw AppError.captureSessionSetup(reason: "Could not find a ultrawide back camera.")
        }
    }
「.builtInUltraWideCamera」は広角カメラ、他に
- .builtInWideAngleCamera :ワイドカメラ(通常のカメラ)
- .builtInTelephotoCamera :望遠カメラ
- .builtInTrueDepthCamera :デプスカメラ
などいろいろある。
今回、背面カメラを使うため「position」には「.back」を指定する。フロントカメラを使いたい場合、「.front」を指定する。
デバイスからセッションにメディアを提供する。
    func setupAVSession() throws{
        guard let videoDevice = AVCaptureDevice.default(.builtInUltraWideCamera, for: .video, position: .back)else{
            throw AppError.captureSessionSetup(reason: "Could not find a ultrawide back camera.")
        }

        guard let deviceInput = try? AVCaptureDeviceInput(device: videoDevice)else{
            throw AppError.captureSessionSetup(reason:"Could not create video device input.")
        }
    }
キャプチャセッションの設定変更をする。
「AVCaptureSession」のインスタンスを生成する。
「.beginConfiguration」でキャプチャセッションの設定変更の開始をマークする。
画質の設定をするために、「sessionPreset」に「AVCaptureSession.Preset.high」をいれる。
    func setupAVSession() throws{
        guard let videoDevice = AVCaptureDevice.default(.builtInUltraWideCamera, for: .video, position: .back)else{
            throw AppError.captureSessionSetup(reason: "Could not find a ultrawide back camera.")
        }

        guard let deviceInput = try? AVCaptureDeviceInput(device: videoDevice)else{
            throw AppError.captureSessionSetup(reason:"Could not create video device input.")
        }
        let session = AVCaptureSession()
        session.beginConfiguration()
        session.sessionPreset = AVCaptureSession.Preset.high
    }
今回高画質にするため、「.high」にしたが、低画質から4Kまでいろいろ設定できる。
セッションにメディアを追加できるか確認し、追加する。
    func setupAVSession() throws{
        guard let videoDevice = AVCaptureDevice.default(.builtInUltraWideCamera, for: .video, position: .back)else{
            throw AppError.captureSessionSetup(reason: "Could not find a ultrawide back camera.")
        }

        guard let deviceInput = try? AVCaptureDeviceInput(device: videoDevice)else{
            throw AppError.captureSessionSetup(reason:"Could not create video device input.")
        }
        let session = AVCaptureSession()
        session.beginConfiguration()
        session.sessionPreset = AVCaptureSession.Preset.high
        guard session.canAddInput(deviceInput)else{
            throw AppError.captureSessionSetup(reason: "Could not add video device input to the session")
        }
        session.addInput(deviceInput)
    }
映像を記録し、処理のために映像フレームへのアクセスを提供する「AVCaptureVideoDataOutput」クラスのインスタンスを生成する。
セッションに出力を追加できるか確認し、追加する。
    func setupAVSession() throws{
        guard let videoDevice = AVCaptureDevice.default(.builtInUltraWideCamera, for: .video, position: .back)else{
            throw AppError.captureSessionSetup(reason: "Could not find a ultrawide back camera.")
        }

        guard let deviceInput = try? AVCaptureDeviceInput(device: videoDevice)else{
            throw AppError.captureSessionSetup(reason:"Could not create video device input.")
        }
        let session = AVCaptureSession()
        session.beginConfiguration()
        session.sessionPreset = AVCaptureSession.Preset.high
        guard session.canAddInput(deviceInput)else{
            throw AppError.captureSessionSetup(reason: "Could not add video device input to the session")
        }
        session.addInput(deviceInput)

        let dataOutput = AVCaptureVideoDataOutput()

        guard session.canAddOutput(dataOutput)else{
            throw AppError.captureSessionSetup(reason: "Could not add video data out put to the session")
        }
        session.addOutput(dataOutput)
    }
ビデオフレームが遅れて到着した場合にドロップするよう「alwaysDiscardsLateVideoFrrame」に「true」をいれる。
ビデオ処理の設定をする。
サンプルバッファデリゲートと、コールバック呼び出し用のキューを設定する。
    func setupAVSession() throws{
        guard let videoDevice = AVCaptureDevice.default(.builtInUltraWideCamera, for: .video, position: .back)else{
            throw AppError.captureSessionSetup(reason: "Could not find a ultrawide back camera.")
        }

        guard let deviceInput = try? AVCaptureDeviceInput(device: videoDevice)else{
            throw AppError.captureSessionSetup(reason:"Could not create video device input.")
        }
        let session = AVCaptureSession()
        session.beginConfiguration()
        session.sessionPreset = AVCaptureSession.Preset.high
        guard session.canAddInput(deviceInput)else{
            throw AppError.captureSessionSetup(reason: "Could not add video device input to the session")
        }
        session.addInput(deviceInput)

        let dataOutput = AVCaptureVideoDataOutput()

        guard session.canAddOutput(dataOutput)else{
            throw AppError.captureSessionSetup(reason: "Could not add video data out put to the session")
        }
        session.addOutput(dataOutput)

        dataOutput.alwaysDiscardsLateVideoFrames = true
        dataOutput.videoSettings = [kCVPixelBufferPixelFormatTypeKey as String: Int(kCVPixelFormatType_420YpCbCr8BiPlanarFullRange)]
        dataOutput.setSampleBufferDelegate(self, queue: videoDataOutputQueue)
    }
「.commitConfiguration」でキャプチャセッションの設定をコミットする。
設定したセッションを「cameraFeedSession」に反映させる。
上で設定したセッションを画面に表示させる。
アプリの画面から離れているときに、セッションを止め、戻ってきたときにセッションを開始するために、
「viewDidAppear」と「viewWillDisappear」を実装する。
    override func viewDidAppear(_ animated: Bool){
        super.viewDidAppear(animated)
    }

    override func viewWillDisappear(_ animated: Bool){
        super.viewWillDisappear(animated)
    }
まず、「viewDidAppear」から処理を記述する。
「cameraFeedSession」にセッションが入っていない場合、
映像のアスペクト比を保ったままレイヤーを埋めるように設定し、カメラのセットアップをするためのオブジェクトである「setupAVSession」を実行する。
プレビューのためのビジュアル出力をするセッションに「cameraFeedSession」を追加する。
そして、セッションを開始する。
    override func viewDidAppear(_ animated: Bool){
        super.viewDidAppear(animated)
        do{
            if(cameraFeedSession == nil){
                cameraView.previewLayer.videoGravity = .resizeAspectFill
                try setupAVSession()
                cameraView.previewLayer.session = cameraFeedSession
            }
            cameraFeedSession?.startRunning()
        }catch{
            AppError.display(error,inViewController: self)
        }
    }
アプリの画面から離れたとき、セッションをストップする。
    override func viewWillDisappear(_ animated: Bool){
        cameraFeedSession?.stopRunning()
        super.viewWillDisappear(animated)
    }
エラーが発生した際の処理
「CameraViewController」に以下のオブジェクトをすでに記載しているため、現時点ではコードにアラートが表示されている。
AppDelegate.swiftに以下の処理を書く。
import UIKit

@UIApplicationMain
class AppDelegate: UIResponder, UIApplicationDelegate {
    // MARK: UISceneSession Lifecycle

    func application(_ application: UIApplication, configurationForConnecting connectingSceneSession: UISceneSession, options: UIScene.ConnectionOptions) -> UISceneConfiguration {
        // Called when a new scene session is being created.
        // Use this method to select a configuration to create the new scene with.
        return UISceneConfiguration(name: "Default Configuration", sessionRole: connectingSceneSession.role)
    }
}

enum AppError: Error{
    case captureSessionSetup(reason: String)
    case otherError(error: Error)

    static func display(_ error: Error,inViewController viewController: UIViewController){
        if let appError = error as? AppError{
            appError.displayInViewController(viewController)
        }else{
            AppError.otherError(error: error).displayInViewController(viewController)
        }
    }

    func displayInViewController(_ viewConntroller: UIViewController){
        let title: String?
        let message: String?
        switch self{
            case .captureSessionSetup(let reason):
                title = "AVSession Setup Error"
                message = reason
            case .otherError(let error):
            title = "Error"
            message = error.localizedDescription
        }

        let alert = UIAlertController(title: title, message:message, preferredStyle: .alert)
        alert.addAction(UIAlertAction(title: "OK", style: .default, handler: nil))

        viewConntroller.present(alert, animated: true,completion: nil)
    }
}
カメラ画像の表示終了
ここまででiPhoneをPCにつなぎ、実行するとカメラから得た画像が画面にリアルタイムで表示されるようになる。
次へ
カメラを起動する処理は終わったため、次は「Vison Framework」を使い、手の認識を行いたいと思う。